


上一节的完整项目(链接:https://pan.baidu.com/s/1sLHA3cSE2SgJLVO3LpUn3g 提取码:s5bb)
1.分模块开发与设计
将原始模块按照功能拆分成若干子模块,方便模块间的相互调用,接口共享
实验
① 新建项目maven01,将SpringMVC02项目的domain文件移动到maven01中
② 删除将SpringMVC02项目中的domain文件(BookService出现报错)
③ 在SpringMVC02中的pom.xml中导入maven01的坐标(坐标在maven01中)
<!--依赖domain运行-->
<dependency>
    <groupId>com.example</groupId>
    <artifactId>maven01</artifactId>
    <version>1.0-SNAPSHOT</version>
</dependency>
④ 将maven01安装到本地仓库(maven的install)
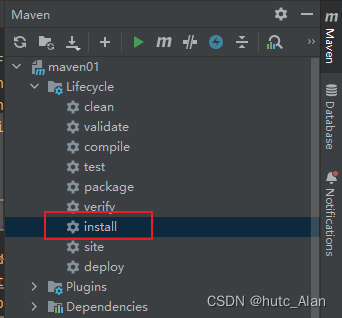
⑤ 在SpringMVC02项目中更新maven
2. 依赖管理
2.1 依赖传递
-
依赖具有传递性
- 直接依赖:在当前项目中通过依赖配置建立的依赖关系
- 间接依赖:被依赖的资源如果依赖其他资源,当前项目简介依赖其他资源
-
依赖传递冲突问题
- 路径优先:当依赖中出现想用的资源时,层级越深,优先级越低,层级越浅,优先级越高
- 声明优先:当资源在相同层级被依赖时,配置顺序靠前的覆盖配置顺序靠后的
- 特殊优先:当同层级配置了相同资源的不同版本,后配置的覆盖先配置的
2.2 可选依赖与排除依赖
可选依赖:可选依赖是指隐藏当前锁依赖的资源——不透明
<dependency>
    <groupId>com.example</groupId>
    <artifactId>maven01</artifactId>
    <version>1.0-SNAPSHOT</version>
    <!--可选依赖是隐藏当前工程所依赖的资源,隐藏后对应资源不具有依赖传递性-->
    <optional>true</optional>
</dependency>
排除依赖:
<dependency>
    <groupId>com.example</groupId>
    <artifactId>maven01</artifactId>
    <version>1.0-SNAPSHOT</version>
    <!--排除依赖时隐藏当前资源对应的依赖关系-->
    <exclusions>
        <exclusion>
            <groupId>log4j</groupId>
            <artifactId>log4j</artifactId>
        </exclusion>
    </exclusions>
</dependency>
3.继承与聚合
3.1 聚合
- 聚合::将多个模块组织成一个整体,同时进行项目构建的过程称为聚合
- 聚合工程:通常是一个不具有业务功能的"空"工程(有且仅有一个pom文件)
- 作用:使用聚合工程可以将多个工程编组,通过对聚合工程进行构建,实现对所包含的模块进行同步构建
- 当工程中某个模块发生更新(变更)时,必须保障工程中与已更新模块关联的模块同步更新,此时可以使用聚合工程来解决批量模块同步构建的问题。
聚合具体实现步骤
① 创建新项目maven_parent,设置打包类型为pom
<groupId>com.example</groupId>
<artifactId>maven_parent</artifactId>
<version>1.0-SNAPSHOT</version>
<packaging>pom</packaging>
注意事项:每个maven工程都有对应的打包方式,默认为jar,工程打包方式为war
② 设置当前聚合工程包含的子模块名称
<!--设置管理的模块名称-->
<modules>
    <module>../maven01</module>
    <module>../SpringMVC02</module>
</modules>
注意事项:聚合工程中所包含的模块在进行构建时会根据模块间的依赖关系设置构建顺序,与聚合工程中模块的配置书写位置无关
参与聚合的工程无法向上感知是否参与聚合,只能向下配置哪些模块参与本工程的聚合
3.2 继承
概念::描述的是两个工程间的关系,与java中的继承相似,子工程可以继承父工程中的配置信息,常见于依赖关系的继承。
作用:
简化配置
减少版本冲突
继承步骤
① 在父工程的pom中配置依赖关系(子工程将沿用父工程中的依赖关系)
<dependencies>
    <dependency>
        <groupId>org.springframework</groupId>
        <artifactId>spring-webmvc</artifactId>
        <version>5.2.10.RELEASE</version>
    </dependency>
    ...
</dependencies>
② 配置子工程中可选的依赖关系(依旧在父工程的pom.xml中)
<!--    定义依赖管理-->
<dependencyManagement>
    <dependencies>
        <dependency>
            <groupId>junit</groupId>
            <artifactId>junit</artifactId>
            <version>4.11</version>
            <scope>test</scope>
        </dependency>
        ...
    </dependencies>
</dependencyManagement>
③ 在子工程中配置当前工程所继承的父工程
<!--    配置当前工程继承自parent工程-->
<parent>
    <groupId>com.example</groupId>
    <artifactId>maven_parent</artifactId>
    <version>1.0-SNAPSHOT</version>
    <!--填写父工程的pom文件-->
    <relativePath>../maven_parent/pom.xml</relativePath>
</parent>
④ 在子工程中配置使用父工程可选依赖的坐标
<dependencies>
    <dependency>
        <groupId>junit</groupId>
        <artifactId>junit</artifactId>
        <scope>test</scope>
    </dependency>
</dependencies>
注意事项:子工程中使用父工程的可选依赖时,仅需要提供群组id和项目id,无需提供版本,版本由父工程统一提供,避免版本冲突
子工程中还可以定义父工程中没有定义的依赖关系
3.3 聚合与继承的区别
- 作用
- 聚合用于快速构建项目
- 继承用于快速配置
- 相同点:
- 聚合与继承的pom.xml文件打包方式均为pom,可以将两种关系制作到同一个pom文件中
- 聚合与继承均属于设计型模块,并无实际的模块内容
- 不同点:
- 聚合是在当前模块中配置关系,聚合可以感知到参与聚合的模块有哪些
- 继承是在子模块中配置关系,父模块无法感知哪些子模块继承了自己
4.属性
4.1 属性配置与使用
属性配置与使用步骤
① 定义属性
<!--    定义属性-->
<properties>
    <spring.version>5.2.10.RELEASE</spring.version>
    <mybatis.version>3.5.6</mybatis.version>
</properties>
② 引用属性
<dependencies>
    <dependency>
        <groupId>org.springframework</groupId>
        <artifactId>spring-webmvc</artifactId>
        <version>${spring.version}</version>
    </dependency>

    <dependency>
        <groupId>org.springframework</groupId>
        <artifactId>spring-jdbc</artifactId>
        <version>${spring.version}</version>
    </dependency>

    <dependency>
        <groupId>org.springframework</groupId>
        <artifactId>spring-test</artifactId>
        <version>${spring.version}</version>
    </dependency>

    <dependency>
        <groupId>org.mybatis</groupId>
        <artifactId>mybatis</artifactId>
        <version>${mybatis.version}</version>
    </dependency>
    ...
</dependencies>
4.2 配置文件加载属性
配置文件加载属性步骤
① 定义属性
<properties>
    <spring.version>5.2.10.RELEASE</spring.version>
    <mybatis.version>3.5.6</mybatis.version>
    <jdbc.url>jdbc:mysql://192.168.1.224:3306/ssm_db?useSSL=false</jdbc.url>
</properties>
② 配置文件中引用属性
jdbc.driver=com.mysql.jdbc.Driver
jdbc.url=${jdbc.url}
jdbc.username=root
jdbc.password=123456
③ 开启资源文件目录加载属性的过滤器
<build>
    <resources>
        <resource>
            <directory>${project.basedir}/src/main/resources</directory>
            <filtering>true</filtering>
        </resource>
    </resources>
</build>
③ 在父工程中重新安装maven–>install
④ 配置maven打war包时,忽略web.xml检查
<build>
    <plugins>
        <plugin>
            <groupId>org.apache.maven.plugins</groupId>
            <artifactId>maven-war-plugin</artifactId>
            <version>3.3.2</version>
            <configuration>
                <failOnMissingWebXml>false</failOnMissingWebXml>
            </configuration>
        </plugin>
    </plugins>
</build>
4.3 其他属性(了解)
| 属性分类 | 引用格式 | 示例 |
|---|---|---|
| 自定义属性 | ${自定义属性名} | ${spring.version} |
| 内置属性 | ${内置属性名} | ${basedir} ${version} |
| Setting属性 | ${Setting.属性名} | ${settings.localRepository} |
| Java系统属性 | ${系统属性分类.系统属性名} | ${user.home} |
| 环境变量属性 | ${env.环境变量属性名} | ${env.JAVA_HOME} |
4.4 版本管理
- 工程版本:
- SNAPSHOT(快照版本)
- 项目开发过程中临时输出的版本,称为快照版本
- 快照版本会随着开发的进展不断更新
- RELEASE(发布版本)
- 项目开发到一定阶段里程碑后,向团队外部发布较为稳定的版本,这种版本所对应的构件文件是稳定的
- 即便进行功能的后续开发,也不会改变当前发布版本内容,这种版本称为发布版本
- SNAPSHOT(快照版本)
- 发布版本
- alpha版:内测版,bug多不稳定内部版本不断添加新功能
- beta版:公测版,不稳定(比alpha稳定些),bug相对较多不断添加新功能
- 纯数字版
5. 多环境配置与应用
多环境开发:maven提供配置多种环境的设定,帮助开发者使用过程中快速切换环境
步骤
① 定义多环境
<!--    配置多环境-->
<profiles>
    <!--开发环境-->
    <profile>
        <id>env_dep</id>
        <properties>
            <jdbc.url>jdbc:mysql://192.168.1.224:3306/ssm_db?useSSL=false</jdbc.url>
        </properties>
        <!--设定是否为默认启动的环境-->
        <activation>
            <activeByDefault>true</activeByDefault>
        </activation>
    </profile>
    <!--生产环境-->
    <profile>
        <id>env_pro</id>
        <properties>
            <jdbc.url>jdbc:mysql://192.168.1.224:3306/ssm_db?useSSL=false</jdbc.url>
        </properties>
    </profile>
    <!--测试环境-->
    <profile>
        <id>env_test</id>
        <properties>
            <jdbc.url>jdbc:mysql://192.168.1.224:3306/ssm_db?useSSL=false</jdbc.url>
        </properties>
    </profile>
</profiles>
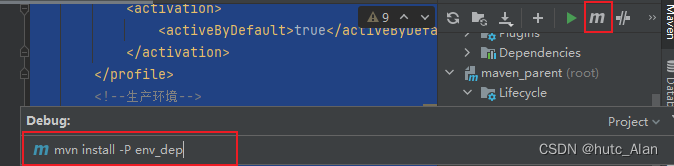
② 使用多环境(构建过程)
mvn 指令 -P 环境定义id
例如:
mvn install -P pro_env
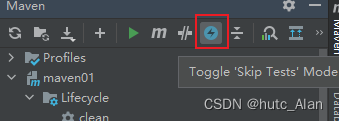
5.1 跳过测试
方式一:点下图所示按钮跳过测试(弊端:所有测试均跳过)
方式二:使用指令
mvn 指令 -D skipTests
范例:
mvn install -D skipTests
方式三:细粒度控制跳过测试(使用插件)
<plugin>
    <artifactId>maven-surefire-plugin</artifactId>
    <version>2.22.1</version>
    <configuration>
        <skipTests>false</skipTests>
        <!--排除掉不参与测试的内容-->
        <excludes>
            <exclude>**/BookServiceTest.java</exclude>
        </excludes>
    </configuration>
</plugin>
6.私服
6.1 私服简介
私服是一台独立的服务器,用于解决团队内部的资源共享与资源同步问题
Nexus
Sonatype公司的一款maven私服产品
下载地址:https://help.sonatype.com/repomanager3/download
① 下载nexus并解压(链接:https://pan.baidu.com/s/100enFQslOVQGeltjdOdikQ 提取码:wox3)
② 在终端(cmd),打开
进入解压后的nexus-3.30.1-01\bin目录下运行一下指令启动私服
nexus.exe /run nexus
③ 浏览器访问:http://localhost:8081/
登录,账号为admin
密码为:05108a80-849f-4bdf-9ef4-2d53cf9bcb13
密码在latest-win64\sonatype-work\nexus3目录下admin.password文件中
修改基础配置信息:
安装路径下etc目录中nexus-default.properties
修改服务器运行配置信息
安装目录中nexus.vmoptions文件保存有nexus服务器启动对应的配置信息,例如默认占用内存空间
6.2 私服仓库分类
| 仓库类别 | 英文名称 | 功能 | 关联操作 |
|---|---|---|---|
| 宿主仓库 | hosted | 保存自主研发+第三方资源 | 上传 |
| 代理仓库 | proxy | 代理连接中央仓库 | 下载 |
| 仓库组 | group | 为仓库编组简化下载操作 | 下载 |
6.3 本地仓库访问私服配置
① 访问:http://localhost:8081/#admin/repository/repositories
创建两个仓库(Create Repository ==> maven2(hosted))
分别为example-snapshot和example-realase(记得改对应的Version policy)
② 修改maven配置文件settings.xml
在servers标签中添加(密码改成自己设置的)
<server>
  <id>example-snapshot</id>
  <username>admin</username>
  <password>admin</password>
</server>
<server>
  <id>example-realase</id>
  <username>admin</username>
  <password>admin</password>
</server>
③ 私服访问路径
访问:http://localhost:8081/#admin/repository/repositories:maven-public
将我们创建的两个仓库添加到Menbers中并保存
在settings.xml配置文件的mirrors标签中添加
    <!--私服的访问路径-->
    <mirror>
      <id>maven-public</id>
      <mirrorOf>*</mirrorOf>
      <url>http://localhost:8081/repository/maven-public/</url>
      <blocked>true</blocked>
    </mirror>
  </mirrors>
6.4 私服资源上传与下载
在pom.xml中配置前工程保存在私服中的具体位置
<!--配置当前工程保存在私服中的具体位置-->
<distributionManagement>
    <repository>
        <id>example-release</id>
        <url>http://localhost:8081/repository/example-release/</url>
    </repository>
    <snapshotRepository>
        <id>example-snapshot</id>
        <url>http://localhost:8081/repository/example-snapshot/</url>
    </snapshotRepository>
</distributionManagement>
发布指令mvn deploy
换源:
http://localhost:8081/#admin/repository/repositories:maven-central
修改Remote storage


 141
141


 被折叠的 条评论
为什么被折叠?
被折叠的 条评论
为什么被折叠?
 到【灌水乐园】发言


