


Zabbix 介绍
Zabbix 是一种企业级的分布式开源监控解决方案。
Zabbix 是一款能够监控众多网络参数和服务器的健康度和完整性的软件。Zabbix 使用灵活的通知机制,允许用户为几乎任何事件配置基于邮件的警报。这样可以快速相应服务器问题。Zabbix 基于存储的数据提供出色的报告和数据可视化。这些功能使得 Zabbix 成为容量规划的理想选择。
Zabbix 支持轮询和被动捕获。所有的 Zabbix 报告、统计信息和配置参数都可以通过基于 Web 的前端页面进行访问。基于 Web 的前端页面确保您的网络状态和服务器健康状况可以从任何地方进行评估。
在经过适当的配置后,Zabbix 可以在监控 IT 基础设施方面发挥重要作用。无论是对于拥有少量服务器的小型组织,还是拥有大量服务器的大型公司而言,同样适用。
Zabbix 功能
数据采集
- 可用性和性能采集;
- 支持 SNMP(包括主动轮询和被动捕获)、IPMI、JMX、VMware 监控;
- 自定义检查;
- 按照自定义的时间间隔采集需要的数据;
- 通过 Server/Proxy 和 Agents 来执行数据采集。
灵活的阈值定义
- 可以定义非常灵活的告警阈值,称之为触发器,触发器从后端数据库获得参考值
高度可配置化的告警
- 可以根据递增计划、接收者、媒介类型自定义发送告警通知;
- 使用宏变量可以使告警通知变得更加高效有益;
- 自动动作包含远程命令。
实时图形
- 使用内置图形功能可实以将监控项绘制成图形。
Web 监控功能
- Zabbix 可以追踪模拟鼠标在 Web 网站上的点击操作,来检查 Web 网站的功能和响应时间。
丰富的可视化选项
- 能够创建可以将多个监控项组合到单个视图中的自定义图形;
- 网络拓扑图;
- 以仪表盘样式展示自定义聚合图形和幻灯片演示;
- 报表;
- 监控资源的高层次(业务)视图。
历史数据存储
- 存储在数据库中的数据;
- 可配置的历史数据;
- 内置数据管理机制(housekeeping)。
以上内容摘子官方文档,更多内容去官方文档学习
[ZABBIX官方文档](2. 定义 (zabbix.com))
安装部署
安装环境
zabbix-server端
IP:47.108.146.17
1核4G
zabbix-agent端
IP:47.108.231.72
1核2G
zabbix-server端操作
yum安装mysql
删除Centos7下自带的Mariadb
# 查找系统自带的Mariadb
rpm -qa|grep mariadb
[root@localhost ~]# rpm -qa|grep mariadb
mariadb-libs-5.5.68-1.el7.x86_64

# 删除查找出来的软件
rpm -e --nodeps 软件名

[root@localhost ~]# rpm -e --nodeps mariadb-libs-5.5.68-1.el7.x86_64

# 查看本机是否安装了mysql,有则删除
rpm -qa | grep mysql
下载官方的mysql安装包
wget https://dev.mysql.com/get/mysql57-community-release-el7-8.noarch.rpm
如果wget命令没有安装的,需要提前安装
curl -o /etc/yum.repos.d/CentOS-Base.repo http://mirrors.aliyun.com/repo/Centos-7.repo
yum -y install wget
安装mysql
rpm -ivh mysql57-community-release-el7-8.noarch.rpm
[root@zabbix-server ~]# rpm -ivh mysql57-community-release-el7-8.noarch.rpm
warning: mysql57-community-release-el7-8.noarch.rpm: Header V3 DSA/SHA1 Signature, key ID 5072e1f5: NOKEY
Preparing...                          ################################# [100%]
Updating / installing...
   1:mysql57-community-release-el7-8  ################################# [100%]
安装完后,/etc/yum.repos.d/目录下会多两个mysql文件

更新密钥
rpm --import https://repo.mysql.com/RPM-GPG-KEY-mysql-2022
yum安装
yum -y install mysql-server
启动mysql服务
systemctl start mysqld
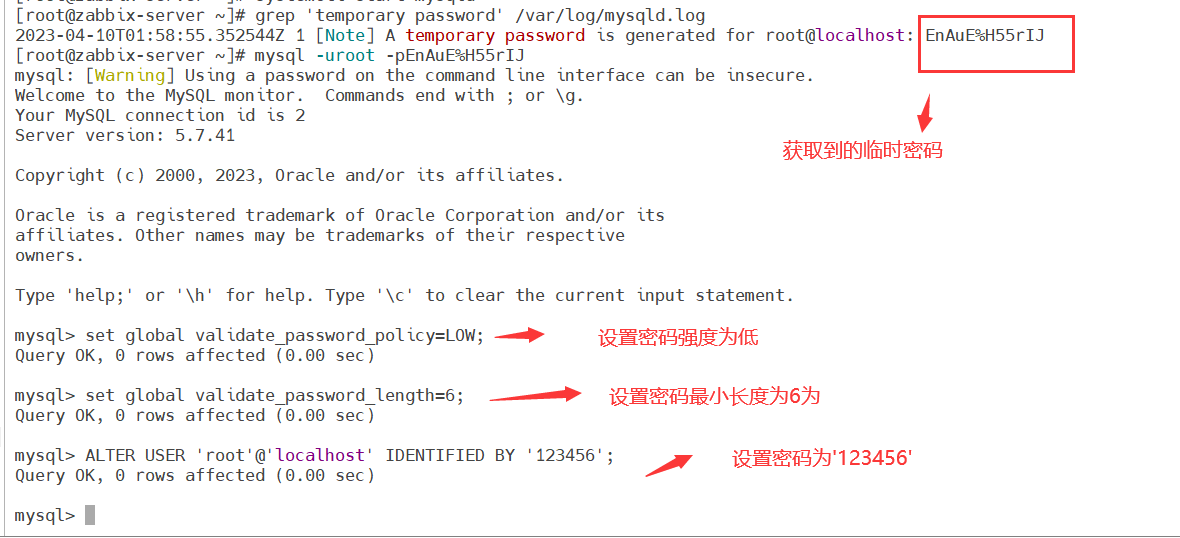
获取临时密码
grep 'temporary password' /var/log/mysqld.log
使用临时密码登录
mysql -uroot -p
修改mysql密码策略
把MySQL的密码校验强度改为低风险
set global validate_password_policy=LOW;
修改MySQL的密码长度为6位
set global validate_password_length=6;
修改MySQL密码为123456
ALTER USER ‘root’@‘localhost’ IDENTIFIED BY ‘123456’;
查找安装完是否有mysql.sock文件 不然后续可能会出错
find / -name mysql.sock

安装zabbix
官方文档:https://www.zabbix.com/cn/download?zabbix=5.0&os_distribution=centos&os_version=7&components=server_frontend_agent&db=mysql&ws=nginx
安装Zabbix存储库
rpm -Uvh https://repo.zabbix.com/zabbix/5.0/rhel/7/x86_64/zabbix-release-5.0-1.el7.noarch.rpm
yum clean all
[root@zabbix-server ~]# rpm -Uvh https://repo.zabbix.com/zabbix/5.0/rhel/7/x86_64/zabbix-release-5.0-1.el7.noarch.rpm
Retrieving https://repo.zabbix.com/zabbix/5.0/rhel/7/x86_64/zabbix-release-5.0-1.el7.noarch.rpm
warning: /var/tmp/rpm-tmp.ZnPLbQ: Header V4 RSA/SHA512 Signature, key ID a14fe591: NOKEY
Preparing...                          ################################# [100%]
Updating / installing...
   1:zabbix-release-5.0-1.el7         ################################# [100%]
[root@zabbix-server ~]# yum clean all
Loaded plugins: fastestmirror
Cleaning repos: base epel extras mysql-connectors-community mysql-tools-community mysql57-community updates zabbix
              : zabbix-non-supported
Cleaning up list of fastest mirrors
安装Zabbix server,Web前端,agent
yum install -y zabbix-server-mysql zabbix-agent
安装Zabbix前端
yum install -y centos-release-scl
启用Red Hat软件集合
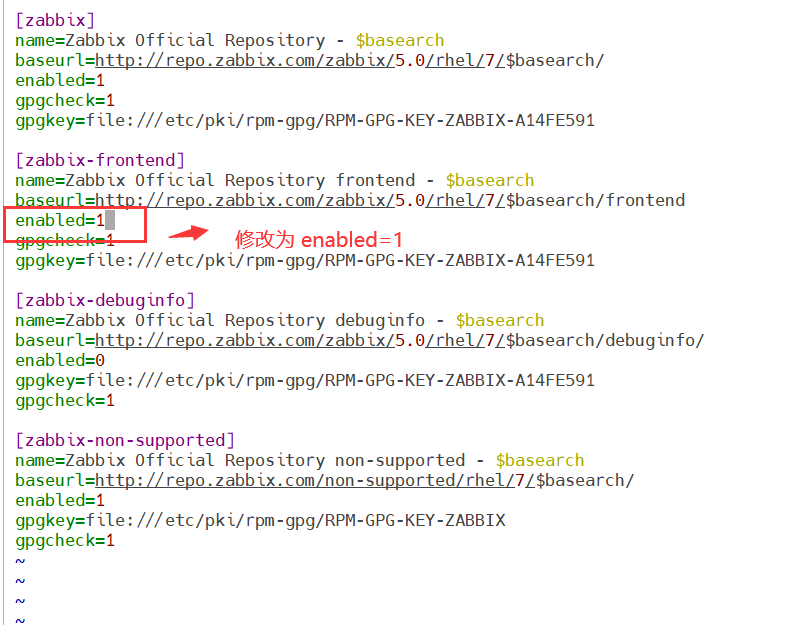
编辑配置文件 /etc/yum.repos.d/zabbix.repo
vim /etc/yum.repos.d/zabbix.repo
[zabbix-frontend]
...
enabled=1
...
安装Zabbix前端软件包
yum install -y zabbix-web-mysql-scl zabbix-nginx-conf-scl
创建初始数据库
请确保数据库服务器已启动并正在运行
在数据库主机上运行以下代码
mysql -uroot -p123456
mysql> create database zabbix character set utf8 collate utf8_bin;
mysql> create user zabbix@localhost identified by ‘123456’;
mysql> grant all privileges on zabbix.* to zabbix@localhost;
mysql> set global log_bin_trust_function_creators = 1;
mysql> quit;
[root@zabbix-server ~]# mysql -uroot -p123456
mysql: [Warning] Using a password on the command line interface can be insecure.
Welcome to the MySQL monitor.  Commands end with ; or \g.
Your MySQL connection id is 3
Server version: 5.7.41 MySQL Community Server (GPL)

Copyright (c) 2000, 2023, Oracle and/or its affiliates.

Oracle is a registered trademark of Oracle Corporation and/or its
affiliates. Other names may be trademarks of their respective
owners.

Type 'help;' or '\h' for help. Type '\c' to clear the current input statement.

mysql> create database zabbix character set utf8 collate utf8_bin;
Query OK, 1 row affected (0.00 sec)

mysql> create user zabbix@localhost identified by '123456';
Query OK, 0 rows affected (0.00 sec)

mysql> grant all privileges on zabbix.* to zabbix@localhost;
Query OK, 0 rows affected (0.00 sec)

mysql> set global log_bin_trust_function_creators = 1;
Query OK, 0 rows affected (0.00 sec)

mysql> quit;
Bye
导入初始架构和数据,系统将提示您输入新创建的密码
zcat /usr/share/doc/zabbix-server-mysql*/create.sql.gz | mysql -uzabbix -p zabbix
[root@zabbix-server ~]# zcat /usr/share/doc/zabbix-server-mysql*/create.sql.gz | mysql -uzabbix -p zabbix
Enter password:
导入数据库架构后禁用log_bin_trust_function_creators选项
mysql -uroot -p123456
mysql> set global log_bin_trust_function_creators = 0;
mysql> quit;
[root@zabbix-server ~]# mysql -uroot -p123456
mysql: [Warning] Using a password on the command line interface can be insecure.
Welcome to the MySQL monitor.  Commands end with ; or \g.
Your MySQL connection id is 5
Server version: 5.7.41 MySQL Community Server (GPL)

Copyright (c) 2000, 2023, Oracle and/or its affiliates.

Oracle is a registered trademark of Oracle Corporation and/or its
affiliates. Other names may be trademarks of their respective
owners.

Type 'help;' or '\h' for help. Type '\c' to clear the current input statement.

mysql> set global log_bin_trust_function_creators = 0;
Query OK, 0 rows affected (0.00 sec)

mysql> quit;
Bye
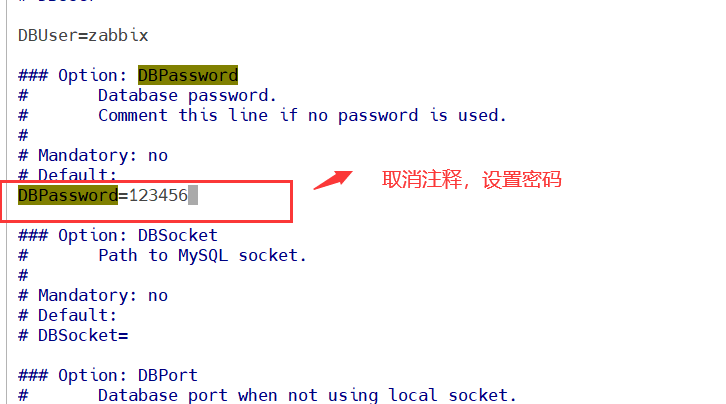
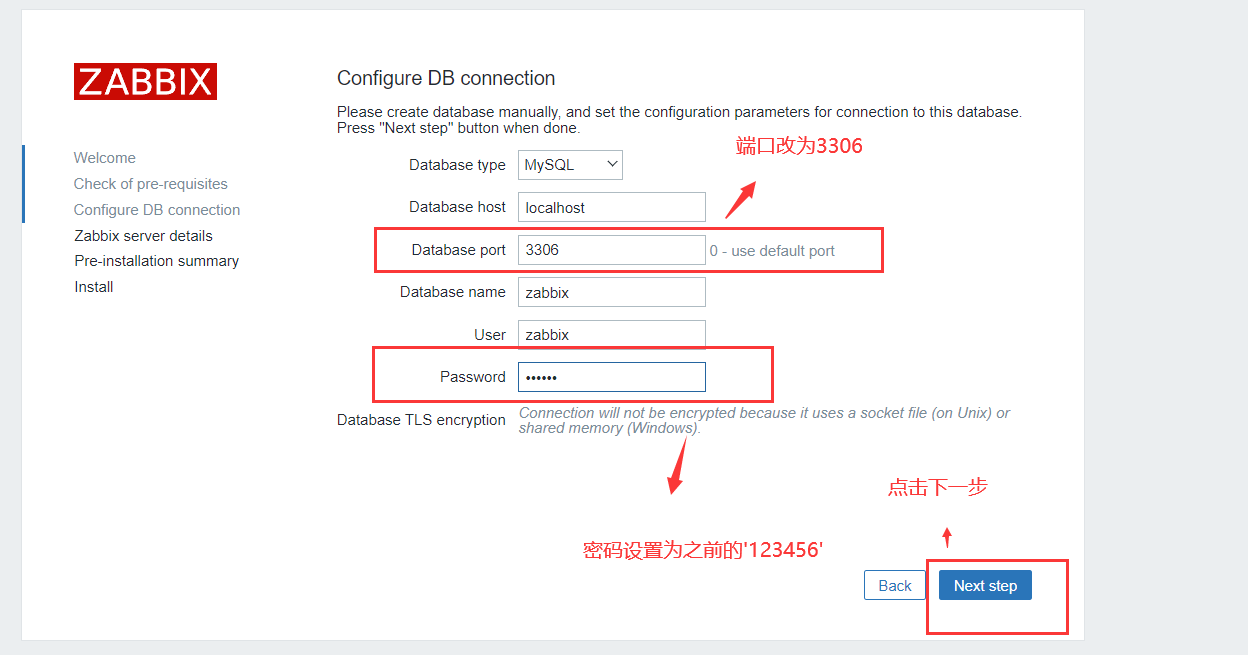
为Zabbix server配置数据库
编辑配置文件 /etc/zabbix/zabbix_server.conf
vim /etc/zabbix/zabbix_server.conf
为Zabbix前端配置PHP
编辑配置文件 /etc/opt/rh/rh-nginx116/nginx/conf.d/zabbix.conf

这里是设置zabbix的端口 官方文档是设置为80端口,但是该端口和nginx端口冲突,如果设置为80端口,则需要修改nginx的端口为其他,如果不想修改nginx端口 这里可以不设置80端口,我设置为8081
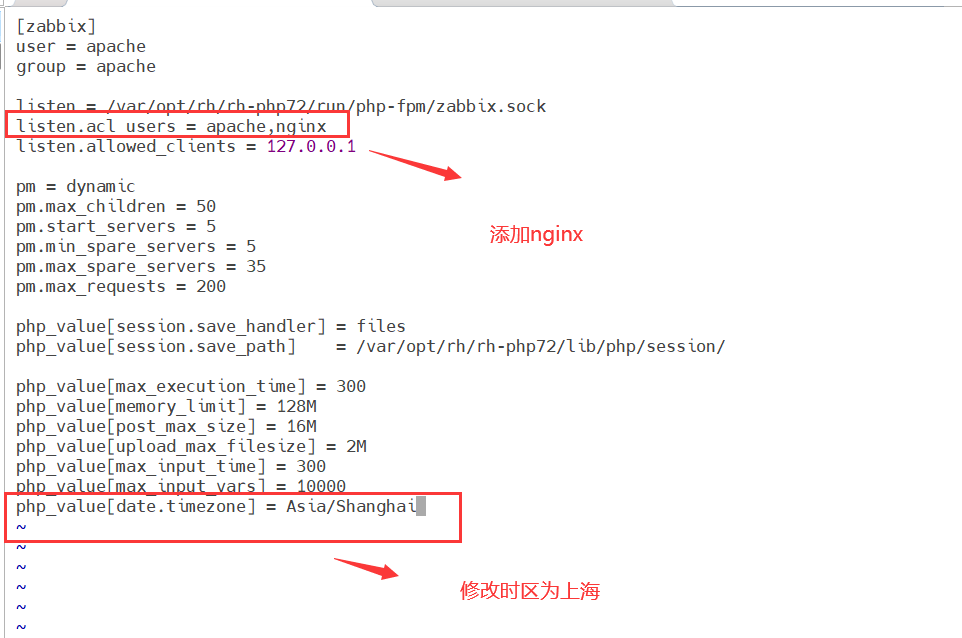
编辑配置文件 /etc/opt/rh/rh-php72/php-fpm.d/zabbix.conf
启动Zabbix server和agent进程,并为它们设置开机自启
systemctl restart zabbix-server zabbix-agent rh-nginx116-nginx rh-php72-php-fpm
systemctl enable zabbix-server zabbix-agent rh-nginx116-nginx rh-php72-php-fpm
浏览器访问
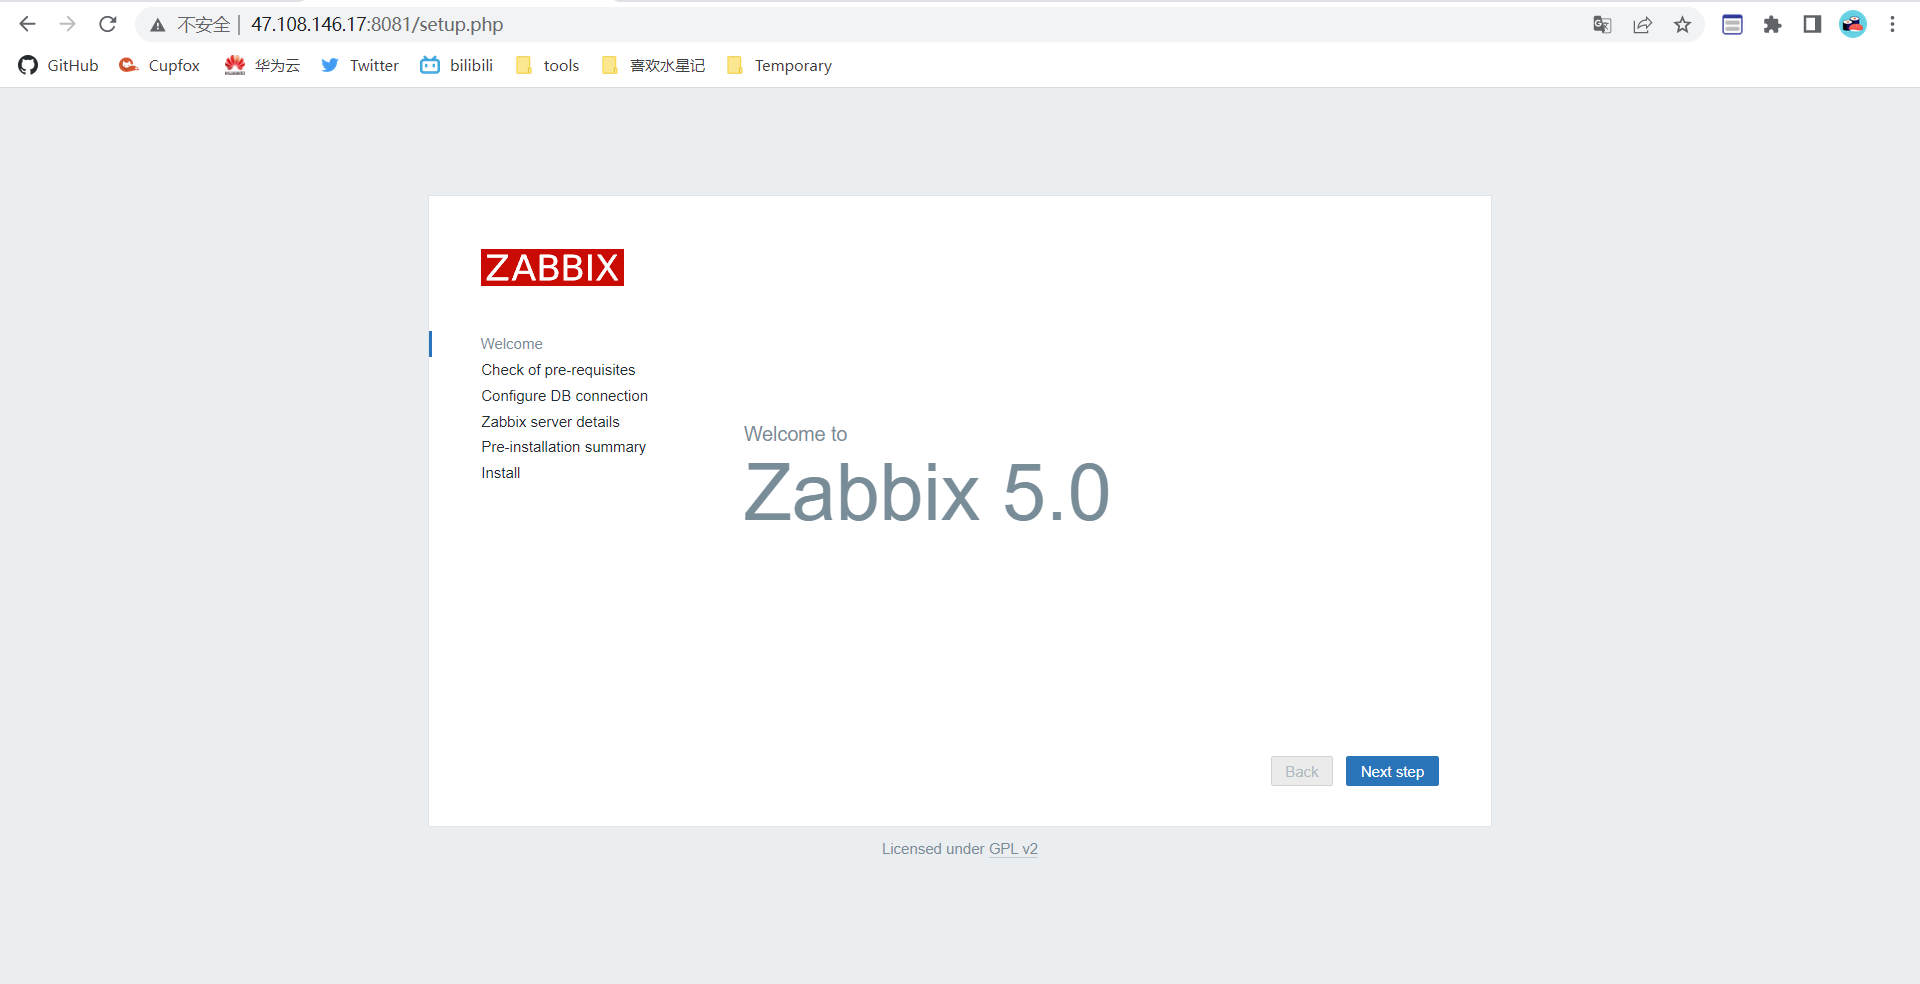
点击下一步
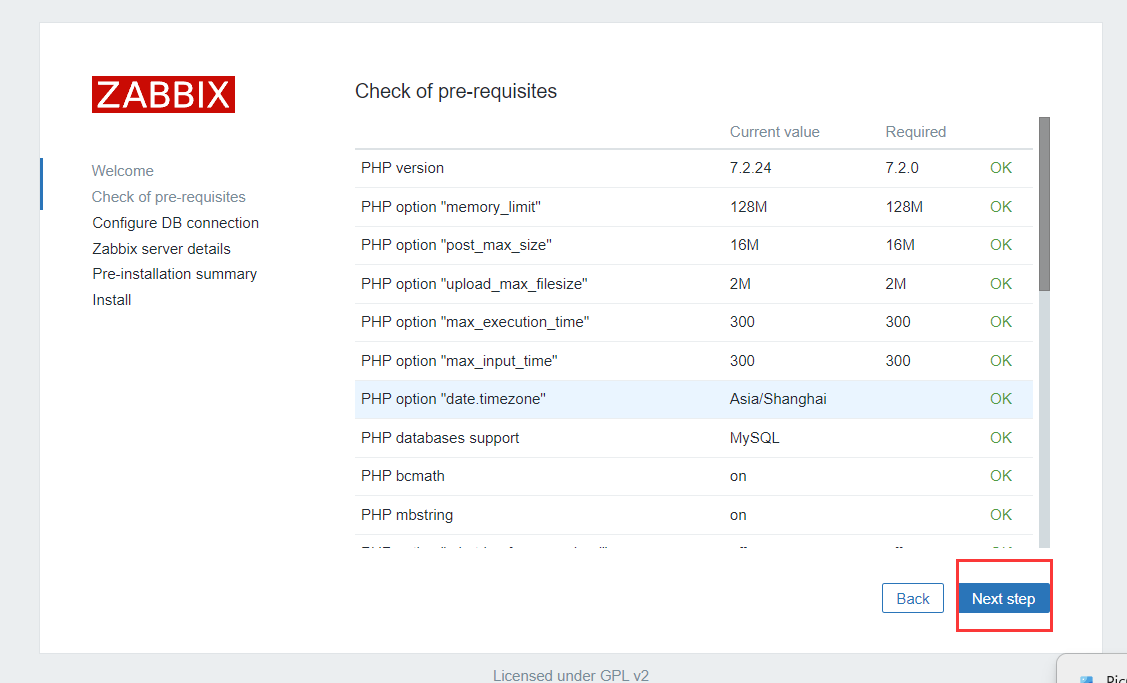
如果全部配置没问题,则都显示ok状态,点击下一步
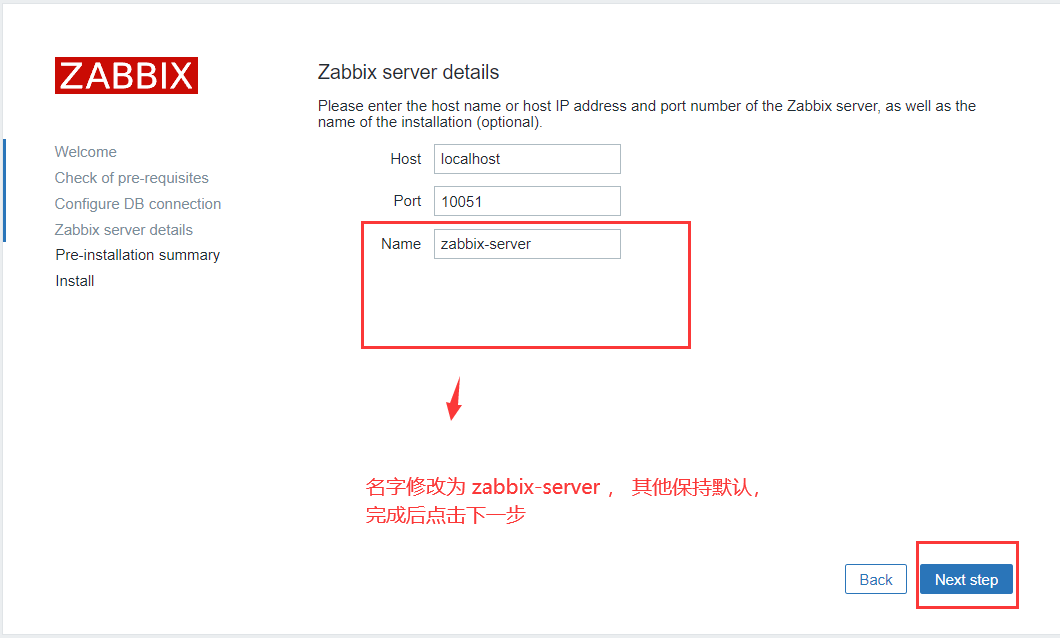
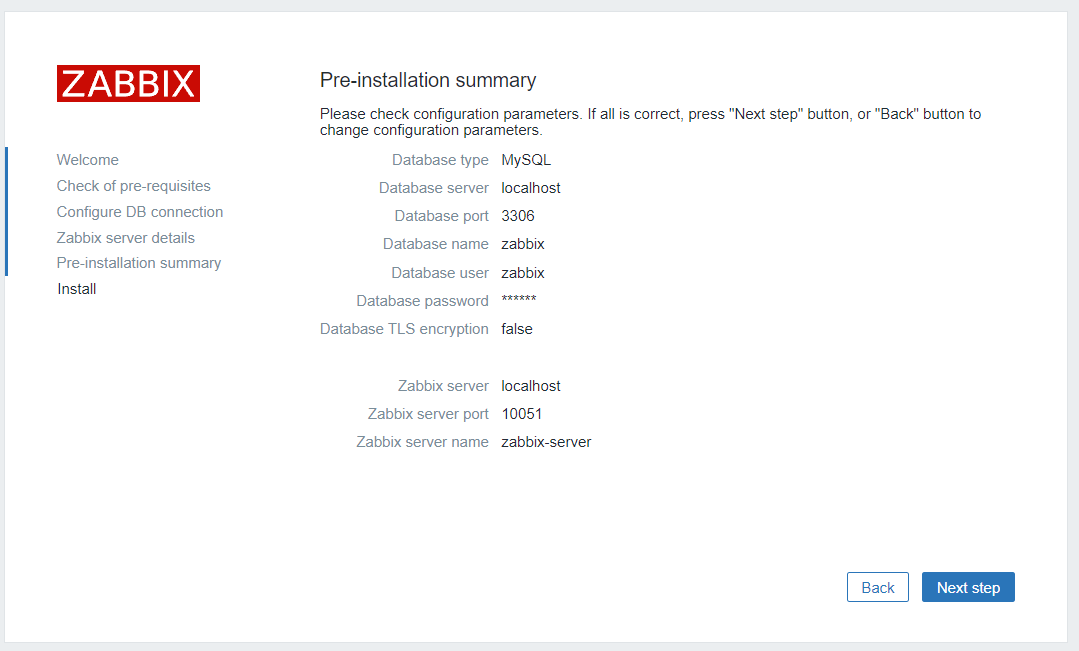
确定配置信息,无误则点击下一步
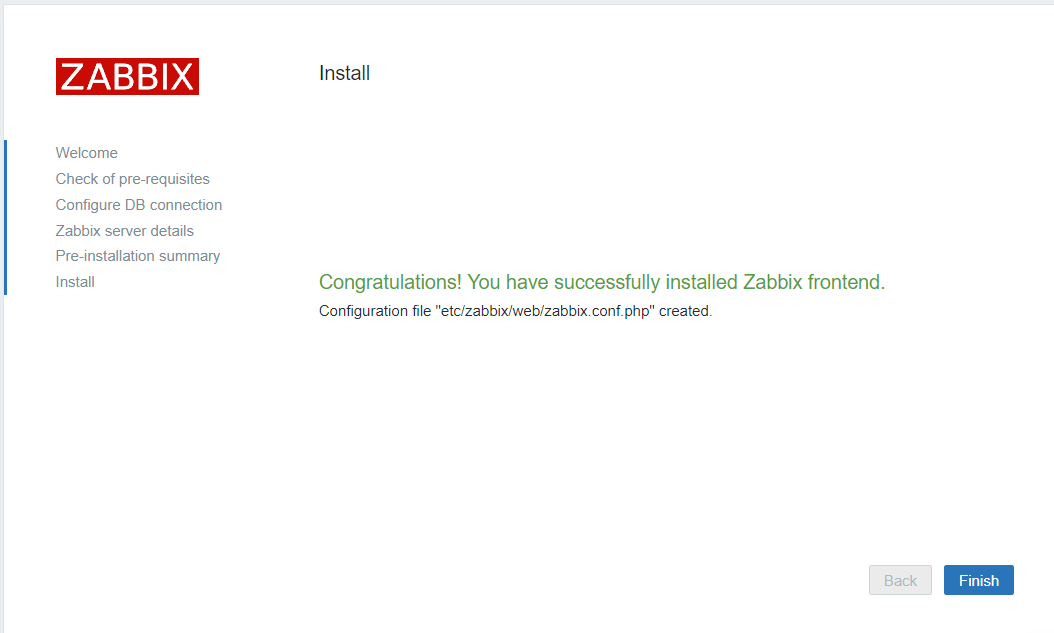
点击完成
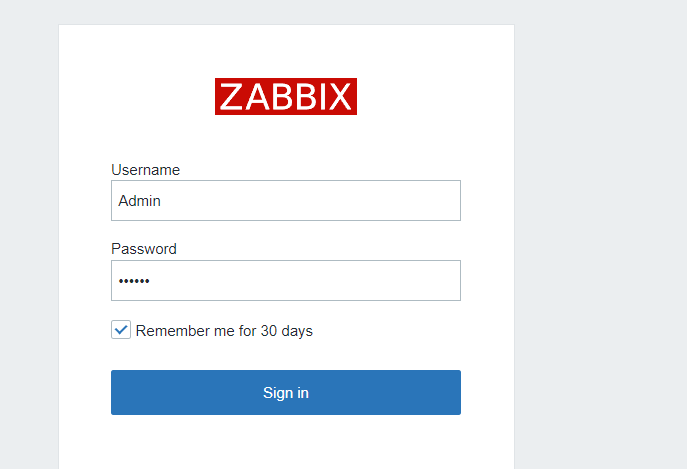
登录
默认用户名: Admin
默认密码:zabbix
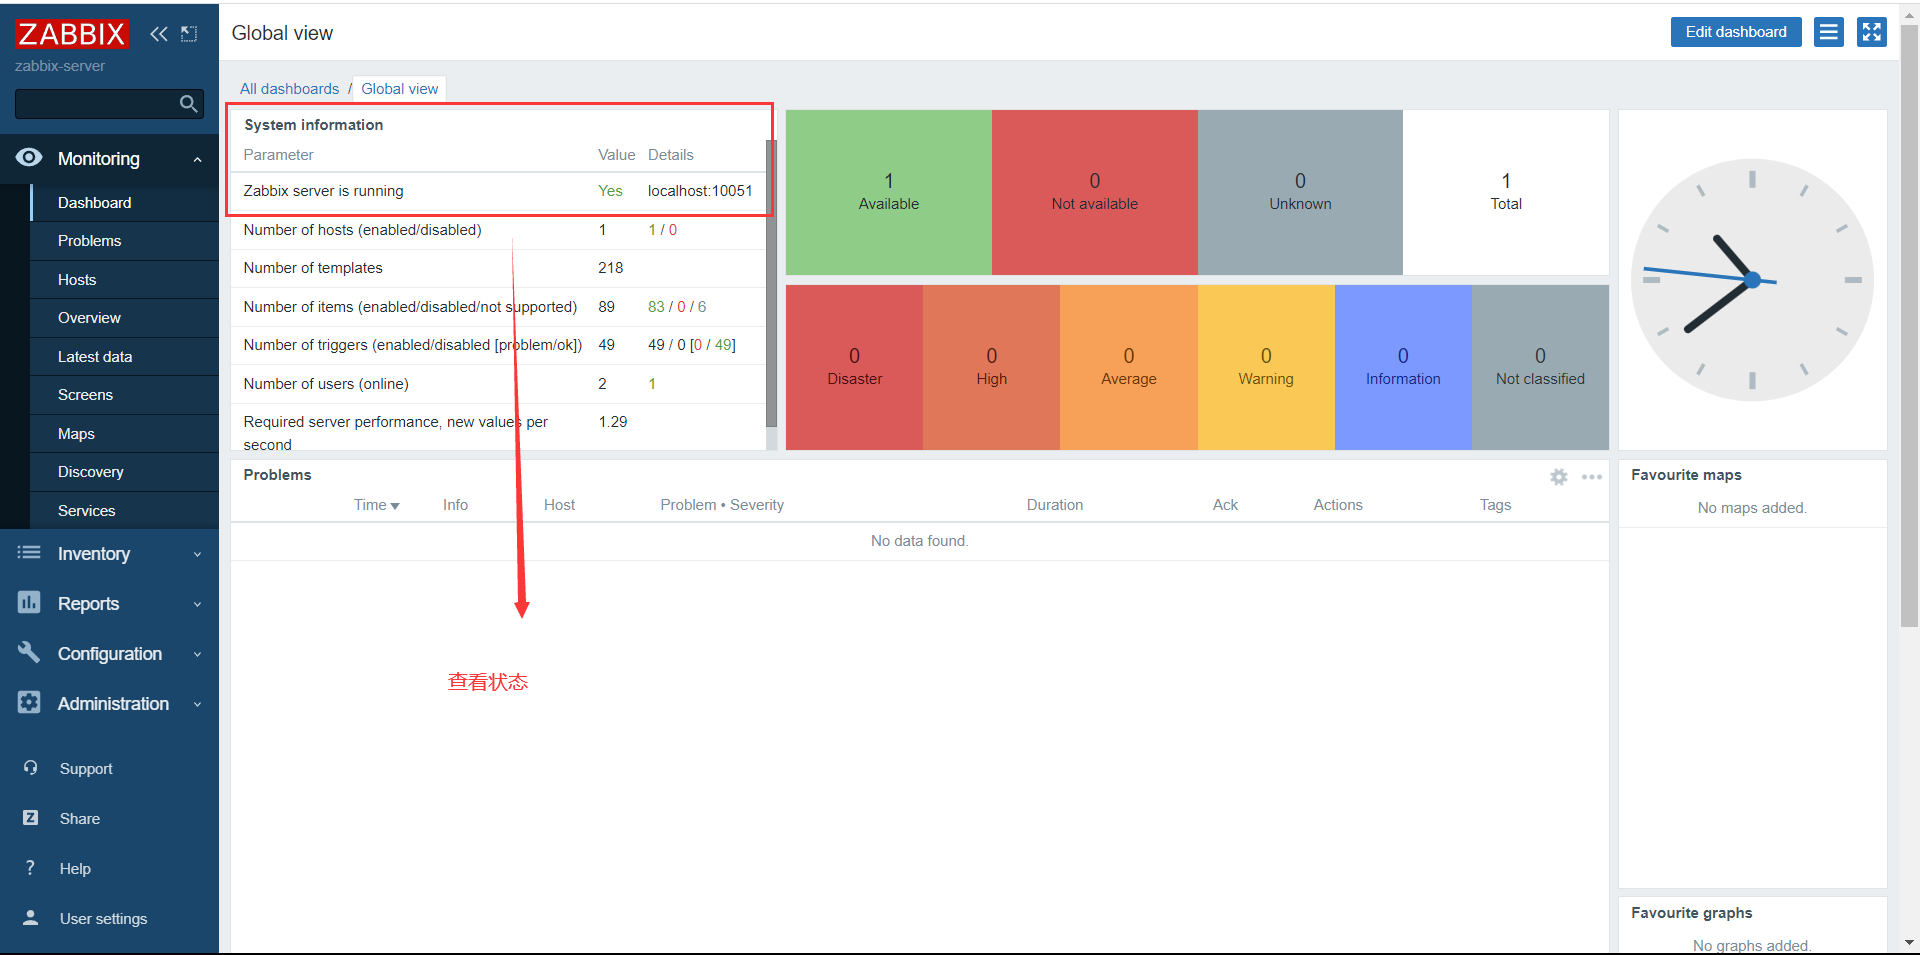
至此,server端就基本部署完了,状态为yes则正常
zabbix-agent端操作
安装Zabbix存储库
rpm -Uvh https://repo.zabbix.com/zabbix/5.0/rhel/7/x86_64/zabbix-release-5.0-1.el7.noarch.rpm
yum clean all
[root@zabbix-agent ~]# rpm -Uvh https://repo.zabbix.com/zabbix/5.0/rhel/7/x86_64/zabbix-release-5.0-1.el7.noarch.rpm
Retrieving https://repo.zabbix.com/zabbix/5.0/rhel/7/x86_64/zabbix-release-5.0-1.el7.noarch.rpm
warning: /var/tmp/rpm-tmp.8oQM0M: Header V4 RSA/SHA512 Signature, key ID a14fe591: NOKEY
Preparing...                          ################################# [100%]
Updating / installing...
   1:zabbix-release-5.0-1.el7         ################################# [100%]
[root@zabbix-agent ~]# yum clean all
Loaded plugins: fastestmirror
Cleaning repos: base epel extras updates zabbix zabbix-non-supported
安装Zabbix代理
yum install -y zabbix-agent
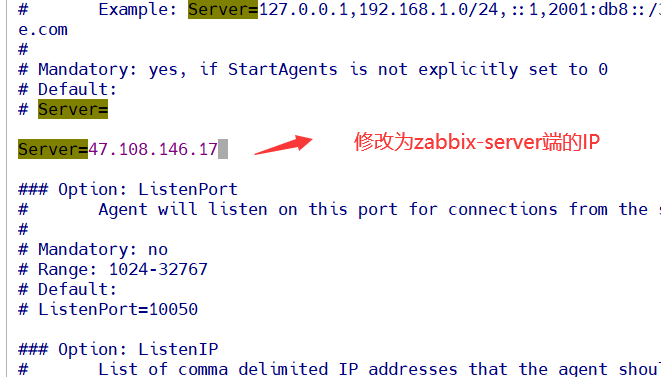
修改zabbix_agentd.conf
查找文件
find / -name zabbix*.conf
vim /etc/zabbix/zabbix_agentd.conf

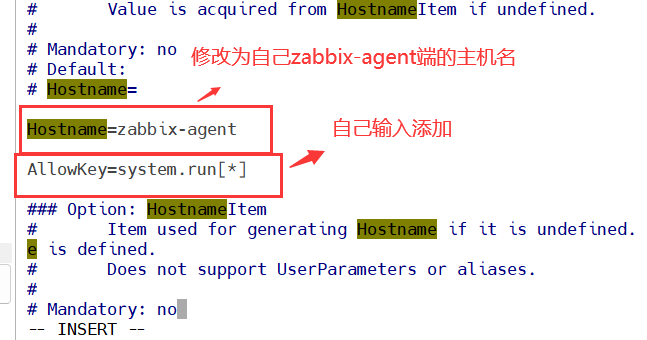
AllowKey=system.run[*]
启动Zabbix代理程序
systemctl restart zabbix-agent
systemctl enable zabbix-agent
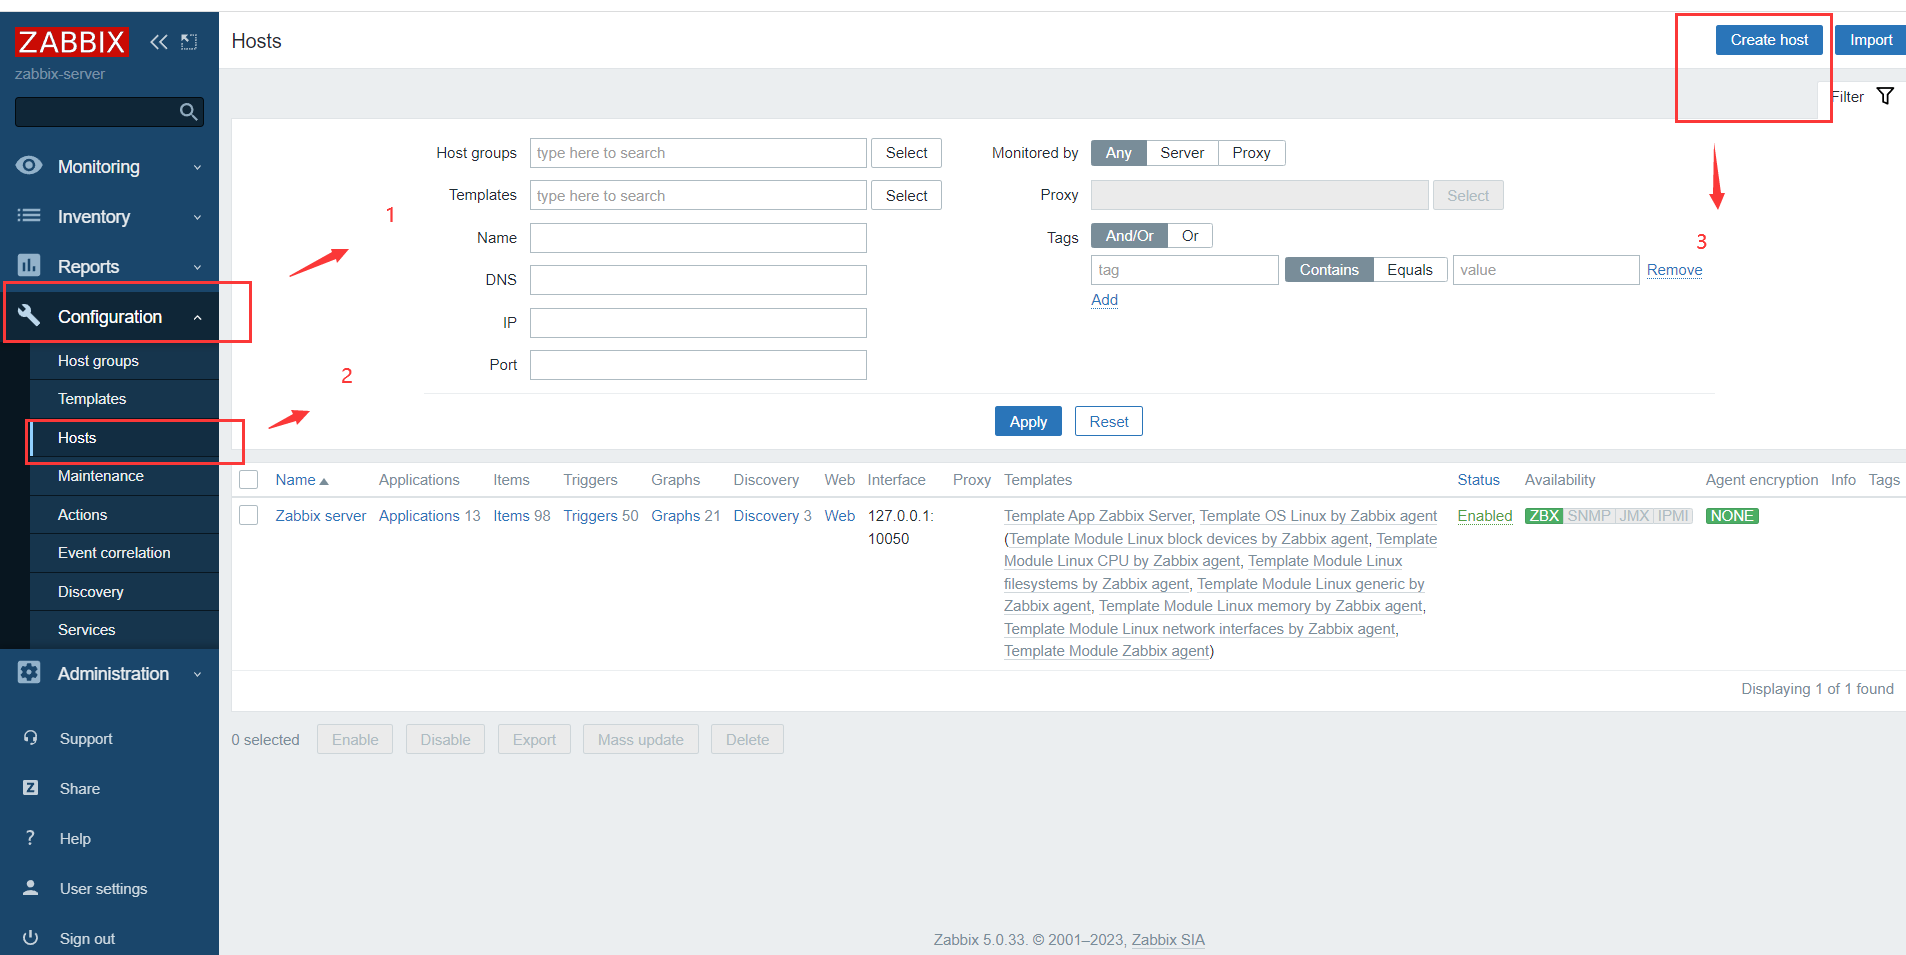
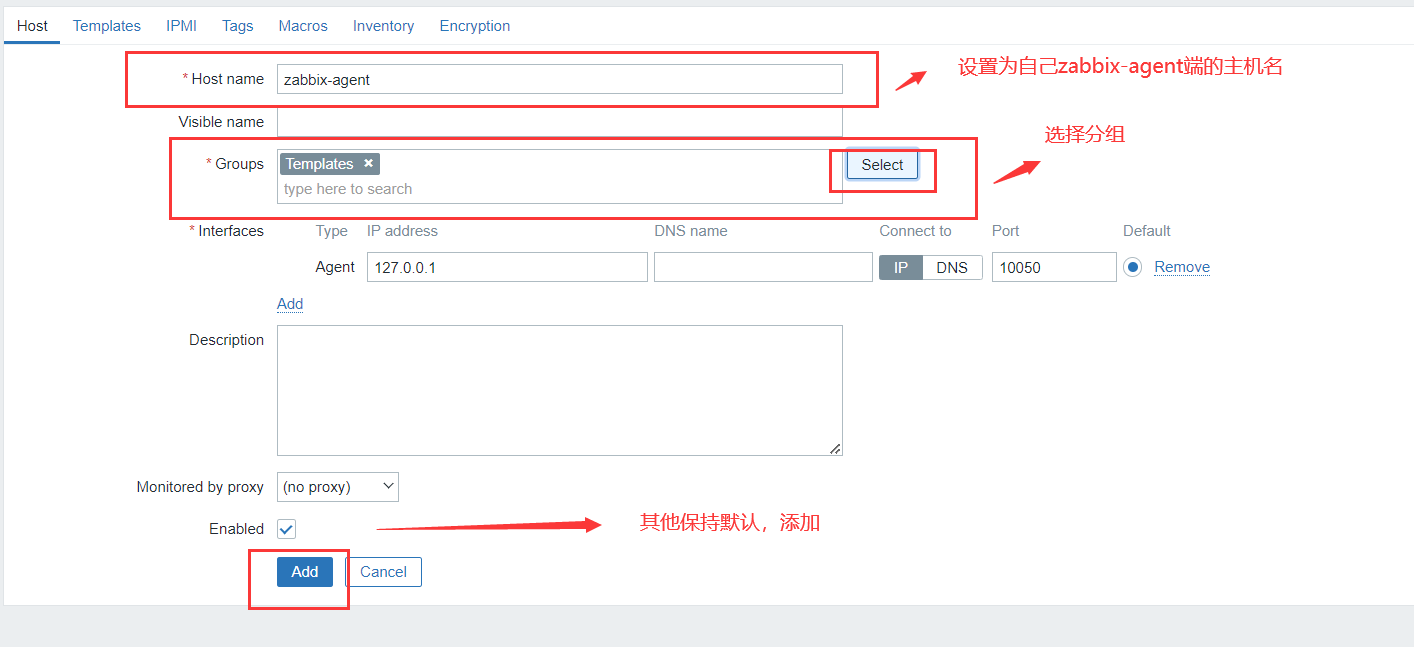
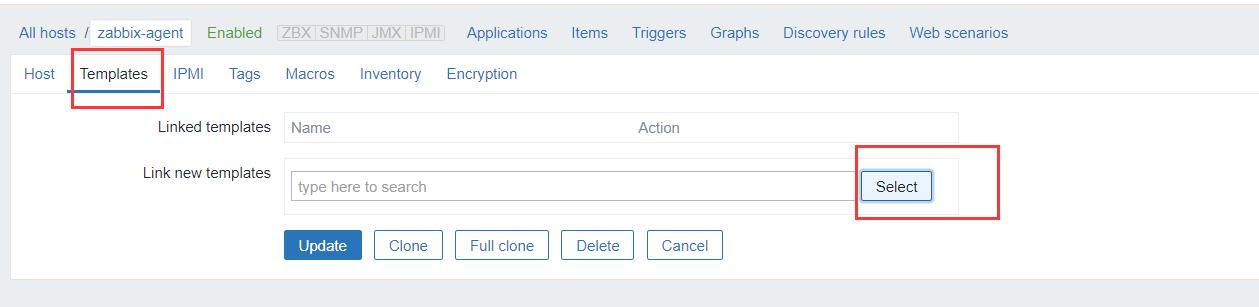
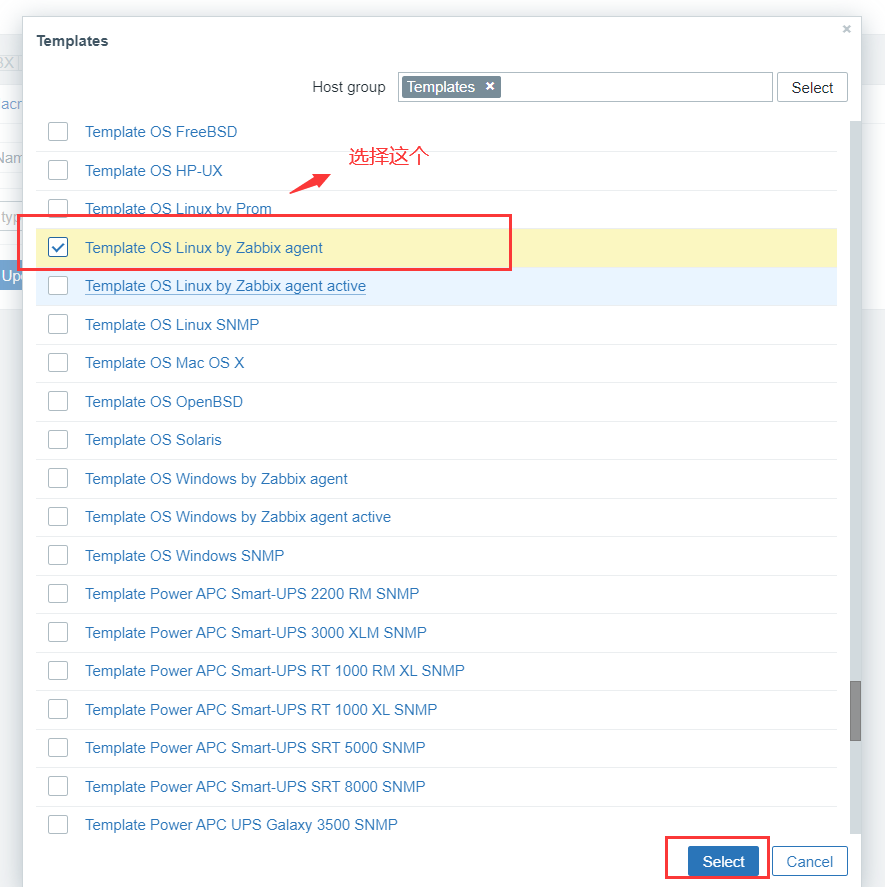
添加agent端
纠错修改:
Agent的IP 改为 zabbix-agent端的IP地址
修改后:
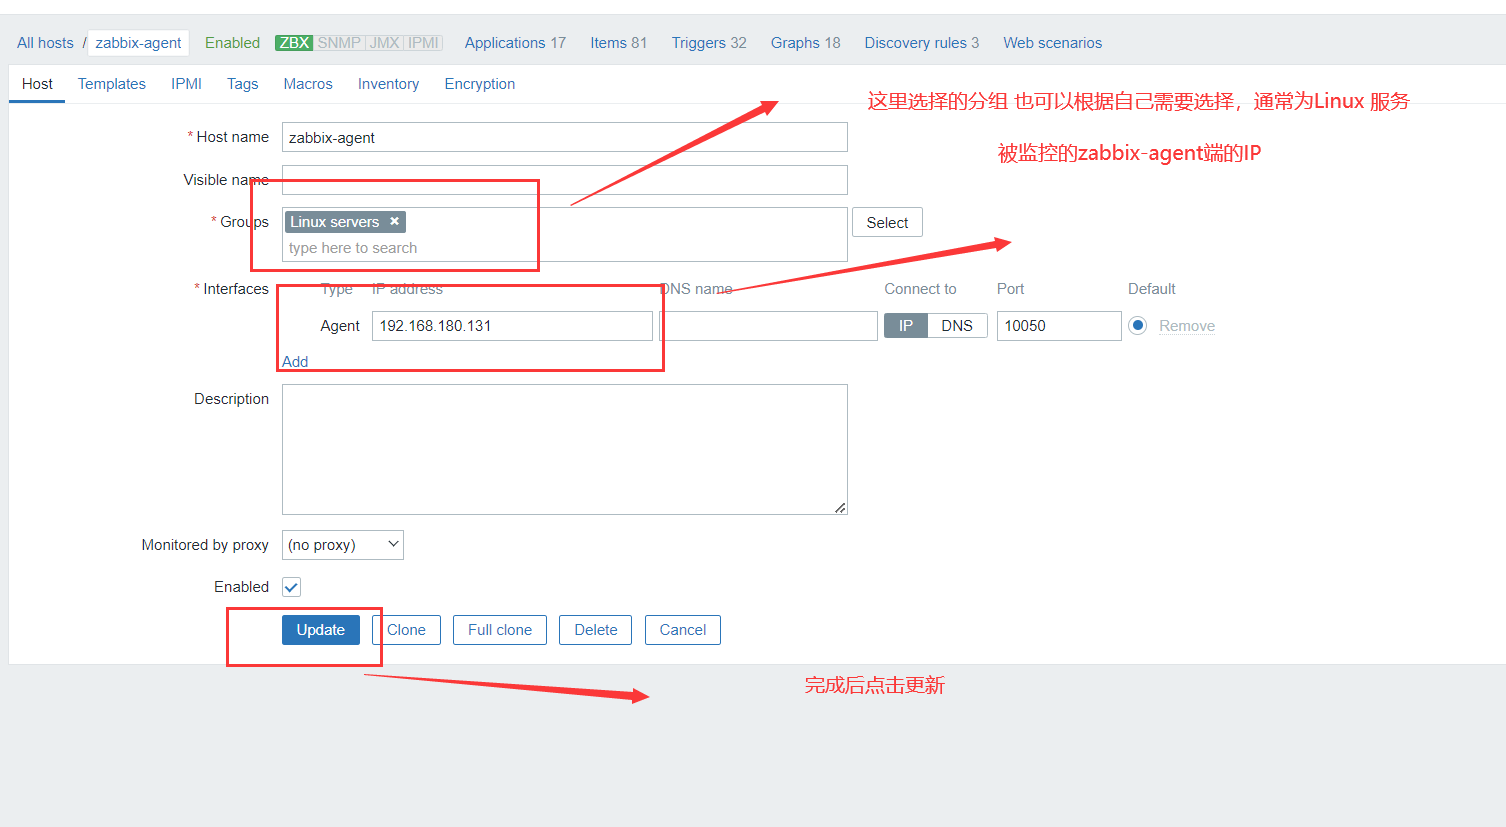
完成添加

排错:
检查server端和agent端有没有关闭防火墙和禁selinux
查看防火墙状态
systemctl status firewalld
如果防火墙处于 running 运行状态,则需要关闭防火墙
systemctl stop firewalld
关闭selinux
临时关闭:
setenforce 0 (临时关闭,系统重启后还是会自动开启)
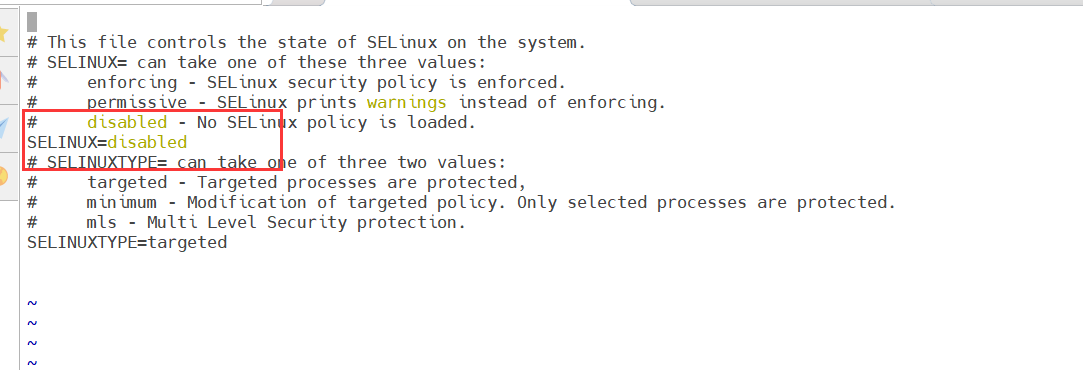
永久关闭
vi /etc/selinux/config
将 SELINUX=enforcing 改为 SELINUX=disabled 然后保存并退出


 被折叠的 条评论
为什么被折叠?
被折叠的 条评论
为什么被折叠?
 到【灌水乐园】发言


