


linux 安全模块开发
一、内核编译与调试
1. 编译内核
-
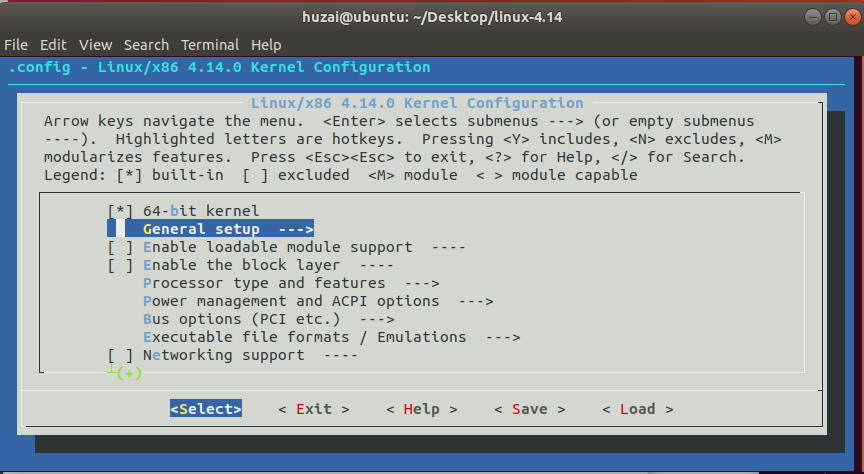
进入到下载好的Linux内核文件中,将配置文件中的选项清空
make allnoconfig -
make menuconfig进入配置文件菜单选项,将以下选择勾选64-bit kernel ---> yes General setup ---> Initial RAM filesystem and RAM disk (initramfs/initrd) support ---> yes General setup ---> Configure standard kernel features ---> Enable support for printk ---> yes Executable file formats / Emulations ---> Kernel support for ELF binaries ---> yes Executable file formats / Emulations ---> Kernel support for scripts starting with #! ---> yes Device Drivers ---> Generic Driver Options ---> Maintain a devtmpfs filesystem to mount at /dev ---> yes Device Drivers ---> Generic Driver Options ---> Automount devtmpfs at /dev, after the kernel mounted the rootfs ---> yes Device Drivers ---> Character devices ---> Enable TTY ---> yes Device Drivers ---> Character devices ---> Serial drivers ---> 8250/16550 and compatible serial support ---> yes Device Drivers ---> Character devices ---> Serial drivers ---> Console on 8250/16550 and compatible serial port ---> yes File systems ---> Pseudo filesystems ---> /proc file system support ---> yes File systems ---> Pseudo filesystems ---> sysfs file system support ---> yes
-
编译内核,差不多只有
1Msudo make -j8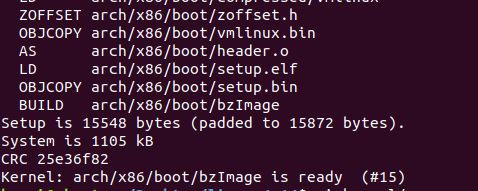
2. 使用busybox构建根文件系统
-
进入busybox文件夹,使用默认的配置文件
make defconfig -
make menuconfig编辑配置文件,一定开启静态编译Busybox Settings ---> Build Options ---> Build BusyBox as a static binary (no shared libs) ---> yes -
编译busybox
time make -j 8 -
安装busybox, install之后出现_install 文件夹
make install -
cd _install创建一些文件夹以及文件-
mkdir -p proc sys dev etc etc/init.d lib tmp -
ln -sf linuxrc init -
cat > etc/init.d/rcS <<EOF #!/bin/sh mount -t proc none /proc mount -t sysfs none /sys /sbin/mdev -s ifconfig lo up EOF -
chmod +x etc/init.d/rcS -
cat > etc/inittab <<EOF
# /etc/inittab
::sysinit:/etc/init.d/rcS
::askfirst:-/bin/sh
::ctrlaltdel:/sbin/reboot
::shutdown:/bin/umount -a -r
EOF
-
-
使用cpio生成根文件系统
find . -print0 | cpio --null -ov --format=newc | gzip -9 > ../initramfs.cpio.gz -
busybox文件夹中,解压刚才生成的
initramfs.cpio.gz为initramfs.cpio
3. 使用qemu启动编译好的内核
-
qemu-system-x86_64 -kernel ~/Desktop/linux-4.14/arch/x86/boot/bzImage -initrd initramfs.cpio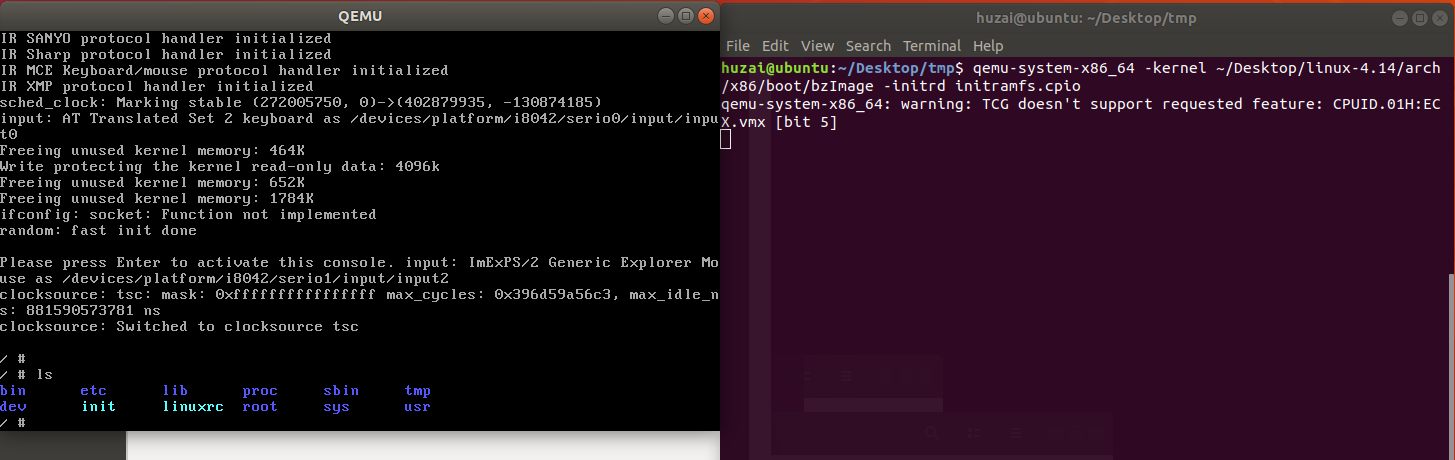
二、linux 内核增加系统调用
1. 前提知识(系统调用如何执行)
- 我们通常写的
c,有相对应的开源的标准库glibc,(2.23的glibc中还是有很多缺陷的)其中的头文件unistd.h就包含了许多的系统调用,如read/write/open等等 - 系统调用是通过的修改寄存器
eax的值,然后通过触发 软中断使系统进入内核空间,比如32位下经典的int 80以及64位的syscall。如果你想更清楚的了解系统调用可以查看我之前写的 ret2syscall 。 - 所以内核的中断处理函数是根据系统调用号来调用相应的内核函数,
c中的read/write,其实调用了内核函数sys_read/sys_write - 因此,添加一个系统调用需要注册 系统调用号 以及相应的 中断处理函数,如此,内核才能找到这个系统调用和执行对应的内核函数。内核的汇编代码最终会在
include/generated/asm/syscalls_64.h中查找调用号,不过我们并不修改这里,x86平台提供了一个专门用来注册系统调用的文件/arch/x86/entry/syscalls/syscall_64.tbl,在编译时会运行同目录下的syscalltbl.sh脚本,将这个文件中登记过的系统调用都生成到前面的syscalls_64.h文件中。因此我们后面要添加系统调用就是修改这个tbl文件。 - 系统执行相应功能,调用的是C代码编写的函数,而不是汇编代码,减轻了编写实现系统调用的负担。系统调用的函数定义在
include/linux/syscalls.h中,因为汇编代码到C代码的参数传递是通过栈实现的,所以可以看到所有系统调用的函数前面都使用了asmlinkage宏,它意味着编译时限制只使用栈来传递参数。 - 系统调用函数的实现 在
kernel/sys.c中,当我们注册了相应的系统调用号以及定义了 系统调用的函数 之后,我们就可以在此文件的代码的最后添加自己的函数,这个文件中有很多已经实现的系统调用的函数作为参考。
2. 添加系统调用号
- 编辑调用号注册表
cd  arch/x86/entry/syscalls/
vi syscall_64.tbl
-
添加系统调用号
#上面省略
328     64      pwritev2                sys_pwritev2
329     common  pkey_mprotect           sys_pkey_mprotect
330     common  pkey_alloc              sys_pkey_alloc
331     common  pkey_free               sys_pkey_free
332     common  statx                   sys_statx
333     common  ps_counter              sys_ps_counter
# 下面的我们x32先不管,系统调用号,就在330左右,在此行上面添加
# x32-specific system call numbers start at 512 to avoid cache impact
# for native 64-bit operation.
#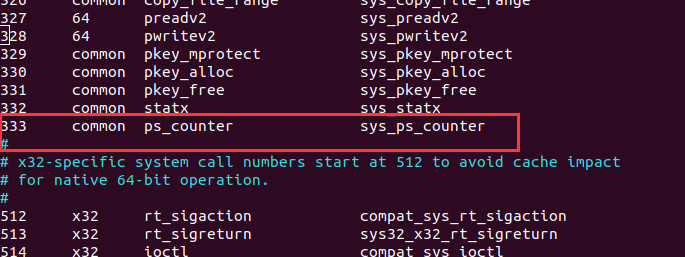
3. 定义系统调用函数
-
编辑系统调用函数原型定义
vi include/linux/syscalls.h -
添加函数原型(__user 是为了向用户空间传值)
#以上省略
asmlinkage long sys_pkey_mprotect(unsigned long start, size_t len,
                                  unsigned long prot, int pkey);
asmlinkage long sys_pkey_alloc(unsigned long flags, unsigned long init_val);
asmlinkage long sys_pkey_free(int pkey);
asmlinkage long sys_ps_counter(int __user *num);
asmlinkage long sys_statx(int dfd, const char __user *path, unsigned flags,
                          unsigned mask, struct statx __user *buffer);

#endif
[外链图片转存失败,源站可能有防盗链机制,建议将图片保存下来直接上传(img-keJMnAb3-1646184138966)(https://cdn.jsdelivr.net/gh/huzai9527/blog_pics@master/uPic/image-20210517082803018.png)]
4. 编写实现函数
-
实现函数文件
vi kernel/sys.c -
实现函数(这里就只要统计task数量到用户空间,我顺便输出了内核相关的task的信息,可以做调试用)
SYSCALL_DEFINE1(ps_counter, int __user*, num)
{
        struct task_struct *task;
        int counter=0;
        printk("[Syscall] ps_counter\n");
        printk("Now pid = %ld",current->pid);#current是宏,指向当前task
        printk("Pid    Parent->pid");
        for_each_process(task){
                counter++;
                printk(" %ld    %ld\n",task->pid,task->parent->pid);
        }
        copy_to_user(num, &counter, sizeof(int)); #结果显示到用户空间
        return 0;
}
5. 编写测试代码
- 源文件
vi test_syscall.c
#include <unistd.h>
#include <syscall.h>
#include <stdio.h>
int main(void){
        int result;
        syscall(333,&result); //系统调用号,是你自己在`tbl`中注册的
        printf("process number is %d\n",result);
        return 0;
}
- 编译(一定静态编译,因为你的qemu下的linux可能没有这些库)
gcc -static -o get_ps_num get_ps_num.c
- 将编译好的二进制,放到
busybox下的_install下的tmp文件夹中,重新压缩gpio文件,这一步看之前的文章 裁剪Linux内核,用qemu进行调试
find . -print0 | cpio --null -ov --format=newc | gzip -9 > ../initramfs.cpio.gz
6. 运行测试程序
-
编译添加完系统调用号,定义了系统调用函数,完成了函数实现之后,编译
linux内核sudo make -j8 -
使用新编译的内核以及刚打包的根文件系统,启动虚拟机
qemu-system-x86_64 -kernel ~/Desktop/linux-4.14/arch/x86/boot/bzImage -initrd ~/Desktop/busybox-1.32.1/initramfs.cpio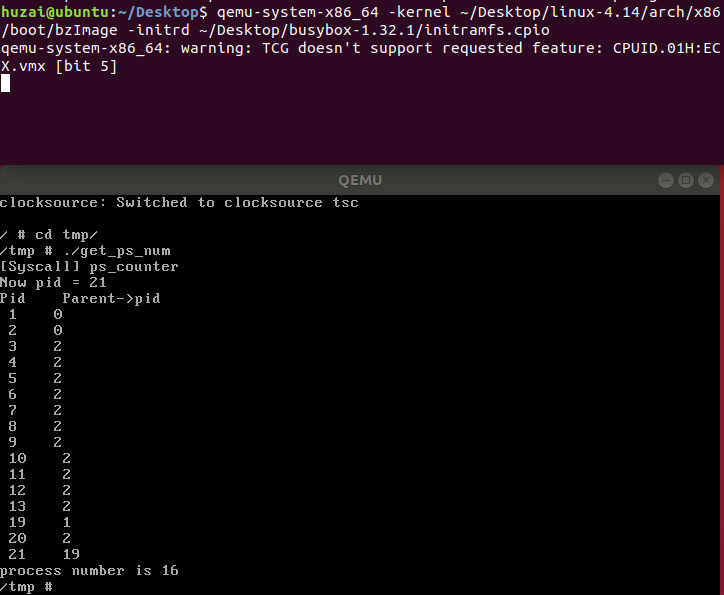
三、新建一个LSM模块
1. 文件组织框架
- security
- HUHU_LSM(工作目录)
- lsm.c(主要的的代码)
- Makefile(自己创建)
- Kconfig(自己创建)
- Kconfig(需要修改)
- Makefile(需要修改)
- HUHU_LSM(工作目录)
2. 基本函数框架
-
hook_implement_function(自己编写的安全函数)
-
static struct security_hook_list gmlsm_hooks[] = { LSM_HOOK_INIT(inode_rename,gmlsm_inode_rename), LSM_HOOK_INIT(inode_create,gmlsm_inode_create), }- LSM_HOOK_INIT(将自己编写的函数与内核中的接口进行绑定)
-
void __init gmlsm_add_hooks(void) { security_add_hooks(gmlsm_hooks, ARRAY_SIZE(gmlsm_hooks)); }- security_add_hooks(将hook插入内核)
-
static __init int gmlsm_init(void){ gmlsm_add_hooks(); return 0; } security_initcall(gmlsm_init);- security_initcall(初始化)
3. 一个小的demo
https://github.com/guomo233/LSM-based-RBAC
四、为LSM模块实现功能
1. 选择相应的hook函数,并实现
-
实现task_alloc函数(首先实现的自己的huhu_task_alloc函数,与lsm中的task_alloc对应)
int huhu_task_alloc(struct task_struct *task,unsigned long clone_flags) // 2. implement relevant function
{
    printk("[+huhu] call task_create(). count=%llu\n", ++count);
    return 0;
}
2. 将实现的hook函数与lsm_hook函数绑定
-
绑定,将实现了的函数与lsm中的hook函数绑定,并放入hooks[]中
static struct security_hook_list huhu_hooks[] = {
    LSM_HOOK_INIT(task_alloc,huhu_task_alloc),
    LSM_HOOK_INIT(file_alloc_security,huhu_file_alloc_security),
    LSM_HOOK_INIT(inode_create,huhu_inode_create), //3. add to security_hook_list
    LSM_HOOK_INIT(file_permission,huhu_file_permission),
    LSM_HOOK_INIT(inode_rename,huhu_inode_rename),
    LSM_HOOK_INIT(inode_alloc_security,huhu_inode_alloc_security),
    LSM_HOOK_INIT(inode_free_security,huhu_inode_free_security),

};
3. 初始化这些hook函数
-
将这些hook函数,放入到security框架中
void __init huhu_add_hooks(void)
{
    pr_info("Demo: becoming mindful.\n");        //print relevant mesg, cat by dmesg | grep huhu
    security_add_hooks(huhu_hooks, ARRAY_SIZE(huhu_hooks),"huhu");   //add security model function
}
4. 设置security初始化函数
-
安全模块的初始化工作
static __init int huhu_init(void){
    	huhu_add_hooks();
    	return 0;
}
security_initcall(huhu_init); //4. register this hook function
五、内核与用户之间的通信
1. /proc文件系统
-
/proc是一种伪文件系统(也即虚拟文件系统),存储的是当前内核运行状态的一系列特殊文件,用户可以通过这些文件查看有关系统硬件及当前正在运行进程的信息,甚至可以通过更改其中某些文件来改变内核的运行状态。
-
相关链接(详细阅读)
https://www.cnblogs.com/cute/archive/2011/04/20/2022280.html
https://blog.csdn.net/sty23122555/article/details/51638697
https://www.cnblogs.com/bakari/p/10966303.html
2. /proc文件创建
-
首先指定该文件具有哪些操作
static const struct file_operations huhu_policy_fops = { .owner = THIS_MODULE, .read = my_read, .write = my_write, }; huhu_policy_file = proc_create(NODE_POLICY, 0, NULL, &huhu_policy_fops);- my_read、my_write是自己实现的读写方式
3. /proc文件的读写方式
-
读写方式根据自己的实际需求进行修改
static ssize_t
my_read(struct file *file, char __user *buf, size_t lbuf, loff_t *ppos)
{
	int nbytes = sprintf(huhu_policy_buf, "policy->level %d\npolicy->pepartment %d\npolicy->project %d\n", huhu_policy.level,huhu_policy.department,huhu_policy.project);
	return simple_read_from_buffer(buf, lbuf, ppos, huhu_policy_buf, nbytes);
}

static ssize_t
my_write(struct file *file, const char __user *buf, size_t lbuf,
			loff_t *ppos)
{
	ssize_t rc;
	rc = simple_write_to_buffer(huhu_policy_buf, lbuf, ppos, buf, lbuf);
	sscanf(huhu_policy_buf, "%d%d%d", &huhu_policy.level, &huhu_policy.department, &huhu_policy.project);
	pr_info("levle has been set to %d\n", huhu_policy.level);
	pr_info("department has been set to %d\n", huhu_policy.department);
	pr_info("project has been set to %d\n", huhu_policy.project);
	return rc;
}


 1万+
1万+


 被折叠的 条评论
为什么被折叠?
被折叠的 条评论
为什么被折叠?
 到【灌水乐园】发言


