


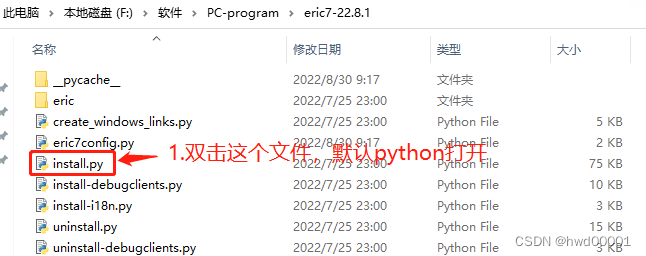
今天本来要安装eric6+pyqt5,没想到最终安装了eric7+pyqt6,最新的组合还没有用过,先记录安装过程。先下载程序:
Python 版本:3.10.6 ——官网:https://www.python.org/downloads/release/python-3106/
Eric7 版本:22.8.1 ——官网:http://eric-ide.python-projects.org/eric-download.html
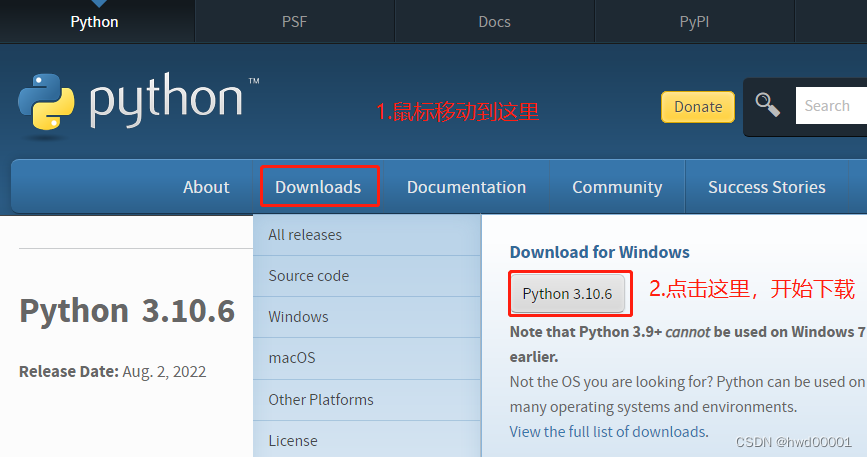
1.下载python并安装
打开官网,目前比较新的版本是 3.10.6,我就选这个版本:
下载后,直接点击运行,进入安装界面:
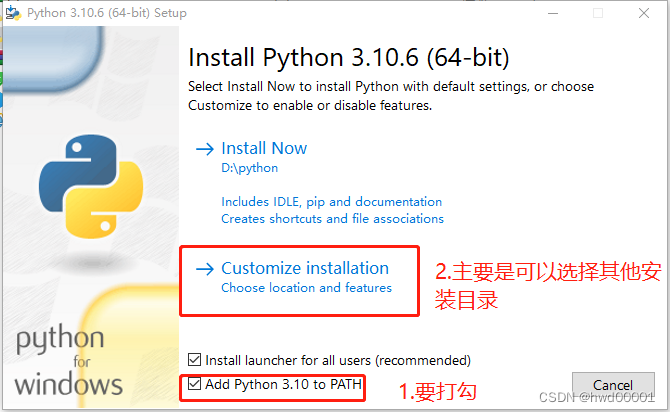
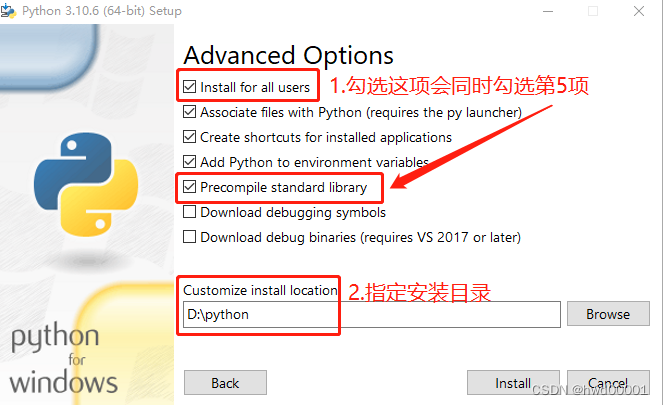
没有需要操作的界面就略过,直接下一步:
一直到安装完成。
2.更新安装工具pip到最新版本
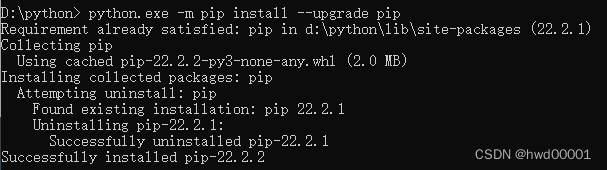
在python安装目录下(我的是 D:\python),打开shell命令行:
在python的安装目录下,新建文件《新建文本文档.txt》,写入 cmd.exe 这7个字符 ,保存,再更改文件名为《cmd.bat》,双击 cmd.bat文件,就可以在当前目录打开shell。
首先要更新pip,pip 是 Python 包管理工具,该工具提供了对Python包的查找、下载、安装、卸载的功能。pip 是一个命令行程序。安装pip后,会向系统添加一个pip命令,该命令可以从命令提示符运行。
原来我使用python3.8.7自带的pip 版本是 20.0.1,现在python3.10.6自带的pip版本是 22.2.1,这些统统不行,必须是最新的 22.2.2
【1】pip更新到最新版本
python.exe -m pip install --upgrade pip
3.下载eric7并安装
打开上面的官网,点击windows版本,下载:

解压文件:
接下来会自动完成安装依赖包,我把重点信息列出来:
Checking dependencies

Successfully installed PyQt6-6.3.1 PyQt6-Qt6-6.3.1 PyQt6-sip-13.4.0
Found PyQt6
Found pyuic6

Successfully installed PyQt6-WebEngine-6.3.1 PyQt6-WebEngine-Qt6-6.3.1

Successfully installed PyQt6-Charts-6.3.1 PyQt6-Charts-Qt6-6.3.1

Successfully installed PyQt6-QScintilla-2.13.3
Found PyQt6-QScintilla
Found QtGui
Found QtNetwork
Found QtPrintSupport
Found QtSql
Found QtSvg
Found QtSvgWidgets
Found QtWidgets

Successfully installed docutils-0.19

Successfully installed Markdown-3.4.1

Successfully installed pyyaml-6.0

Successfully installed tomlkit-0.11.4

Successfully installed chardet-5.0.0

Successfully installed asttokens-2.0.8 six-1.16.0

Successfully installed EditorConfig-0.12.3

Successfully installed Send2Trash-1.8.0

Successfully installed Pygments-2.13.0

Successfully installed pyenchant-3.2.2

Successfully installed wheel-0.37.1

Successfully installed parso-0.8.3

Successfully installed jedi-0.18.1

Successfully installed cyclonedx-python-lib-2.7.1 packageurl-python-0.10.1 sortedcontainers-2.4.0

Successfully installed cyclonedx-bom-3.5.0 pip-requirements-parser-31.2.0

Successfully installed trove-classifiers-2022.8.24

Successfully installed black-22.6.0 click-8.1.3 colorama-0.4.5 mypy-extensions-0.4.3 pathspec-0.9.0 platformdirs-2.5.2 tomli-2.0.1

Successfully installed qt6-applications-6.1.0.2.2

Version Information
-------------------
Python: 3.10.6
Qt6: 6.3.1
sip: 6.6.2
PyQt6: 6.3.1
PyQt6-QScintilla: 2.13.3
PyQt6-WebEngine: 6.3.1

All dependencies ok.

Cleaning up old installation ...

Creating configuration file ...

Compiling user interface files ...

Compiling source files ...

Installing eric ...
Installing Python API files to 'D:\python\Lib\site-packages\eric7\api\python'.
Installing Ruby API files to 'D:\python\Lib\site-packages\eric7\api\ruby'.
Installing QSS API files to 'D:\python\Lib\site-packages\eric7\api\qss'.

Installation complete.

Press enter to continue...
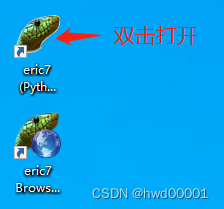
安装完成,桌面多了两个图标:
4.测试运行eric7+pyqt6
双击桌面图标就可以运行eric7,现在打开工程有2个后缀名选择 epj 和 e4p :
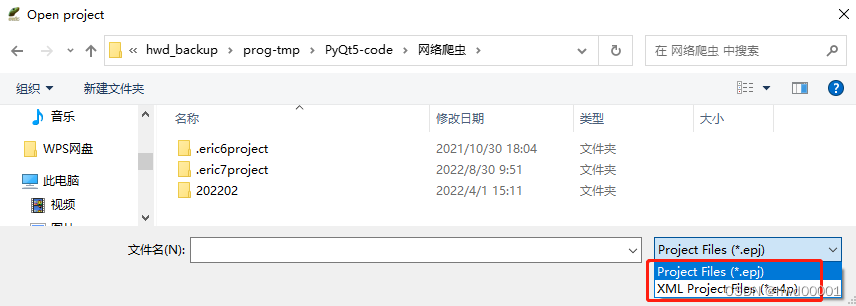
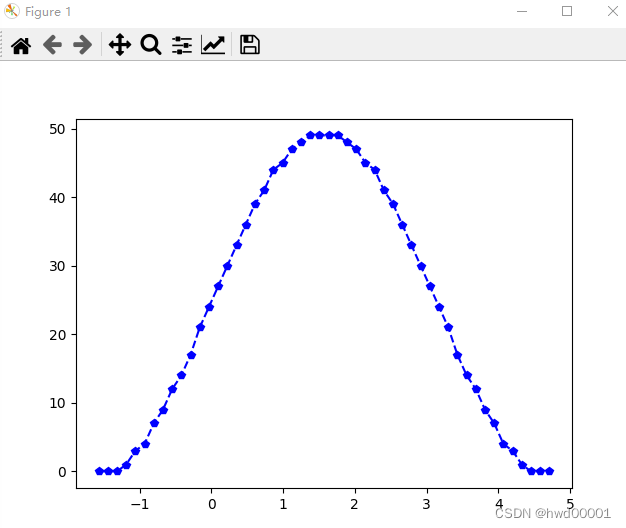
e4p是使用eric6+pyqt5创建的工程名称,eric7一样可以打开,测试运行程序,和eric6+pyqt5的组合基本没什么区别。
附录:
1.Ubuntu python3.10 安装教程,并更新python,pip默认指向为python3.10, pip3(超详细教程)
https://www.iotword.com/2390.html


 4920
4920

 被折叠的 条评论
为什么被折叠?
被折叠的 条评论
为什么被折叠?
 到【灌水乐园】发言


