


 该文章展示了如何在Vue.js中创建一个基础表格,并通过CSS实现固定表头、去除表格间隔线以及设置背景色和字体样式。同时,文章还介绍了如何通过添加滚动容器和调整定时器来实现平滑的自动滚动效果。
1.写一个简单的table表格框架
 <table>
        <thead class="my-table">
          <tr>
            <th>姓名</th>
            <th>年龄</th>
            <th>性别</th>
          </tr>
        </thead>
        <tbody>
          <tr v-for="(item, index) in tableData" :key="index">
            <td>{{ item.name }}</td>
            <td>{{ item.age }}</td>
            <td>{{ item.address }}</td>
          </tr>
        </tbody>
     </table>
table里的数据在data里返回,以下是实例数据
   tableData: [
          {
            name: "张三",
            age: 30,
            address: "北京市朝阳区"
          },
          {
            name: "李四",
            age: 28,
            address: "上海市浦东新区"
          },
          {
            name: "王五",
            age: 32,
            address: "广州市天河区"
          },
          {
            name: "赵六",
            age: 25,
            address: "深圳市福田区"
          },
          {
            name: "孙七",
            age: 27,
            address: "成都市武侯区"
          },
      ],
这样我们就拥有了一个没有样式的基础表格
2.为了使表格更好看,我实现了如下几步:
- 固定表头,滚动时保留表格上面的标题
将th的 position设置为sticky,固定首行,也就是top=0,为其设置为一个区分的颜色
  th {
    background-color: #3c7ca7;
    font-weight: bold;
    position: sticky;
    top: 0;
    background-color: rgb(110, 138, 163);
  }
- 将表格间的分割线去除
<table cellspacing="0"  >
	<--...table内容-->
</table>
- 修改表格背景颜色,字体等样式
为了好看点还设置了隔行的颜色区分也就是 tr:nth-child(even)
 th, td {
    padding: 20px;
    text-align: center;
    font-family: '微软雅黑',"times","courier","arial";
    font-weight:"medium";
    //border: 1px solid #ccc;
    font-size: 20px;
    color: #ffffff;
  }
  th {
    background-color: #3c7ca7;
    font-weight: bold;
    position: sticky;
    top: 0;
    background-color: rgb(110, 138, 163);
  }
  tr:nth-child(even) {
    background-color: #3c7ca7;
  }
- 自动滚动效果
首先为了滚动效果的顺利实现,给table类增加一个外框类table-container
增加滑动框并隐藏
.table-container {
    overflow-y: scroll;
    -webkit-overflow-scrolling: touch;
  }
  .table-container::-webkit-scrollbar {
  display: none;
}
然后利用timer定时器和scrollTop 属性设置滚动效果,
mounted() {
     this.timerId = setInterval(() => {
      const tableContainer = this.$refs.tableContainer;
      const rowHeight = tableContainer.querySelector('tbody tr').offsetHeight;
      tableContainer.scrollTop += rowHeight;
      if (tableContainer.scrollTop == lasttop) {
        tableContainer.scrollTop = 0;
      }else{
          lasttop=tableContainer.scrollTop
      }
    }, 2000);
    this.init();
  },
   beforeDestroy() {
    // 在组件销毁前清除 setInterval
    clearInterval(this.timerId);
},
由于上面的滚动效果不好,看起来很卡顿,下面优化了滚动效果,加入缓动
  mounted() {
     this.timerId = setInterval(() => {
      const tableContainer = this.$refs.tableContainer;
      const rowHeight = tableContainer.querySelector('tbody tr').offsetHeight;
      tableContainer.scrollTop += rowHeight/30;
      if (tableContainer.scrollTop == lasttop) {
        tableContainer.scrollTop = 0;
      }else{
          lasttop=tableContainer.scrollTop
      }
    }, 30);
    this.init();
   // this.tableroll();
  },
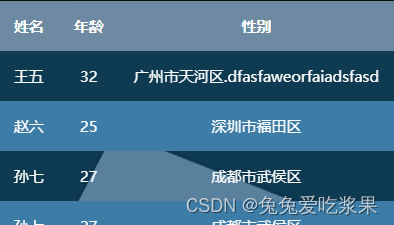
- 最后实现效果
3.全部代码
<div class="table-container" ref="tableContainer">
      <table cellspacing="0"  >
        <thead class="my-table">
          <tr>
            <th>姓名</th>
            <th>年龄</th>
            <th>性别</th>
          </tr>
        </thead>
        <tbody>
          <tr v-for="(item, index) in tableData" :key="index">
            <td>{{ item.name }}</td>
            <td>{{ item.age }}</td>
            <td>{{ item.address }}</td>
          </tr>
        </tbody>
     </table>
    </div>

export default {
  data() {
        tableData: [
          {
            name: "张三",
            age: 30,
            address: "北京市朝阳区"
          },
          {
            name: "李四",
            age: 28,
            address: "上海市浦东新区"
          },
          {
            name: "王五",
            age: 32,
            address: "广州市天河区.dfasfaweorfaiadsfasd"
          },
          {
            name: "赵六",
            age: 25,
            address: "深圳市福田区"
          },
          {
            name: "孙七",
            age: 27,
            address: "成都市武侯区"
          },
      ],
  },
  .table-container::-webkit-scrollbar {
  display: none;
}
.table-container {
    position: absolute;
    left: 80%;
    top:70%;
    height: 300px;
    overflow-y: scroll;
    -webkit-overflow-scrolling: touch;
    background-color:rgba(18, 76, 117, 0.7);
    .my-table {
  }
  th, td {
    padding: 20px;
    text-align: center;
    font-family: '微软雅黑',"times","courier","arial";
    font-weight:"medium";
    //border: 1px solid #ccc;
    font-size: 20px;
    color: #ffffff;
  }
  th {
    background-color: #3c7ca7;
    font-weight: bold;
    position: sticky;
    top: 0;
    background-color: rgb(110, 138, 163);
  }
  tr:nth-child(even) {
    background-color: #3c7ca7;
  }
}


 被折叠的 条评论
为什么被折叠?
被折叠的 条评论
为什么被折叠?
 到【灌水乐园】发言


