


目录
一、说明
本篇文章主要解决springBoot+mybatis读取多数据源问题,这里配置了两个数据源(oracle、mysql),分别从这个两个数据库中读取想要得到数据;这里需要在配置文件配置两个数据源的连接信息;
1、需要将springboot自动配置数据源的功能给去掉:
@SpringBootApplication(exclude = {DataSourceAutoConfiguration.class})
2、不需要在配置文件这样配置mapper位置了,需要在代码中指定:
# mybatis配置
mybatis.mapper-locations=classpath:com/*/*/mapping/*.xml
二、具体实现
1、制造数据源数据
1)oracle数据库
create table SYSTEM.STUDENT
(
  name VARCHAR2(12),
  age  NUMBER,
  sex  VARCHAR2(2)
);

insert into student(name,age,sex) values('lisi',20,'男');
insert into student(name,age,sex) values('wangli',34,'女');
2)mysql数据库
CREATE TABLE `lesson`(
  `id` VARCHAR(12) PRIMARY KEY,
  `name` VARCHAR(36) NOT NULL ,
  `credit` FLOAT  DEFAULT 0,
  `teacher` VARCHAR(36) DEFAULT 0
);

INSERT INTO lesson (id, name, credit, teacher) VALUES ('1', 'chiness', 5, 'zhangsan');
INSERT INTO lesson (id, name, credit, teacher) VALUES ('2', 'math', 5, 'lisi');
2、整体项目位置


3、配置文件—application.properties
#设置静态资源路径
spring.thymeleaf.prefix=classpath:/templates/
spring.resources.static-locations=classpath:static/,file:static/
server.port=8093

spring.message.encoding=UTF-8

spring.datasource.first.url= jdbc:oracle:thin:@127.0.0.1:1521:orcl
spring.datasource.first.username= system
spring.datasource.first.password= 123456
spring.datasource.first.driverClassName=oracle.jdbc.driver.OracleDriver

spring.datasource.second.url=jdbc:mysql://192.168.230.21:3306/test?useUnicode=true&characterEncoding=utf-8&serverTimezone=UTC
spring.datasource.second.username= root
spring.datasource.second.password=123456
spring.datasource.second.driverClassName=com.mysql.jdbc.Driver
4、FirstDataSourceConfig
package com.springboot.manydata.config;

import org.apache.ibatis.session.SqlSessionFactory;
import org.mybatis.spring.SqlSessionFactoryBean;
import org.mybatis.spring.SqlSessionTemplate;
import org.mybatis.spring.annotation.MapperScan;
import org.springframework.beans.factory.annotation.Qualifier;
import org.springframework.beans.factory.annotation.Value;
import org.springframework.boot.jdbc.DataSourceBuilder;
import org.springframework.context.annotation.Bean;
import org.springframework.context.annotation.Configuration;
import org.springframework.context.annotation.Primary;
import org.springframework.core.io.support.PathMatchingResourcePatternResolver;
import org.springframework.jdbc.datasource.DataSourceTransactionManager;

import javax.sql.DataSource;

@Configuration
@MapperScan(basePackages = "com.springboot.manydata.mapper.first",sqlSessionTemplateRef ="firstSqlSessionTemplate")
public class FirstDataSourceConfig {
    @Value("${spring.datasource.first.url}")
    private String url;
    @Value("${spring.datasource.first.username}")
    private String username;
    @Value("${spring.datasource.first.password}")
    private String password;
    @Value("${spring.datasource.first.driverClassName}")
    private String driverClassName;
    /**本数据源扫描的mapper路径*/
    static final String MAPPER_LOCATION = "classpath:mapping/first/*.xml";


    /**创建数据源*/
    @Bean(name = "firstDS")
    @Primary
    public DataSource getFirstDataSource() {
        DataSource build =  DataSourceBuilder.create()
                .driverClassName(driverClassName)
                .url(url)
                .username(username)
                .password(password)
                .build();
        return build;
    }


    /**创建SessionFactory*/
    @Bean(name = "firstSqlSessionFactory")
    @Primary
    public SqlSessionFactory firstSqlSessionFactory(@Qualifier("firstDS") DataSource dataSource) throws Exception {
        SqlSessionFactoryBean bean = new SqlSessionFactoryBean();
        bean.setDataSource(dataSource);
        //设置mapper配置文件
        bean.setMapperLocations(new PathMatchingResourcePatternResolver().getResources(MAPPER_LOCATION));
        return bean.getObject();
    }

    /**创建事务管理器*/
    @Bean("firstTransactionManger")
    @Primary
    public DataSourceTransactionManager firstTransactionManger(@Qualifier("firstDS") DataSource dataSource){
        return new DataSourceTransactionManager(dataSource);
    }

    /**创建SqlSessionTemplate*/
    @Bean(name = "firstSqlSessionTemplate")
    @Primary
    public SqlSessionTemplate firstSqlSessionTemplate(@Qualifier("firstSqlSessionFactory") SqlSessionFactory sqlSessionFactory){
        return new SqlSessionTemplate(sqlSessionFactory);
    }
}
5、SecondDataSourceConfig
package com.springboot.manydata.config;

import org.apache.ibatis.session.SqlSessionFactory;
import org.mybatis.spring.SqlSessionFactoryBean;
import org.mybatis.spring.SqlSessionTemplate;
import org.mybatis.spring.annotation.MapperScan;
import org.springframework.beans.factory.annotation.Qualifier;
import org.springframework.beans.factory.annotation.Value;
import org.springframework.boot.jdbc.DataSourceBuilder;
import org.springframework.context.annotation.Bean;
import org.springframework.context.annotation.Configuration;
import org.springframework.core.io.support.PathMatchingResourcePatternResolver;
import org.springframework.jdbc.datasource.DataSourceTransactionManager;

import javax.sql.DataSource;

@Configuration
@MapperScan(basePackages = "com.springboot.manydata.mapper.second",sqlSessionTemplateRef ="secondSqlSessionTemplate")
public class SecondDataSourceConfig  {
    @Value("${spring.datasource.second.url}")
    private String url;
    @Value("${spring.datasource.second.username}")
    private String username;
    @Value("${spring.datasource.second.password}")
    private String password;
    @Value("${spring.datasource.second.driverClassName}")
    private String driverClassName;
    /**本数据源扫描的mapper路径*/
    static final String MAPPER_LOCATION = "classpath:mapping/second/*.xml";

    /**创建数据源*/
    @Bean(name = "secondDS")
    public DataSource getSecondDataSource() {
        DataSource build =  DataSourceBuilder.create()
                .driverClassName(driverClassName)
                .url(url)
                .username(username)
                .password(password)
                .build();
        return build;
    }


    /**创建SessionFactory*/
    @Bean(name = "secondSqlSessionFactory")
    public SqlSessionFactory secondSqlSessionFactory(@Qualifier("secondDS") DataSource dataSource) throws Exception {
        SqlSessionFactoryBean bean = new SqlSessionFactoryBean();
        bean.setDataSource(dataSource);
        //设置mapper配置文件
        bean.setMapperLocations(new PathMatchingResourcePatternResolver().getResources(MAPPER_LOCATION));
        return bean.getObject();
    }

    /**创建事务管理器*/
    @Bean("secondTransactionManger")
    public DataSourceTransactionManager secondTransactionManger(@Qualifier("secondDS") DataSource dataSource){
        return new DataSourceTransactionManager(dataSource);
    }

    /**创建SqlSessionTemplate*/
    @Bean(name = "secondSqlSessionTemplate")
    public SqlSessionTemplate secondSqlSessionTemplate(@Qualifier("secondSqlSessionFactory") SqlSessionFactory sqlSessionFactory){
        return new SqlSessionTemplate(sqlSessionFactory);
    }
}
6、po类
package com.springboot.manydata.po;

import lombok.Data;
import lombok.experimental.Accessors;

@Data
@Accessors(chain = true)
public class Lesson {
    private String id;
    private String name;
    private String teacher;
    private  float credit;
}
package com.springboot.manydata.po;
import lombok.Data;
import lombok.experimental.Accessors;
@Data
@Accessors(chain = true)
public class Student {
private String name;
private int age;
private String sex;
}7、xml
<?xml version="1.0" encoding="UTF-8" ?>
<!DOCTYPE mapper PUBLIC "-//mybatis.org//DTD Mapper 3.0//EN"
        "http://mybatis.org/dtd/mybatis-3-mapper.dtd" >
<mapper namespace="com.springboot.manydata.mapper.first.StudentMapper">
    <resultMap id="studentMap" type="com.springboot.manydata.po.Student">
        <result column="name" property="name" />
        <result column="age" property="age" />
        <result column="sex" property="sex" />
    </resultMap>

    <select id="getStudentInfo" resultMap="studentMap">
      select * from student
    </select>

</mapper>
<?xml version="1.0" encoding="UTF-8" ?>
<!DOCTYPE mapper PUBLIC "-//mybatis.org//DTD Mapper 3.0//EN"
"http://mybatis.org/dtd/mybatis-3-mapper.dtd" >
<mapper namespace="com.springboot.manydata.mapper.second.LessonMapper">
<resultMap id="lessonMap" type="com.springboot.manydata.po.Lesson">
<result column="id" property="id" />
<result column="name" property="name" />
<result column="credit" property="credit" />
<result column="teacher" property="teacher" />
</resultMap>
<select id="getLessonInfo" resultMap="lessonMap">
select * from lesson;
</select>
</mapper>8、mapper接口
public interface StudentMapper {
    List<Student> getStudentInfo();
}
public interface LessonMapper {
List<Lesson> getLessonInfo();
}9、service层
@Service
public class StudentService implements StudentMapper {
    @Autowired
    StudentMapper studentMapper;
    @Override
    public List<Student> getStudentInfo() {
        return studentMapper.getStudentInfo();
    }
}
@Service
public class LessonService implements LessonMapper {
@Autowired
LessonMapper lessonMapper;
@Override
public List<Lesson> getLessonInfo() {
return lessonMapper.getLessonInfo();
}
}10、controller层
@Controller
@RequestMapping("/student")
public class StudentController {
@Autowired
StudentService studentService;
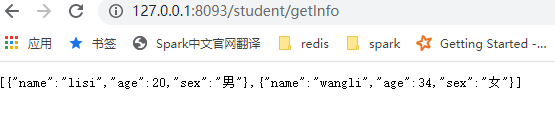
@RequestMapping("/getInfo")
@ResponseBody
public List<Student> getStudentInfo(){
List<Student> studentInfo = studentService.getStudentInfo();
return studentInfo;
}
}@Controller
@RequestMapping("/lesson")
public class LessonController {
@Autowired
LessonService lessonService;
@RequestMapping("/getInfo")
@ResponseBody
public List<Lesson> getStudentInfo(){
List<Lesson> lessonInfo = lessonService.getLessonInfo();
return lessonInfo;
}
}三、测试
启动程序,在页面输入路径测试成功!

四、经验收获
mybatis+oracle在xml中书写的sql不能带最后的分号,否则会报 ORA-00911: 无效字符;
mybatis+mysql在xml中书写的sql可以带最后的分号;


 3447
3447


 被折叠的 条评论
为什么被折叠?
被折叠的 条评论
为什么被折叠?
 到【灌水乐园】发言


