


Channel
一、ByteBuffer正确使用方法

一次读文件
//FileChannel
        //1.输入输出流。2.RandomAccessFile
        try (FileChannel channel = new FileInputStream("data.txt").getChannel()) {
            //准备缓冲区
            ByteBuffer buffer = ByteBuffer.allocate(10);
            //从channel读取数据,向BUffer些
            channel.read(buffer);
            //打印buffer的内容
            buffer.flip();//切换至读模式
            while (buffer.hasRemaining()){//是否还有数据
                byte b = buffer.get();
                System.out.println((char) b);
            }
        } catch (IOException e) {
        }
多次读取文件
 //FileChannel
        //1.输入输出流。2.RandomAccessFile
        try (FileChannel channel = new FileInputStream("data.txt").getChannel()) {
            //准备缓冲区
            ByteBuffer buffer = ByteBuffer.allocate(10);
            while (true) {
                //从channel读取数据,向buffer些
                int len = channel.read(buffer);
                log.debug("读取到的字节数  {}",len);
                if (len == -1){//没有内容了
                    break;
                }
                //打印buffer的内容
                buffer.flip();//切换至读模式
                while (buffer.hasRemaining()) {//是否还有数据
                    byte b = buffer.get();
                    log.debug("实际字节{}",(char)b);
                }
                buffer.clear();//切换到写模式
            }
        } catch (IOException e) {
        }
得到结果:

二、Allocate的使用
		System.out.println(ByteBuffer.allocate(16).getClass());
       System.out.println(ByteBuffer.allocateDirect(16).getClass());
结果

class java.nio.HeapByteBuffer
- java堆内存
- 读写效率低
- 容易受到GC(垃圾回收)的影响
class java.nio.DirectByteBuffer
- 直接内存
- 读写效率高(少一次拷贝)
- 不会受GC影响
- 但分配效率低(要调用操作系统分配内存的函数)
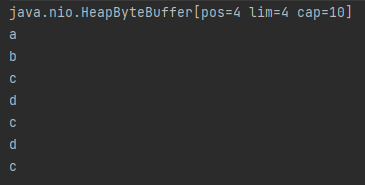
三、ByteBuffer中剩余几个函数的使用
        ByteBuffer buffer = ByteBuffer.allocate(10);
        buffer.put(new byte[]{'a','b','c','d'});
        buffer.flip();//读模式

        //
        System.out.println(buffer.get(new byte[4]));
        buffer.rewind();//从头开始读
        System.out.println((char)buffer.get());
        System.out.println((char)buffer.get());

        //Mark & reset
        buffer.mark();//标记当前position的位置
        System.out.println((char)buffer.get());
        System.out.println((char)buffer.get());
        buffer.reset();//回到mark标记的position的位置
        System.out.println((char)buffer.get());
        System.out.println((char)buffer.get());

        //get(i)不会改变读索引的位置
        System.out.println((char)buffer.get(2));
结果:
四、字符串转为ByteBuffer的方法
读当前buffer中内容的方法(未开启读模式)
public PrintBuffer(ByteBuffer buffer) {
        this.buffer = buffer;
        while (buffer.hasRemaining()) {
            byte b = buffer.get();
            log.debug("实际字节{}", (char)b);
        }
        buffer.clear();
三种读字符串的方法
        //1.字符串转为ByteBuffer
        ByteBuffer buffer = ByteBuffer.allocate(16);
        buffer.put("hello".getBytes());
        new PrintBuffer(buffer);

        System.out.println("---------------------");

        //2.Charset
        ByteBuffer buffer1 = StandardCharsets.UTF_8.encode("hello");//encode会直接切换成读模式
        new PrintBuffer(buffer1);

        System.out.println("---------------------");

        //3.wrap,同样也会直接切换成读模式
        ByteBuffer buffer2 = ByteBuffer.wrap("hello".getBytes());
        new PrintBuffer(buffer2);
结果:

可以看出第一种方法并不会自动开启读模式,后两种方法会自动开启读模式
将ByteBuffer转为字符串(decode)
		String str1 = StandardCharsets.UTF_8.decode(buffer1).toString();
        System.out.println(str1);
decode不会开启读模式!!!
五、分散读,集中写
- 分散读
        try (FileChannel channel = new RandomAccessFile("words.txt", "r").getChannel()) {
            ByteBuffer b1 = ByteBuffer.allocate(3);
            ByteBuffer b2 = ByteBuffer.allocate(3);
            ByteBuffer b3 = ByteBuffer.allocate(5);
            channel.read(new ByteBuffer[]{b1,b2,b3});
            new PrintBuffer(b1);
            new PrintBuffer(b2);
            new PrintBuffer(b3);
        } catch (IOException e) {
        }
结果:

- 集中写
ByteBuffer b1 = StandardCharsets.UTF_8.encode("hello");
        ByteBuffer b2 = StandardCharsets.UTF_8.encode("word");
        ByteBuffer b3 = StandardCharsets.UTF_8.encode("你好");

        try (FileChannel channel = new RandomAccessFile("words2.txt", "rw").getChannel()) {
            channel.write(new ByteBuffer[]{b1,b2,b3});
        } catch (IOException e) {
        }
分散读集中写的思想可以减少数据拷贝次数,提高性能!
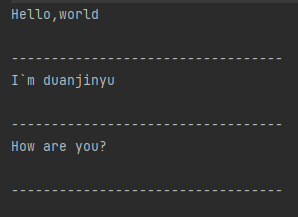
六、总结小测试
题目:将连续的以\n结尾的消息分段存入新buffer
        ByteBuffer source = ByteBuffer.allocate(32);
        source.put("Hello,world\nI`m duanjinyu\nHo".getBytes());
        spilt(source);
        source.put("w are you?\n".getBytes());
        spilt(source);
spilt函数用来实现
    private static void spilt(ByteBuffer source) {
        source.flip();
        for (int i = 0; i < source.limit(); i++) {
            //找到一条完整的消息
            if (source.get(i) == '\n') {
                //计算这条信息的长度
                int length = i+1-source.position();
                ByteBuffer buffer = ByteBuffer.allocate(length);
                //存入新的Buffer
                for (int j = source.position(); j < i+1; j++) {
                    buffer.put(source.get());
                }
                new PrintBuffer(buffer);
            }
        }
        //将剩余没读完的压缩
        source.compact();
    }
结果:
七、文件传输
transferTo:效率高,底层会利用操作系统的零拷贝进行优化
        try (FileChannel from = new FileInputStream("data.txt").getChannel();
          FileChannel to = new FileOutputStream("to.txt").getChannel();
     ) {
         from.transferTo(0,from.size(),to);
     } catch (IOException e) {
         e.printStackTrace();//显示异常
     }
文件较大需要分段传时
			long size = from.size();
            //left变量表示还剩余多少字节
            for (long left = from.size();left > 0;){
                System.out.println("pos=" + (size - left) + ",left=" + left);
                left -= from.transferTo(size-left,from.size(),to);
起始位置:size-left
剩余:left
八、访问文件夹
private static void m1() throws IOException {
		//计数方法(匿名内部类不能直接定义整形)
       AtomicInteger dirCount = new AtomicInteger();
       AtomicInteger fileCount = new AtomicInteger();
       Files.walkFileTree(Paths.get("E:\\"),new SimpleFileVisitor<Path>(){
           @Override
           //访问前要做什么
           public FileVisitResult preVisitDirectory(Path dir, BasicFileAttributes attrs) throws IOException {
               System.out.println("======>" + dir);
               dirCount.incrementAndGet();
               return super.preVisitDirectory(dir, attrs);
           }

           @Override
           //访问时要做什么
           public FileVisitResult visitFile(Path file, BasicFileAttributes attrs) throws IOException {
               System.out.println(file);
               fileCount.incrementAndGet();
               return super.visitFile(file, attrs);
           }
       });
       System.out.println("文件夹数量:" +dirCount);
       System.out.println("文件数量:" +fileCount);
   }
筛选名字(文件类型)
			@Override
            public FileVisitResult visitFile(Path file, BasicFileAttributes attrs) throws IOException {
                if (file.toString().endsWith(".exe")) {
                    System.out.println(file);
                    exeCount.incrementAndGet();
                }
                return super.visitFile(file, attrs);
            }
九、删除文件夹(先删除文件夹中的文件再删除文件夹)
    private static void m3() throws IOException {
        Files.walkFileTree(Paths.get("E:\\论文\\资料\\first - 副本"), new SimpleFileVisitor<Path>() {
            @Override
            public FileVisitResult visitFile(Path file, BasicFileAttributes attrs) throws IOException {
                Files.delete(file);
                return super.visitFile(file, attrs);
            }

            @Override
            public FileVisitResult postVisitDirectory(Path dir, IOException exc) throws IOException {
                Files.delete(dir);
                return super.postVisitDirectory(dir, exc);
            }
        });
    }
十、多级目录的拷贝(先新建文件夹,再复制文件)
        String source = "E:\\boot源文件";
        String target = "E:\\boot源文件-副本";
        Files.walk(Paths.get(source)).forEach(path -> {
            String targetName = path.toString().replace(source,target);
            try {
                //如果是文件夹
                if (Files.isDirectory(path)){
                    Files.createDirectory(Paths.get(targetName));
                }
                //如果是文件
                else if(Files.isRegularFile(path)){
                    Files.copy(path,Paths.get(targetName));
                }
            } catch (IOException e) {
                e.printStackTrace();
            }
        });


 666
666


 被折叠的 条评论
为什么被折叠?
被折叠的 条评论
为什么被折叠?
 到【灌水乐园】发言


