


Docker
Docker的安装
查看当前服务器的内核版本以及系统版本
root@localhost :~$ uname -r
3.10.0-1160.76.1.el7.x86_64
root@localhost :~$ cat /etc/redhat-release
CentOS Linux release 7.9.2009 (Core)

Centos安装Docker
Docker 软件包和依赖包已经包含在默认的 CentOS-Extras 软件源里,安装命令如下:
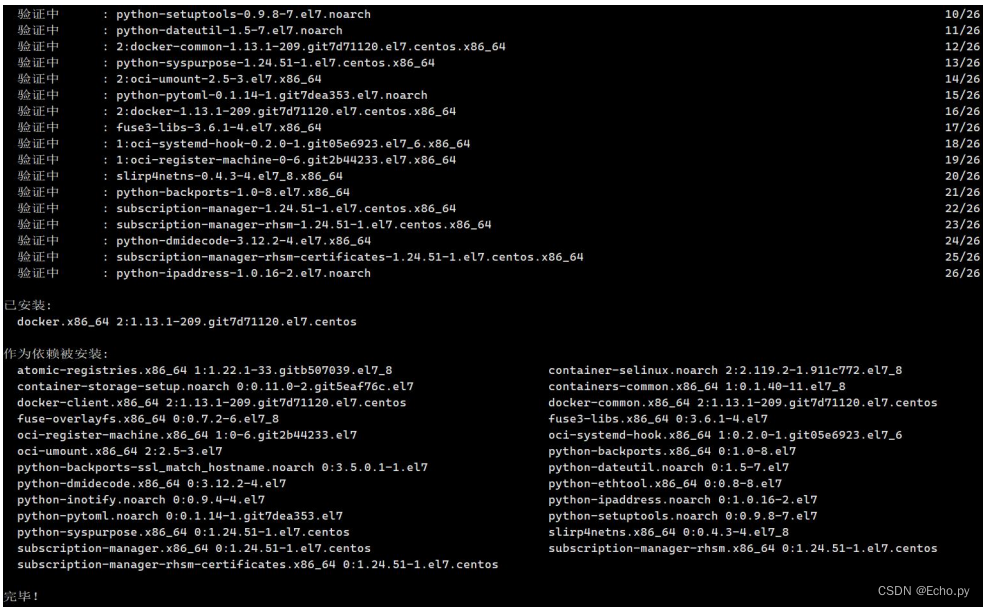
[root@localhost ~]# yum -y install docker
启动 Docker 后台服务
[root@localhost ~]# service docker start
注:
Docker的守护线程绑定的是unix socket,而不是TCP端口,这个套接字默认属于root,其他用户可以通过sudo去访问这个套接字文件。所以docker服务进程都是以root账户运行。
解决的方式是创建docker用户组,把应用用户加入到docker用户组里面。只要docker组里的用户都可以直接执行docker命令。
可以先通过指令查看是否有用户组:
第一步:创建docker用户组
sudo groupadd docker
第二步:用户加入到用户组
sudo usermod -aG docker 用户名
第三步:检查是否有效
cat /etc/group
第四步:重启docker-daemon
sudo systemctl restart docker
第五步:给docker.sock添加权限
sudo chmod a+rw /var/run/docker.sock
Docker 的使用
查看docker镜像
docker images
删除docker镜像
docker rmi 镜像名称
查看docker容器
#显示正在运行的容器
docker ps
#显示所有容器(包括已经停止运行的)
docker pa -a
通过镜像启动一个容器
docker run -itd --name SavaB sava-omb:fix /bin/bash


docker run -itd --name SavaB --privileged=true -v /sys/fs/cgroup:/sys/fs/cgroup -p 80:8080 -p 8000:8000 sava-omb:fix /usr/sbin/init
#命令参数说明:
-i:交互式操作
-t: 终端
-d: 后台运行
--name: 指定容器名字
--privileged=true -v /sys/fs/cgroup:/sys/fs/cgroup /usr/sbin/init: 以特权方式启动容器
-p 80:8080:将容器的8080端口映射到主机的80端口(访问主机80端口即可访问容器8080端口服务)
-v /sys/fs/cgroup:/sys/fs/cgroup:将主机当前目录下的/sys/fs/cgroup挂载到容器的/sys/fs/cgroup
删除容器
docker rm SavaB
进入容器
docker exec-it SavaB bash
将宿主机文件拷贝到容器里
docker cp NetworkManageSystem SavaB:/home/management

docker cp 本地文件路径 容器ID/容器NAME:容器内路径
查看容器的IP
docker inspect 容器名称/容器ID

"Networks": {
                "bridge": {
                    "IPAMConfig": null,
                    "Links": null,
                    "Aliases": null,
                    "NetworkID": "48674edd6477f4b22b4654185a94f97c072d6c54885ca6e96483c0e5972761fa",
                    "EndpointID": "c39bb1883f69bb16b75003f8c8948d29021664f12a5799e4d9ac006c8384d2fa",
                    "Gateway": "172.17.0.1",
                    "IPAddress": "172.17.0.3",
                    "IPPrefixLen": 16,
                    "IPv6Gateway": "fa00:daad:beee::1",
                    "GlobalIPv6Address": "fa00:daad:beee::242:ac11:3",
                    "GlobalIPv6PrefixLen": 48,
                    "MacAddress": "02:42:ac:11:00:03",
                    "DriverOpts": null
                }
打包容器为镜像
docker commit -p 容器ID 镜像名称
Docker容器化服务部署
项目的容器化部署上线
方式一:
拉取一个docker基础镜像(eg:docker pull centos:7.9.2009),以此镜像启动一个容器docker run -itd --name SavaB centos:7.9.2009 /bin/bash 启动的这个容器SavaB就相当于一台ECS虚拟机,进入容器docker exec -it SavaB bash 进入容器后安装Mysql、Redis、Nginx等服务进行项目部署上线(详见项目部署上线完整流程—Echo版)。
方式二:
但遵循容器设计原则,一个容器里运行一个服务(eg:拉取mysql镜像,启动mysql容器,多个容器运行多个服务,容器间进行相互通信)进行项目的部署上线
例如mysql:
查找Docker Hub上的mysql镜像
root@localhost:/mysql$ docker search mysql
NAME                     DESCRIPTION                                     STARS     OFFICIAL   AUTOMATED
mysql                    MySQL is a widely used, open-source relati...   2529      [OK]
mysql/mysql-server       Optimized MySQL Server Docker images. Crea...   161                  [OK]
centurylink/mysql        Image containing mysql. Optimized to be li...   45                   [OK]
sameersbn/mysql                                                          36                   [OK]
google/mysql             MySQL server for Google Compute Engine          16                   [OK]
appcontainers/mysql      Centos/Debian Based Customizable MySQL Con...   8                    [OK]
marvambass/mysql         MySQL Server based on Ubuntu 14.04              6                    [OK]
drupaldocker/mysql       MySQL for Drupal                                2                    [OK]
azukiapp/mysql           Docker image to run MySQL by Azuki - http:...   2                    [OK]
...
拉取官方mysql镜像
docker pull mysql
运行并配置mysql容器
docker run -p 3306:3306 --name savab_mysql -v $PWD/conf/my.cnf:/etc/mysql/my.cnf -v $PWD/logs:/logs -v $PWD/data:/mysql_data -e MYSQL_ROOT_PASSWORD=SAVA@manager -d mysql:5.7.30
命令说明:
- **-p 3306:3306:**将容器的3306端口映射到主机的3306端口
- **-v $PWD/conf/my.cnf:/etc/mysql/my.cnf:**将主机当前目录下的conf/my.cnf挂载到容器的/etc/mysql/my.cnf
- **-v $PWD/logs:/logs:**将主机当前目录下的logs目录挂载到容器的/logs
- **-v $PWD/data:/mysql_data:**将主机当前目录下的data目录挂载到容器的/mysql_data
- **-e MYSQL_ROOT_PASSWORD=123456:**初始化root用户的密码
在容器中启动mysql并进行数据库的数据迁移
将本机sql文件拷贝至容器
docker cp sava.sql savab_mysql:/usr/local
进入savab_mysql容器中
docker exec -it savab_mysql bash
sava.sql 在容器usr/local中,切换到该目录
cd /usr/local
登录mysql
mysql -u root -p
创建数据库
create database sava default charset utf8 collate utf8_general_ci;
show databases;
use sava;
迁移
source sava.sql
这样mysql服务就启动起来了,查看mysql服务容器的ip docker inspect savab_mysql 然后将ip跟数据库信息配置到后台服务容器中的项目settings.py文件中完成mysql服务容器间的通信。
容器化部署过程中的问题
解决docker无法访问linux内核权限问题
systemd维护系统服务程序,它需要特权去会访问Linux内核。而容器并不是一个完整的操作系统,只有一个文件系统,而且默认启动只是普通用户这样的权限访问Linux内核,也就是没有特权,所以自然就用不了!因此,请遵守容器设计原则,一个容器里运行一个服务
docker容器中centos系统无法使用systemctl命令管理进程,报以下错误:
Failed to get D-Bus connection: Operation not permitted
解决方式:
以特权方式启动容器
docker run -itd --name 容器名称 --privileged=true 镜像ID/镜像name /usr/sbin/init
使用docker搭建服务环境,拉取了一个Centos7镜像,在镜像中使用 systemctl命令启动 sladpd服务,已经使用 --privileged=true启用特权模式,但还是报错。
错误信息:
New main PID 558 does not belong to service, and PID file is not owned by root. Refusing.
解决方法:
挂载宿主机 cgroup目录,启动时加上
-v /sys/fs/cgroup:/sys/fs/cgroup
完整启动命令如下:
docker run -itd --name SavaB --privileged=true -v /sys/fs/cgroup:/sys/fs/cgroup -p 80:80 sava-omb:fix /usr/sbin/init
docker中运行mysql无法启动
报错 :
libpthread.so.0: cannot stat shared object: Permission denied
原因:Ubuntu(Debian)具有一种名为AppArmor的安全机制,该机制阻止Docker的特权模式。mysql安装的时候自带这个AppArmor。
privileged: true,Docker中的容器可以具有与主机几乎相同的特权,例如,您可以在Docker中构建类似Docker的环境。另一方面,可以访问容器外部的资源,从而打破了容器之间的松散耦合,因此,除非出于开发目的,否则通常不使用它。
在主机操作系统上安装MySQL的情况下,如果在启用特权模式的情况下启动MySQL容器,AppArmor将识别出" MySQL正在未经授权的资源上运行"并运行它。
启动错误
解决方式:
容器内安装完mysql之后,从AppArmor监控中排除MySQL
sudo ln -s /etc/apparmor.d/usr.sbin.mysqld /etc/apparmor.d/disable/
sudo apparmor_parser -R /etc/apparmor.d/usr.sbin.mysqld
安装python后pip库无法使用
报错:
-
pip is configured with locations that require TLS/SSL, however the ssl module in Python is not available. -
Segmentation fault (core dumped)
解决:
1.下载 openssl:
http://www.openssl.org/source/openssl-1.0.2a.tar.gz
2.安装:
tar -xzvf openssl-1.0.2a.tar.gz
cd openssl-1.0.2a
./config --prefix=/usr/local --openssldir=/usr/local/openssl
make && make install
3.在/usr/local目录下找到lib64和include目录,(注意openssl的库是被安装到lib还是lib64,这步很重要)
[root@Linux local]# pwd
/usr/local
[root@Linux local]# ll
drwxr-xr-x. 2 root root 4096 11月 13 13:59 bin
drwxr-xr-x. 3 root root 4096 11月 13 13:59 include
drwxr-xr-x. 2 root root 4096 11月 1 2011 lib
drwxr-xr-x. 4 root root 4096 11月 13 13:59 lib64
drwxr-xr-x. 2 root root 4096 11月 1 2011 libexec
drwxr-xr-x. 2 root root 4096 11月 1 2011 sbin
4.进入Python安装包
cd /usr/local/Python-3.6.9
5.把上一次编译过程清理干净
make distclean
6.在Python安装包Modules找到Setup.dist文件,按如下步骤修改,使编译Python的时候能找到刚才安装的openssl的库
1)找到SSL相关配置

#SSL=/usr/local/ssl

#_ssl _ssl.c \

# -DUSE_SSL -I$(SSL)/include -I$(SSL)/include/openssl \

# -L$(SSL)/lib -lssl -lcrypto

2) 由于openssl是被安装在/usr/local目录下的lib64和include目录的不是安装在/usr/local/ssl目录,所有把步骤1)找到的4行的注释去掉,如下修改

SSL=/usr/local

_ssl _ssl.c \

-DUSE_SSL -I$(SSL)/include -I$(SSL)/include/openssl \

-L$(SSL)/lib64 -lssl -lcrypto
7.编译安装Python,并创建软连接
./configure --prefix=/usr/local/python3
make && make install
安装easysnmp依赖包报错
netsnmp/client_intf.c:9:38: fatal error: net-snmp/net-snmp-config.h: No such file or directory
 #include <net-snmp/net-snmp-config.h>
                                      ^
compilation terminated.
error: command 'gcc' failed with exit status 1
解决:
这是因为缺少Python和net-snmp的环境

yum install python36-devel -y

yum install net-snmp-devel -y
安装dwebsocket依赖包报错
File "/tmp/pip-install-wftowpu8/senticnet/setup.py", line 20, in <module>
   license=open('LICENSE').read(),
File "/usr/lib/python3.6/encodings/ascii.py", line 26, in decode
   return codecs.ascii_decode(input, self.errors)[0]
UnicodeDecodeError: 'ascii' codec can't decode byte 0xc2 in position 10: ordinal not in range(128)
解决:
机器编码问题
在pip install之前运行export LC_ALL=en_US.UTF-8可以解决这个问题
Harbor仓库的搭建
一、为什么搭建Harbor仓库
就像我们有了本地git代码工具还需要代码托管平台gerrit,gitlab一样,Harbor是由Vmware公司开源的管理容器镜像的平台。
二、环境准备
Harbor的所有服务组件都是在Docker中部署的,所以官方安装使用Docker-compose快速部署,所以需要安装Docker、Docker-compose。由于Harbor是基于Docker Registry V2版本,所以就要求Docker版本不小于1.10.0,Docker-compose版本不小于1.6.0
准备一台虚拟机,我这里准备的是centos7
1)、安装并启动docker
安装所需的包。yum-utils提供了yum-config-manager 效用,并device-mapper-persistent-data和lvm2由需要 devicemapper存储驱动程序
[root@localhost ~]# yum install -y yum-utils device-mapper-persistent-data lvm2
设置稳定存储库
[root@localhost ~]# yum-config-manager --add-repo https://download.docker.com/linux/centos/docker-ce.repo
安装Docker CE
[root@localhost ~]# yum install -y docker-ce docker-ce-cli containerd.io
2)、安装Docker-compose
Compose 是用于定义和运行多容器 Docker 应用程序的工具。通过 Compose,您可以使用 YML 文件来配置应用程序需要的所有服务。然后,使用一个命令,就可以从 YML 文件配置中创建并启动所有服务。
如果你还不了解 YML 文件配置,可以先阅读 YAML 入门教程。
Compose 使用的三个步骤:
- 使用 Dockerfile 定义应用程序的环境。
- 使用 docker-compose.yml 定义构成应用程序的服务,这样它们可以在隔离环境中一起运行。
- 最后,执行 docker-compose up 命令来启动并运行整个应用程序。
下载指定版本的docker-compose
[root@localhost ~]# curl -L https://github.com/docker/compose/releases/download/1.13.0/docker-compose-`uname -s`-`uname -m` > /usr/local/bin/docker-compose
原博文使用的是1.13.0, 我们可以到https://github.com/docker/compose/releases 下查看版本,可以下载最新版本:
curl -L https://github.com/docker/compose/releases/download/v2.2.3/docker-compose-linux-x86_64 -o /usr/local/bin/docker-compose
二进制文件赋可执行权限
[root@localhost ~]# chmod +x /usr/local/bin/docker-compose
测试下docker-compose是否安装成功
[root@localhost ~]# docker-compose --version
Docker Compose version v2.2.3
三、Harbor服务搭建及启动
1)、下载Harbor安装文件
从GitHub上https://github.com/goharbor/harbor/releases下载指定版本的安装包
我下载了最新版本:v1.10.10
[root@localhost ~]# mkdir -p /harbor
[root@localhost ~]# cd /harbor/
[root@localhost harbor]# wget https://github.com/goharbor/harbor/releases/download/v1.10.10/harbor-online-installer-v1.10.10.tgz
[root@localhost harbor]# ls
harbor-online-installer-v1.10.10.tgz
[root@localhost harbor]# tar -zxf harbor-online-installer-v1.10.10.tgz
2)、配置Harbor
[root@localhost harbor]# ls
harbor  harbor-online-installer-v1.10.10.tgz
[root@localhost harbor]# cd harbor
[root@localhost harbor]# ls
LICENSE  common  common.sh  docker-compose.yml  harbor.yml  install.sh  prepare
[root@localhost harbor]# vi harbor.yml
注意,新版本的docker配置放在harbor.yml中。
配置文件harbor.yml详解:
# Configuration file of Harbor

# The IP address or hostname to access admin UI and registry service.
# DO NOT use localhost or 127.0.0.1, because Harbor needs to be accessed by external clients.
hostname: 202.112.237.231

# http related config
http:
  # port for http, default is 80. If https enabled, this port will redirect to https port
  port: 10087

# https related config
#https:
  # https port for harbor, default is 443
  #port: 443
  # The path of cert and key files for nginx
  #certificate: /your/certificate/path
  #private_key: /your/private/key/path

# Uncomment external_url if you want to enable external proxy
# And when it enabled the hostname will no longer used
# external_url: https://reg.mydomain.com:8433

# The initial password of Harbor admin
# It only works in first time to install harbor
# Remember Change the admin password from UI after launching Harbor.
harbor_admin_password: savaom@manager

# Harbor DB configuration
database:
  # The password for the root user of Harbor DB. Change this before any production use.
  password: root123
  # The maximum number of connections in the idle connection pool. If it <=0, no idle connections are retained.
  max_idle_conns: 50
  # The maximum number of open connections to the database. If it <= 0, then there is no limit on the number of open connections.
  # Note: the default number of connections is 100 for postgres.
  max_open_conns: 100

# The default data volume
data_volume: /data

# Harbor Storage settings by default is using /data dir on local filesystem
# Uncomment storage_service setting If you want to using external storage
# storage_service:
#   # ca_bundle is the path to the custom root ca certificate, which will be injected into the truststore
#   # of registry's and chart repository's containers.  This is usually needed when the user hosts a internal storage with self signed certificate.
#   ca_bundle:

#   # storage backend, default is filesystem, options include filesystem, azure, gcs, s3, swift and oss
#   # for more info about this configuration please refer https://docs.docker.com/registry/configuration/
#   filesystem:
#     maxthreads: 100
#   # set disable to true when you want to disable registry redirect
#   redirect:
#     disabled: false

# Clair configuration
clair:
  # The interval of clair updaters, the unit is hour, set to 0 to disable the updaters.
  updaters_interval: 12

jobservice:
  # Maximum number of job workers in job service
  max_job_workers: 10

notification:
  # Maximum retry count for webhook job
  webhook_job_max_retry: 10

chart:
  # Change the value of absolute_url to enabled can enable absolute url in chart
  absolute_url: disabled

# Log configurations
log:
  # options are debug, info, warning, error, fatal
  level: info
  # configs for logs in local storage
  local:
    # Log files are rotated log_rotate_count times before being removed. If count is 0, old versions are removed rather than rotated.
    rotate_count: 50
    # Log files are rotated only if they grow bigger than log_rotate_size bytes. If size is followed by k, the size is assumed to be in kilobytes.
    # If the M is used, the size is in megabytes, and if G is used, the size is in gigabytes. So size 100, size 100k, size 100M and size 100G
    # are all valid.
    rotate_size: 200M
    # The directory on your host that store log
    location: /var/log/harbor

  # Uncomment following lines to enable external syslog endpoint.
  # external_endpoint:
  #   # protocol used to transmit log to external endpoint, options is tcp or udp
  #   protocol: tcp
  #   # The host of external endpoint
  #   host: localhost
  #   # Port of external endpoint
  #   port: 5140

#This attribute is for migrator to detect the version of the .cfg file, DO NOT MODIFY!
_version: 1.10.0

# Uncomment external_database if using external database.
# external_database:
#   harbor:
#     host: harbor_db_host
#     port: harbor_db_port
#     db_name: harbor_db_name
#     username: harbor_db_username
#     password: harbor_db_password
#     ssl_mode: disable
#     max_idle_conns: 2
#     max_open_conns: 0
#   clair:
#     host: clair_db_host
#     port: clair_db_port
#     db_name: clair_db_name
#     username: clair_db_username
#     password: clair_db_password
#     ssl_mode: disable
#   notary_signer:
#     host: notary_signer_db_host
#     port: notary_signer_db_port
#     db_name: notary_signer_db_name
#     username: notary_signer_db_username
#     password: notary_signer_db_password
#     ssl_mode: disable
#   notary_server:
#     host: notary_server_db_host
#     port: notary_server_db_port
#     db_name: notary_server_db_name
#     username: notary_server_db_username
#     password: notary_server_db_password
#     ssl_mode: disable

# Uncomment external_redis if using external Redis server
# external_redis:
#   host: redis
#   port: 6379
#   password:
#   # db_index 0 is for core, it's unchangeable
#   registry_db_index: 1
#   jobservice_db_index: 2
#   chartmuseum_db_index: 3
#   clair_db_index: 4

# Uncomment uaa for trusting the certificate of uaa instance that is hosted via self-signed cert.
# uaa:
#   ca_file: /path/to/ca

# Global proxy
# Config http proxy for components, e.g. http://my.proxy.com:3128
# Components doesn't need to connect to each others via http proxy.
# Remove component from `components` array if want disable proxy
# for it. If you want use proxy for replication, MUST enable proxy
# for core and jobservice, and set `http_proxy` and `https_proxy`.
# Add domain to the `no_proxy` field, when you want disable proxy
# for some special registry.
proxy:
  http_proxy:
  https_proxy:
  # no_proxy endpoints will appended to 127.0.0.1,localhost,.local,.internal,log,db,redis,nginx,core,portal,postgresql,jobservice,registry,registryctl,clair,chartmuseum,notary-server
  no_proxy:
  components:
    - core
    - jobservice
    - clair
配置很简单,首先要修改hostname为机器地址,使用的是http,所以https部分需要注掉。没有搭建自己的数据库,所以使用了默认的数据库。
3)、启动Harbor
修改完配置文件后,在的当前目录执行./install.sh,Harbor服务就会根据当期目录下的docker-compose.yml开始下载依赖的镜像,检测并按照顺序依次启动各个服务
[root@localhost harbor]# ./install.sh
Harbor依赖的镜像及启动服务如下:
[root@localhost harbor]# docker-compose ps
NAME                COMMAND                  SERVICE             STATUS              PORTS
harbor-core         "/harbor/harbor_core"    core                running (healthy)
harbor-db           "/docker-entrypoint.…"   postgresql          running (healthy)   5432/tcp
harbor-jobservice   "/harbor/harbor_jobs…"   jobservice          running (healthy)
harbor-log          "/bin/sh -c /usr/loc…"   log                 running (healthy)   127.0.0.1:1514->10514/tcp
harbor-portal       "nginx -g 'daemon of…"   portal              running (healthy)   8080/tcp
nginx               "nginx -g 'daemon of…"   proxy               running (healthy)   0.0.0.0:80->8080/tcp, :::80->8080/tcp
redis               "redis-server /etc/r…"   redis               running (healthy)   6379/tcp
registry            "/home/harbor/entryp…"   registry            running (healthy)   5000/tcp
registryctl         "/home/harbor/start.…"   registryctl         running (healthy)
4)、修改docker配置,在/etc/docker/daemon.json添加insecure-registry属性
vi /etc/docker/daemon.json
{
  "registry-mirrors": [
    "https://registry.docker-cn.com"
  ]
}
//添加下列json
{
  "insecure-registry":["202.112.237.231:10087"]
}
或:
{
  "registry-mirrors": ["https://registry.docker-cn.com"],
  "insecure-registries": ["202.112.237.231:10087"]
}
5)、重载docker配置并进行docker重启
systemctl daemon-reload
systemctl restart docker #service docker start
使用下列命令查看是否配置成功
# docker info
.....
 Insecure Registries:
  202.112.237.231:10087
  127.0.0.0/8
.....
6)、登录仓库
docker login 202.112.237.231:10087
user:admin
pass:savaom@manager
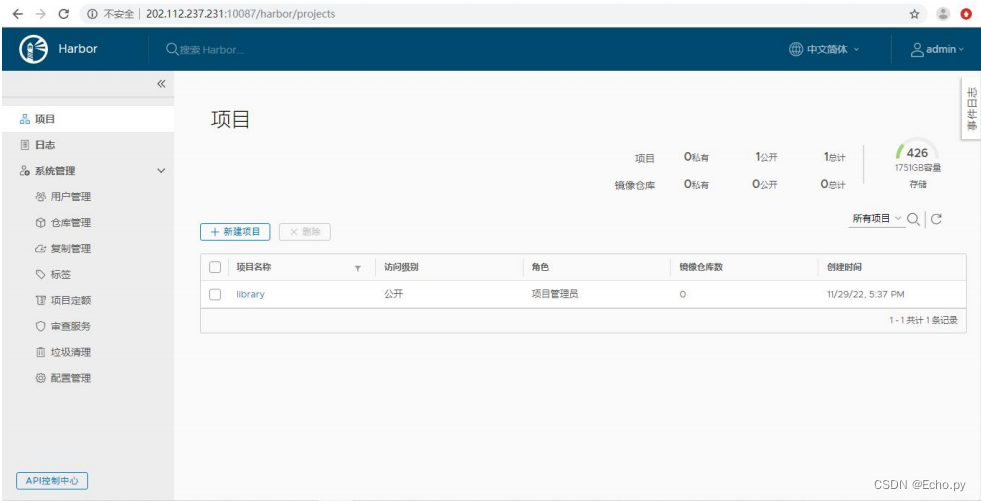
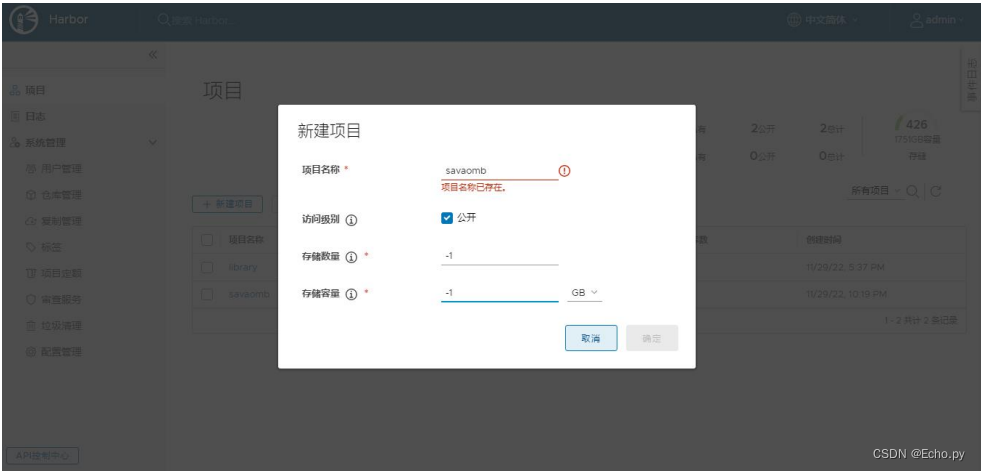
7)、harbor创建项目
8)、对需要推送的镜像签名
root@mengweibin-2:/usr# docker tag savaomb:ok 202.112.237.231:10087/savaomb/savaomb:latest

9)、推送镜像
docker push 202.112.237.231:10087/savaomb/savaomb:latest
可以看到如下推送成功:
root@ubuntu:/home/test/Desktop# docker push 202.112.237.231:10087/savaomb/savaomb:latest
The push refers to repository [202.112.237.231:10087/savaomb/savaomb]
a8bb211e0075: Layer already exists
895762beaf68: Layer already exists
03c67fdbab6d: Layer already exists
dfa2b96454cd: Layer already exists
c7c6e43b31ed: Layer already exists
c5ec52c98b31: Layer already exists
latest: digest: sha256:26bf56e1fa27c49e091ce4804221d3d7ab50e38ec5995144085e3973bf76526a size: 1580


 被折叠的 条评论
为什么被折叠?
被折叠的 条评论
为什么被折叠?
 到【灌水乐园】发言


