


一 在容器里操作宿主机的docker daemon
1,先看下文档
$ docker run -t -i -v /var/run/docker.sock:/var/run/docker.sock -v /path/to/static-docker-binary:/usr/bin/docker busybox sh
By bind-mounting the docker unix socket and statically linked docker binary (refer to get the linux binary), you give the container the full access to create and manipulate(操控) the host’s Docker daemon.
简单讲: 在docker run时候 ,挂载宿主机的docker.sock和docker命令路径,你就赋予了docker完全操控宿主机docker daemon的权限.2,动手实践下
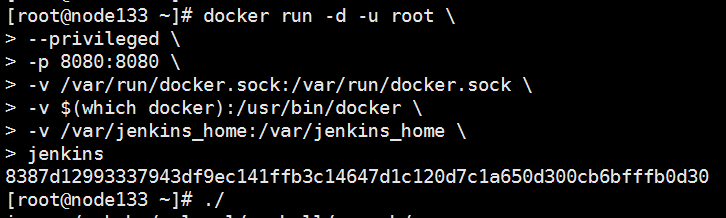
我启动一个jenkins,目标是在jenkins容器里能运行doceker命令(操控借助宿主机的docker)
docker run -d -u root \
-p 8080:8080 \
-v /var/run/docker.sock:/var/run/docker.sock \
-v $(which docker):/usr/bin/docker \
-v /var/jenkins_home:/var/jenkins_home \
jenkins
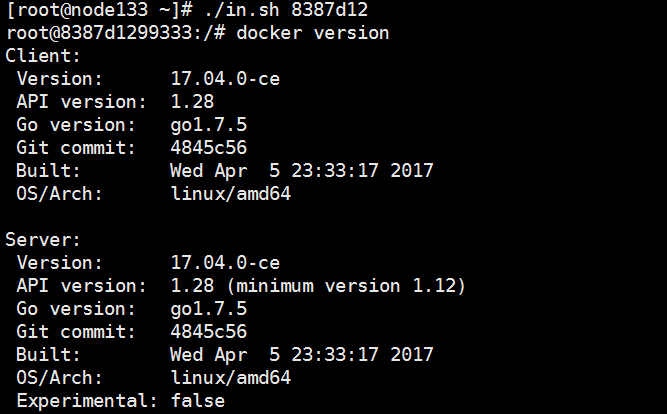
进入jenkins容器
docker version #查看版本
doceker pull busybox#拉取1个镜像

在宿主机查看,实际上在容器里的操作,实际上是在操作宿主机的docker.

自此操控成功.
3, 排错: 版本原因导致容器不能操控宿主机的docker daemon
原因: centos7默认yum安装的docker版本如下, 我用以下这个版本实验时候就报错了. 报错主要有2个,如下
[root@node85 ~]# docker --version
Docker version 1.12.6, build 96d83a5/1.12.6
报错1:
[root@node85 ~]# docker run -t -i -v /var/run/docker.sock:/var/run/docker.sock -v /usr/bin/docker:/usr/bin/docker busybox sh
/ # docker  ps -a
/usr/bin/docker: .: line 2: can't open '/etc/sysconfig/docker'
/ # docker info
/usr/bin/docker: .: line 2: can't open '/etc/sysconfig/docker'
报错2:
root@9047b488d698:/# docker info
You don't have either docker-client or docker-client-latest installed. Please install either one and retry.
root@9047b488d698:/# docker ps -a
You don't have either docker-client or docker-client-latest installed. Please install either one and retry.
如果启动容器指定网络类型为 --net=host,则容器和宿主机共享网络namespace,
也就是说容器的端口和进程在宿主机上可以看到.
如我启动一个nginx,指定网络类型为host
docker run -d --net=host --name mynginx nginx 那么在宿主机上,ps -ef|grep nginx,会显示nginx进程.
三 docker网络
Default Networks
When you install Docker, it creates three networks automatically. You can list these networks using the docker network lscommand:
$ docker network ls

NETWORK ID          NAME                DRIVER
7fca4eb8c647        bridge              bridge
9f904ee27bf5        none                null
cf03ee007fb4        host                host
1,bridge--docker网络默认模式
逻辑图如下:
容器访问internet,使用snat
外界访问容器使用dnat


The default bridge network is present on all Docker hosts. If you do not specify a different network, new containers are automatically connected to the default bridge network.
The docker network inspect command returns information about a network:
$ docker network inspect bridge

[
   {
       "Name": "bridge",
       "Id": "f7ab26d71dbd6f557852c7156ae0574bbf62c42f539b50c8ebde0f728a253b6f",
       "Scope": "local",
       "Driver": "bridge",
       "IPAM": {
           "Driver": "default",
           "Config": [
               {
                   "Subnet": "172.17.0.1/16",
                   "Gateway": "172.17.0.1"
               }
           ]
       },
       "Containers": {},
       "Options": {
           "com.docker.network.bridge.default_bridge": "true",
           "com.docker.network.bridge.enable_icc": "true",
           "com.docker.network.bridge.enable_ip_masquerade": "true",
           "com.docker.network.bridge.host_binding_ipv4": "0.0.0.0",
           "com.docker.network.bridge.name": "docker0",
           "com.docker.network.driver.mtu": "9001"
       },
       "Labels": {}
   }
]
Run the following two commands to start two busybox containers, which are each connected to the default bridge network.
$ docker run -itd --name=container1 busybox

3386a527aa08b37ea9232cbcace2d2458d49f44bb05a6b775fba7ddd40d8f92c

$ docker run -itd --name=container2 busybox

94447ca479852d29aeddca75c28f7104df3c3196d7b6d83061879e339946805c
Inspect the bridge network again after starting two containers. Both of the busybox containers are connected to the network. Make note of their IP addresses, which will be different on your host machine than in the example below.
$ docker network inspect bridge

{[
    {
        "Name": "bridge",
        "Id": "f7ab26d71dbd6f557852c7156ae0574bbf62c42f539b50c8ebde0f728a253b6f",
        "Scope": "local",
        "Driver": "bridge",
        "IPAM": {
            "Driver": "default",
            "Config": [
                {
                    "Subnet": "172.17.0.1/16",
                    "Gateway": "172.17.0.1"
                }
            ]
        },
        "Containers": {
            "3386a527aa08b37ea9232cbcace2d2458d49f44bb05a6b775fba7ddd40d8f92c": {
                "EndpointID": "647c12443e91faf0fd508b6edfe59c30b642abb60dfab890b4bdccee38750bc1",
                "MacAddress": "02:42:ac:11:00:02",
                "IPv4Address": "172.17.0.2/16",
                "IPv6Address": ""
            },
            "94447ca479852d29aeddca75c28f7104df3c3196d7b6d83061879e339946805c": {
                "EndpointID": "b047d090f446ac49747d3c37d63e4307be745876db7f0ceef7b311cbba615f48",
                "MacAddress": "02:42:ac:11:00:03",
                "IPv4Address": "172.17.0.3/16",
                "IPv6Address": ""
            }
        },
        "Options": {
            "com.docker.network.bridge.default_bridge": "true",
            "com.docker.network.bridge.enable_icc": "true",
            "com.docker.network.bridge.enable_ip_masquerade": "true",
            "com.docker.network.bridge.host_binding_ipv4": "0.0.0.0",
            "com.docker.network.bridge.name": "docker0",
            "com.docker.network.driver.mtu": "9001"
        },
        "Labels": {}
    }
]
Containers connected to the default bridge network can communicate with each other by IP address. Docker does not support automatic service discovery on the default bridge network. If you want containers to be able to resolve IP addresses by container name, you should use user-defined networks instead. You can link two containers together using the legacy docker run --linkoption, but this is not recommended in most cases.
2,host网络-和主机共享网络模式
The host network adds a container on the host’s network stack. As far as the network is concerned, there is no isolation between the host machine and the container. For instance, if you run a container that runs a web server on port 80 using host networking, the web server is available on port 80 of the host machine.

3, none模式
The none network adds a container to a container-specific network stack. That container lacks a network interface. Attaching to such a container and looking at its stack you see this:
$ docker attach nonenetcontainer

root@0cb243cd1293:/# cat /etc/hosts
127.0.0.1	localhost
::1	localhost ip6-localhost ip6-loopback
fe00::0	ip6-localnet
ff00::0	ip6-mcastprefix
ff02::1	ip6-allnodes
ff02::2	ip6-allrouters
root@0cb243cd1293:/# ifconfig
lo        Link encap:Local Loopback
          inet addr:127.0.0.1  Mask:255.0.0.0
          inet6 addr: ::1/128 Scope:Host
          UP LOOPBACK RUNNING  MTU:65536  Metric:1
          RX packets:0 errors:0 dropped:0 overruns:0 frame:0
          TX packets:0 errors:0 dropped:0 overruns:0 carrier:0
          collisions:0 txqueuelen:0
          RX bytes:0 (0.0 B)  TX bytes:0 (0.0 B)

root@0cb243cd1293:/#


 1554
1554


 被折叠的 条评论
为什么被折叠?
被折叠的 条评论
为什么被折叠?
 到【灌水乐园】发言


