


knife4j,从名字中就可以看出,像一把小刀一样提供一种高效可用的接口文档,并支持在线调试。
一、准备工作
在Spring Boot单体架构下,knife4j提供了starter供开发者快速使用。
-
引入pom依赖(这里我们用spring boot工程进行演示)
<!-- web --> <dependency> <groupId>org.springframework.boot</groupId> <artifactId>spring-boot-starter-web</artifactId> </dependency> <!-- knife4j --> <dependency> <groupId>com.github.xiaoymin</groupId> <artifactId>knife4j-spring-boot-starter</artifactId> <version>3.0.3</version> </dependency> <!-- lombok --> <dependency> <groupId>org.projectlombok</groupId> <artifactId>lombok</artifactId> </dependency> -
建立包结构
- controller-入口
- config-配置类
- entity-实体类
- resp-返回
- req-请求
-
配置类
需重点关注SWAGGER_SCAN_BASE_PACKAGE的配置,其他个性化配置可以因人而异。
import com.github.xiaoymin.knife4j.spring.annotations.EnableKnife4j;
import org.springframework.context.annotation.Bean;
import org.springframework.context.annotation.Configuration;
import org.springframework.web.servlet.config.annotation.ResourceHandlerRegistry;
import org.springframework.web.servlet.config.annotation.WebMvcConfigurationSupport;
import springfox.documentation.builders.ApiInfoBuilder;
import springfox.documentation.builders.PathSelectors;
import springfox.documentation.builders.RequestHandlerSelectors;
import springfox.documentation.service.ApiInfo;
import springfox.documentation.service.Contact;
import springfox.documentation.spi.DocumentationType;
import springfox.documentation.spring.web.plugins.Docket;
import springfox.documentation.swagger2.annotations.EnableSwagger2;


@Configuration
@EnableKnife4j
@EnableSwagger2
public class KniConfig extends WebMvcConfigurationSupport {

    public static final String SWAGGER_SCAN_BASE_PACKAGE = "com.vainycos";
    public static final String VERSION = "1.0.0";

    @Bean
    public Docket createRestApi() {
        return new Docket(DocumentationType.SWAGGER_2)
                .apiInfo(apiInfo())
                .select()
                //api接口包扫描路径
                .apis(RequestHandlerSelectors.basePackage(SWAGGER_SCAN_BASE_PACKAGE))
                //可以根据url路径设置哪些请求加入文档,忽略哪些请求
                .paths(PathSelectors.any())
                .build();
    }

    private ApiInfo apiInfo() {
        return new ApiInfoBuilder()
                //设置文档的标题
                .title("接口文档示例")
                //设置文档的描述->1.Overview
                .description("更多内容请关注:http://www.baidu.com")
                //设置文档的版本信息-> 1.1 Version information
                .version(VERSION)
                //设置文档的联系方式->1.2 Contact information
                .contact(new Contact("Vainycos", "http://www.baidu.com", "imvaiycos@foxmail.com"))
                //设置文档的License信息->1.3 License information
                .termsOfServiceUrl("https://baidu.com")
                .build();
    }

    @Override
    protected void addResourceHandlers(ResourceHandlerRegistry registry) {
        // 解决静态资源无法访问
        registry.addResourceHandler("/**").addResourceLocations("classpath:/static/");
        // 解决swagger无法访问
        registry.addResourceHandler("/swagger-ui.html").addResourceLocations("classpath:/META-INF/resources/");
        registry.addResourceHandler("/doc.html").addResourceLocations("classpath:/META-INF/resources/");
        // 解决swagger的js文件无法访问
        registry.addResourceHandler("/webjars/**").addResourceLocations("classpath:/META-INF/resources/webjars/");
    }
}
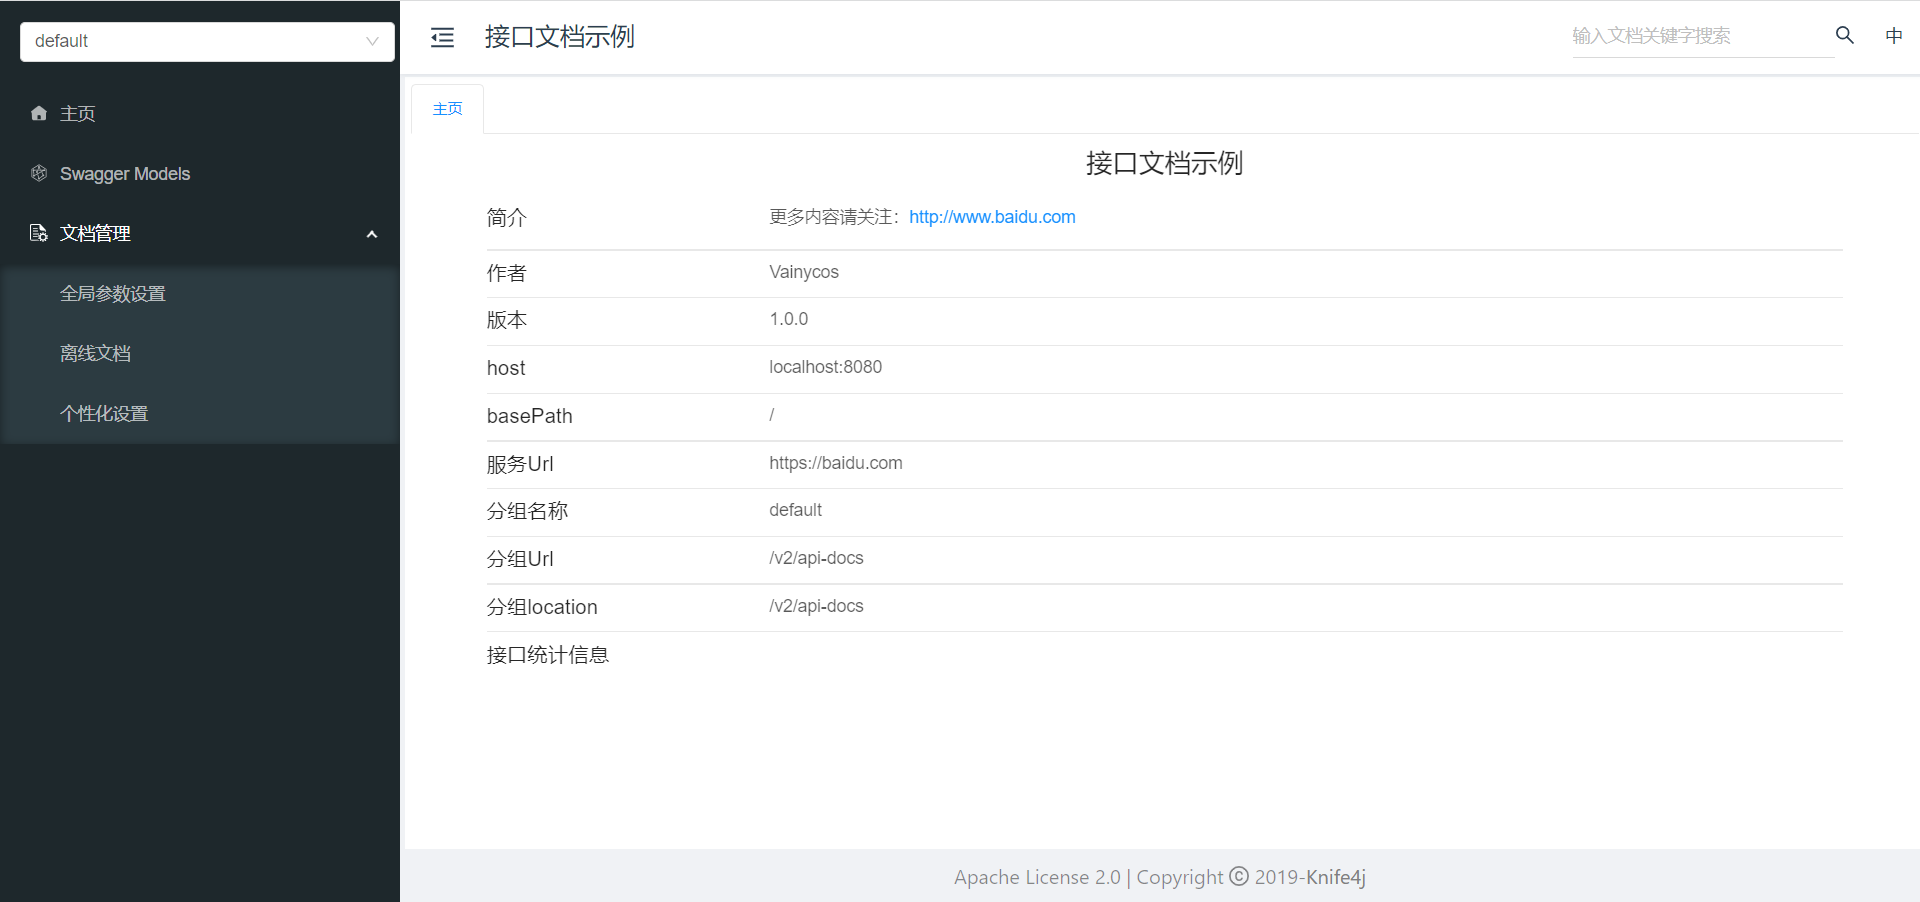
这个时候,我们只要启动工程(默认启动端口为8080),并访问localhost:8080/doc.html,就可以看到swagger-ui的界面。
二、开始动手
我们接下来会模拟用户登录请求,由此来一探究竟knife4j的使用特性。
如果不使用knife4j的swagger注解,我们创建请求实体和返回实体是这样的:
@Data
public class UserReq {

    /**
     * 姓名
     */
    private String name;

    /**
     * 年龄
     */
    private Integer age;
}
@Data
public class UserResp {

    /**
     * 姓名
     */
    private String name;

    /**
     * 年龄
     */
    private Integer age;

    /**
     * 出生日期
     */
    private LocalDateTime birthday;
}
创建controller是这样的:
@RestController
@RequestMapping("/user")
public class UserController {

    @PostMapping("/login")
    public UserResp login(UserReq req){
        // 模拟登录已成功,返回用户信息
        UserResp resp = new UserResp();
        resp.setAge(req.getAge());
        resp.setName(req.getName());
        resp.setBirthday(LocalDateTime.now());
        return resp;
    }
}
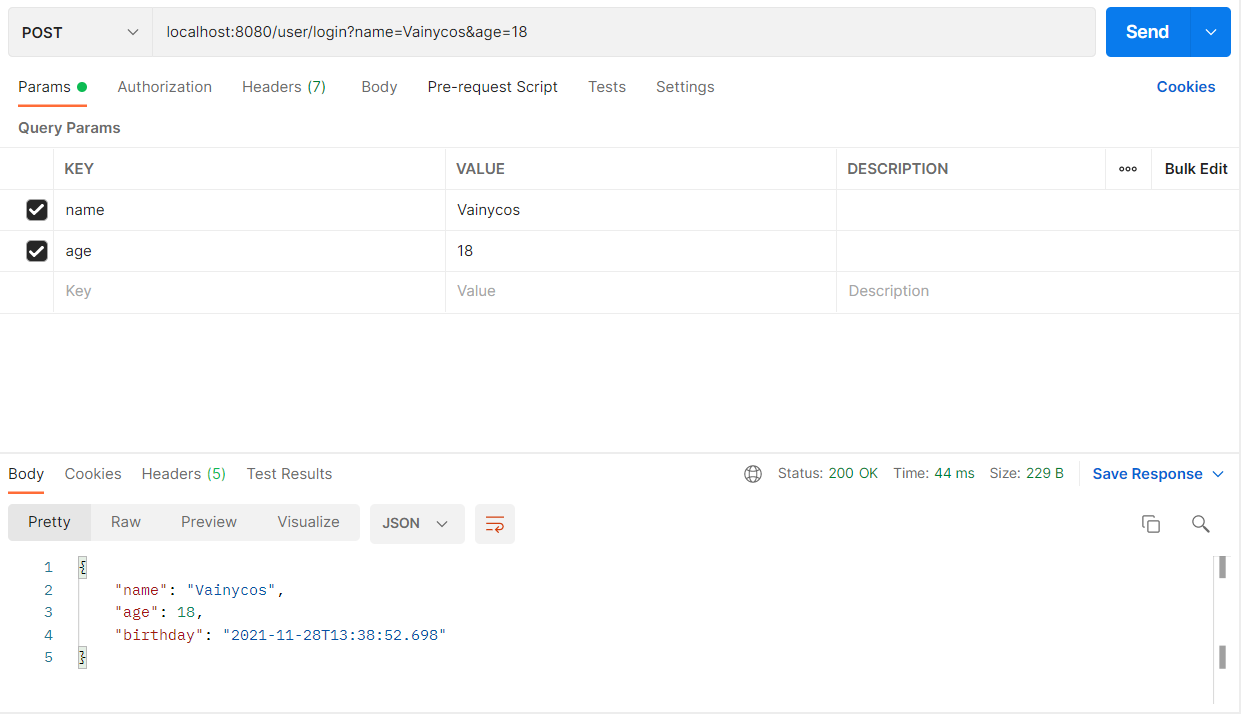
打开postman发送post请求进行测试:
测试成功,这个时候我们打开http://localhost:8080/doc.htm,就会发现其实我们写的UserController已经被集成到swagger文档中了:

但是没有参数说明,且接口名称也没有,那是因为我们没有加上对应的文档注解。
- 这个时候我们从Controller层开始添加,首先在类名上加上@Api注解
@Api(tags={"用户接口"}, value="用户接口Controller")
@RestController
@RequestMapping("/user")
public class UserController {

}
- 请求的方法上加上@ApiOperation注解
@ApiOperation(value = "登录接口", notes = "备注信息")
@PostMapping("/login")
public UserResp login(UserReq req){

}
- 请求实体/返回实体类名加@ApiModel(description= “”)注解,参数加@ApiModelProperty(value = “”)注解
/**
 * @author: Vainycos
 * @description 用户请求类
 * @date: 2021/11/28 11:10
 */
@Data
@ApiModel(description= "请求信息")
public class UserReq {

    /**
     * 姓名
     */
    @ApiModelProperty(value = "姓名")
    private String name;

    /**
     * 年龄
     */
    @ApiModelProperty(value = "年龄")
    private Integer age;
}


/**
 * @author: Vainycos
 * @description 用户返回类
 * @date: 2021/11/28 11:10
 */
@Data
@ApiModel(description= "返回信息")
public class UserResp {

    /**
     * 姓名
     */
    @ApiModelProperty(value = "姓名")
    private String name;

    /**
     * 年龄
     */
    @ApiModelProperty(value = "年龄")
    private Integer age;

    /**
     * 出生日期
     */
    @ApiModelProperty(value = "出生日期")
    private LocalDateTime birthday;
}
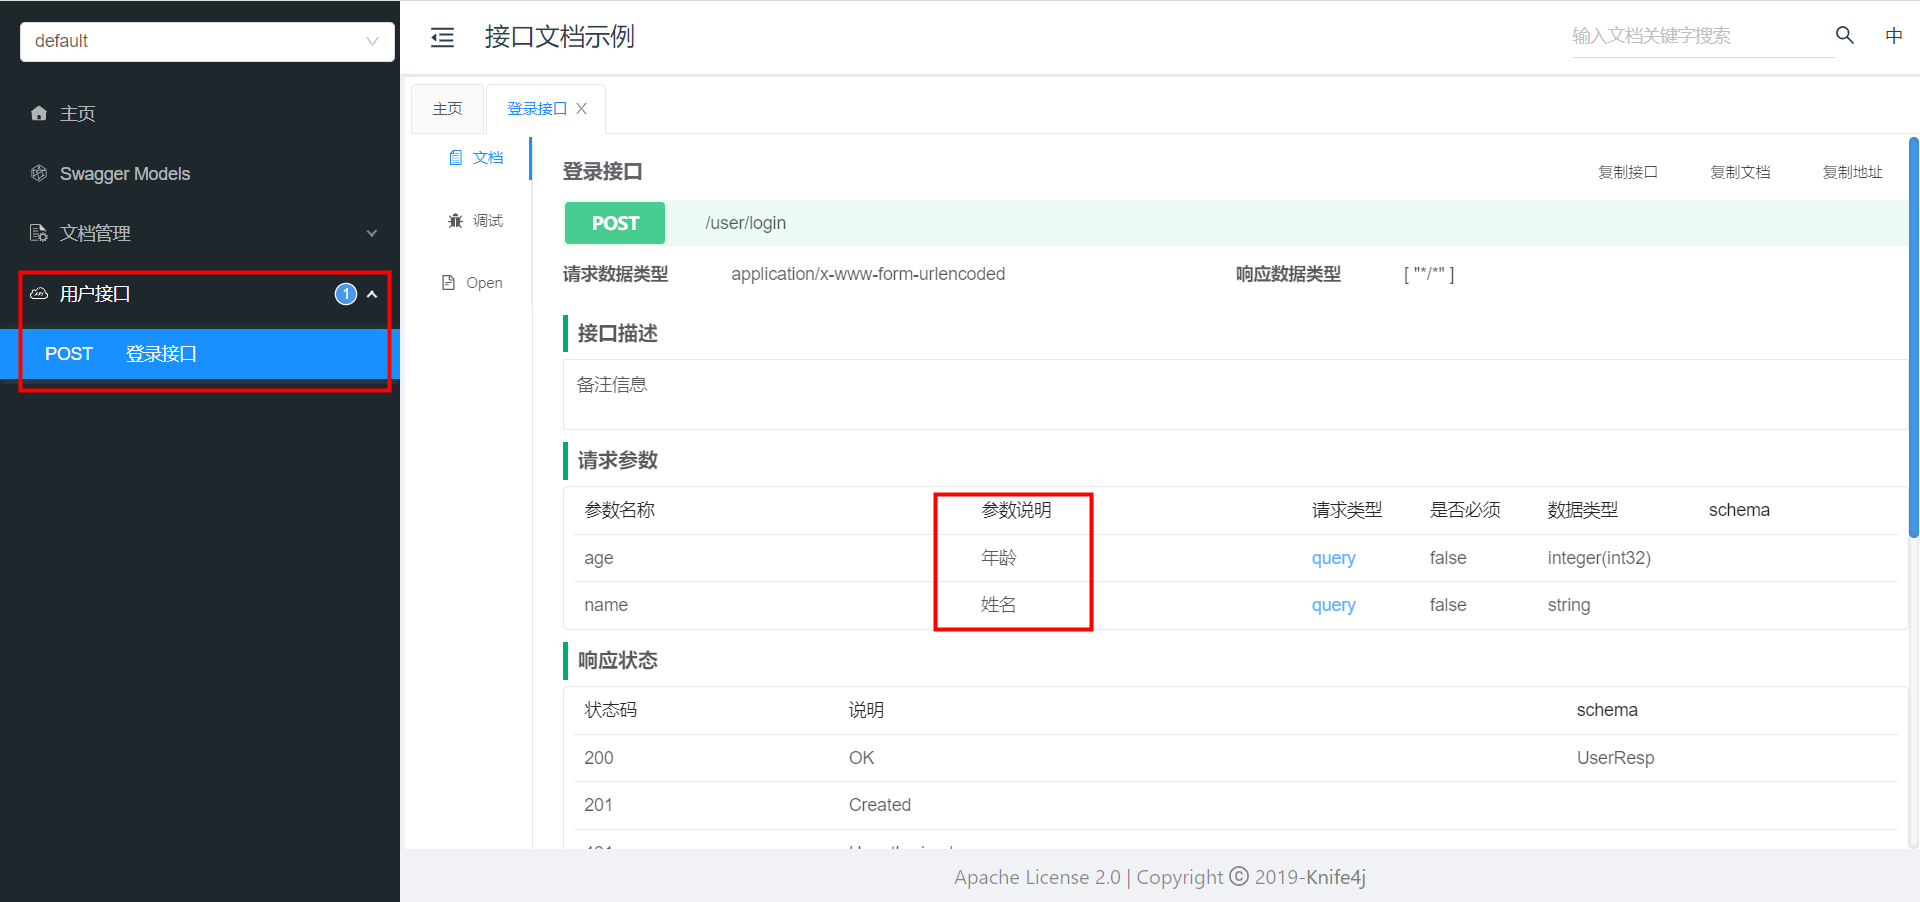
这个时候,我们重启编译一下项目,再次访问localhost:8080/doc.html:

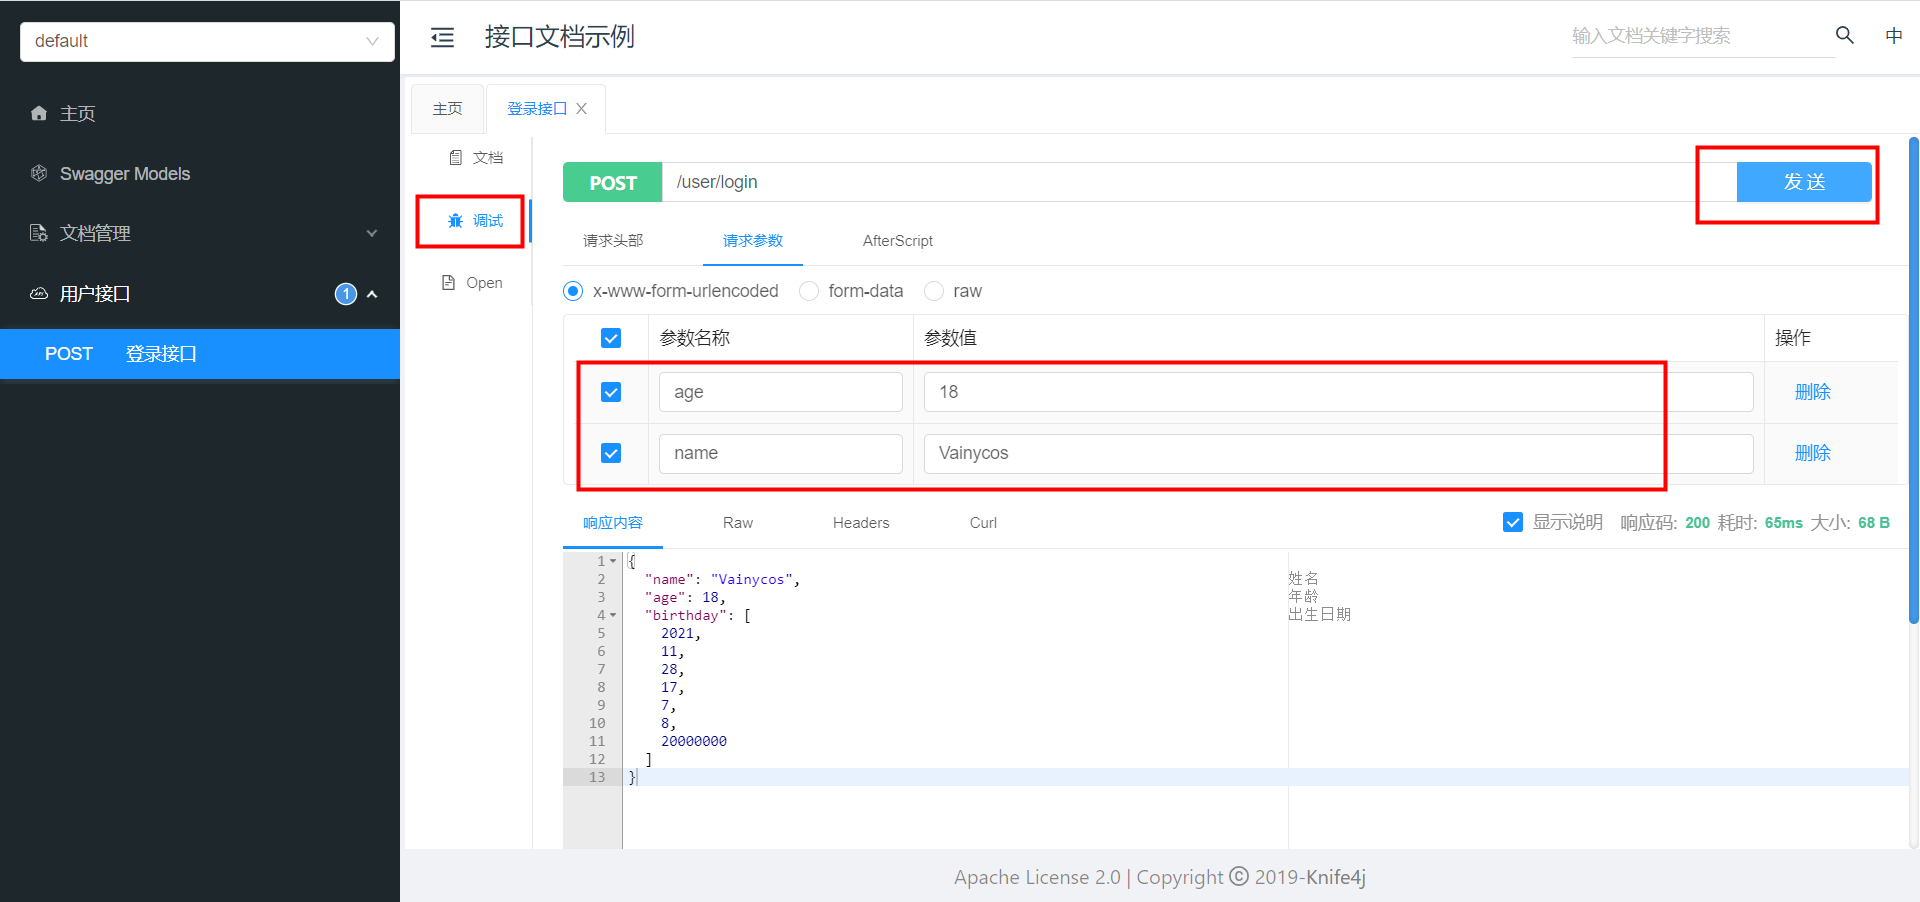
说明信息一目了然,是不是很清爽呢。而且最重要的是他还提供了在线调试功能,我们不用postman也可以在该页面上发起调试请求,极大地方便了前端同学的联调工作:
三、规范标准使用说明
实际上knife4j使用的是swagger2的一整套注解玩法,我们在此规范定义相关类和方法上应该使用的注解。
-
Controller层
-
类名使用
@Api:用在请求的类上,表示对类的说明
    tags="说明该类的作用,可以在UI界面上看到的注解"
    value="该参数没什么意义,在UI界面上也看不到,可选配置"
例:
@Api(tags = "HELLO CONTROLLER 测试功能接口", value = "可填可不填") @RestController public class HelloController { } -
方法使用
@ApiOperation:用在请求的方法上,说明方法的用途、作用
    value="说明方法的用途、作用"
    notes="方法的备注说明"
例:
@ApiOperation(value="用户注册",notes="手机号、密码都是必输项,年龄随边填,但必须是数字") @PostMapping(value = "/signUp") public R SignUp(@RequestBody signUpModelVo signUpModelVo) { } -
方法参数
@ApiParam使用在方法上或者参数上,字段说明;表示对参数的添加元数据(说明或是否必填等)
  name: 参数名
  value: 参数说明
  required: 是否必填
例:
@ApiOperation( value = "编辑公告", notes = "编辑公告")
@PostMapping( value = "/edit")
public RequestResult edit(
    @ApiParam(name = "bisKey", value = "bis_key", required = true) String bisKey,
    @ApiParam(name = "title", value = "公告标题", required = true) @RequestParam String title,
    @ApiParam(name = "content", value = "公告内容", required = true)  String content){
}
-
-
Bean实体类层注解
-
实体类名
@ApiModel:表示数据信息
	  description: 描述信息
例:
@Data @ApiModel(description= "用户请求信息") public class UserReq { } -
属性
@ApiModelProperty:用在属性上,描述参数属性
    value:描述信息
例:
/**
* 姓名
*/
@ApiModelProperty(value = "姓名")
private String name;
-
参考资料:


 21万+
21万+


 被折叠的 条评论
为什么被折叠?
被折叠的 条评论
为什么被折叠?
 到【灌水乐园】发言


