


UIView
1. UIView 概念
- 大家在iPhone上看到的大部分控件都是UIView的子类, 视图通常是UIView的一个对象, 标识屏幕上的一块矩形区域, 同时处理该区域内的绘制和触屏事件.
- 一个视图可以作为另一个视图的父视图,因此影响决定了子视图的位置和大小.
- 视图同时也是程序设计模式MVC模式中的View部分
2. 视图结构中的相关函数
//位置
CGPoint point = CGPointMake(x,y);
//大小
CGSize  size  = CGSizeMake(width,height);
//布局
CGRect  frame = CGRectMake (x,y,width,height);
3. 视图的创建
- 视图的创建有两种方式
- 代码创建和 XIB 创建
//Xib创建
NSBundle * bundle = [NSBundle mainBundle];
    NSArray * array = [bundle loadNibNamed:@"myView" owner:self options:nil];
    UIView * myView = [array objectAtIndex:0];
    [self.view addSubview:myView];
//代码创建
    UIView * view = [[UIView alloc]init];
    view.frame  =  CGRectMake(7, 200, 400, 300);
    view.backgroundColor = [UIColor redColor];
    [self.view addSubview:view];
4.UIView属性和方法
4.1 视图的层次结构
- 一个视图就是容器, 当一个视图包含了其他视图的时候, 两个视图之间就建立了父子关系, 被包含的视图称为子视图(subView), 包含的视图称为父视图或者超视图(superView).
- 以下两个重要的方法
//查看View的父视图
    NSLog(@"--%@--",[view superview]);
//查看View的子视图
    NSLog(@"--%@--",[view subviews]);
4.2 UIView常见方法
- 视图调用addView方法的时候, 会对其进行保留, 可以理解为retain(MRC)一个对象, 当调用removeFromSuperView的时候, 会释放视图, 也就是releas(MRC).
    //1.添加一个视图
    [self.view addSubview:redView];
    //2.将视图插入到指定索引位置
    [redView insertSubview:self.view atIndex:1];
    //3.将视图插入到指定视图之上
    [redView insertSubview:redView aboveSubview:self.view];
    //4.将视图插入到指定位置之下
    [redView insertSubview:self.view belowSubview:redView];
    //5.将视图移动到最顶层
    [redView bringSubviewToFront:self.view];
    //6.将视图移动到最底层
    [redView sendSubviewToBack:myView];
    //7.交换视图位置
    [redView exchangeSubviewAtIndex:0 withSubviewAtIndex:1];
    //8.将视图从父视图上移除
    [redView removeFromSuperview];
4.3 UIView常见属性
//1. 透明度
self.view.alpha = 1;
//2. 背景颜色
self.view.backgroundColor = [UIColor cyanColor];
//3. 子视图
NSArray * subViewsArray = [self.view subviews];
//4. 隐藏状态
self.view.hidden = NO
//5. 标签
self.view.tag = 10;
//6. 多点触摸
self.view.multipleTouchEnabled = YES;
//7. 用户交互
self.view.userInteractionEnabled = YES;
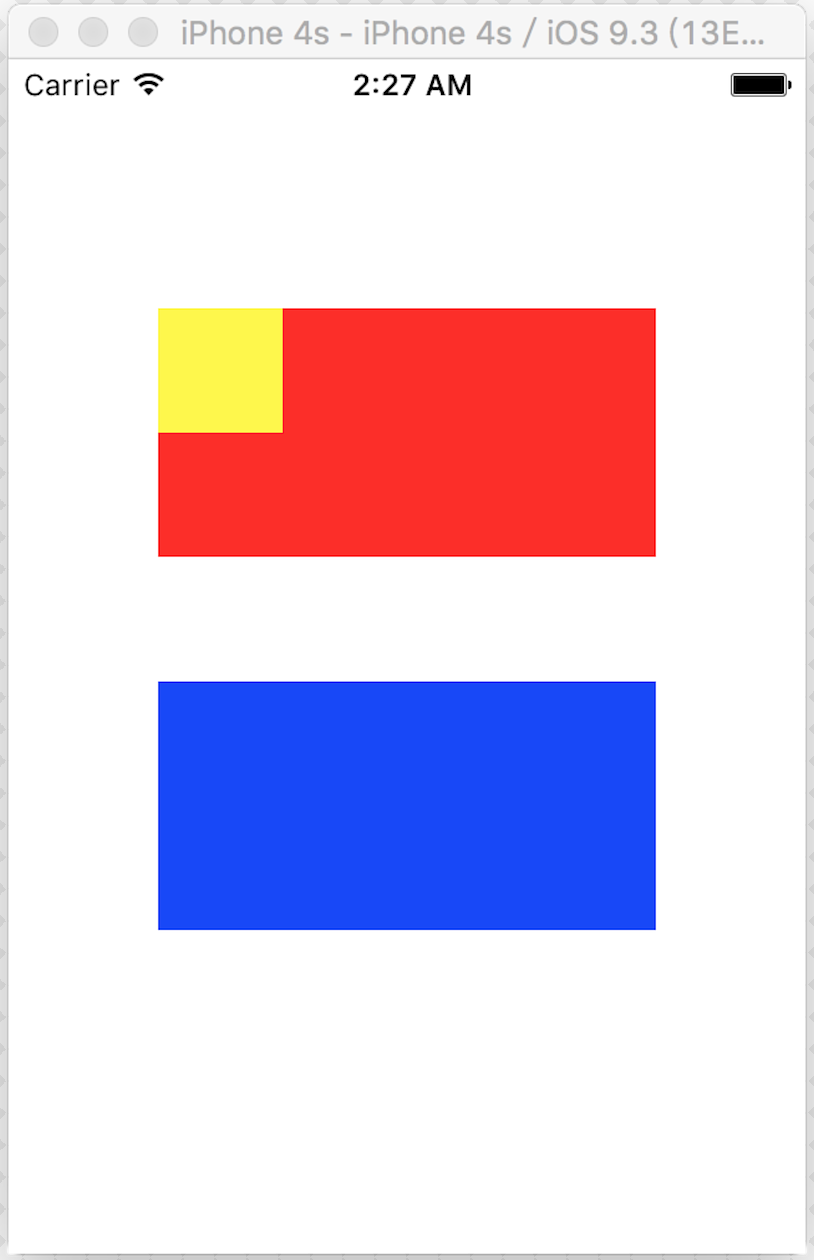
4.4 UIView 示例
UIView * redView = [[UIView alloc]initWithFrame:CGRectMake(60, 100, 200, 100)];
redView.backgroundColor = [UIColor redColor];
[self.view addSubview:redView];

UIView * yellowView = [[UIView alloc]initWithFrame:CGRectMake(0, 0, 50, 50)];
yellowView.backgroundColor = [UIColor yellowColor];
[redView addSubview:yellowView];

UIView * blueView = [[UIView alloc]initWithFrame:CGRectMake(60, 250, 200, 100)];
blueView.backgroundColor = [UIColor blueColor];
[self.view addSubview:blueView];
运行结果 :
5. 自定义UIView
- 自定义一个继承自UIView的类SubView .
//重写dealloc方法
-(void)dealloc{
    NSLog(@"Tag : %d",self.tag);
    [super dealloc]; //MRC!
}- 在AppDelegate中, 添加这个自定义的视图到窗口上.
-(void)awakeFromNib{
    SubView * subView = [[SubView alloc]initWithFrame:CGRectMake(60, 100, 200, 200)];
    subView.tag = 10
    [self.window addSubview:subView];
    [subView release];
//通过tag值获取到视图SubView / viewWithTag /
SubView * view = [self.window viewWithTag:10];
//将视图从父视图上移除 在MRC模式下view的引用计算器为0,就会调用dealloc方法
[view removeFromSuperview];
2015-04-14 02:33:54 Write By MarkDown © Yun.


 1209
1209


 被折叠的 条评论
为什么被折叠?
被折叠的 条评论
为什么被折叠?
 到【灌水乐园】发言


