


概述
Swagger已广泛应用到Java项目开发中,在前后端开发过程中,相当于一个桥梁作用。后端人员根据OpenAI官方定义的注解就可以把接口文档丰富地呈现给前端开发人员。提供了WebUI的在线界面,省去了开发人员写文档的时间,提升了开发效率,沟通效果也相应提升。
“Knife4j 是一个 SwaggerUI 的增强工具,同时也提供了一些增强功能,使用 Java+Vue 进行开发,帮助开发者能在编写接口注释时更加完善,基于 OpenAPI 的规范完全重写 UI 界面,左右布局的方式也更加适合国人的习惯。”
从上文可知,Knife4j是SwaggerUI的增强,主要是在UI界面做了优化,更方便我们在开发中使用。
界面比较
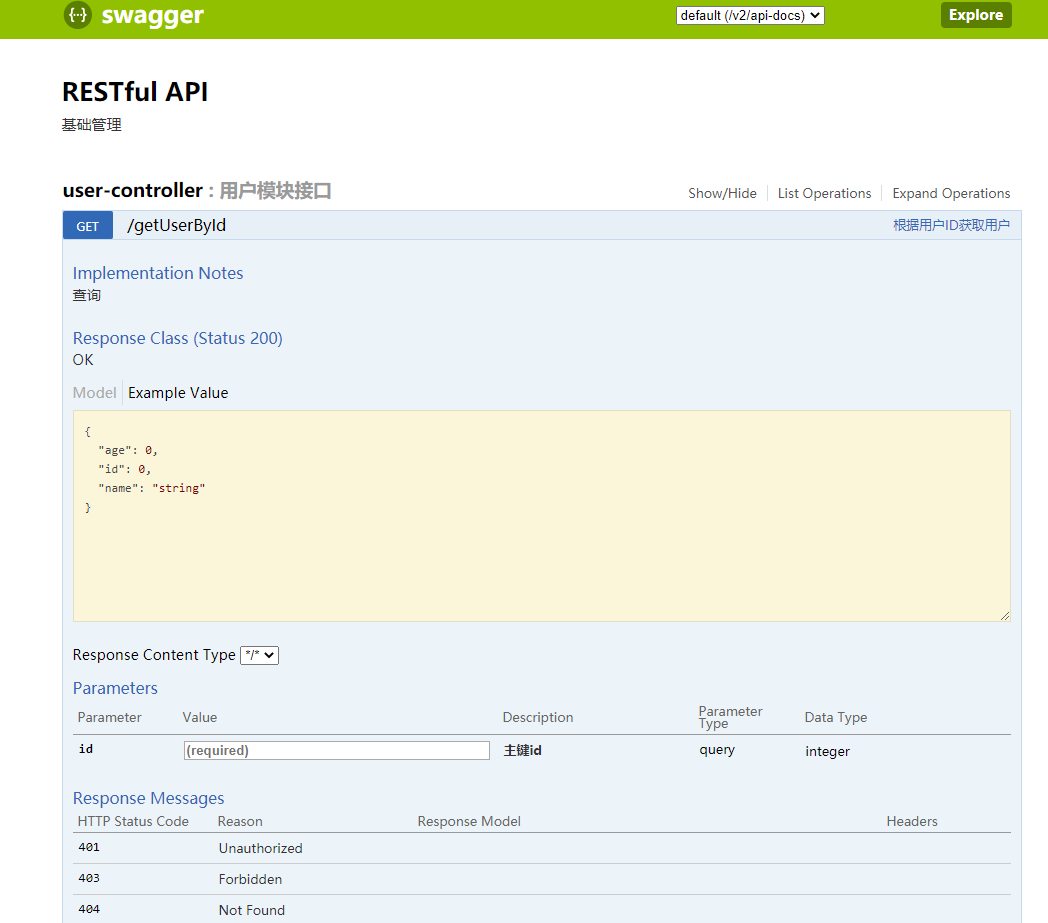
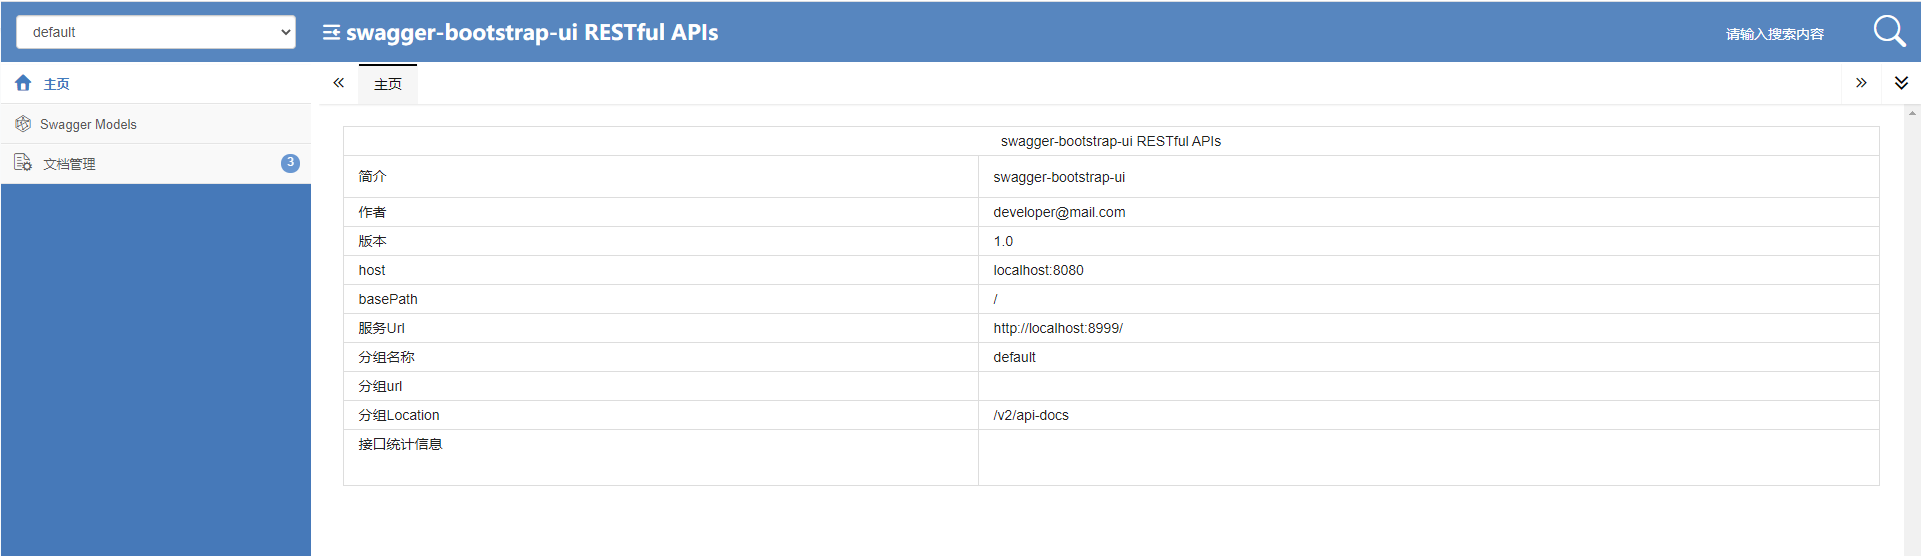
Swagger的默认界面
我们先看看Swagger默认界面是怎样的?
默认链接地址:http://localhost:8080/swagger-ui.html

Knife4j界面
然后我们再看看Knife4j的界面:
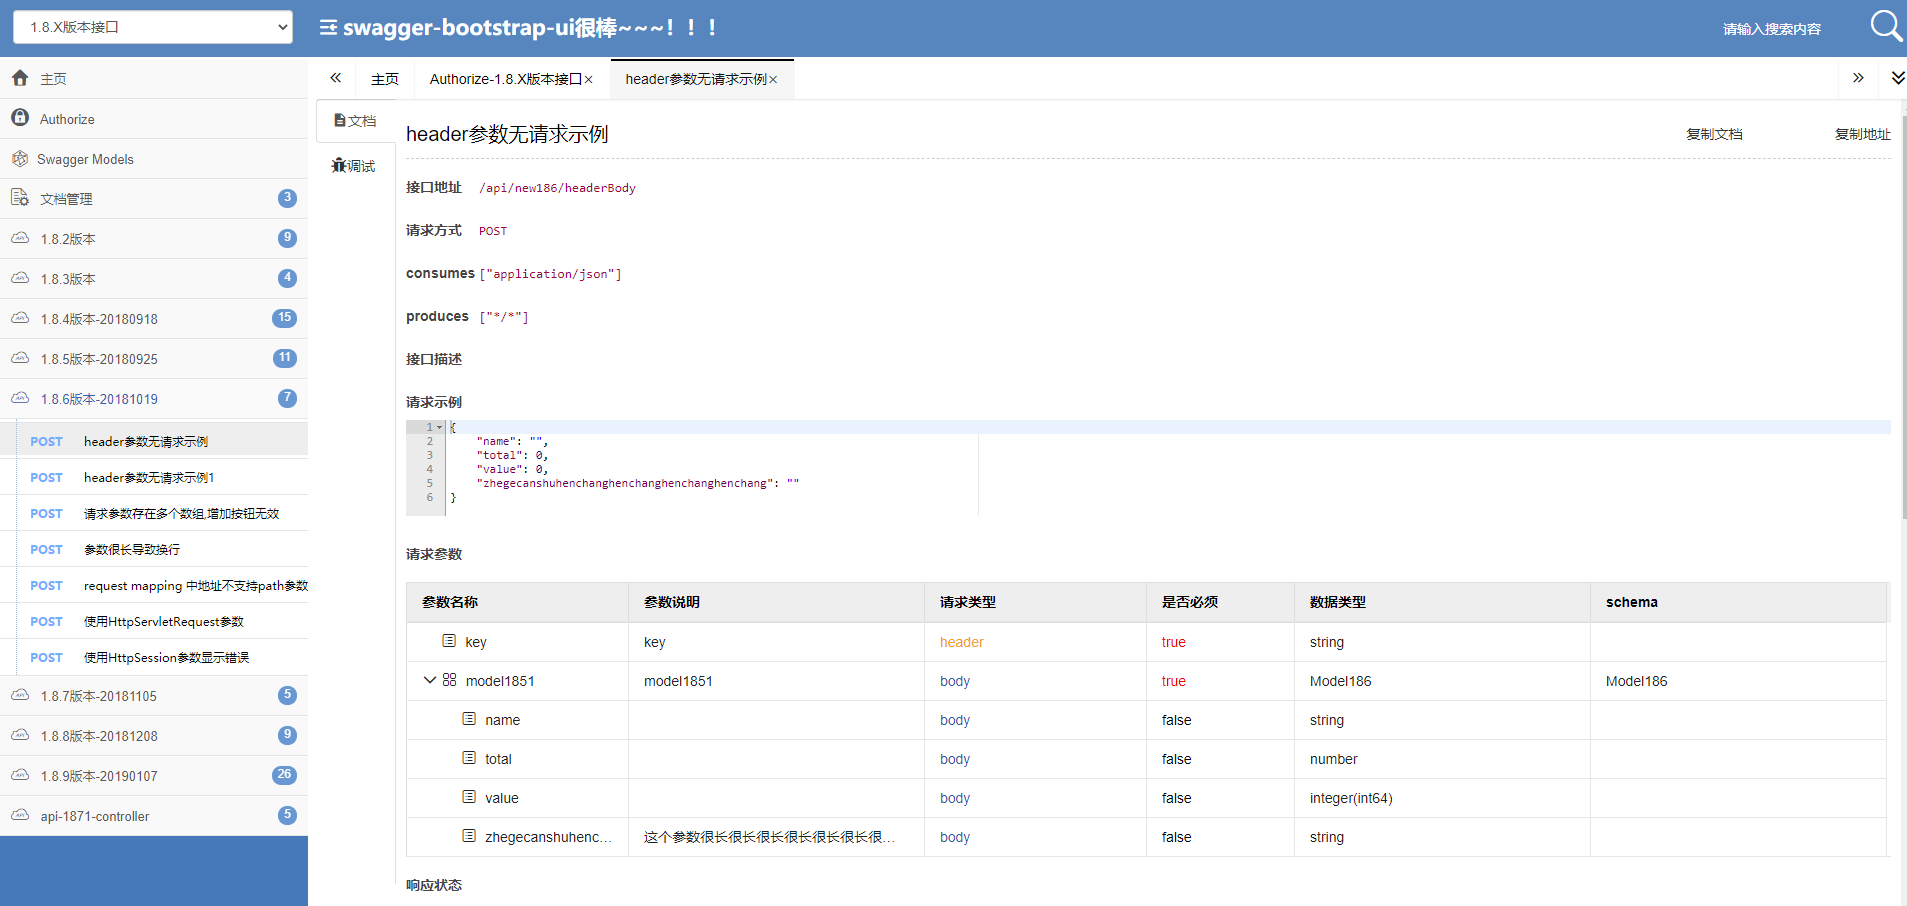
两者相比,Knife4j的界面确实丰富很多,
主要功能
Knife4j的主要功能是Swagger的默认界面是大同小异,都是包含接口文档说明和接口在线调试。但Knife4j在UI方面是比默认的UI界面强大很多,Knife4j除了包含了Swagger官方界面上的功能以外,还包含了以下内容:
-
个性化配置:通过个性化ui配置项,可自定义UI的相关显示信息。
-
离线文档:根据标准规范,生成的在线markdown离线文档,开发者可以进行拷贝生成markdown接口文档,通过其他第三方markdown转换工具转换成html或pdf,这样也可以放弃swagger2markdown组件。
-
接口排序:自1.8.5后,ui支持了接口排序功能,例如一个注册功能主要包含了多个步骤,可以根据swagger-bootstrap-ui提供的接口排序规则实现接口的排序,step化接口操作,方便其他开发者进行接口对接。
(上述来自官网介绍)
体验效果
之前我自己写了关于Springboot+mybatis+swagger的整合博客(https://ispeasant.blog.csdn.net/article/details/109333987),我这次就是基于这个版本进行升级。
引入Knife4j相关jar包
我们在pom.xml文件里添加Knife4j的jar包,名为“SwaggerBootstrapUi”。因为knife4j的前身是
swagger-bootstrap-ui,所以包名还是原来那个。先把原有的"springfox-swagger-ui"注释掉,在后面添加新的。
<!--<dependency>
    <groupId>io.springfox</groupId>
    <artifactId>springfox-swagger-ui</artifactId>
    <version>2.7.0</version>
</dependency>-->
<dependency>
    <groupId>com.github.xiaoymin</groupId>
    <artifactId>knife4j-spring-boot-starter</artifactId>
    <version>1.9.6</version>
</dependency>
这里稍微说明一下,可能有些开发工具有些不一样,但我们添加上述的pom配置文件的时候,会显示红色的,并包没有找到对应jar包,或者报以下错误信息:
ould not find artifact com.github.xiaoymin:swagger-bootstrap-ui:pom:
我一开始以为是有问题,但我重新更新一下项目工程里的maven包就可以了,以IDEA为例,可参考一下操作。
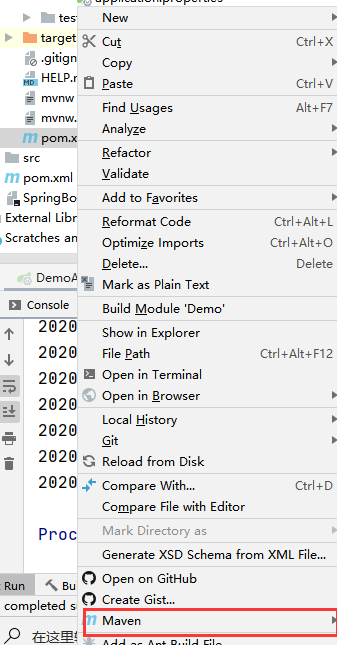
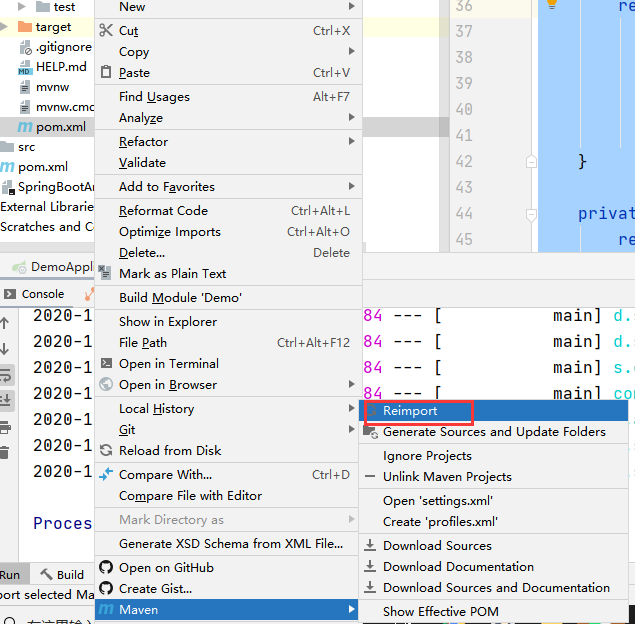
让工具重新导入一下jar包,然后就可以了。
修改Swgger配置类
另外,我们把Swagger配置类也注释掉,添加Knifer4j的相关配置类。如下:
package com.ispeasant.demo.config;

import org.springframework.context.annotation.Bean;
import org.springframework.context.annotation.Configuration;
import springfox.documentation.builders.ApiInfoBuilder;
import springfox.documentation.builders.PathSelectors;
import springfox.documentation.builders.RequestHandlerSelectors;
import springfox.documentation.service.ApiInfo;
import springfox.documentation.spi.DocumentationType;
import springfox.documentation.spring.web.plugins.Docket;
import springfox.documentation.swagger2.annotations.EnableSwagger2;

@Configuration
@EnableSwagger2
public class SpringFoxSwaggerConfig {
    /*@Bean
    public Docket swaggerSpringMvcPlugin() {
        return new Docket(DocumentationType.SWAGGER_2)
                .select()
                .apis(RequestHandlerSelectors.withMethodAnnotation(ApiOperation.class))
                .build().apiInfo(apiInfo())
                ;
    }

    private ApiInfo apiInfo() {
        return new ApiInfoBuilder()
                .title("RESTful API")
                .description("基础管理")
                .termsOfServiceUrl("")
                .version("1.0")
                .build();
    }*/

    @Bean
    public Docket createRestApi() {
        return new Docket(DocumentationType.SWAGGER_2)
                .apiInfo(apiInfo())
                .select()
                .apis(RequestHandlerSelectors.basePackage("com.bycdao.cloud"))
                .paths(PathSelectors.any())
                .build();
    }

    private ApiInfo apiInfo() {
        return new ApiInfoBuilder()
                .title("swagger-bootstrap-ui RESTful APIs")
                .description("swagger-bootstrap-ui")
                .termsOfServiceUrl("http://localhost:8999/")
                .contact("developer@mail.com")
                .version("1.0")
                .build();
    }
}
最后启动一下程序,看看效果。
访问界面
默认访问地址是:http://${host}:${port}/doc.html
我这里是:http://localhost:8080/doc.html
界面出来了,但好像没看到我们的接口。再研究一下。
最后发现,原来是配置类里把包扫描地址写错了,由于我是直接复制官网里的代码,如下:
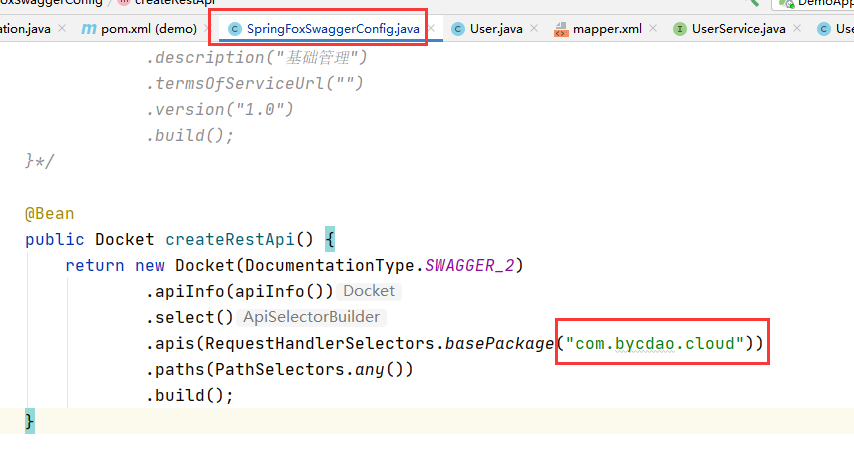
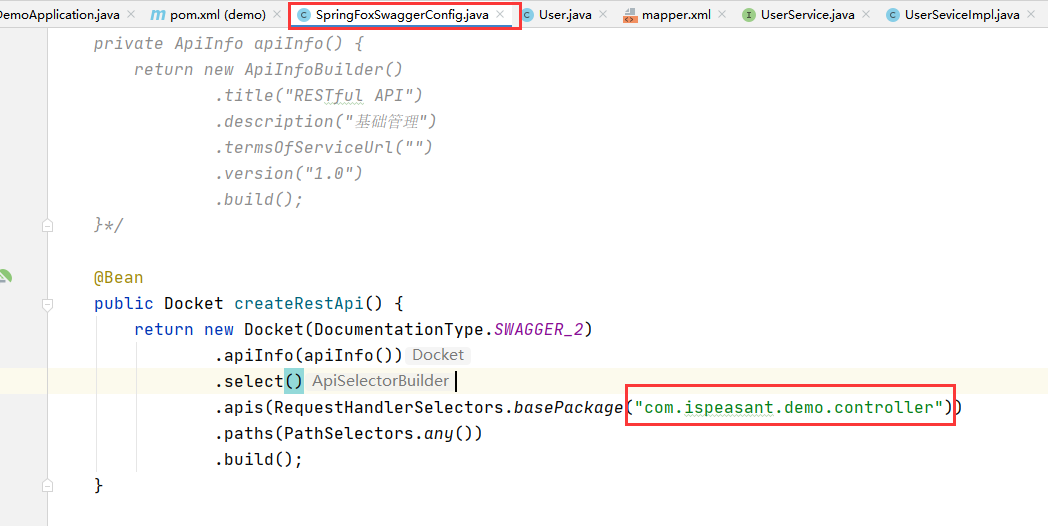
我们只需把它修改我们对应的controller层的路径就可以了,将其修改成这样。
package com.ispeasant.demo.config;

import org.springframework.context.annotation.Bean;
import org.springframework.context.annotation.Configuration;
import springfox.documentation.builders.ApiInfoBuilder;
import springfox.documentation.builders.PathSelectors;
import springfox.documentation.builders.RequestHandlerSelectors;
import springfox.documentation.service.ApiInfo;
import springfox.documentation.spi.DocumentationType;
import springfox.documentation.spring.web.plugins.Docket;
import springfox.documentation.swagger2.annotations.EnableSwagger2;

@Configuration
@EnableSwagger2
public class SpringFoxSwaggerConfig {
    /*@Bean
    public Docket swaggerSpringMvcPlugin() {
        return new Docket(DocumentationType.SWAGGER_2)
                .select()
                .apis(RequestHandlerSelectors.withMethodAnnotation(ApiOperation.class))
                .build().apiInfo(apiInfo())
                ;
    }

    private ApiInfo apiInfo() {
        return new ApiInfoBuilder()
                .title("RESTful API")
                .description("基础管理")
                .termsOfServiceUrl("")
                .version("1.0")
                .build();
    }*/

    @Bean
    public Docket createRestApi() {
        return new Docket(DocumentationType.SWAGGER_2)
                .apiInfo(apiInfo())
                .select()
                .apis(RequestHandlerSelectors.basePackage("com.ispeasant.demo.controller"))
                .paths(PathSelectors.any())
                .build();
    }

    private ApiInfo apiInfo() {
        return new ApiInfoBuilder()
                .title("swagger-bootstrap-ui RESTful APIs")
                .description("swagger-bootstrap-ui")
                .termsOfServiceUrl("http://localhost:8999/")
                .contact("developer@mail.com")
                .version("1.0")
                .build();
    }
}
最后重新启动一下程序,访问看看。
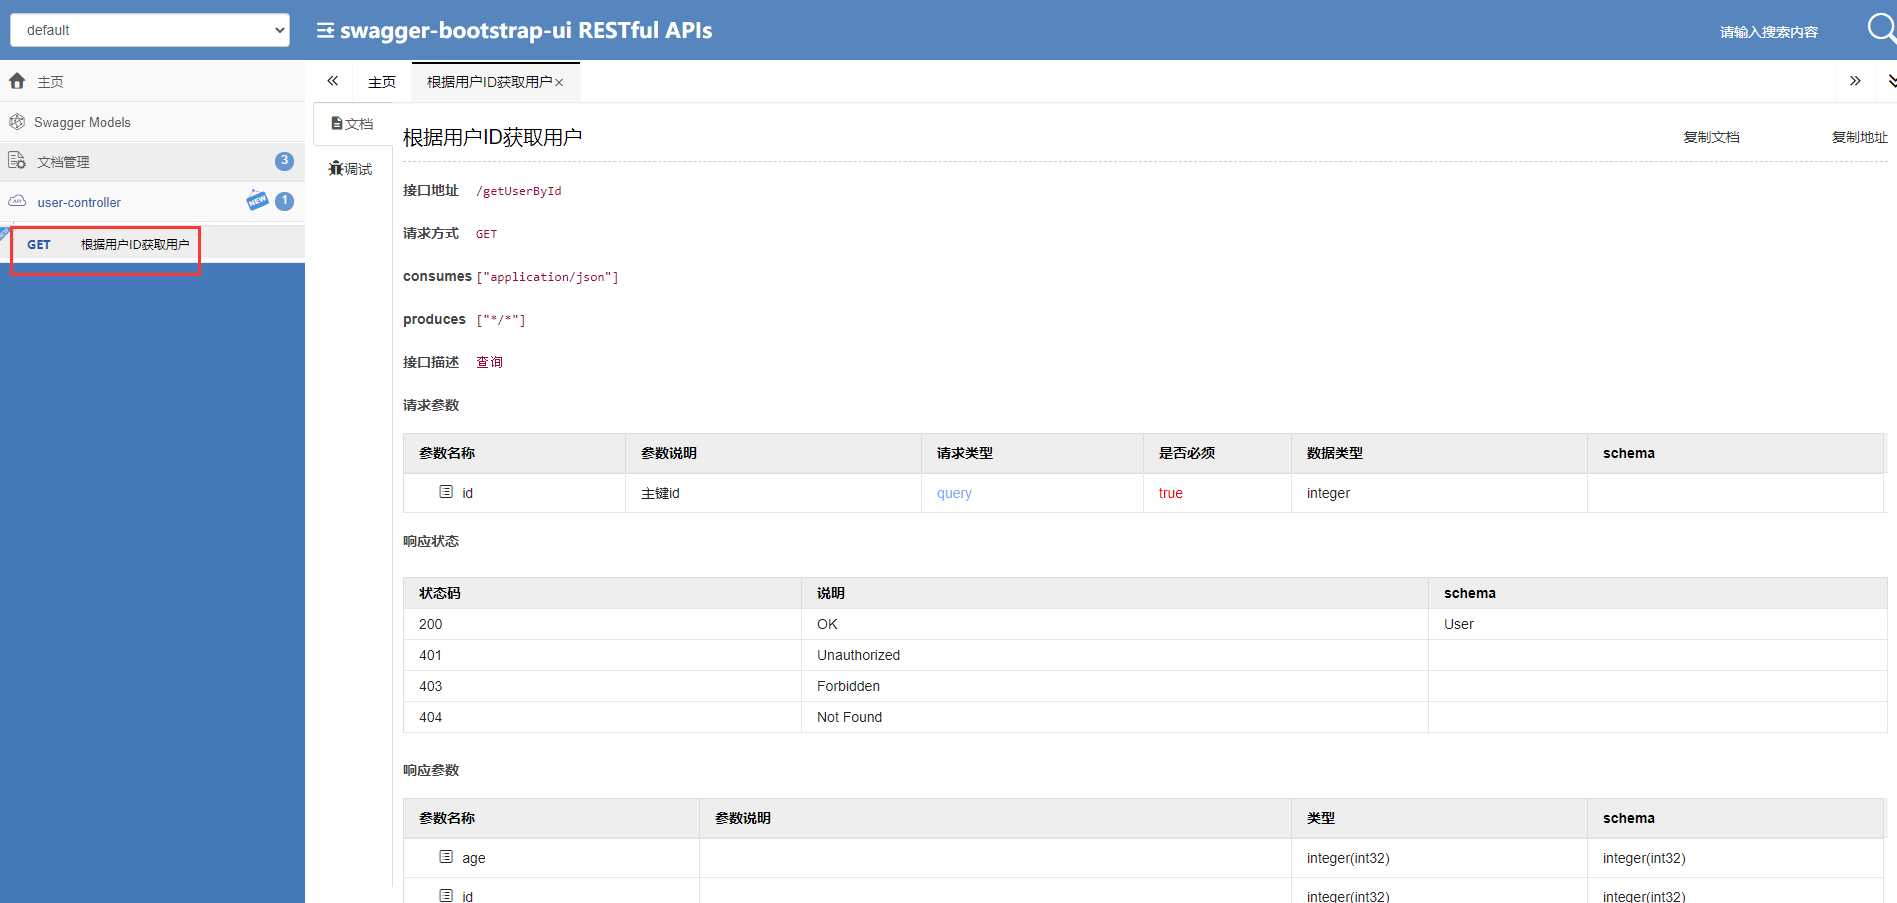
从截图里可以看到,我们自己封装的接口,已经在这里展示出来了。
调试功能
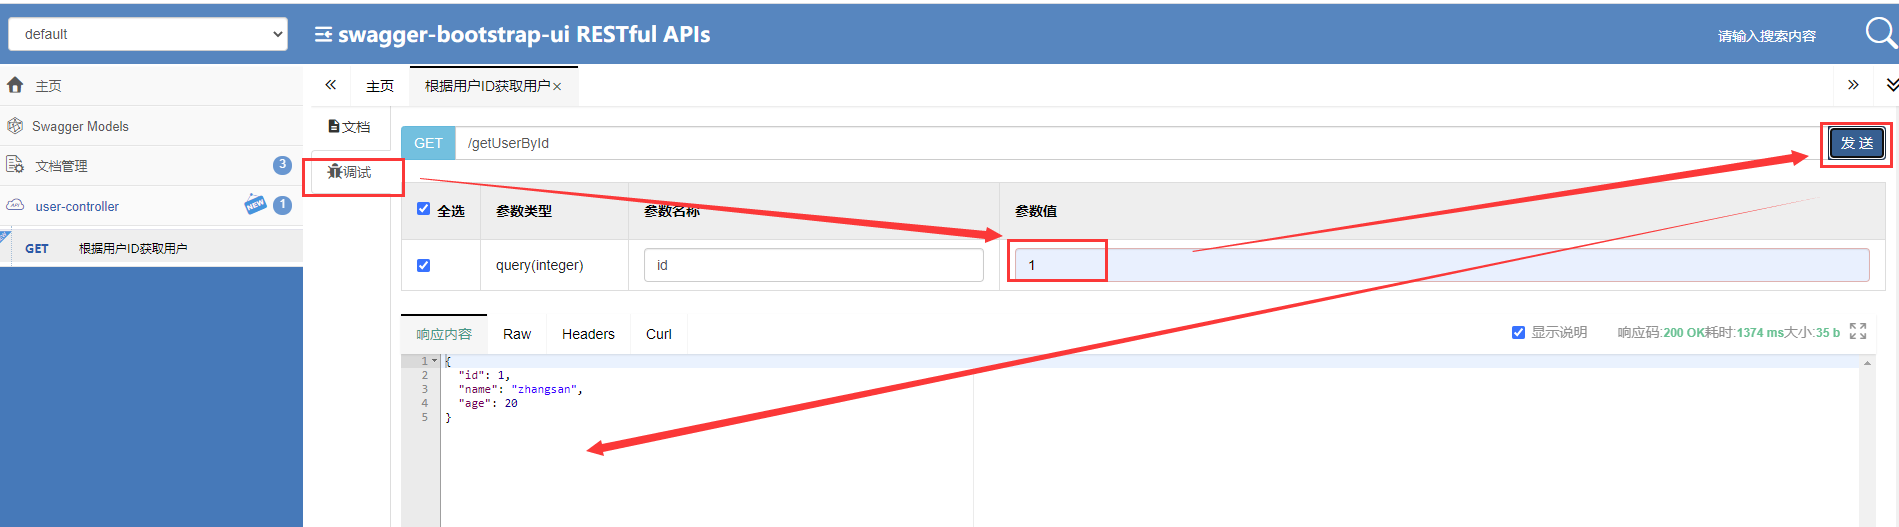
到这里,我们把knife4j搭建好了,也试用了里面的功能。
总结
如果大家在开发过程中,觉得Swagger的界面比较简单,使用起来不是很方便,大家可以考虑一下这个Knife4j,它提供比较丰富的界面,功能也比较丰富,确实会提高大家开发效率。我自己这边用得不算多,而且我们接口封装也不是很多,所以就没有很深入去体验所有功能。如果大家感兴趣,可以再深入去研究一下。
本次代码,我已放到百度网盘,有需要的,可进行获取。
链接:获取代码


 被折叠的 条评论
为什么被折叠?
被折叠的 条评论
为什么被折叠?
 到【灌水乐园】发言


