


Spring Boot 多模块工程
1、新建一个maven工程

工程名 :spring-boot-sample-project

删除多余的文件,只留spring-boot-sample-project工程中的pom.xml文件

2、在spring-boot-sample-project工程中增加子模块

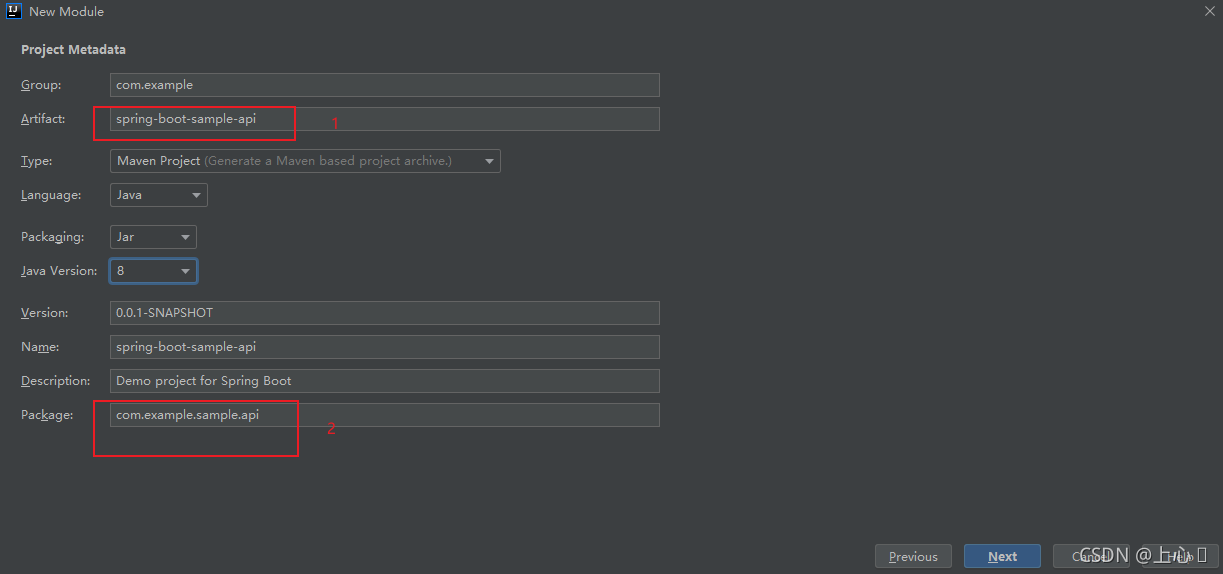
新增:spring-boot-sample-api 模块,注意图中2位置的包名com.example.sample.api,因为后面会涉及到多模块之间的相互调用,为了方便扫描,将包名统一成com.example.sample.模块的名
同理,新增:spring-boot-sample-web模块,选择Spring Boot web开发所需要的依赖的,这里我勾选了Spring Web 和 Lombok

最后整个工程目录如下:

3、配置pom.xml 文件
3.1、父类工程spring-boot-sample-project的pom.xml
1、首先是父类工程的基本信息
<!-- 基本信息 -->
    <description>Spring Boot 多模块构建</description>
    <modelVersion>4.0.0</modelVersion>
    <name>spring-boot-sample</name>
    <packaging>pom</packaging>

    <!-- 项目说明:这里作为聚合工程的父工程 -->
    <groupId>com.example</groupId>
    <artifactId>spring-boot-sample-project</artifactId>
    <version>1.0-SNAPSHOT</version>
2、因为整个工程都会依赖于Spring Boot,因此spring-boot-sample-project需要继承Spring Boot父类
<!-- 继承说明:这里继承SpringBoot提供的父工程 -->
    <parent>
        <groupId>org.springframework.boot</groupId>
        <artifactId>spring-boot-starter-parent</artifactId>
        <version>2.5.6</version>
        <relativePath/> <!-- lookup parent from repository -->
    </parent>
3、声明子模块,创建好的子模块放到modules
<!-- 模块说明:这里声明多个子模块 -->
    <modules>
        <module>spring-boot-sample-api</module>
        <module>spring-boot-sample-web</module>
    </modules>
4 、版本管理,可以将子模块等需要版本管理的依赖放到dependencyManagement进行版本管理
 <!-- 版本说明:这里统一管理依赖的版本号 -->
    <dependencyManagement>
        <dependencies>
            <dependency>
                <groupId>com.example</groupId>
                <artifactId>spring-boot-sample-api</artifactId>
                <version>0.0.1-SNAPSHOT</version>
            </dependency>
            <dependency>
                <groupId>com.example</groupId>
                <artifactId>spring-boot-sample-web</artifactId>
                <version>0.0.1-SNAPSHOT</version>
            </dependency>
        </dependencies>
    </dependencyManagement>
5、其他
3.1.1、完整的父工程pom.xml配置代码
<?xml version="1.0" encoding="UTF-8"?>
<project xmlns="http://maven.apache.org/POM/4.0.0"
         xmlns:xsi="http://www.w3.org/2001/XMLSchema-instance"
         xsi:schemaLocation="http://maven.apache.org/POM/4.0.0 http://maven.apache.org/xsd/maven-4.0.0.xsd">
    <!-- 基本信息 -->
    <description>Spring Boot 多模块构建</description>
    <modelVersion>4.0.0</modelVersion>
    <name>spring-boot-sample-project</name>
    <packaging>pom</packaging>

    <!-- 项目说明:这里作为聚合工程的父工程 -->
    <groupId>com.example</groupId>
    <artifactId>spring-boot-sample-project</artifactId>
    <version>1.0-SNAPSHOT</version>

    <!-- 继承说明:这里继承SpringBoot提供的父工程 -->
    <parent>
        <groupId>org.springframework.boot</groupId>
        <artifactId>spring-boot-starter-parent</artifactId>
        <version>2.5.6</version>
        <relativePath/> <!-- lookup parent from repository -->
    </parent>
    <!-- 模块说明:这里声明多个子模块 -->
    <modules>
        <module>spring-boot-sample-api</module>
        <module>spring-boot-sample-web</module>
    </modules>
    <!--jdk 版本 -->
    <properties>
        <java.version>1.8</java.version>
    </properties>
    <!-- 版本说明:这里统一管理依赖的版本号 -->
    <dependencyManagement>
        <dependencies>
            <dependency>
                <groupId>com.example</groupId>
                <artifactId>spring-boot-sample-api</artifactId>
                <version>0.0.1-SNAPSHOT</version>
            </dependency>
            <dependency>
                <groupId>com.example</groupId>
                <artifactId>spring-boot-sample-web</artifactId>
                <version>0.0.1-SNAPSHOT</version>
            </dependency>
        </dependencies>
    </dependencyManagement>


</project>
3.2、配置子模块pom.xml
子模块配置都大同小异,故以配置spring-boot-sample-webweb为例
1、注释掉子模块默认的Spring Boot 父工程,
将子模块的父工程配置为继承至spring-boot-sample-project
<!--<parent>
<groupId>org.springframework.boot</groupId>
<artifactId>spring-boot-starter-parent</artifactId>
<version>2.5.6</version>
<relativePath/> <!– lookup parent from repository –>
</parent>-->
<!--修改继承的父工程-->
<parent>
<groupId>com.example</groupId>
<artifactId>spring-boot-sample-project</artifactId>
<version>1.0-SNAPSHOT</version>
<relativePath/> <!-- lookup parent from repository -->
</parent>
2、子模块自己的依赖,因为web模块会依赖api模块因此增加spring-boot-sample-api依赖
<dependencies>
    <!--依赖 spring-boot-sample-api -->
    <dependency>
        <groupId>com.example</groupId>
        <artifactId>spring-boot-sample-api</artifactId>
    </dependency>
    <dependency>
        <groupId>org.springframework.boot</groupId>
        <artifactId>spring-boot-starter-web</artifactId>
    </dependency>

    <dependency>
        <groupId>org.springframework.boot</groupId>
        <artifactId>spring-boot-devtools</artifactId>
        <scope>runtime</scope>
        <optional>true</optional>
    </dependency>
    <dependency>
        <groupId>org.projectlombok</groupId>
        <artifactId>lombok</artifactId>
        <optional>true</optional>
    </dependency>
    <dependency>
        <groupId>org.springframework.boot</groupId>
        <artifactId>spring-boot-starter-test</artifactId>
        <scope>test</scope>
    </dependency>
</dependencies>
3.2.1 子模块完整的pom.xml配置
<?xml version="1.0" encoding="UTF-8"?>
<project xmlns="http://maven.apache.org/POM/4.0.0" xmlns:xsi="http://www.w3.org/2001/XMLSchema-instance"
xsi:schemaLocation="http://maven.apache.org/POM/4.0.0 https://maven.apache.org/xsd/maven-4.0.0.xsd">
<modelVersion>4.0.0</modelVersion>
<!--<parent>
<groupId>org.springframework.boot</groupId>
<artifactId>spring-boot-starter-parent</artifactId>
<version>2.5.6</version>
<relativePath/> <!– lookup parent from repository –>
</parent>-->
<!--修改继承的父类-->
<parent>
<groupId>com.example</groupId>
<artifactId>spring-boot-sample-project</artifactId>
<version>1.0-SNAPSHOT</version>
<relativePath/> <!-- lookup parent from repository -->
</parent>
<groupId>com.example</groupId>
<artifactId>spring-boot-sample-web</artifactId>
<version>0.0.1-SNAPSHOT</version>
<name>spring-boot-sample-web</name>
<description>Demo project for Spring Boot</description>
<dependencies>
<dependency>
<groupId>com.example</groupId>
<artifactId>spring-boot-sample-api</artifactId>
</dependency>
<dependency>
    <groupId>org.springframework.boot</groupId>
    <artifactId>spring-boot-starter-web</artifactId>
</dependency>
<dependency>
<groupId>org.springframework.boot</groupId>
<artifactId>spring-boot-devtools</artifactId>
<scope>runtime</scope>
<optional>true</optional>
</dependency>
<dependency>
<groupId>org.projectlombok</groupId>
<artifactId>lombok</artifactId>
<optional>true</optional>
</dependency>
<dependency>
<groupId>org.springframework.boot</groupId>
<artifactId>spring-boot-starter-test</artifactId>
<scope>test</scope>
</dependency>
</dependencies>
<build>
<plugins>
<plugin>
<groupId>org.springframework.boot</groupId>
<artifactId>spring-boot-maven-plugin</artifactId>
<configuration>
<excludes>
<exclude>
<groupId>org.projectlombok</groupId>
<artifactId>lombok</artifactId>
</exclude>
</excludes>
</configuration>
</plugin>
</plugins>
</build>
</project>
3.3 、其他
当然,web模块的依赖也可以直接放到父工程的pom.xml里面,这样只要继承了父工程的pom就可以使用了,比如将:spring-boot-starter-web放到父工程pom依赖中,则子模块只要继承了父工程,就不用再次依赖了。
<dependency>
<groupId>org.springframework.boot</groupId>
<artifactId>spring-boot-starter-web</artifactId>
</dependency>
4、启动
4.1、启动 spring-boot-sample-project工程
一般情况下,整个工程都只会留一个启动类,所以我们将api中的启动类删除,只留子模块 spring-boot-sample-web的启动类,找到启动类我们直接运行他

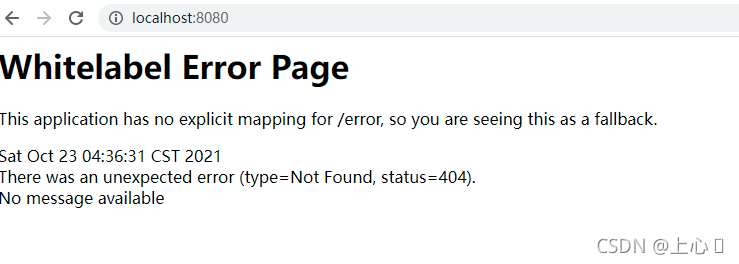
启动成功之后直接访问: http://localhost:8080/ ,出现下面页面表明我们成功了。
4.2、解决多模块调用问题
4.2.1 、子模块spring-boot-starter-web测试代码。
我们在web模块添加简单的测试代码,编写代码如下
package com.example.sample.web.controller;

import com.example.sample.web.service.IHelloService;
import org.springframework.web.bind.annotation.GetMapping;
import org.springframework.web.bind.annotation.RestController;

import javax.annotation.Resource;

/**
 * HelloController class
 *
 * @author zhangl
 * @date 2021/10/23 13:42
 */
@RestController
public class HelloController {
    @GetMapping("/hello")
    public String hello(){
        return "Hello World ! ";
    }
}
运行结果:

增加一个service接口的调用,HelloController代码如下:
package com.example.sample.web.controller;

import com.example.sample.web.service.IHelloService;
import org.springframework.web.bind.annotation.GetMapping;
import org.springframework.web.bind.annotation.RestController;

import javax.annotation.Resource;

/**
 * HelloController class
 *
 * @author zhangl
 * @date 2021/10/23 13:42
 */
@RestController
public class HelloController {
    @Resource
    private IHelloService helloService;
    @GetMapping("/hello")
    public String hello(){
        return "Hello World ! " + helloService.sayHello();
    }
}
接口 IHelloService 代码如下:
package com.example.sample.web.service;

import org.springframework.stereotype.Service;

/**
 * iHelloService interface
 *
 * @author zhangl
 * @date 2021/10/23 13:43
 */
@Service
public interface IHelloService {
    /**
     * 测试方法
     * @return
     */
    String sayHello();
}
实现类 HelloServiceImpl 代码如下
package com.example.sample.web.service.impl;

import com.example.sample.web.service.IHelloService;
import org.springframework.stereotype.Service;

/**
 * HelloServiceImpl class
 *
 * @author zhangl
 * @date 2021/10/23 13:44
 */
@Service(value = "iHelloService")
public class HelloServiceImpl implements IHelloService {
    @Override
    public String sayHello() {
        return "Hello IHelloServiceImpl ... ";
    }
}
代码结构如下:

运行结果,将调用的方法sayHello里面的字符串拼接到 Hello World 后面

4.2.2、Web模块使用spring-boot-sample-api模块的代码
在spring-boot-sample-api模块创建一个类 ITestApiService,里面有一个**success()**方法,返回一个字符串
package com.example.sample.api.service;

import org.springframework.stereotype.Service;

/**
 * TestApiService interface
 *
 * @author zhangl
 * @date 2021/10/23 14:03
 */
@Service
public interface ITestApiService {
    /**
     * 返回一个字符串
     * @return
     */
    String success();
}
实现类 TestApiServiceImpl,返回字符串**“看见这个字符串,说明你多模块调用成功了!”**
package com.example.sample.api.service.impl;

import com.example.sample.api.service.ITestApiService;
import org.springframework.stereotype.Service;

/**
 * TestApiServiceImpl class
 *
 * @author zhangl
 * @date 2021/10/23 14:04
 */
@Service(value = "iTestApiService")
public class TestApiServiceImpl implements ITestApiService {
    @Override
    public String success() {
        return " 看见这个字符串,说明你多模块调用成功了!";
    }
}
将 ITestApiService类注入到 spring-boot-starter-web的 HelloController中,代码如下
package com.example.sample.web.controller;

import com.example.sample.api.service.ITestApiService;
import com.example.sample.web.service.IHelloService;
import org.springframework.beans.factory.annotation.Autowired;
import org.springframework.web.bind.annotation.GetMapping;
import org.springframework.web.bind.annotation.RestController;

import javax.annotation.Resource;

/**
 * HelloController class
 *
 * @author zhangl
 * @date 2021/10/23 13:42
 */
@RestController
public class HelloController {
    @Resource
    private IHelloService helloService;
    /**
     *  注入 api 模块的 ITestApiService 接口
      */
    @Resource
    private ITestApiService testApiService;
    @GetMapping("/hello")
    public String hello(){
        //拼接字符
        return "Hello World ! " + helloService.sayHello() + testApiService.success();
    }
}
项目结构如下:


运行,报错
***************************
APPLICATION FAILED TO START
***************************

Description:

A component required a bean of type 'com.example.sample.api.service.ITestApiService' that could not be found.


Action:

Consider defining a bean of type 'com.example.sample.api.service.ITestApiService' in your configuration.

解决方法,在启动类增加注解,指定扫描的包即可;@ComponentScan(basePackages = {“com.example.sample”}),代码如下:
package com.example.sample.web;

import org.springframework.boot.SpringApplication;
import org.springframework.boot.autoconfigure.SpringBootApplication;
import org.springframework.context.annotation.ComponentScan;
import org.springframework.stereotype.Component;

/**
 *
 * @author zhangl
 */
@ComponentScan(basePackages = {"com.example.sample"})//扫描com.example.sample下的文件
@SpringBootApplication
public class SpringBootSampleWebApplication {

    public static void main(String[] args) {
        SpringApplication.run(SpringBootSampleWebApplication.class, args);
    }

}
当然还有别的方法解决。但在此只介绍@ComponentScan注解
再次启动,并访问http://localhost:8080/hello,结果如下:


 6702
6702


 被折叠的 条评论
为什么被折叠?
被折叠的 条评论
为什么被折叠?
 到【灌水乐园】发言


