


Linux Distribution:Ubuntu 14
一,Nginx的安装
首先从Nginx的官网下载最新的稳定版本1.10.1,下载地址如下
http://nginx.org/en/download.htmlsean@sean:~$ tar -xzf nginx-1.10.1.tar.gz
sean@sean:~$ cd nginx-1.10.1/
sean@sean:~/nginx-1.10.1$ sudo ./configure
......
./configure: error: the HTTP rewrite module requires the PCRE library.
You can either disable the module by using --without-http_rewrite_module
option, or install the PCRE library into the system, or build the PCRE library
statically from the source with nginx by using --with-pcre=<path> option.配置时异常,提示HTTP的rewrite模块需要PCRE库,如果需要使用HTTP的rewrite功能,需要首先安装PCRE库,如果不需要该功能,也可使用--without-http_rewrite_module关闭该功能
PCRE库的下载地址如下
https://sourceforge.net/projects/pcre/files/pcre/8.39/pcre-8.39.tar.gz/downloadsean@sean:~$ tar -xzf pcre-8.39.tar.gz
sean@sean:~$ cd pcre-8.39/
sean@sean:~/pcre-8.39$ sudo ./configure
sean@sean:~/pcre-8.39$ sudo make
......
configure: error: You need a C++ compiler for C++ support.提示没有C++编译器
sean@sean:~/pcre-8.39$ sudo apt-get install gcc-c++
Reading package lists... Done
Building dependency tree
Reading state information... Done
E: Unable to locate package gcc-c+
E: Couldn't find any package by regex 'gcc-c+'
sean@sean:~/pcre-8.39$ sudo apt-get install g++
Ubuntu中C++的编译器并不叫gcc-c++,而是叫g++
继续之前的操作,完成PCRE的安装
sean@sean:~/pcre-8.39$ sudo make
sean@sean:~/pcre-8.39$ sudo make install
PCRE安装完成之后可以继续Nginx的安装
sean@sean:~/pcre-8.39$ cd ../nginx-1.10.1/
sean@sean:~/nginx-1.10.1$ sudo ./configure
	......
./configure: error: the HTTP gzip module requires the zlib library.
You can either disable the module by using --without-http_gzip_module
option, or install the zlib library into the system, or build the zlib library
statically from the source with nginx by using --with-zlib=<path> option.
HTTP的gzip模块需要zlib库的支持,zlib库的下载地址为:
http://www.zlib.net/zlib的最新版本为1.2.8
sean@sean:~$ tar -xzvf zlib-1.2.8.tar.gz
sean@sean:~$ cd zlib-1.2.8/
sean@sean:~/zlib-1.2.8$ sudo ./configure
sean@sean:~/zlib-1.2.8$ sudo make
sean@sean:~/zlib-1.2.8$ sudo make install
安装完zlib库之后再次安装Nginx
sean@sean:~/zlib-1.2.8$ cd ../nginx-1.10.1/
sean@sean:~/nginx-1.10.1$ sudo ./configure --without-http_gzip_module
sean@sean:~/nginx-1.10.1$ sudo make
sean@sean:~/nginx-1.10.1$ sudo make install
Nginx最终将被安装在/usr/local/nginx目录下
sean@sean:/usr/local/nginx$ ll
total 24
drwxr-xr-x  6 root root 4096  7月  4 22:14 ./
drwxr-xr-x 11 root root 4096  7月  4 22:14 ../
drwxr-xr-x  2 root root 4096  7月  4 22:14 conf/
drwxr-xr-x  2 root root 4096  7月  4 22:14 html/
drwxr-xr-x  2 root root 4096  7月  4 22:14 logs/
drwxr-xr-x  2 root root 4096  7月  4 22:14 sbin/
Nginx的可执行文件放在sbin目录下
sean@sean:/usr/local/nginx/sbin$ ./nginx
./nginx: error while loading shared libraries: libpcre.so.1: cannot open shared object file: No such file or directory
sean@sean:/usr/local/nginx/sbin$ ldd nginx
	linux-vdso.so.1 =>  (0x00007ffdb31f6000)
	libdl.so.2 => /lib/x86_64-linux-gnu/libdl.so.2 (0x00007fa01d5c4000)
	libpthread.so.0 => /lib/x86_64-linux-gnu/libpthread.so.0 (0x00007fa01d3a6000)
	libcrypt.so.1 => /lib/x86_64-linux-gnu/libcrypt.so.1 (0x00007fa01d16c000)
	libpcre.so.1 => not found
	libz.so.1 => /usr/local/lib/libz.so.1 (0x00007f8278c55000)
	libc.so.6 => /lib/x86_64-linux-gnu/libc.so.6 (0x00007fa01cda7000)
	/lib64/ld-linux-x86-64.so.2 (0x00005583ba8e7000)
虽然Pcre已经安装了,但是Nginx启动时找不到libpcre.so.1,Pcre默认安装在/usr/local/lib目录下,在/lib目录中手动创建一个libpcre.so.1的链接即可
sean@sean:/usr/local/nginx/sbin$ sudo ln -s /usr/local/lib/libpcre.so.1 /lib
sean@sean:/usr/local/nginx/sbin$ ldd nginx
	linux-vdso.so.1 =>  (0x00007fff2abef000)
	libdl.so.2 => /lib/x86_64-linux-gnu/libdl.so.2 (0x00007f15a891f000)
	libpthread.so.0 => /lib/x86_64-linux-gnu/libpthread.so.0 (0x00007f15a8701000)
	libcrypt.so.1 => /lib/x86_64-linux-gnu/libcrypt.so.1 (0x00007f15a84c7000)
	libpcre.so.1 => /lib/libpcre.so.1 (0x00007f15a82a9000)
	libz.so.1 => /usr/local/lib/libz.so.1 (0x00007f8278c55000)
	libc.so.6 => /lib/x86_64-linux-gnu/libc.so.6 (0x00007f15a7ee4000)
	/lib64/ld-linux-x86-64.so.2 (0x000055fce0ecb0
再次尝试启动Nginx
sean@sean:/usr/local/nginx/sbin$ ./nginx
nginx: [alert] could not open error log file: open() "/usr/local/nginx/logs/error.log" failed (13: Permission denied)
2016/07/05 00:01:01 [emerg] 59770#0: open() "/usr/local/nginx/logs/access.log" failed (13: Permission denied)
sean@sean:/usr/local/nginx/sbin$ sudo ./nginx
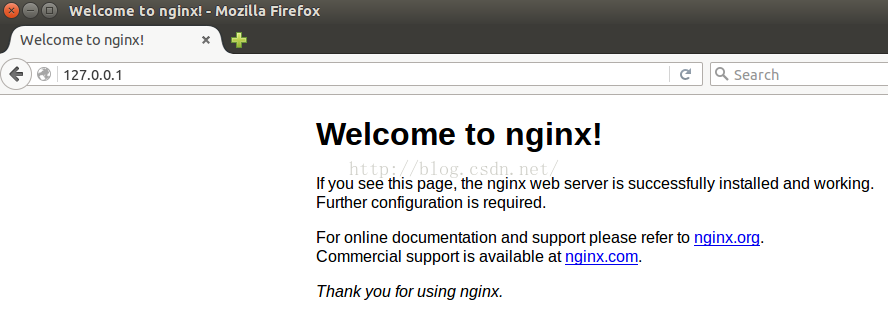
查看一下进程状态可以发现Nginx已经成功启动了
sean@sean:/usr/local/nginx/sbin$ ps -ef|grep nginx
root       9700   9062  0 22:31 ?        00:00:00 nginx: master process ./nginx
nobody     9701   9700  0 22:31 ?        00:00:00 nginx: worker process
sean       9729   9638  0 22:32 pts/6    00:00:00 grep --color=auto nginx
Nginx的默认监听端口是80,此时我们访问http://127.0.0.1:80,就会看到Nginx的欢迎页面
二,Nginx的启停
sean@sean:/usr/local/nginx/sbin$ sudo ./nginx -h
nginx version: nginx/1.10.1
Usage: nginx [-?hvVtTq] [-s signal] [-c filename] [-p prefix] [-g directives]

Options:
  -?,-h         : this help
  -v            : show version and exit
  -V            : show version and configure options then exit
  -t            : test configuration and exit
  -T            : test configuration, dump it and exit
  -q            : suppress non-error messages during configuration testing
  -s signal     : send signal to a master process: stop, quit, reopen, reload
  -p prefix     : set prefix path (default: /usr/local/nginx/)
  -c filename   : set configuration file (default: conf/nginx.conf)
  -g directives : set global directives out of configuration file
比较常用的几个命令如下:
1,使用-t来校验配置文件格式
sean@sean:/usr/local/nginx/sbin$ sudo ./nginx -t
nginx: the configuration file /usr/local/nginx/conf/nginx.conf syntax is ok
nginx: configuration file /usr/local/nginx/conf/nginx.conf test is successful
2,使用-c指定单独的配置文件
3,平滑关闭
sean@sean:/usr/local/nginx/sbin$ sudo ./nginx -s quit
当然也可以使用kill -QUIT <pid>
4,快速关闭
sean@sean:/usr/local/nginx/sbin$ sudo ./nginx -s stop
当然也可以使用kill -TERM <pid>
此外还有平滑的重载配置文件等一系列命令


 344
344


 被折叠的 条评论
为什么被折叠?
被折叠的 条评论
为什么被折叠?
 到【灌水乐园】发言


