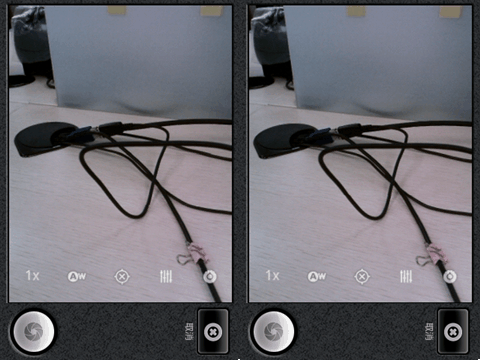
很多开发者都想在程序用来调用摄像头,并对拍出的照片进行处理。首先先对程序的进行一下预览


首先先对主页面进行设计,这里很简单,只是加了个按钮和一张图片
<?xml version="1.0" encoding="utf-8"?> <LinearLayout xmlns:android="http://schemas.android.com/apk/res/android" android:layout_width="match_parent" android:layout_height="match_parent" android:orientation="vertical" > <Button android:id="@+id/button1" android:layout_width="match_parent" android:layout_height="wrap_content" android:text="@string/camera" /> <ImageView android:id="@+id/imageView1" android:layout_width="wrap_content" android:layout_height="wrap_content" android:src="@drawable/ic_launcher" /> </LinearLayout>接下来就是对按钮事件进行处理,按下按钮的时候会调用本机摄像头
//图片存入地址 imageFilePath = Environment.getExternalStorageDirectory() .getAbsolutePath() + "/mypicture.jpg"; File imageFile = new File(imageFilePath); Uri imageFileUri = Uri.fromFile(imageFile); Intent i = new Intent(android.provider.MediaStore.ACTION_IMAGE_CAPTURE); i.putExtra(android.provider.MediaStore.EXTRA_OUTPUT, imageFileUri); startActivityForResult(i, CAMERA_RESULT);
这里我们直接用了Activity里的onActivityResult这个方法,这个方法是对Activity返回结果的处理
@Override protected void onActivityResult(int requestCode, int resultCode, Intent intent) { // TODO Auto-generated method stub super.onActivityResult(requestCode, resultCode, intent); //如果拍照成功 if (resultCode == RESULT_OK) { // Bundle extras = intent.getExtras(); // Bitmap bmp = (Bitmap)extras.get("data"); imv = (ImageView) findViewById(R.id.imageView1); //取得屏幕的显示大小 Display currentDisplay = getWindowManager().getDefaultDisplay(); int dw = currentDisplay.getWidth(); int dh = currentDisplay.getHeight(); //对拍出的照片进行缩放 BitmapFactory.Options bmpFactoryOptions = new BitmapFactory.Options(); bmpFactoryOptions.inJustDecodeBounds = true; Bitmap bmp = BitmapFactory.decodeFile(imageFilePath, bmpFactoryOptions); int heightRatio = (int) Math.ceil(bmpFactoryOptions.outHeight / (float) dh); int widthRatio = (int) Math.ceil(bmpFactoryOptions.outWidth / (float) dw); if (heightRatio > 1 && widthRatio > 1) { if (heightRatio > widthRatio) { bmpFactoryOptions.inSampleSize = heightRatio; } else { bmpFactoryOptions.inSampleSize = widthRatio; } } bmpFactoryOptions.inJustDecodeBounds = false; bmp = BitmapFactory.decodeFile(imageFilePath, bmpFactoryOptions); imv.setImageBitmap(bmp); } }
这里我们就完成了对本机摄像头的调用,其实在这里主要要学习的是startActivityForResult和onActivityResult这两个方法,一个是调用Activity并将结果返回给调用的Activity,一个就是处理返回的数据了,好了,如果哪位想要程序的话,可以直接留邮件地址。


 4265
4265


 被折叠的 条评论
为什么被折叠?


