


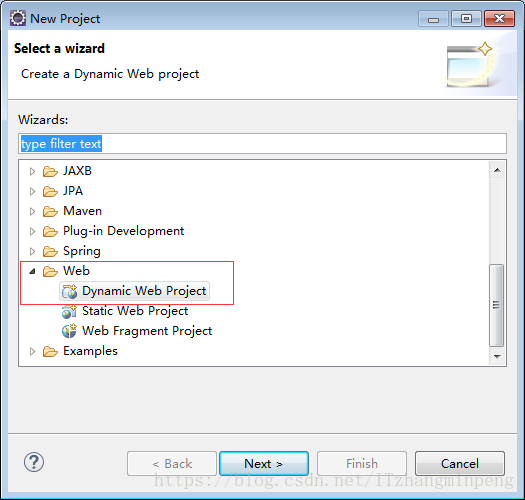
1.新建web项目
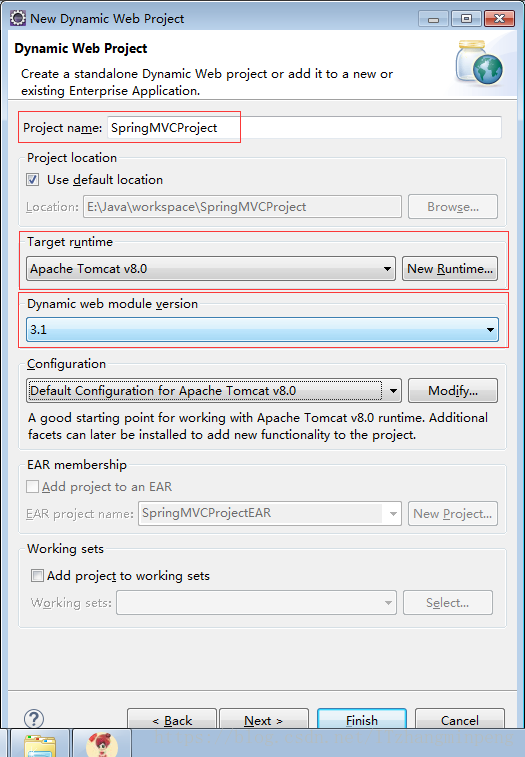
2.选择对应的配置,注意红色框内圈出来的,填写或选择对应版本
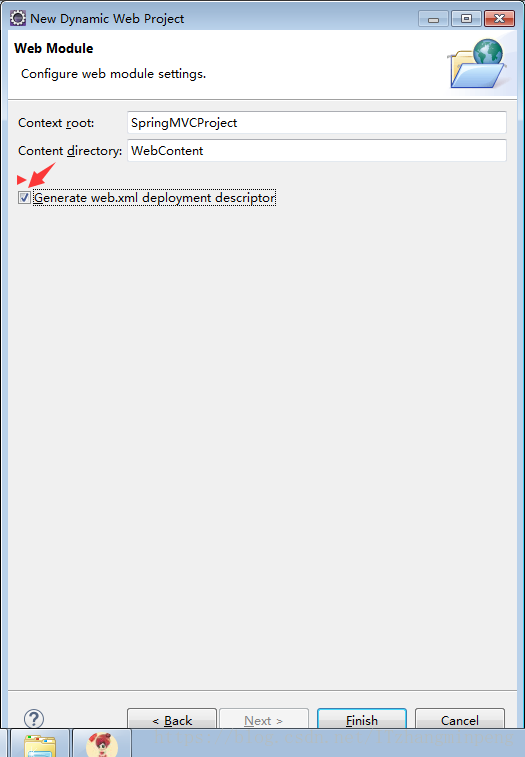
然后下一步,注意选择直接生成web.xml文件
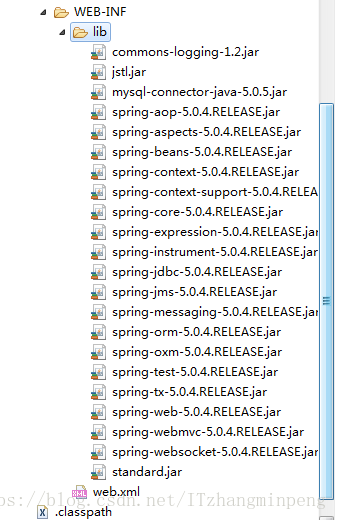
3.导入jar包,可以直接去对应的官网下载,或者直接到正文的网站下载,我已经整理并上传了
https://download.csdn.net/download/itzhangminpeng/10312343
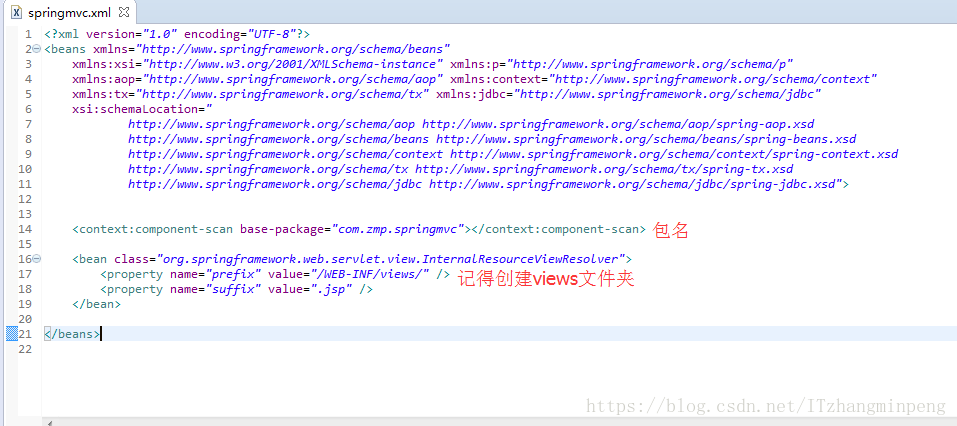
4.新建spirngmvc.xml配置文件,并进行编辑,代码如下:
<beans xmlns="http://www.springframework.org/schema/beans"
    xmlns:xsi="http://www.w3.org/2001/XMLSchema-instance" xmlns:p="http://www.springframework.org/schema/p"
    xmlns:aop="http://www.springframework.org/schema/aop" xmlns:context="http://www.springframework.org/schema/context"
    xmlns:tx="http://www.springframework.org/schema/tx" xmlns:jdbc="http://www.springframework.org/schema/jdbc"
    xsi:schemaLocation="
            http://www.springframework.org/schema/aop http://www.springframework.org/schema/aop/spring-aop.xsd
            http://www.springframework.org/schema/beans http://www.springframework.org/schema/beans/spring-beans.xsd
            http://www.springframework.org/schema/context http://www.springframework.org/schema/context/spring-context.xsd
            http://www.springframework.org/schema/tx http://www.springframework.org/schema/tx/spring-tx.xsd
            http://www.springframework.org/schema/jdbc http://www.springframework.org/schema/jdbc/spring-jdbc.xsd">


    <context:component-scan base-package="com.zmp.springmvc"></context:component-scan>

    <bean class="org.springframework.web.servlet.view.InternalResourceViewResolver">
        <property name="prefix" value="/WEB-INF/views/" />
        <property name="suffix" value=".jsp" />
    </bean>

</beans>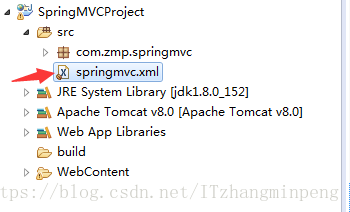
5.编辑web.xml文件,代码如下:
  <display-name>SpringMVCProject</display-name>
  <welcome-file-list>
    <welcome-file>index.jsp</welcome-file>
  </welcome-file-list>

  <servlet>
        <servlet-name>springDispatcherServlet</servlet-name>
        <servlet-class>org.springframework.web.servlet.DispatcherServlet</servlet-class>
        <init-param>
            <param-name>contextConfigLocation</param-name>
            <param-value>classpath:springmvc.xml</param-value>
        </init-param>
  </servlet>

  <servlet-mapping>
        <servlet-name>springDispatcherServlet</servlet-name>
        <url-pattern>/</url-pattern>
  </servlet-mapping>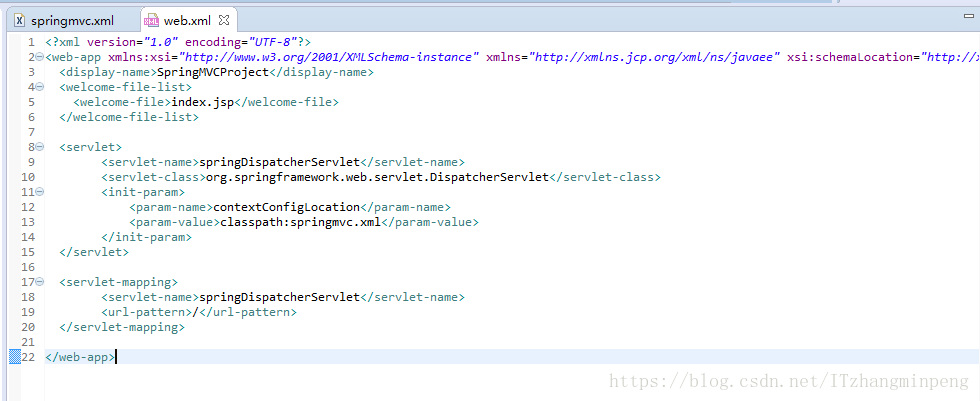
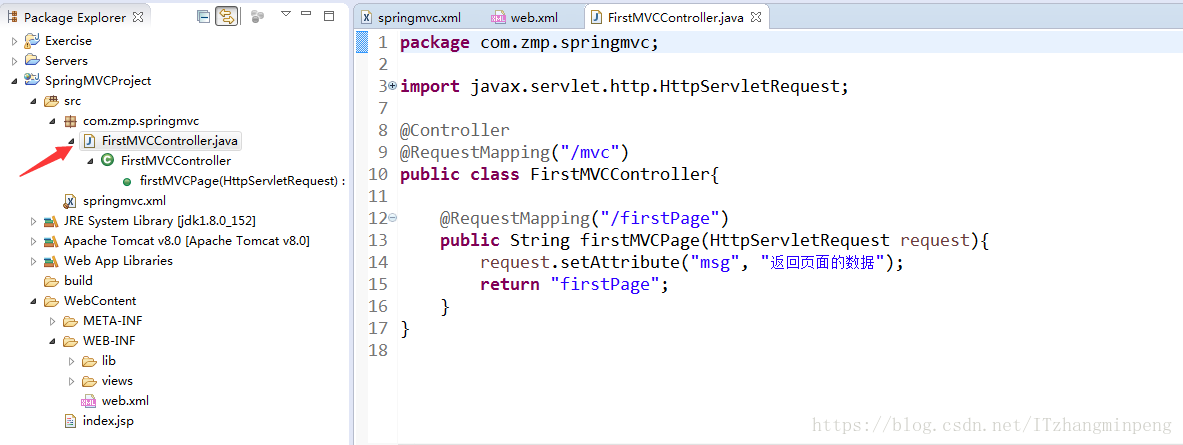
6.新建Controller层类,注意返回页面路径及名称的时候要视图层保持一致(下一步建页面),代码如下:
package com.zmp.springmvc;
import javax.servlet.http.HttpServletRequest;
import org.springframework.stereotype.Controller;
import org.springframework.web.bind.annotation.RequestMapping;
/**
* @author zmp
* @desc 后台控制类,也没啥好注释的
* @date 2018.3.27
*/
@Controller
@RequestMapping(“/mvc”)
public class FirstMVCController{
/*
* 返回页面
*/
@RequestMapping("/firstPage")
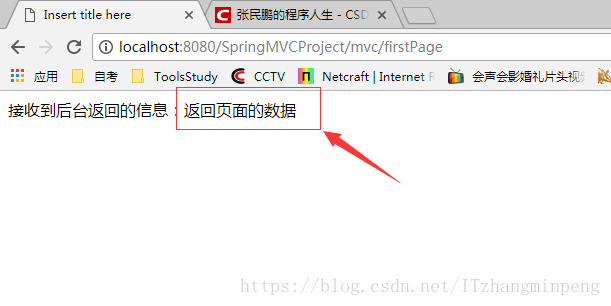
public String firstMVCPage(HttpServletRequest request){
request.setAttribute("msg", "返回页面的数据");
return "firstPage";
}
}
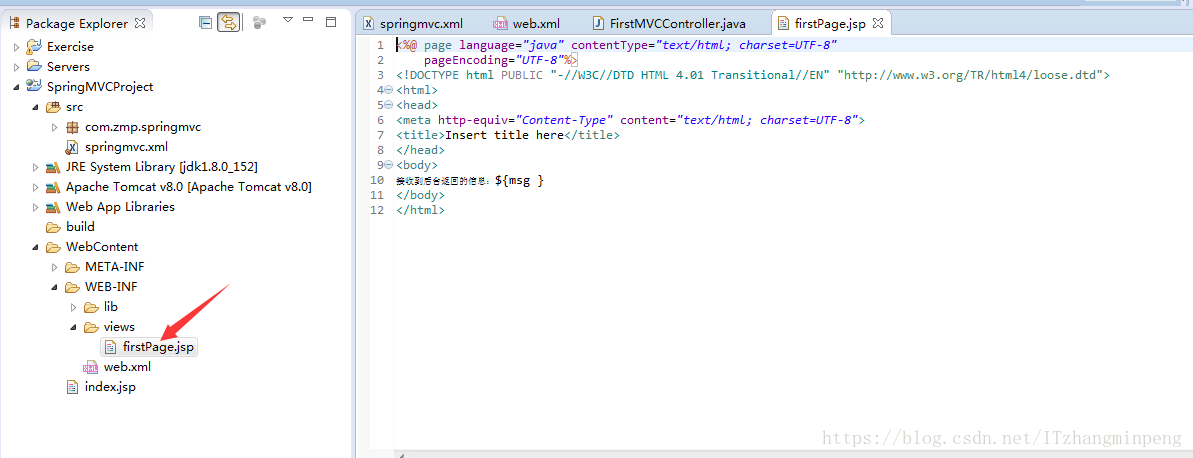
7.建返回页面,注意和后台方法返回的页面名称保持一致,否则会报404,接收后台${msg}注意和后台返回变量保持一致
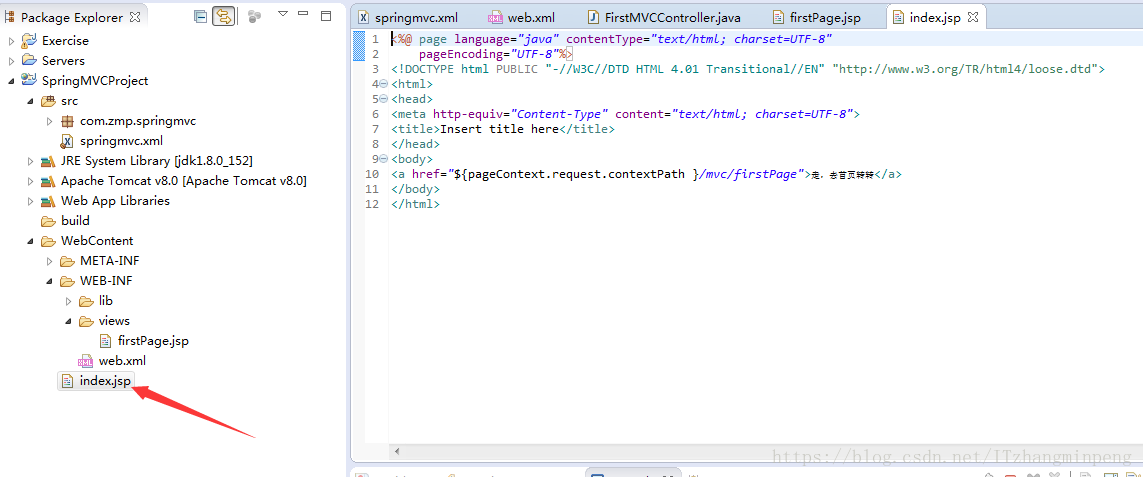
8.创建项目index页
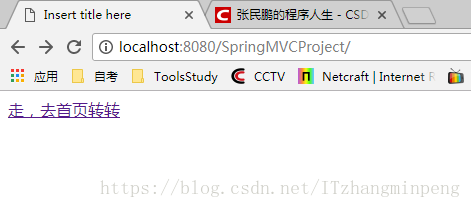
9.项目搭建完毕,运行起来,看看效果
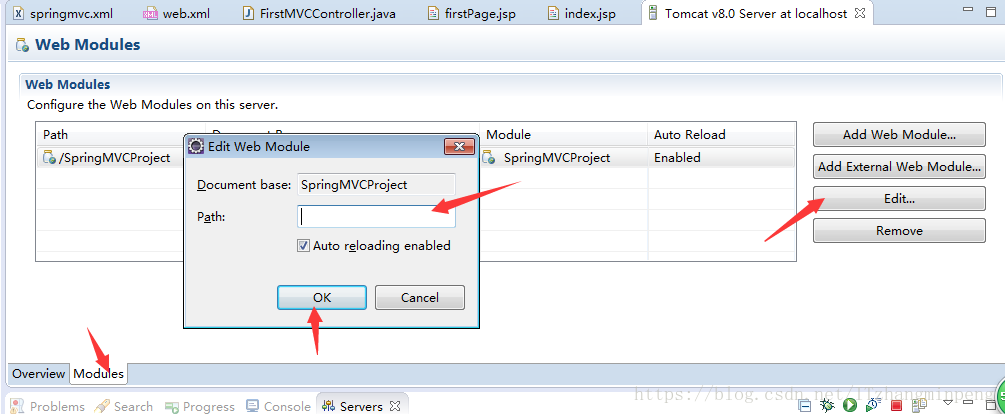
10.如果有朋友需要设置不带项目名访问,双击tomcat,操作方式如下:


 4021
4021


 被折叠的 条评论
为什么被折叠?
被折叠的 条评论
为什么被折叠?
 到【灌水乐园】发言


