


Android软件开发之 自定义控件
虽然Android系统提供了各种各样的控件供我们开发使用,但在实际的开发中,系统提供的控件有时候不能满足我们的需求,这时我们就需要自定义一个控件。
下面的例子就来自定义一个简单的Button:
首先是布局,image_btn.xml:
<?xml version="1.0" encoding="utf-8"?>
<LinearLayout
  xmlns:android="http://schemas.android.com/apk/res/android"
  android:orientation="horizontal"
  android:gravity="center_horizontal"
  android:layout_width="fill_parent"
  android:layout_height="fill_parent"
  android:background="@drawable/btn_bg">
  <ImageView
  	android:id="@+id/imageView0"
  	android:layout_width="wrap_content"
  	android:layout_height="wrap_content"
  	android:layout_gravity="center_vertical"
  	android:src="@drawable/image0"
  	/>
  <TextView
  	android:id="@+id/textView0"
  	android:layout_width="wrap_content"
  	android:layout_height="wrap_content"
  	android:layout_gravity="center_vertical"
  	android:textSize="20sp"
  	android:textColor="#000"
  	android:text="@string/ic_img_up"
  	/>

</LinearLayout>
然后实现一个新的控件,ImageBtn.java:
public class ImageBtn extends LinearLayout {

	private ImageView imageView;
	private TextView textView;

	public ImageBtn(Context context, AttributeSet attrs) {
		super(context, attrs);
		LayoutInflater inflater = (LayoutInflater) context.getSystemService(Context.LAYOUT_INFLATER_SERVICE);
		inflater.inflate(R.layout.image_btn, this);

		//实例化控件对象
		imageView = (ImageView) findViewById(R.id.imageView0);
		textView = (TextView) findViewById(R.id.textView0);
	}

	public ImageBtn(Context context) {
		super(context);
	}

	/**
	 * 设置图片资源
	 * @param resId
	 */
	public void setImageResource(int resId) {
		imageView.setImageResource(resId);
	}

	/**
	 * 设置要显示的文字
	 * @param text
	 */
	public void setText(int strId) {
		textView.setText(strId);
	}

}
然后在main.xml中使用该控件:
<?xml version="1.0" encoding="utf-8"?>
<LinearLayout xmlns:android="http://schemas.android.com/apk/res/android"
    android:orientation="vertical"
    android:layout_width="fill_parent"
    android:layout_height="fill_parent"
    >
	<jack.userdefined.ImageBtn
		android:id="@+id/imgBtn0"
		android:layout_width="wrap_content"
	    android:layout_height="wrap_content"
	    />

</LinearLayout>
最后,在MainActivity中进行测试,我们实现点击该控件,该控件中的图片进行切换和text同时也相应的改变。
public class MainActivity extends Activity implements OnClickListener {
//声明一个ImageBtn对象
private ImageBtn imgBtn0;
//定义一个数组用于存放图片资源
private int[] resId = {R.drawable.image0, R.drawable.image1, R.drawable.image2, R.drawable.image3};
//定义一个数组用于存放字符资源
private int[] strId = {R.string.ic_img_up, R.string.ic_img_right, R.string.ic_img_down, R.string.ic_img_left};
//资源索引标志
private int Num = 0;
@Override
public void onCreate(Bundle savedInstanceState) {
super.onCreate(savedInstanceState);
setContentView(R.layout.main);
//实例化ImageBtn对象
imgBtn0 = (ImageBtn) findViewById(R.id.imgBtn0);
imgBtn0.setOnClickListener(this);
}
@Override
public void onClick(View v) {
if (Num > resId.length - 1) {
Num = 0;
}
imgBtn0.setImageResource(resId[Num]);
imgBtn0.setText(strId[Num]);
Num++;
}
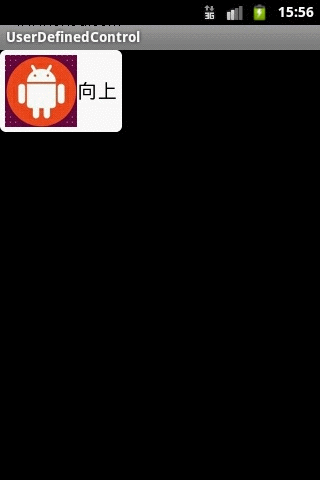
}Run app之后,如下图所示:
Download source:http://115.com/file/be6whdbx


 857
857


 被折叠的 条评论
为什么被折叠?
被折叠的 条评论
为什么被折叠?
 到【灌水乐园】发言


