


 本文详细介绍了iOS中的Core Data框架,包括名词解释、运作方式、环境搭建、模型文件创建以及如何操作Managed Object。Core Data提供ORM功能,简化了数据存储,基于SQLite高效管理内存。文中通过实例讲解如何创建实体、属性、关系以及如何添加、查询数据。
Apple给我们提供了Core Data框架,它提供了对象-关系映射(ORM)功能,可以将OC对象转换为数据进行存储,也可以将保存在数据库中的数据还原成OC对象,可以直接按对象的方式操作数据,让这些变得非常简单。
core data是iOS应用中一种很好的持久性数据存储方式,从本质上来说,core data使用的SQLite, 所以效率也非常高,而且它可以很好的管理内存,它是对底层SQLite接口的一层封装。
名词
先看看下面这张官方图片:
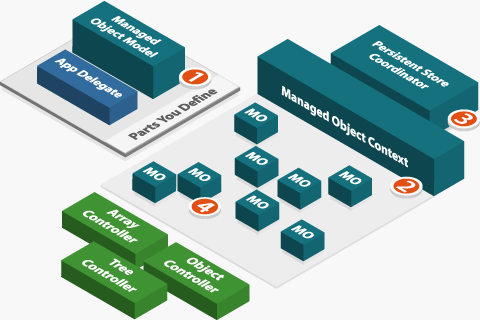
在上图中,我们可以看到有五个相关模块:
1, Managed Object Model
Managed Object Model 是描述应用程序的数据模型,这个模型包含实体(Entity),特性(Property),读取请求(Fetch Request)等。(下文都使用英文术语。)
2,Managed Object Context
Managed Object Context 参与对数据对象进行各种操作的全过程,并监测数据对象的变化,以提供对 undo/redo 的支持及更新绑定到数据的 UI(这个很重要!)。
3,Persistent Store Coordinator
Persistent Store Coordinator 相当于数据文件管理器,处理底层的对数据文件的读取与写入。一般我们无需与它打交道。
4,Managed Object
Managed Object 数据对象,与 Managed Object Context 相关联,就相当于表中的一条记录。
5,Controller
图中绿色的 Array Controller, Object Controller, Tree Controller 这些控制器,一般都是通过 control+drag 将 Managed Object Context 绑定到它们,这样我们就可以在 nib 中可视化地操作数据。
运作方式
上面的这些模块是怎样运作的呢:
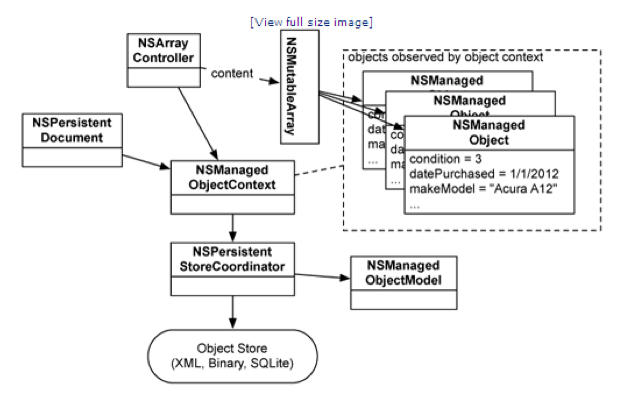
1,应用程序先创建或读取模型文件(后缀为xcdatamodeld)生成 NSManagedObjectModel 对象。Document应用程序是一般是通过 NSDocument 或其子类 NSPersistentDocument)从模型文件(后缀为 xcdatamodeld)读取。
2,然后生成 NSManagedObjectContext 和 NSPersistentStoreCoordinator 对象,前者对用户透明地调用后者对数据文件进行读写。
3,NSPersistentStoreCoordinator 负责从数据文件(xml, sqlite,二进制文件等)中读取数据生成 Managed Object,或保存 Managed Object 写入数据文件。
4,NSManagedObjectContext 参与对数据进行各种操作的整个过程,它持有 Managed Object。我们通过它来监测 Managed Object。监测数据对象有两个作用:支持 undo/redo 以及数据绑定。这个类是最常被用到的。
5,Array Controller, Object Controller, Tree Controller 这些控制器一般与 NSManagedObjectContext 关联,因此我们可以通过它们在 nib 中可视化地操作数据对象。
环境搭建
在创建项目的时候,勾选”使用core data”,系统会自动帮我们加入以下代码,当然,我们可以手动加入到appdelegate中:
- NSManagedObjectModel
lazy var managedObjectModel: NSManagedObjectModel = {
        // The managed object model for the application. This property is not optional. It is a fatal error for the application not to be able to find and load its model.
        let modelURL = NSBundle.mainBundle().URLForResource("coreDataTest", withExtension: "momd")!
        return NSManagedObjectModel(contentsOfURL: modelURL)!
    }()
2.NSPersistentStoreCoordinator
lazy var applicationDocumentsDirectory: NSURL = {
        // The directory the application uses to store the Core Data store file. This code uses a directory named "com.jamy.coreDataTest" in the application's documents Application Support directory.
        let urls = NSFileManager.defaultManager().URLsForDirectory(.DocumentDirectory, inDomains: .UserDomainMask)
        return urls[urls.count-1]
    }()

lazy var persistentStoreCoordinator: NSPersistentStoreCoordinator = {
        // The persistent store coordinator for the application. This implementation creates and returns a coordinator, having added the store for the application to it. This property is optional since there are legitimate error conditions that could cause the creation of the store to fail.
        // Create the coordinator and store
        let coordinator = NSPersistentStoreCoordinator(managedObjectModel: self.managedObjectModel)
        let url = self.applicationDocumentsDirectory.URLByAppendingPathComponent("SingleViewCoreData.sqlite")
        var failureReason = "There was an error creating or loading the application's saved data."
        do {
            try coordinator.addPersistentStoreWithType(NSSQLiteStoreType, configuration: nil, URL: url, options: nil)
        } catch {
            // Report any error we got.
            var dict = [String: AnyObject]()
            dict[NSLocalizedDescriptionKey] = "Failed to initialize the application's saved data"
            dict[NSLocalizedFailureReasonErrorKey] = failureReason

            dict[NSUnderlyingErrorKey] = error as NSError
            let wrappedError = NSError(domain: "YOUR_ERROR_DOMAIN", code: 9999, userInfo: dict)
            // Replace this with code to handle the error appropriately.
            // abort() causes the application to generate a crash log and terminate. You should not use this function in a shipping application, although it may be useful during development.
            NSLog("Unresolved error \(wrappedError), \(wrappedError.userInfo)")
            abort()
        }

        return coordinator
    }()
3.NSManagedObjectContext
lazy var managedObjectContext: NSManagedObjectContext = {
        // Returns the managed object context for the application (which is already bound to the persistent store coordinator for the application.) This property is optional since there are legitimate error conditions that could cause the creation of the context to fail.
        let coordinator = self.persistentStoreCoordinator
        var managedObjectContext = NSManagedObjectContext(concurrencyType: .MainQueueConcurrencyType)
        managedObjectContext.persistentStoreCoordinator = coordinator
        return managedObjectContext
    }()

    // MARK: - Core Data Saving support

    func saveContext () {
        if managedObjectContext.hasChanges {
            do {
                try managedObjectContext.save()
            } catch {
                // Replace this implementation with code to handle the error appropriately.
                // abort() causes the application to generate a crash log and terminate. You should not use this function in a shipping application, although it may be useful during development.
                let nserror = error as NSError
                NSLog("Unresolved error \(nserror), \(nserror.userInfo)")
                abort()
            }
        }
    }
模型文件
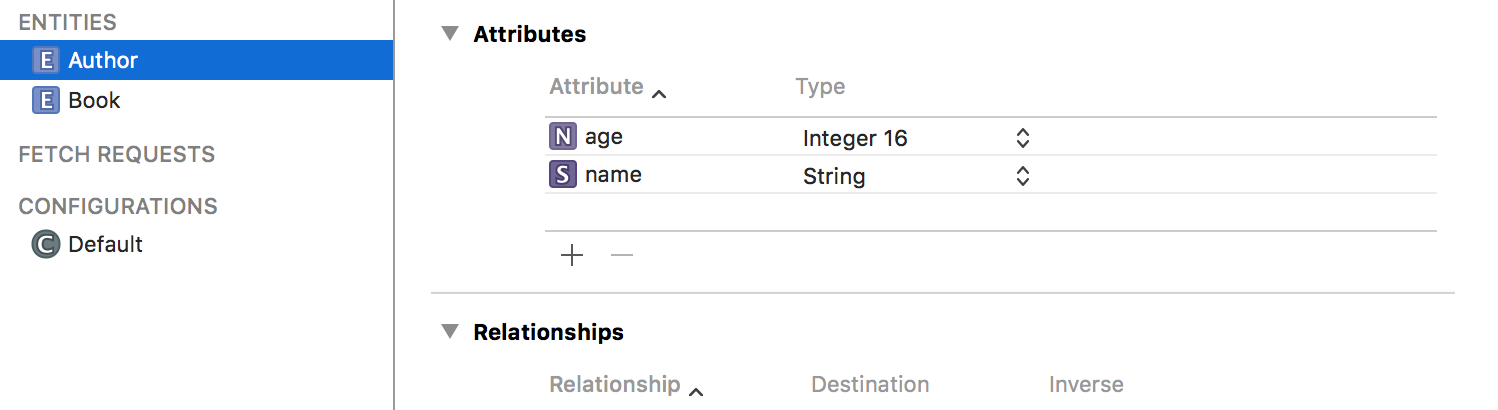
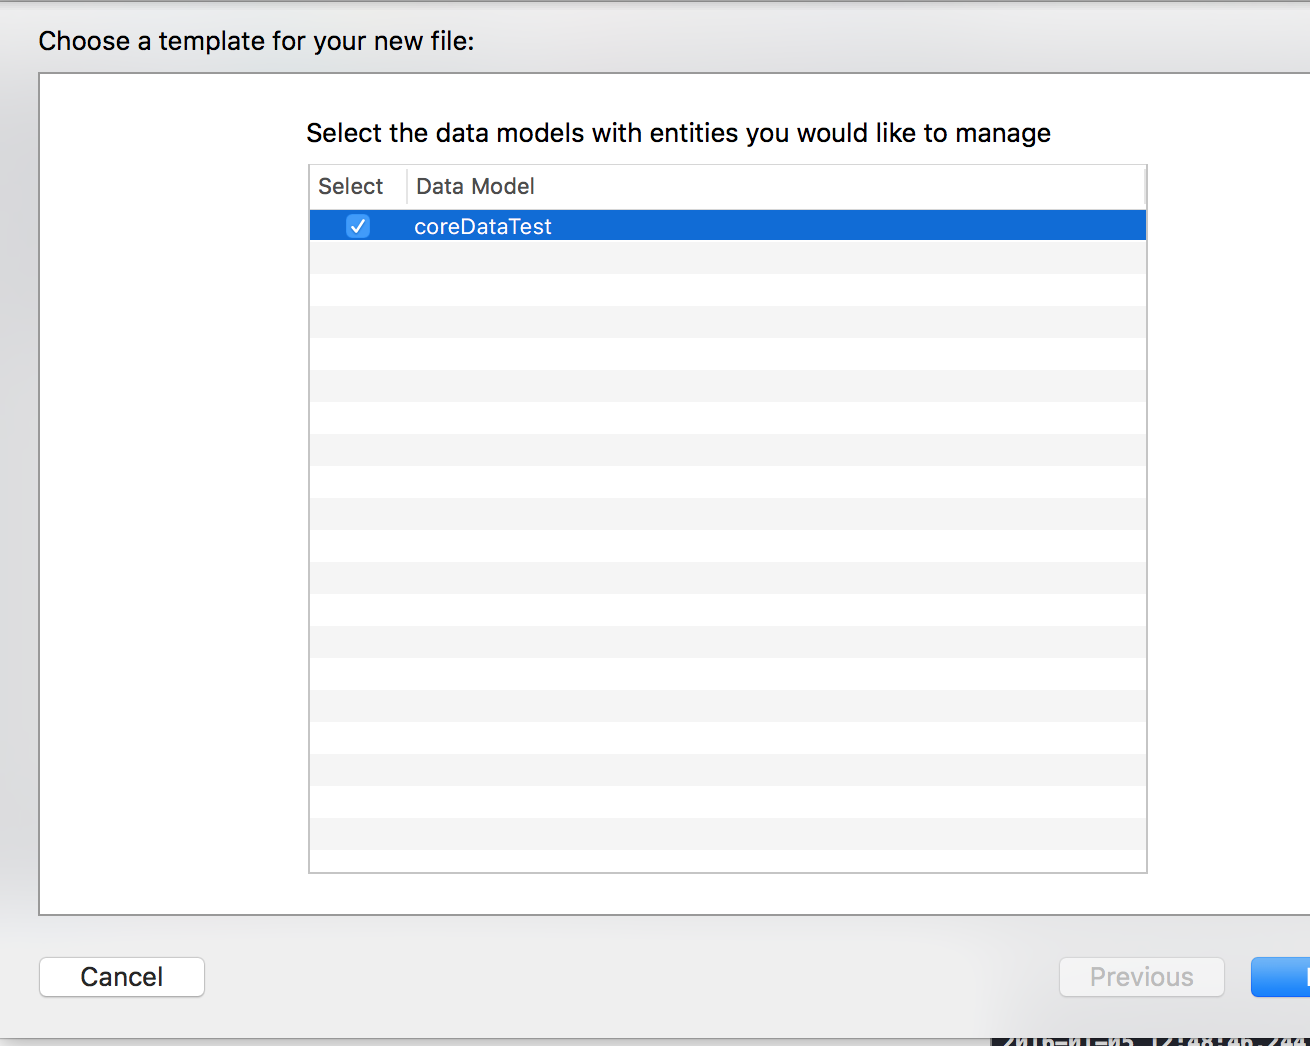
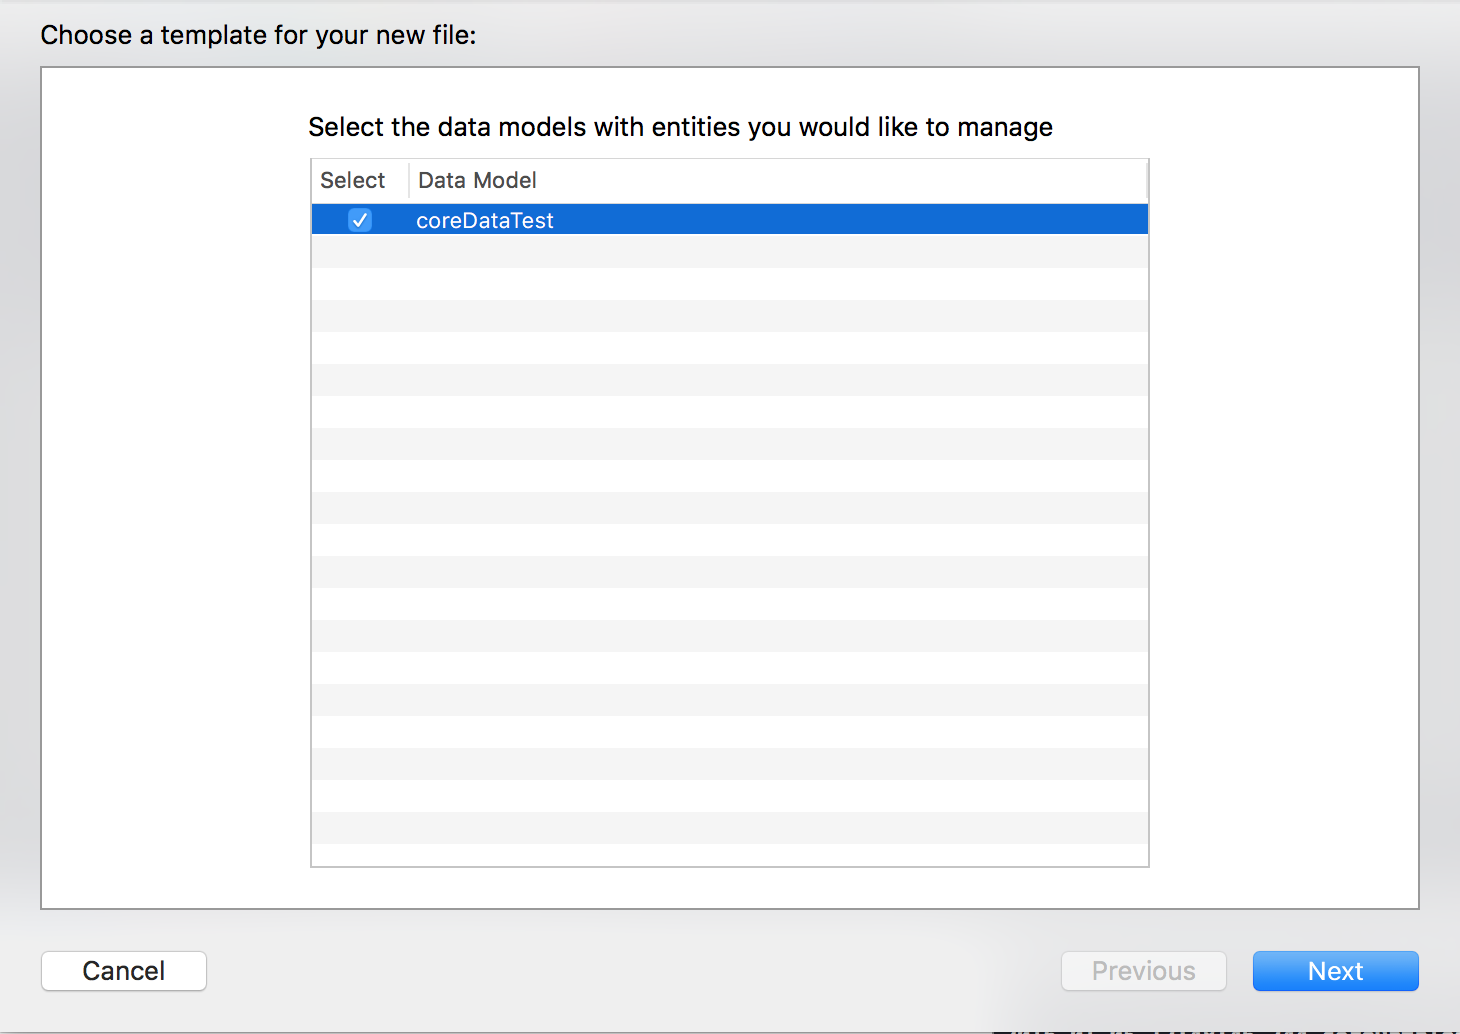
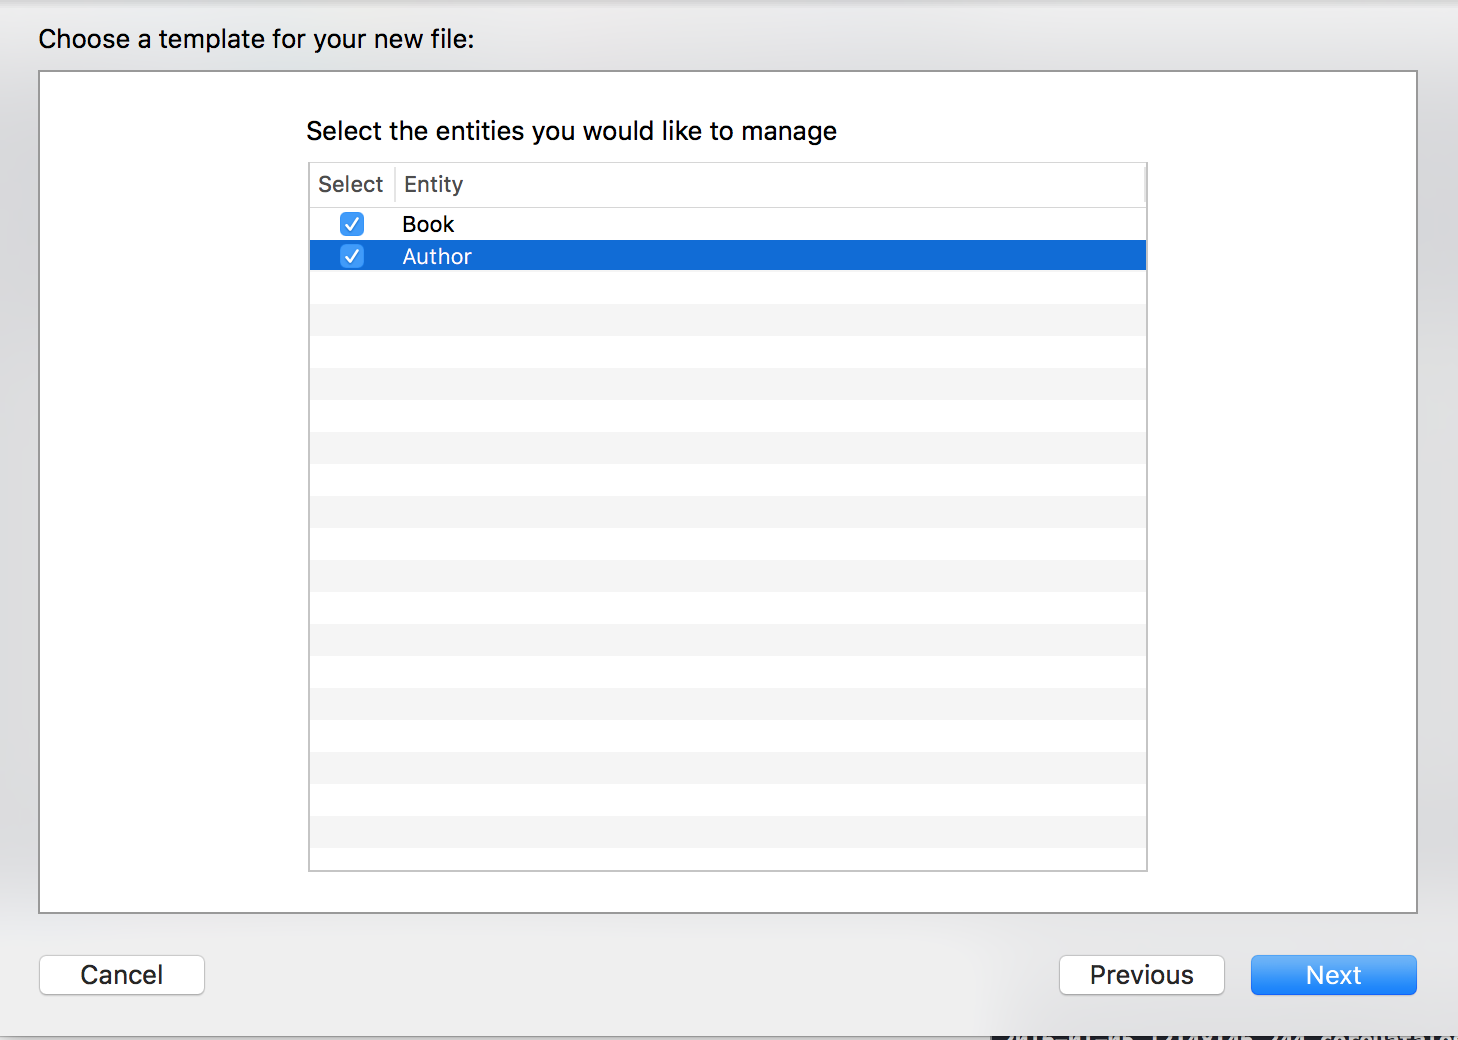
在core data中,需要映射的对象称为实体(Entity),而且需要使用Core Data的模型文件来描述所有的实体和实体属性,这里我以Book和Author 2个实体为例子:
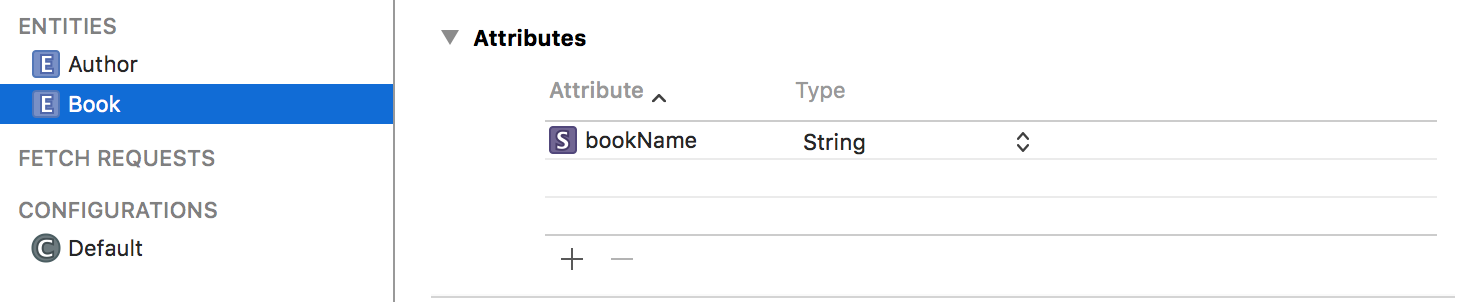
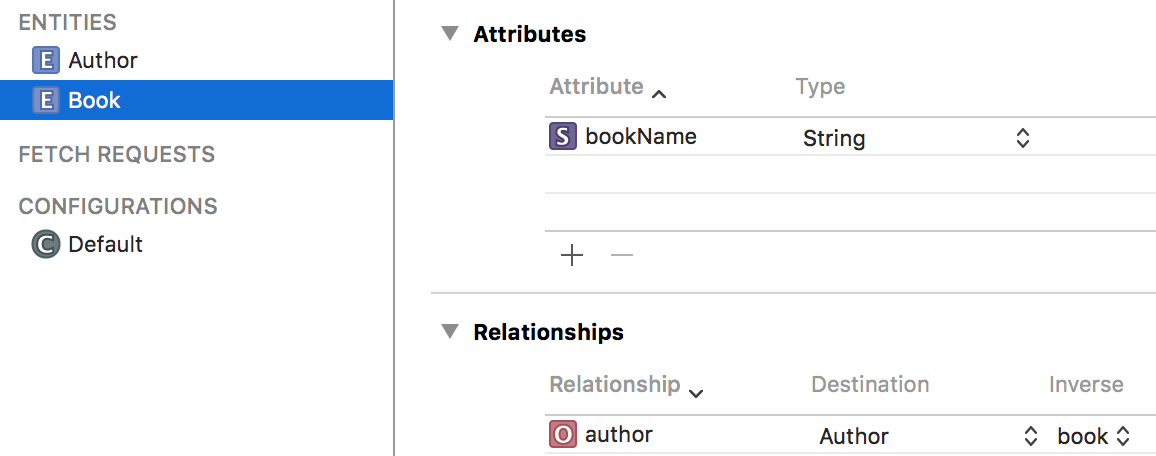
Book实体中有:bookName, author两个属性;
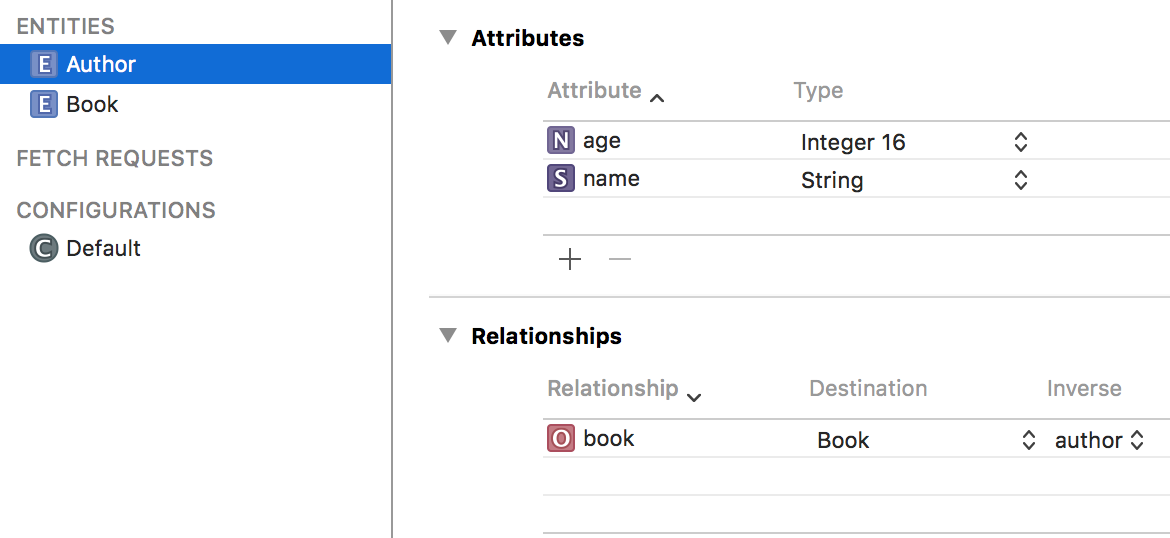
Author实体有:name, age, book三个属性。
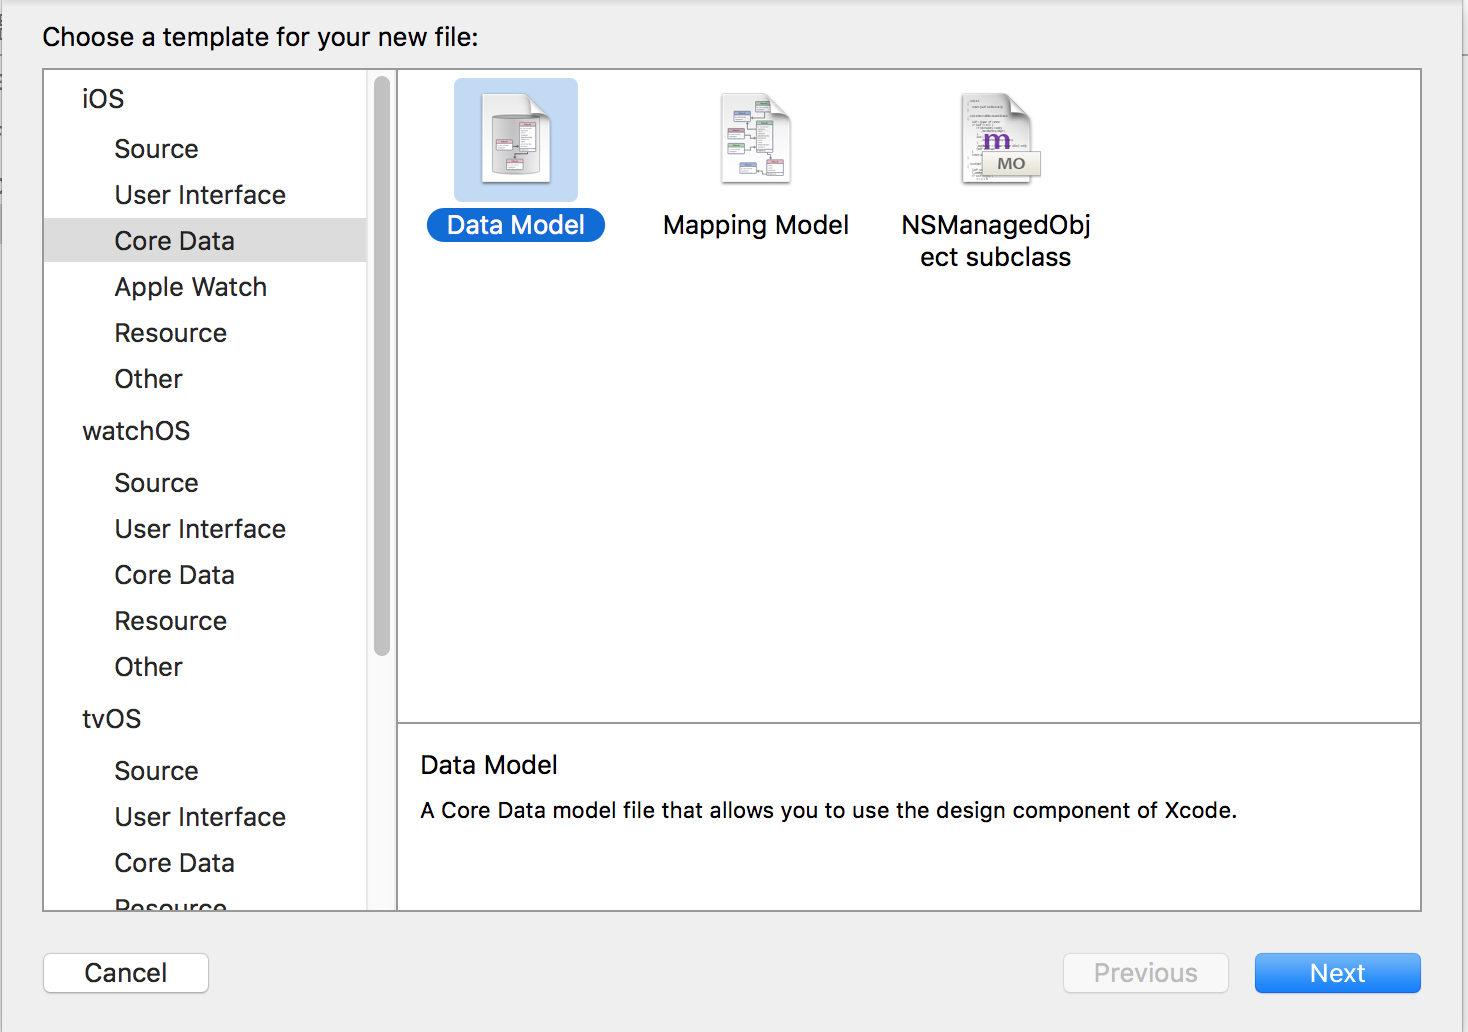
下面创建模型文件:
添加实体Author:
添加实体Book:
建立实体关系:
ManagerObject
Managed Object 表示数据文件中的一条记录,每一个 Managed Object 在内存中对应 Entity 的一个数据表示。Managed Object 的成员为 Entity 的 Property 所描述。
比如在上面的代码,author 这个 NSManagedObject,对应名为 Author 的 Entity。
每一个Managed Object 都有一个全局 ID(类型为:NSManagedObjectID)。Managed Object 会附加到一个 Managed Object Context,我们可以通过这个全局 ID 在 Managed Object Context 查询对应的 Managed Object。
NSManagedObject 常用方法
-entity
获取其 Entity
-objectID
获取其 Managed Object ID
-valueForKey:
获取指定 Property 的值
-setValue: forKey:
设定指定 Property 的值
它的使用方法和NSDictionary,通过键-值对的方式来存储、获取所有的实体属性。
添加数据:
func appDelegate() -> AppDelegate {
      return UIApplication.sharedApplication().delegate as! AppDelegate
    }

    func addData() {
        let context = appDelegate().managedObjectContext
        let author = NSEntityDescription.insertNewObjectForEntityForName("Author", inManagedObjectContext: context)
        author.setValue("jamy", forKey: "name")
        author.setValue(NSNumber(integer: 26), forKey: "age")

        let book = NSEntityDescription.insertNewObjectForEntityForName("Book", inManagedObjectContext: context)
        book.setValue("my book", forKey: "bookName")
        author.setValue(book, forKey: "book")

        appDelegate().saveContext()
    }
查询数据:
func fetchData() {
let request = NSFetchRequest()
request.entity = NSEntityDescription.entityForName("Author", inManagedObjectContext: appDelegate().managedObjectContext)
let sort = NSSortDescriptor(key: "age", ascending: false)
request.sortDescriptors = [sort]
let predicate = NSPredicate(format: "name like %@", "jamy")
request.predicate = predicate
do {
let results = try appDelegate().managedObjectContext.executeFetchRequest(request)
for objc in results {
let names = objc as! NSManagedObject
NSLog("name=%@", names.valueForKey("name") as! String)
}
} catch {
let error = error as NSError
NSLog("%@", error)
}
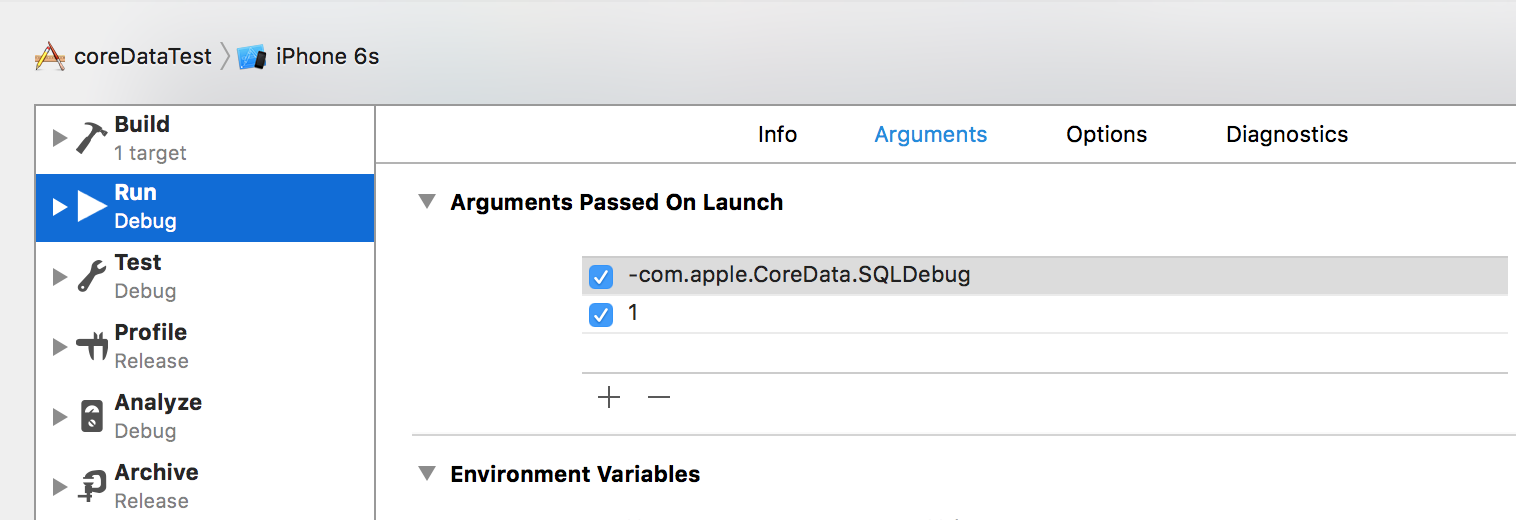
}我们在调试的过程中,可能需要看对应的SQL语句,这点,苹果也提供了相应的方法:
1:打开项目,点击项目名称下面的EditScheme;
2: 点击Arguments下面的“+”号,添加下面的语句:
-com.apple.CoreData.SQLDebug
1
创建NSManagerObject子类
从上面的几个基本操作上我们知道,我们实际操作的对象是NSManagerObject,主要是通过键-值对的方式来操作数据的,但是实际使用中,我们大多数情况下需要更多的操作,那么就必须使用子类的方法:
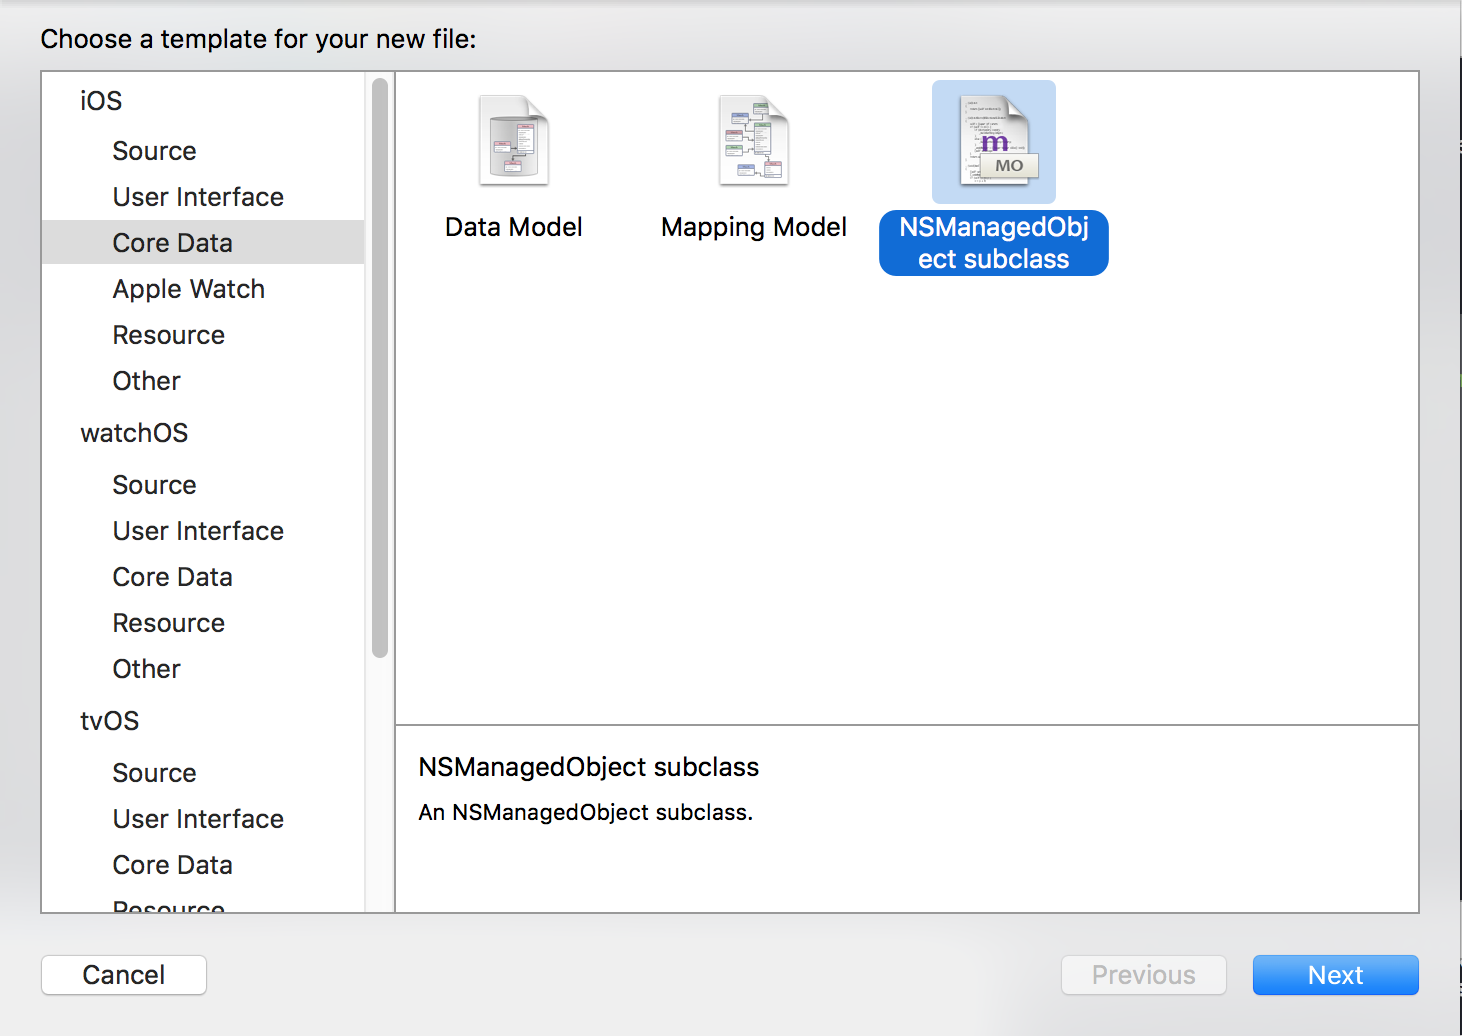
执行完以上操作后,系统自动为我们添加了一些文件:
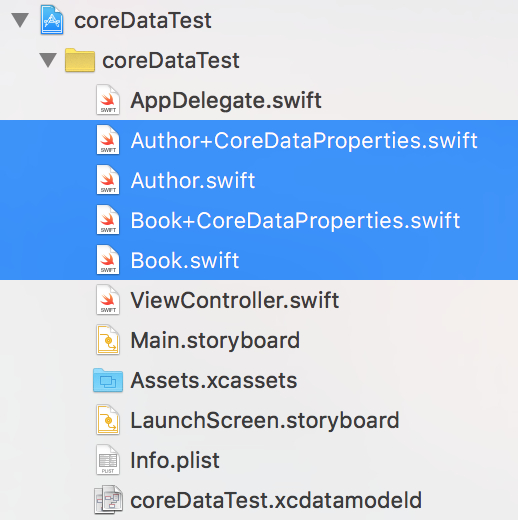
这是swift对应的文件,OC生成的也是类似的,我们来看看文件里面的内容:
import Foundation
import CoreData


class Author: NSManagedObject {

// Insert code here to add functionality to your managed object subclass

}

extension Author {

    @NSManaged var name: String?
    @NSManaged var age: NSNumber?
    @NSManaged var book: Book?

}
所以,我们就可以通过下面这种方式来直接操作了,不需要上面的键值对的方式:
func addDataUseObjc() {
        let author = NSEntityDescription.insertNewObjectForEntityForName("Author", inManagedObjectContext: appDelegate().managedObjectContext) as! Author
        author.name = "jamy001"
        author.age = NSNumber(integer: 25)

        let book = NSEntityDescription.insertNewObjectForEntityForName("Book", inManagedObjectContext: appDelegate().managedObjectContext) as! Book
        book.bookName = "很好一本书"

        author.book = book

        appDelegate().saveContext()
    }


 2万+
2万+

 被折叠的 条评论
为什么被折叠?
被折叠的 条评论
为什么被折叠?
 到【灌水乐园】发言


