


Maven配置信息,大部分配置可以通过命令行参数获得
<plugin>
<groupId>org.liquibase</groupId>
<artifactId>liquibase-maven-plugin</artifactId>
<version>${liquibase.version}</version>
<configuration>
<changeLogFile>resources/config/liquibase/master.xml</changeLogFile>
<!--<diffChangeLogFile>classpath:config/liquibase/changelog/${maven.build.timestamp}_changelog.xml</diffChangeLogFile>-->
<driver>com.mysql.jdbc.Driver</driver>
<url>jdbc:mysql://localhost:3306/entranceguard?useUnicode=true&characterEncoding=utf8</url>
<defaultSchemaName>entranceguard</defaultSchemaName>
<username>root</username>
<password>root</password>
<referenceUrl>jdbc:mysql://localhost:3306/entranceguard2?useUnicode=true&characterEncoding=utf8</referenceUrl>
<referenceUsername>root</referenceUsername>
<referencePassword>root</referencePassword>
<!--<rollbackTag>T4</rollbackTag>-->
<!--<rollbackDate>Feb 16, 2016</rollbackDate>-->
<!--<tag>Release0100-2</tag>-->
<referenceDefaultSchemaName>entranceguard2</referenceDefaultSchemaName>
<verbose>true</verbose>
<logging>debug</logging>
</configuration>
<dependencies>
<dependency>
<groupId>org.javassist</groupId>
<artifactId>javassist</artifactId>
<version>3.18.2-GA</version>
</dependency>
<dependency>
<groupId>org.liquibase.ext</groupId>
<artifactId>liquibase-hibernate4</artifactId>
<version>${liquibase-hibernate4.version}</version>
</dependency>
<dependency>
<groupId>org.springframework.boot</groupId>
<artifactId>spring-boot-starter-data-jpa</artifactId>
<version>1.3.1.RELEASE</version>
</dependency>
</dependencies>
</plugin>通过maven命令行传递参数, 参数形式如下所示
mvn liquibase:rollback -Dliquibase.rollbackTag=T4http://www.liquibase.org/documentation/maven/generated/update-mojo.html#changeLogFile
直接在命令行调用liquibase
java -jar /xxx/liquibase-core.jar
--driver=com.mysql.jdbc.Driver
--classpath=/opt/temp/mysql.jar
--url="jdbc:mysql://localhost:3306/entranceguard?useUnicode=true&characterEncoding=utf8"
--changeLogFile=/Users/yejianxin/workspace_hs_saas_all/hs-dms/hs-dms-database/resources/config/liquibase/master.xml
--username=root
--password=root
rollback
Release0100-2
主要流程是这样的,
- 通过运行update将所有变更导入到数据库,
- 通过tag命令进行更新标记 如果要rollback,
- 则可以根据时间或tag进行回滚
数据库脚本可以通过XML或sql形式存放,一般结构如下
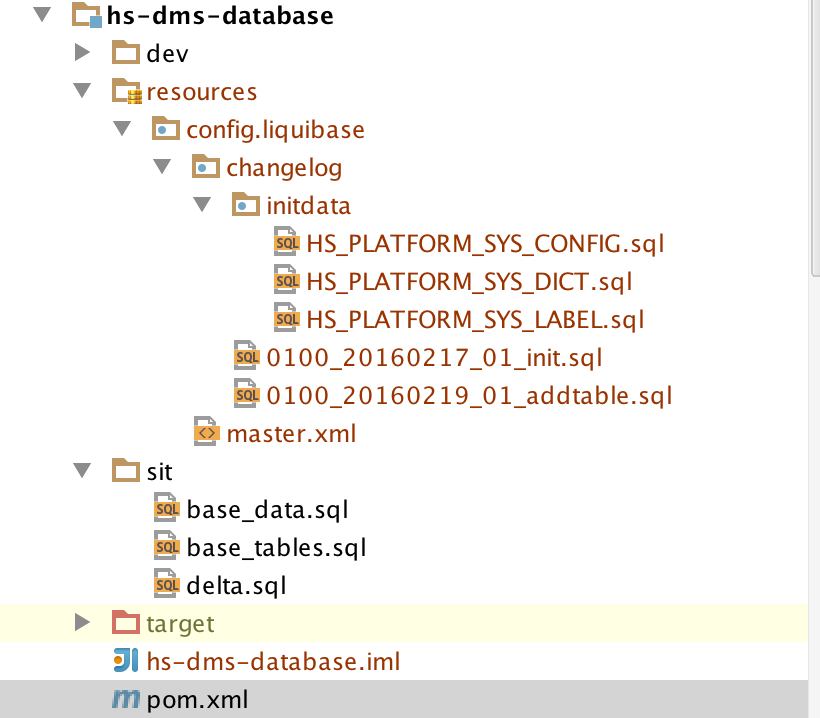
master.xml文件是总文件,它会include其他需要执行的文件。 注意路径,可以用相对路径,只要将relativeToChangelogFile设为”true”
<?xml version="1.0" encoding="utf-8"?>
<databaseChangeLog
        xmlns="http://www.liquibase.org/xml/ns/dbchangelog"
        xmlns:xsi="http://www.w3.org/2001/XMLSchema-instance"
        xsi:schemaLocation="http://www.liquibase.org/xml/ns/dbchangelog http://www.liquibase.org/xml/ns/dbchangelog/dbchangelog-3.4.xsd">

    <include file="./changelog/0100_20160217_01_init.sql" relativeToChangelogFile="true"/>
    <include file="./changelog/0100_20160219_01_addtable.sql" relativeToChangelogFile="true"/>
    <include file="./changelog/initdata/HS_PLATFORM_SYS_CONFIG.sql" relativeToChangelogFile="true"/>
    <include file="./changelog/initdata/HS_PLATFORM_SYS_DICT.sql" relativeToChangelogFile="true"/>
    <include file="./changelog/initdata/HS_PLATFORM_SYS_LABEL.sql" relativeToChangelogFile="true"/>
</databaseChangeLog>
在SQL文件里,必须加上头标签如下所示
--liquibase formatted sql
--changeset JasonYe:Release0100-1
update table1 set column1=333;
--rollback delete from table1 where column1=333;


 804
804


 被折叠的 条评论
为什么被折叠?
被折叠的 条评论
为什么被折叠?
 到【灌水乐园】发言


