|
<?xml version="1.0" encoding="UTF-8"?>
<beans xmlns="http://www.springframework.org/schema/beans" xmlns:xsi="http://www.w3.org/2001/XMLSchema-instance"
xmlns:context="http://www.springframework.org/schema/context" xmlns:jdbc="http://www.springframework.org/schema/jdbc"
xmlns:jee="http://www.springframework.org/schema/jee" xmlns:tx="http://www.springframework.org/schema/tx"
xmlns:jpa="http://www.springframework.org/schema/data/jpa"
xsi:schemaLocation="
http://www.springframework.org/schema/beans http://www.springframework.org/schema/beans/spring-beans-4.0.xsd
http://www.springframework.org/schema/context http://www.springframework.org/schema/context/spring-context-4.0.xsd
http://www.springframework.org/schema/jdbc http://www.springframework.org/schema/jdbc/spring-jdbc-4.0.xsd
http://www.springframework.org/schema/jee http://www.springframework.org/schema/jee/spring-jee-4.0.xsd
http://www.springframework.org/schema/tx http://www.springframework.org/schema/tx/spring-tx-4.0.xsd
http://www.springframework.org/schema/data/jpa http://www.springframework.org/schema/data/jpa/spring-jpa-1.3.xsd"
default-lazy-init="true">
<description>Spring公共配置 </description>
<context:annotation-config />
<!-- 使用annotation 自动注册bean, 并保证@Required、@Autowired的属性被注入 -->
<context:component-scan base-package="com.eteclab.wodm">
<context:exclude-filter type="annotation" expression="org.springframework.stereotype.Controller"/>
<context:exclude-filter type="annotation" expression="org.springframework.web.bind.annotation.ControllerAdvice"/>
</context:component-scan>
<!-- Jpa Entity Manager 配置 -->
<bean id="entityManagerFactory" class="org.springframework.orm.jpa.LocalContainerEntityManagerFactoryBean">
<property name="dataSource" ref="dataSource"/>
<property name="jpaVendorAdapter" ref="hibernateJpaVendorAdapter"/>
<property name="packagesToScan" value="com.eteclab"/>
<property name="jpaProperties">
<props>
<!-- 命名规则 My_NAME->MyName -->
<prop key="hibernate.ejb.naming_strategy">org.hibernate.cfg.ImprovedNamingStrategy</prop>
</props>
</property>
</bean>
<bean id="hibernateJpaVendorAdapter" class="org.springframework.orm.jpa.vendor.HibernateJpaVendorAdapter">
<property name="databasePlatform">
<bean factory-method="getDialect" class="org.eteclab.modules.persistence.Hibernates">
<constructor-arg ref="dataSource"/>
</bean>
</property>
</bean>
<!-- Spring Data Jpa配置 -->
<jpa:repositories base-package="com.eteclab.wodm" transaction-manager-ref="transactionManager" entity-manager-factory-ref="entityManagerFactory"/>
<!-- Jpa 事务配置 -->
<bean id="transactionManager" class="org.springframework.orm.jpa.JpaTransactionManager">
<property name="entityManagerFactory" ref="entityManagerFactory"/>
</bean>
<!-- 使用annotation定义事务 -->
<tx:annotation-driven transaction-manager="transactionManager" proxy-target-class="true" />
<!-- JSR303 Validator定义 -->
<bean id="validator" class="org.springframework.validation.beanvalidation.LocalValidatorFactoryBean" />
<!-- production环境 -->
<beans profile="production">
<context:property-placeholder ignore-unresolvable="true"
location="classpath*:/application.properties"/>
<!-- 数据源配置, 使用Tomcat JDBC连接池 -->
<bean id="dataSource" class="org.apache.tomcat.jdbc.pool.DataSource" destroy-method="close">
<!-- Connection Info -->
<property name="driverClassName" value="${jdbc.driver}" />
<property name="url" value="${jdbc.url}" />
<property name="username" value="${jdbc.username}" />
<property name="password" value="${jdbc.password}" />
<!-- 连接数控制与连接归还策略 -->
<property name="maxActive" value="${jdbc.pool.maxActive}" />
<property name="maxIdle" value="${jdbc.pool.maxIdle}" />
<property name="minIdle" value="${jdbc.pool.minIdle}" />
<property name="maxWait" value="${jdbc.pool.maxWait}" />
<property name="defaultAutoCommit" value="false" />
<!-- 连接Idle一个小时后超时 -->
<property name="timeBetweenEvictionRunsMillis" value="30000" />
<property name="minEvictableIdleTimeMillis" value="30000" />
<!-- 应对网络不稳定的策略 -->
<!-- <property name="testOnBorrow" value="true" />
<property name="validationInterval" value="30000" />
<property name="validationQuery" value="select 1 from dual" /> -->
<property name="testOnReturn" value="true"></property>
<property name="testWhileIdle" value="true"></property>
<property name="testOnBorrow" value="true" />
<property name="validationInterval" value="30000" />
<property name="validationQuery" value="select 1 from dual" />
<!-- 应对连接泄漏的策略 -->
<property name="removeAbandoned" value="true" />
<property name="removeAbandonedTimeout" value="60" />
</bean>
<!-- 数据源配置,使用应用服务器的数据库连接池 -->
<!--<jee:jndi-lookup id="dataSource" jndi-name="java:comp/env/jdbc/ExampleDB" />-->
</beans>
<!-- local development环境 -->
<beans profile="development">
<context:property-placeholder ignore-resource-not-found="true"
location="classpath*:/application.development.properties" />
<!-- Tomcat JDBC连接池 -->
<bean id="dataSource" class="org.apache.tomcat.jdbc.pool.DataSource" destroy-method="close">
<!-- Connection Info -->
<property name="driverClassName" value="${jdbc.driver}" />
<property name="url" value="${jdbc.url}" />
<property name="username" value="${jdbc.username}" />
<property name="password" value="${jdbc.password}" />
<!-- 连接数控制与连接归还策略 -->
<property name="maxActive" value="${jdbc.pool.maxActive}" />
<property name="maxIdle" value="${jdbc.pool.maxIdle}" />
<property name="minIdle" value="${jdbc.pool.minIdle}" />
<property name="maxWait" value="${jdbc.pool.maxWait}" />
<property name="defaultAutoCommit" value="false" />
<!-- 连接Idle一个小时后超时 -->
<property name="timeBetweenEvictionRunsMillis" value="30000" />
<property name="minEvictableIdleTimeMillis" value="30000" />
<!-- 应对网络不稳定的策略 -->
<property name="testOnBorrow" value="true" />
<property name="validationInterval" value="30000" />
<property name="validationQuery" value="select 1 from dual" />
<!-- 应对连接泄漏的策略 -->
<property name="removeAbandoned" value="true" />
<property name="removeAbandonedTimeout" value="60" />
</bean>
</beans>
<!-- local test 环境 -->
<beans profile="local">
<context:property-placeholder ignore-resource-not-found="true"
location="classpath*:/application.local.properties" />
<!-- Tomcat JDBC连接池 -->
<bean id="dataSource" class="org.apache.tomcat.jdbc.pool.DataSource" destroy-method="close">
<!-- Connection Info -->
<property name="driverClassName" value="${jdbc.driver}" />
<property name="url" value="${jdbc.url}" />
<property name="username" value="${jdbc.username}" />
<property name="password" value="${jdbc.password}" />
<!-- 连接数控制与连接归还策略 -->
<property name="maxActive" value="${jdbc.pool.maxActive}" />
<property name="maxIdle" value="${jdbc.pool.maxIdle}" />
<property name="minIdle" value="${jdbc.pool.minIdle}" />
<property name="maxWait" value="${jdbc.pool.maxWait}" />
<property name="defaultAutoCommit" value="false" />
<!-- 连接Idle一个小时后超时 -->
<property name="timeBetweenEvictionRunsMillis" value="30000" />
<property name="minEvictableIdleTimeMillis" value="30000" />
<!-- 应对网络不稳定的策略 -->
<property name="testOnBorrow" value="true" />
<property name="validationInterval" value="30000" />
<property name="validationQuery" value="select 1 from dual" />
<!-- 应对连接泄漏的策略 -->
<property name="removeAbandoned" value="true" />
<property name="removeAbandonedTimeout" value="60" />
</bean>
</beans>
<!-- unit test环境 -->
<beans profile="test">
<context:property-placeholder ignore-resource-not-found="true"
location="classpath*:/application.test.properties" />
<!-- Tomcat JDBC连接池 -->
<bean id="dataSource" class="org.apache.tomcat.jdbc.pool.DataSource" destroy-method="close">
<!-- Connection Info -->
<property name="driverClassName" value="${jdbc.driver}" />
<property name="url" value="${jdbc.url}" />
<property name="username" value="${jdbc.username}" />
<property name="password" value="${jdbc.password}" />
<!-- 连接数控制与连接归还策略 -->
<property name="maxActive" value="${jdbc.pool.maxActive}" />
<property name="maxIdle" value="${jdbc.pool.maxIdle}" />
<property name="minIdle" value="${jdbc.pool.minIdle}" />
<property name="maxWait" value="${jdbc.pool.maxWait}" />
<property name="defaultAutoCommit" value="false" />
<!-- 连接Idle一个小时后超时 -->
<property name="timeBetweenEvictionRunsMillis" value="30000" />
<property name="minEvictableIdleTimeMillis" value="30000" />
<!-- 应对网络不稳定的策略 -->
<property name="testOnBorrow" value="true" />
<property name="validationInterval" value="30000" />
<property name="validationQuery" value="select 1 from dual" />
<!-- 应对连接泄漏的策略 -->
<property name="removeAbandoned" value="true" />
<property name="removeAbandonedTimeout" value="60" />
</bean>
</beans>
</beans>
| 


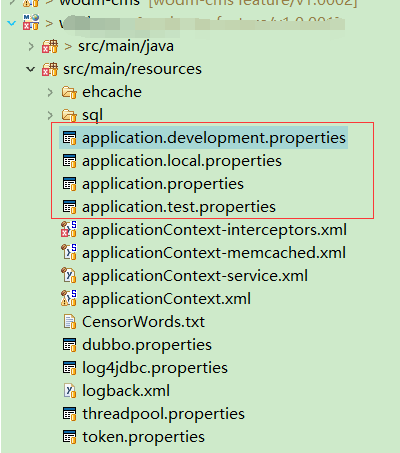
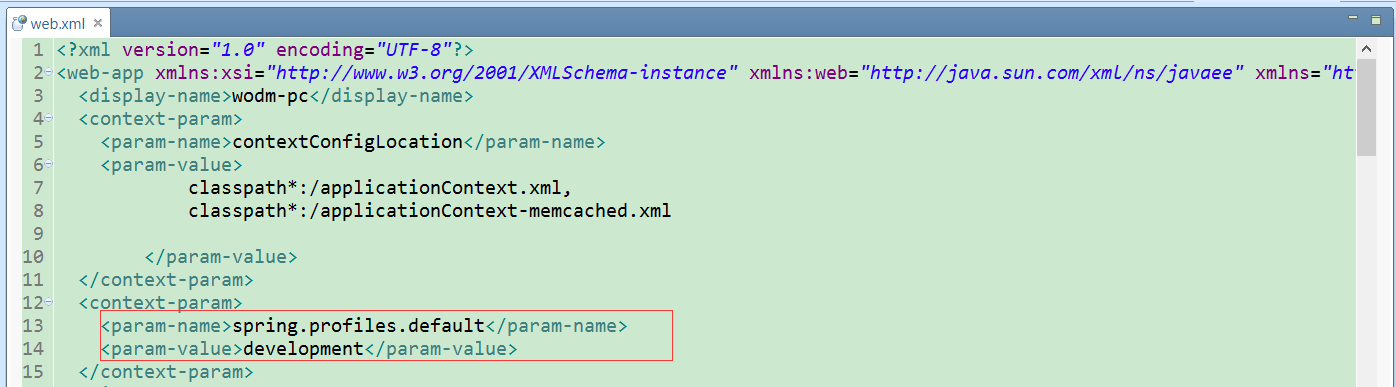
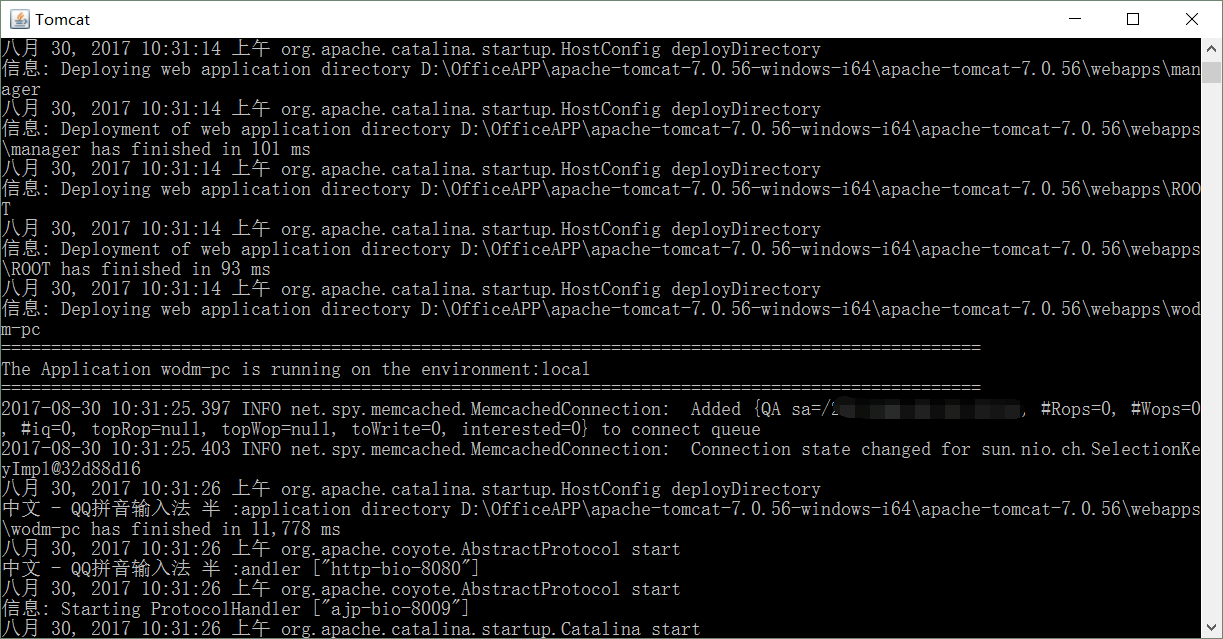
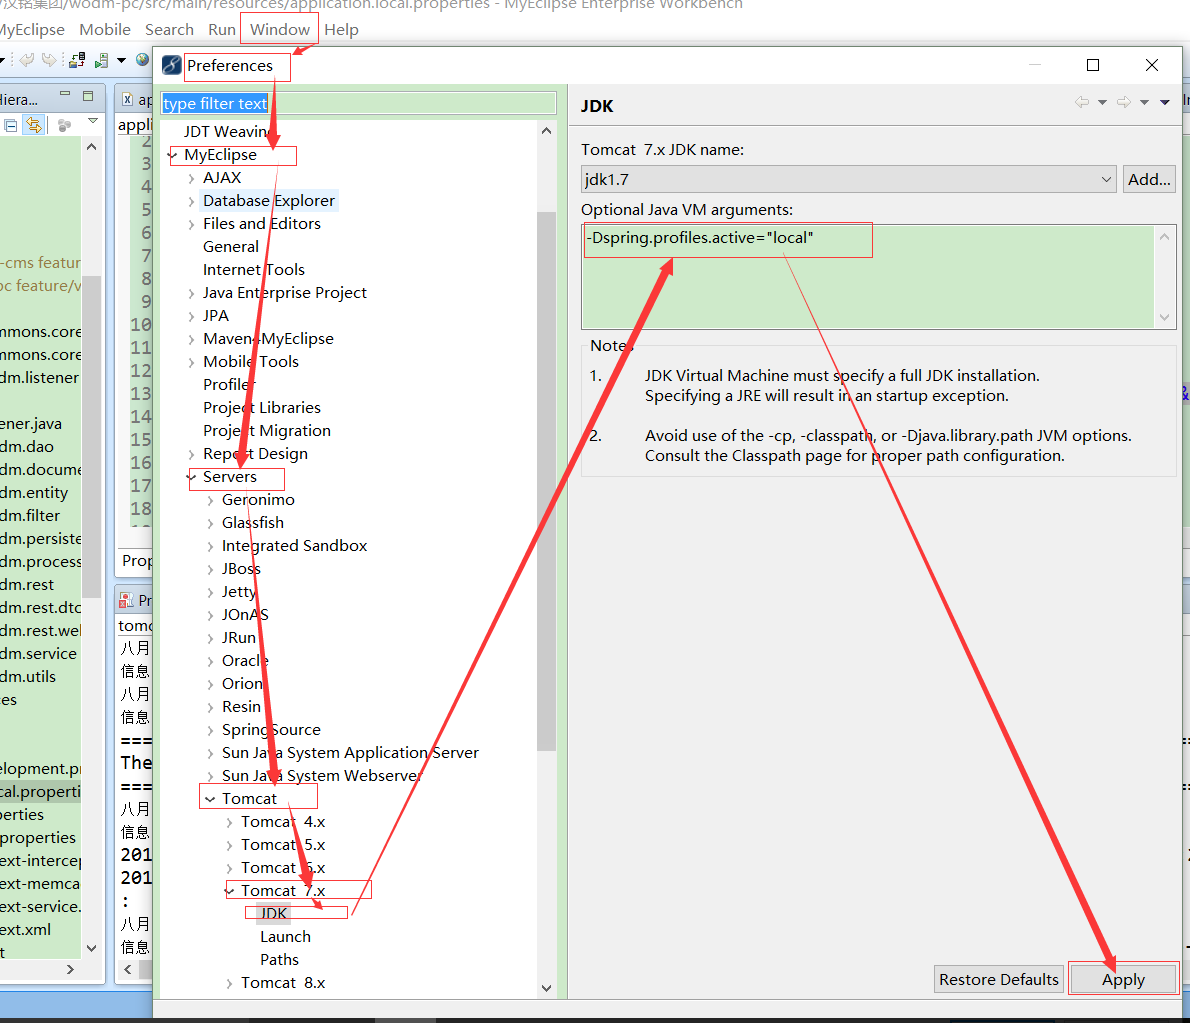
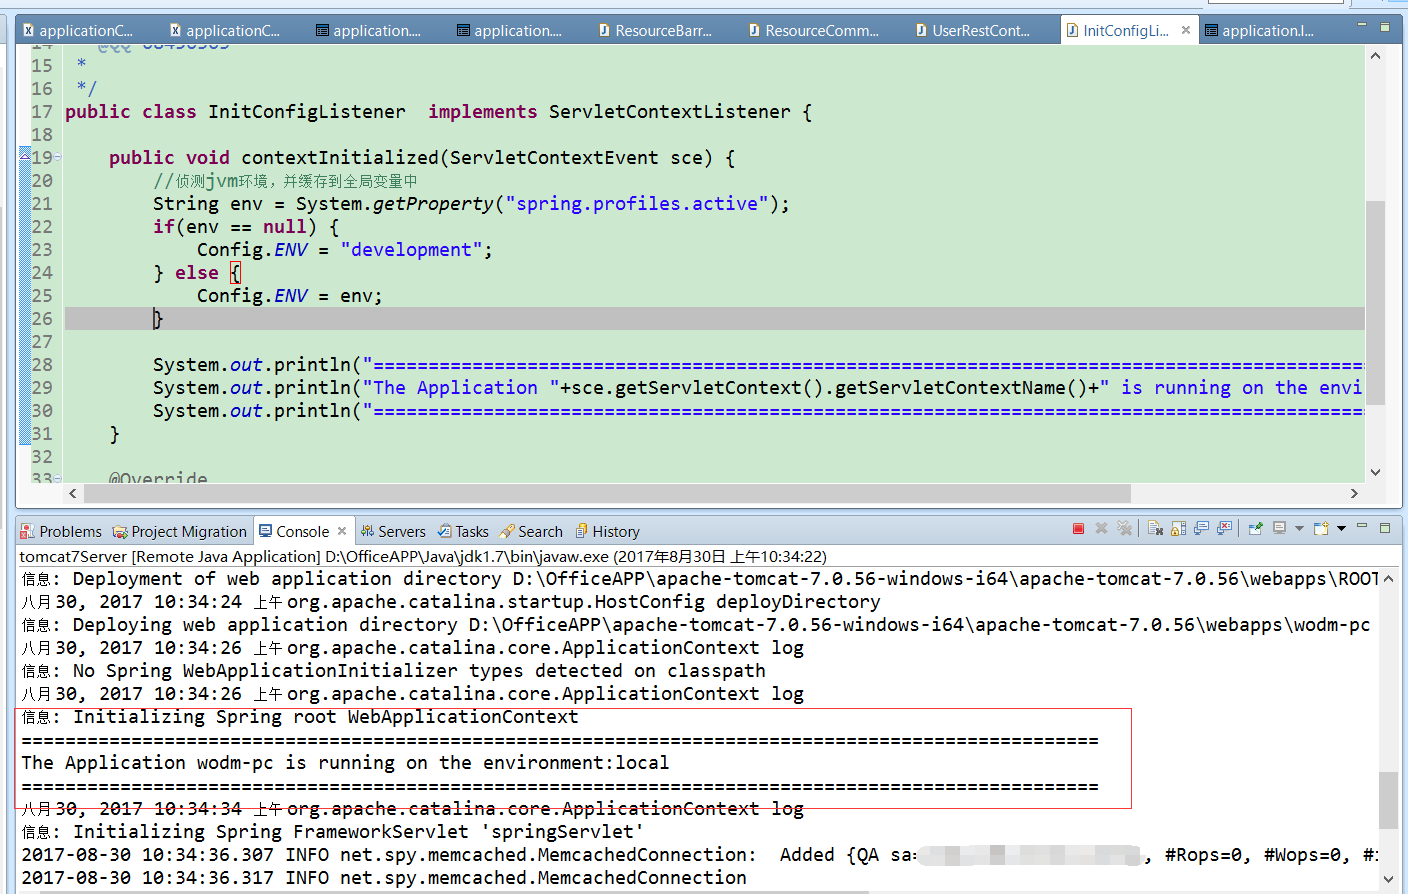
 本文介绍了一种在不同环境中配置数据库的方法,通过设置多个数据源配置文件,避免生产环境数据污染。具体包括如何配置多个环境的数据源、在Tomcat中激活特定环境配置以及通过监听器确定运行环境。


 873
873

 被折叠的 条评论
为什么被折叠?
被折叠的 条评论
为什么被折叠?
 到【灌水乐园】发言


