


 本教程详细介绍了如何使用 IntelliJ IDEA 进行 Java 和 Web 项目的开发,包括下载安装、配置文件位置、创建 Java 项目、添加 JAR 包、创建 Web 项目以及配置 Tomcat 并启动 Web 项目等步骤。
Intellij IDEA系列教材 (一)- 基础 - 教程
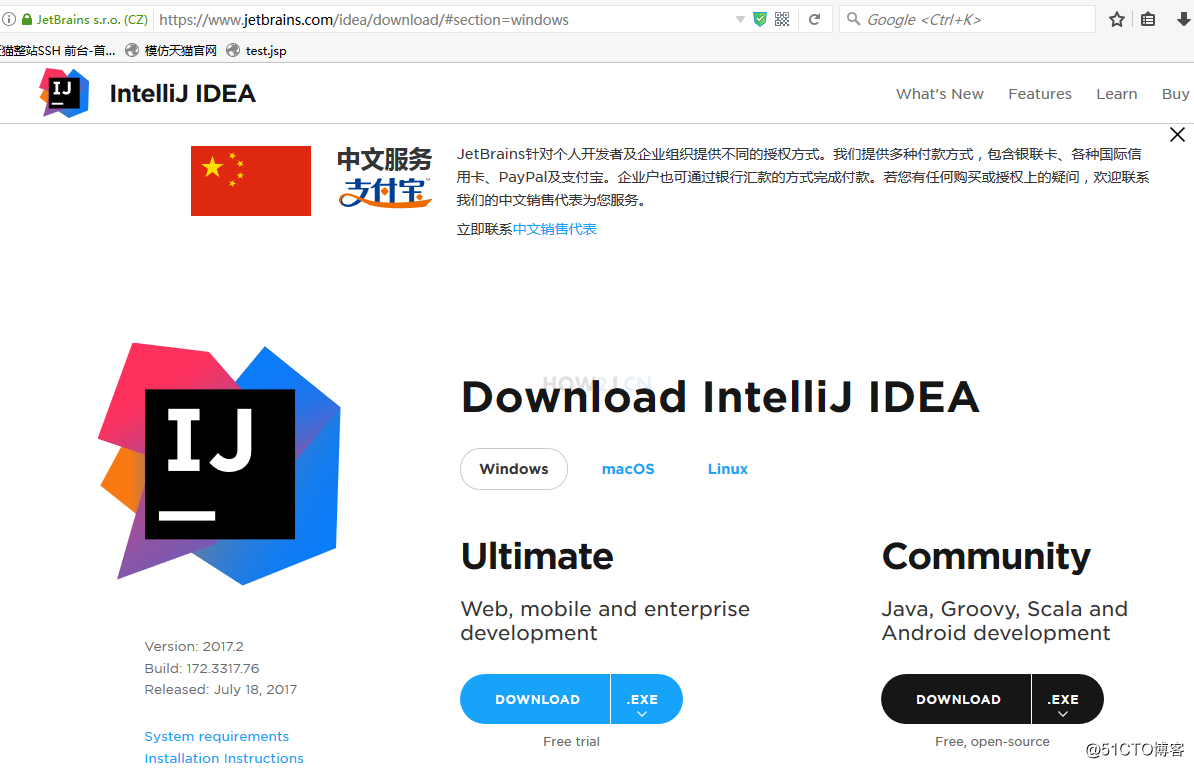
步骤 1 : 下载地址
下载地址:https://www.jetbrains.com/idea/download/#section=windows
下载Ultimate,这个版本有对J2EE的支持,Community对WEB的支持没有那么全。
Ultimate可以免费试用一个月
步骤 2 : 也可以下载右上角的 ideaIU-2017.2.rar
建议在官网下载,如果不在官网下也可以在下载区(点击进入)下载ideaIU-2017.2.rar,截至目前(2017.7.28) 为止最新版本:
ideaIU-2017.2.rar
本教程的讲解都基于这个版本: 2017.2
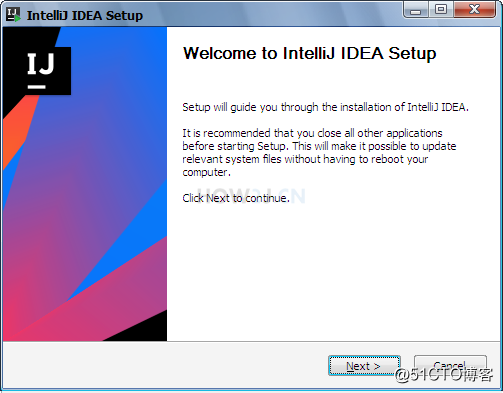
步骤 3 : 开始安装
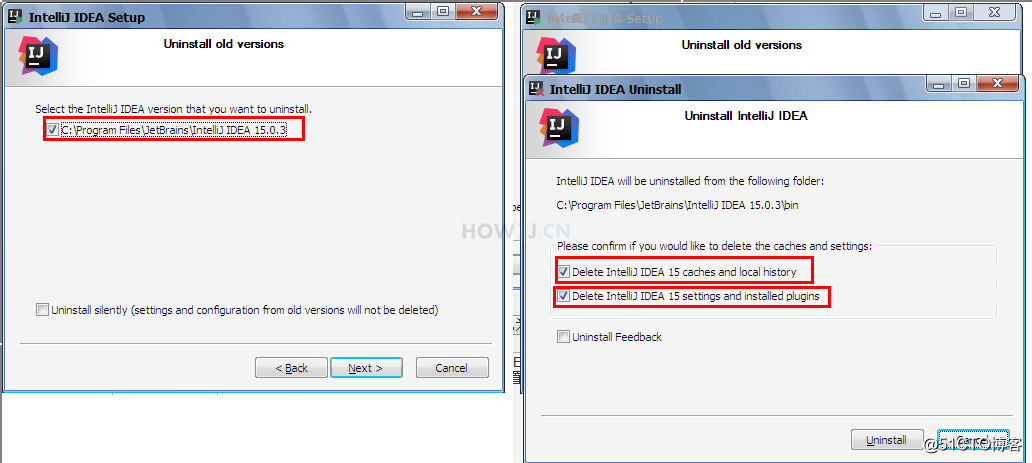
步骤 4 : 旧版本
倘若机器上安装过旧的IDEA版本就会提示是否卸载旧版本的IDEA.
如图所示,发现了15.0.3版本,通常忽略即可。
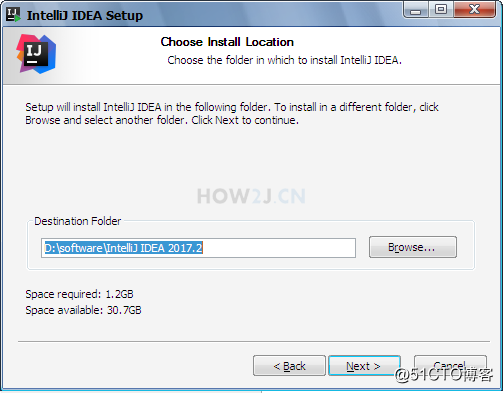
步骤 5 : 安装需要1.2G
安装一共需要1.2G的空间,我通常会安装在非C盘,这样重装系统后,软件还在
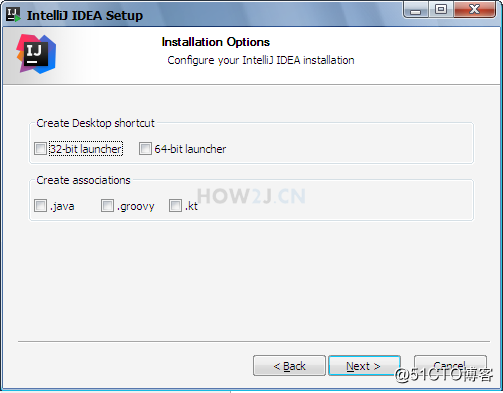
步骤 6 : 设置文件关联
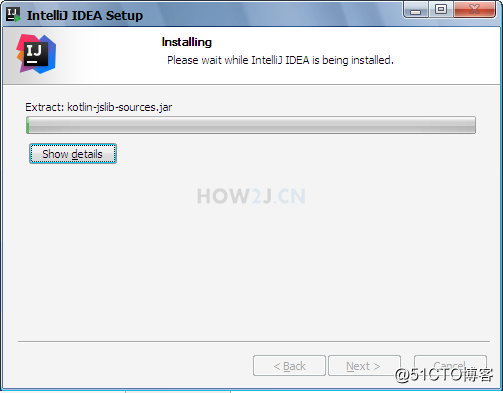
步骤 7 : 慢慢等吧~
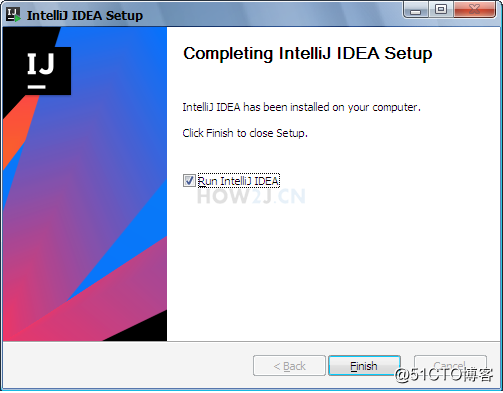
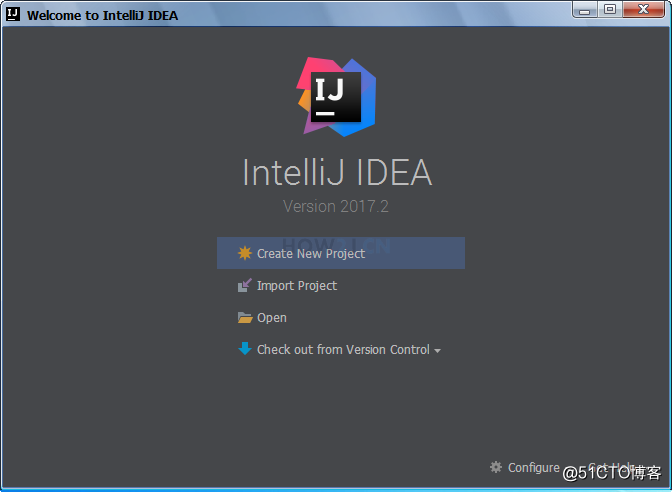
步骤 8 : 运行
Intellij IDEA系列教材 (二)- 基础 - 启动
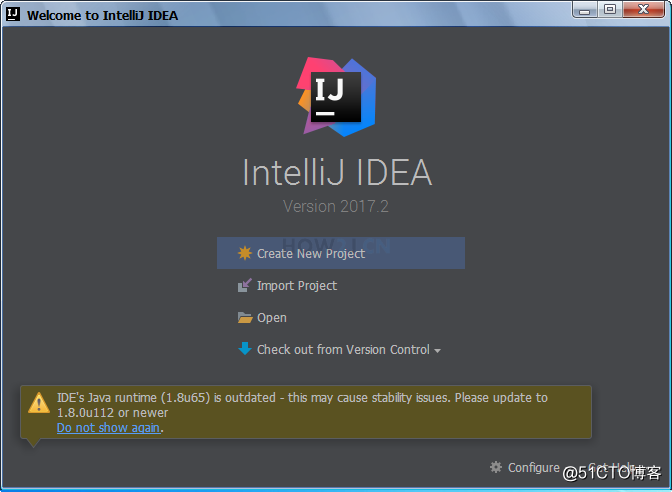
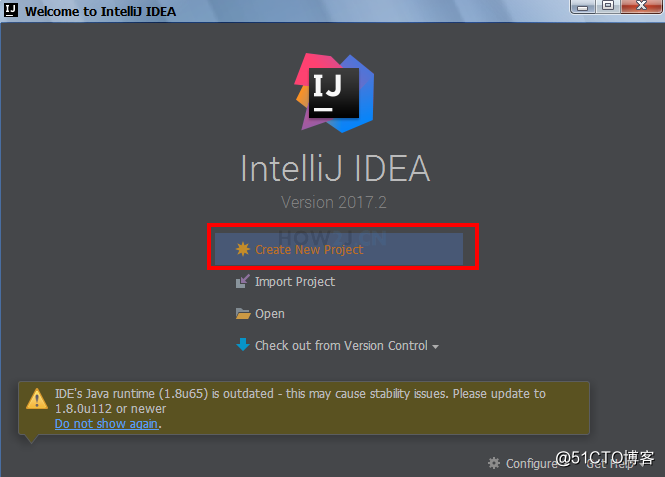
步骤 1 : 启动IDEA
IDEA和其他的IDE有所不同,它刚开始启动都有许多配置需要做,如果是第一次用的同学多多少少有些懵~ 所以挨个截图一下,简单说明一下
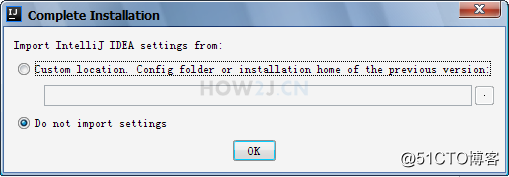
步骤 2 : 导入旧的设置
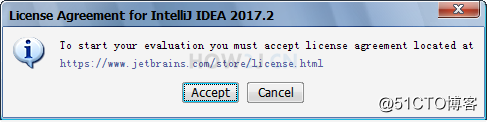
步骤 3 : 霸王条款1
反正你也不会看是什么,点Accept

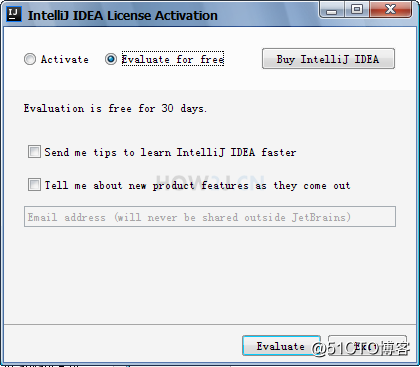
步骤 4 : 激活
Ultimate版一年的费用是499美元,所以。。。。还没有买的同学,先试用一个月吧。
选Evaluate for free
步骤 5 : 霸王条款2
反正你还是不会看是什么,点Accept

 转存失败重新上传取消
步骤 6 : 选择主题风格
选右边Darcula, 吸血伯爵风格,黑压压的,IDEA标志性界面
点 Next: Default plugins

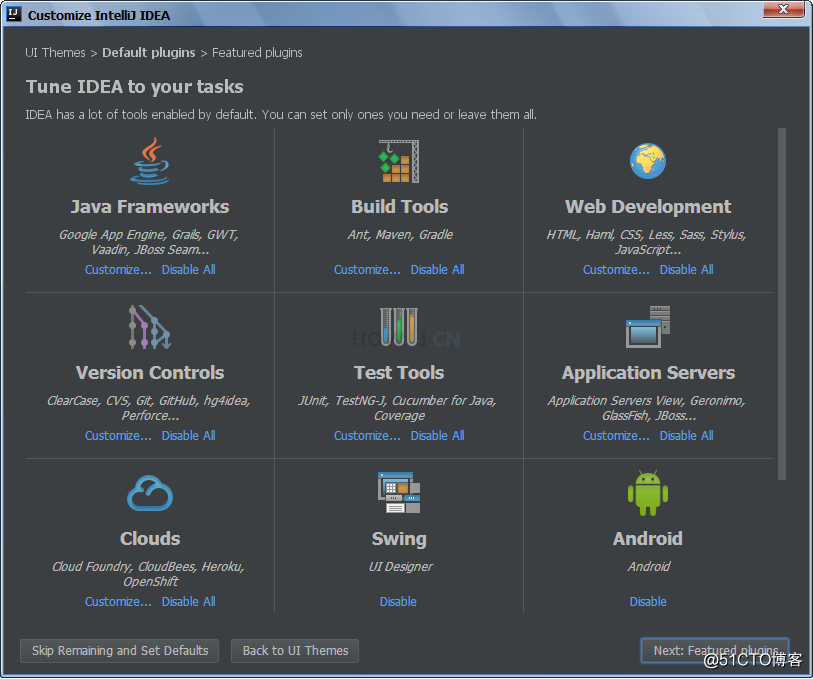
步骤 7 : 插件
这就是默认提供的插件,如果是第一次用,反正也不知道什么。。。。直接点Next:Featured plugins
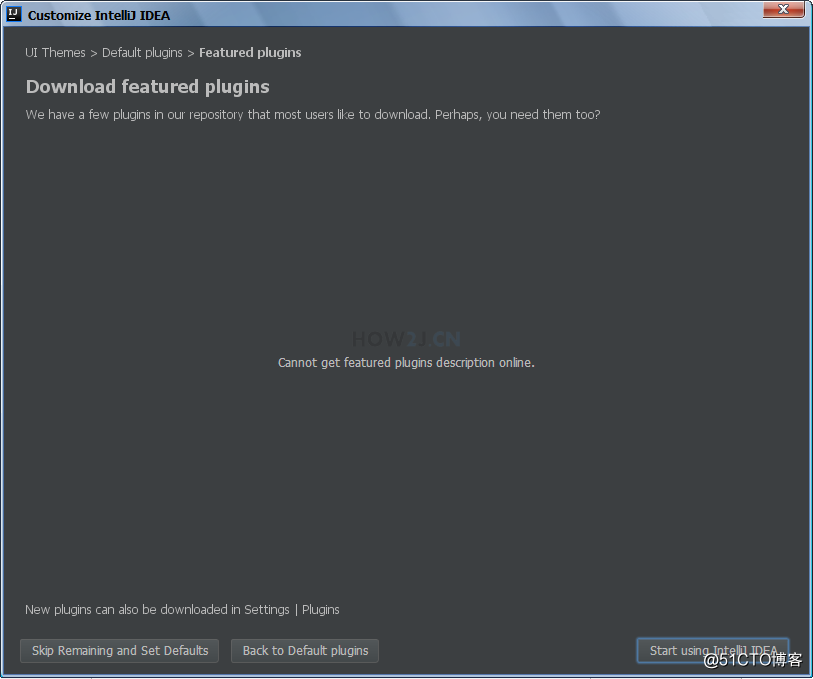
步骤 8 : 开始使用
点击Start using IntelliJ IDEA
步骤 9 : 启动成功界面
到这里就启动成功了,进入创建项目阶段
Intellij IDEA系列教材 (三)- 基础 - 配置文件位置
步骤 1 : 关于配置文件的位置
一旦开始使用IDEA之后,就需要做很多的配置相关工作,使得IDEA越来越符合你的个人习惯,让你使用起来得心应手。
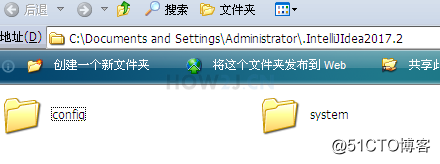
而这些配置信息,都保存在C盘,比如我的就会默认保存在如图所示的位置
C:\Documents and Settings\Administrator\.IntelliJIdea2017.2 |
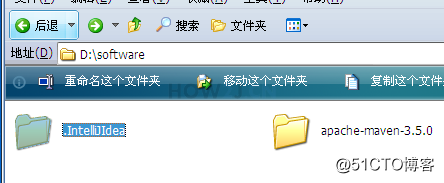
而默认放在C盘是不好的习惯,一旦重装系统之后,所有的配置信息都丢失了,又要全部重头来过,所以本知识点讲解如何配置在其他盘下面
步骤 2 : 关闭IDEA
首先关闭已经打开的IDEA
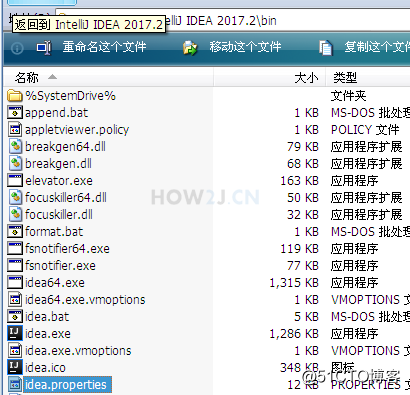
步骤 3 : 打开idea.properties
IDEA的配置信息存放在idea.properties,如图所示,我的位置是在:
D:\software\IntelliJ IDEA 2017.2\bin\idea.properties |
步骤 4 : 修改配置位置
如图所示,需要修改这两个位置。(注意要把前面的#去掉,否则就处于注释状态)
我是修改在了d:/software/.IntelliJIdea这个目录下,修改不放心的同学,可以复制使用我贴上来的idea.properties
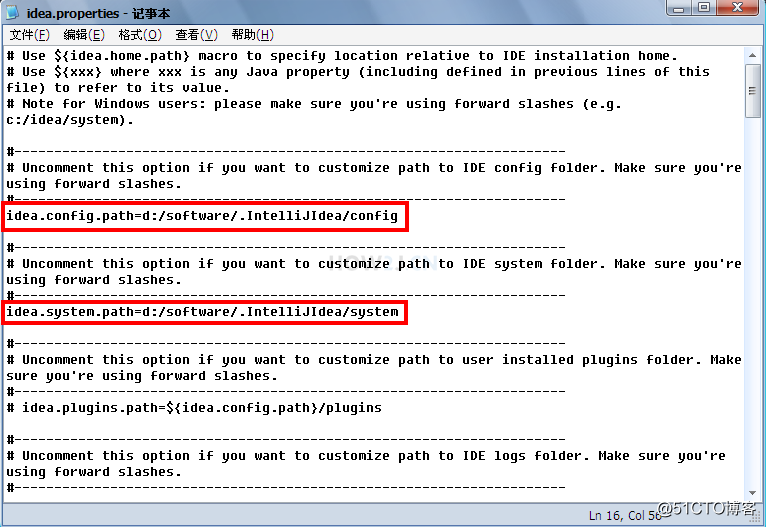
# Use ${idea.home.path} macro to specify location relative to IDE installation home. # Use ${xxx} where xxx is any Java property (including defined in previous lines of this file) to refer to its value. # Note for Windows users: please make sure you're using forward slashes (e.g. c:/idea/system). #--------------------------------------------------------------------- # Uncomment this option if you want to customize path to IDE config folder. Make sure you're using forward slashes. #--------------------------------------------------------------------- idea.config.path=d:/software/.IntelliJIdea/config #--------------------------------------------------------------------- # Uncomment this option if you want to customize path to IDE system folder. Make sure you're using forward slashes. #--------------------------------------------------------------------- idea.system.path=d:/software/.IntelliJIdea/system #--------------------------------------------------------------------- # Uncomment this option if you want to customize path to user installed plugins folder. Make sure you're using forward slashes. #--------------------------------------------------------------------- # idea.plugins.path=${idea.config.path}/plugins #--------------------------------------------------------------------- # Uncomment this option if you want to customize path to IDE logs folder. Make sure you're using forward slashes. #--------------------------------------------------------------------- # idea.log.path=${idea.system.path}/log #--------------------------------------------------------------------- # Maximum file size (kilobytes) IDE should provide code assistance for. # The larger file is the slower its editor works and higher overall system memory requirements are # if code assistance is enabled. Remove this property or set to very large number if you need # code assistance for any files available regardless their size. #--------------------------------------------------------------------- idea.max.intellisense.filesize=2500 #--------------------------------------------------------------------- # Maximum file size (kilobytes) IDE is able to open. #--------------------------------------------------------------------- idea.max.content.load.filesize=20000 #--------------------------------------------------------------------- # This option controls console cyclic buffer: keeps the console output size not higher than the specified buffer size (Kb). # Older lines are deleted. In order to disable cycle buffer use idea.cycle.buffer.size=disabled #--------------------------------------------------------------------- idea.cycle.buffer.size=1024 #--------------------------------------------------------------------- # Configure if a special launcher should be used when running processes from within IDE. # Using Launcher enables "soft exit" and "thread dump" features #--------------------------------------------------------------------- idea.no.launcher=false #--------------------------------------------------------------------- # To avoid too long classpath #--------------------------------------------------------------------- idea.dynamic.classpath=false #--------------------------------------------------------------------- # Uncomment this property to prevent IDE from throwing ProcessCanceledException when user activity # detected. This option is only useful for plugin developers, while debugging PSI related activities # performed in background error analysis thread. # DO NOT UNCOMMENT THIS UNLESS YOU'RE DEBUGGING IDE ITSELF. Significant slowdowns and lockups will happen otherwise. #--------------------------------------------------------------------- #idea.ProcessCanceledException=disabled #--------------------------------------------------------------------- # There are two possible values of idea.popup.weight property: "heavy" and "medium". # If you have WM configured as "Focus follows mouse with Auto Raise" then you have to # set this property to "medium". It prevents problems with popup menus on some # configurations. #--------------------------------------------------------------------- idea.popup.weight=heavy #--------------------------------------------------------------------- # Removing this property may lead to editor performance degradation under Windows. #--------------------------------------------------------------------- sun.java2d.d3d=false #--------------------------------------------------------------------- # Set swing.bufferPerWindow=false to workaround a slow scrolling in JDK6 (see IDEA-35883), # But this may lead to performance degradation in JDK8, because it disables a double buffering, # which is needed to eliminate tearing on blit-accelerated scrolling and to restore # a frame buffer content without the usual repainting, even when the EDT is blocked. #--------------------------------------------------------------------- swing.bufferPerWindow=true #--------------------------------------------------------------------- # Removing this property may lead to editor performance degradation under X Window. #--------------------------------------------------------------------- sun.java2d.pmoffscreen=false #--------------------------------------------------------------------- # Enables HiDPI support in JBRE #--------------------------------------------------------------------- sun.java2d.uiScale.enabled=true #--------------------------------------------------------------------- # Applicable to the Swing text components displaying HTML (except JEditorPane). # Rebases CSS size map depending on the component's font size to let relative # font size values (smaller, larger) scale properly. JBRE only. #--------------------------------------------------------------------- javax.swing.rebaseCssSizeMap=true #--------------------------------------------------------------------- # Workaround to avoid long hangs while accessing clipboard under Mac OS X. #--------------------------------------------------------------------- #ide.mac.useNativeClipboard=True #--------------------------------------------------------------------- # Maximum size (kilobytes) IDEA will load for showing past file contents - # in Show Diff or when calculating Digest Diff #--------------------------------------------------------------------- #idea.max.vcs.loaded.size.kb=20480 #--------------------------------------------------------------------- # IDEA file chooser peeks inside directories to detect whether they contain a valid project # (to mark such directories with a corresponding icon). # Uncommenting the option prevents this behavior outside of user home directory. #--------------------------------------------------------------------- #idea.chooser.lookup.for.project.dirs=false #----------------------------------------------------------------------- # Experimental option that does a number of things to make truly smooth scrolling possible: # # * Enables hardware-accelerated scrolling. # Blit-acceleration copies as much of the rendered area as possible and then repaints only newly exposed region. # This helps to improve scrolling performance and to reduce CPU usage (especially if drawing is compute-intensive). # # * Enables "true double buffering". # True double buffering is needed to eliminate tearing on blit-accelerated scrolling and to restore # frame buffer content without the usual repainting, even when the EDT is blocked. # # * Adds "idea.true.smooth.scrolling.debug" option. # Checks whether blit-accelerated scrolling is feasible, and if so, checks whether true double buffering is available. # # * Enables handling of high-precision mouse wheel events. # Although Java 7 introduced MouseWheelEven.getPreciseWheelRotation() method, JScrollPane doesn't use it so far. # Depends on the Editor / General / Smooth Scrolling setting, remote desktop detection and power save mode state. # Ideally, we need to patch the runtime (on Windows, Linux and Mac OS) to improve handling of the fine-grained input data. # This feature can be toggled via "idea.true.smooth.scrolling.high.precision" option. # # * Enables handling of pixel-perfect scrolling events. # Currently this mode is available only under Mac OS with JetBrains Runtime. # This feature can be toggled via "idea.true.smooth.scrolling.pixel.perfect" option. # # * Enables interpolation of scrolling input (scrollbar, mouse wheel, touchpad, keys, etc). # Smooths input which lacks both spatial and temporal resolution, performs the rendering asynchronously. # Depends on the Editor / General / Smooth Scrolling setting, remote desktop detection and power save mode state. # The feature can be tweaked using the following options: # "idea.true.smooth.scrolling.interpolation" - the main switch # "idea.true.smooth.scrolling.interpolation.scrollbar" - scrollbar interpolation # "idea.true.smooth.scrolling.interpolation.scrollbar.delay" - initial delay for scrollbar interpolation (ms) # "idea.true.smooth.scrolling.interpolation.mouse.wheel" - mouse wheel / touchpad interpolation # "idea.true.smooth.scrolling.interpolation.mouse.wheel.delay.min" - minimum initial delay for mouse wheel interpolation (ms) # "idea.true.smooth.scrolling.interpolation.mouse.wheel.delay.max" - maximum initial delay for mouse wheel interpolation (ms) # "idea.true.smooth.scrolling.interpolation.precision.touchpad" - precision touchpad interpolation # "idea.true.smooth.scrolling.interpolation.precision.touchpad.delay" - initial delay for precision touchpad interpolation (ms) # "idea.true.smooth.scrolling.interpolation.other" - interpolation of other input sources # "idea.true.smooth.scrolling.interpolation.other.delay" - initial delay for other input source interpolation (ms) # # * Adds on-demand horizontal scrollbar in editor. # The horizontal scrollbar is shown only when it's actually needed for currently visible content. # This helps to save editor space and to prevent occasional horizontal "jitter" on vertical touchpad scrolling. # This feature can be toggled via "idea.true.smooth.scrolling.dynamic.scrollbars" option. #----------------------------------------------------------------------- #idea.true.smooth.scrolling=true #--------------------------------------------------------------------- # IDEA can copy library .jar files to prevent their locking. # By default this behavior is enabled on Windows and disabled on other platforms. # Uncomment this property to override. #--------------------------------------------------------------------- # idea.jars.nocopy=false #--------------------------------------------------------------------- # The VM option value to be used to start a JVM in debug mode. # Some JREs define it in a different way (-XXdebug in Oracle VM) #--------------------------------------------------------------------- idea.xdebug.key=-Xdebug #----------------------------------------------------------------------- # Change to 'enabled' if you want to receive instant visual notifications # about fatal errors that happen to an IDE or plugins installed. #----------------------------------------------------------------------- idea.fatal.error.notification=disabled |
步骤 5 : 再次启动IDEA
再次启动后,就可以发现配置信息都保存在d:\software\.IntelljIIdea下了,这样即便是重装了系统,相关信息也不会丢失了。
Intellij IDEA系列教材 (四)- 基础 - Java Project
步骤 1 : 版本冲突提示
当前的IDEA是最新的(20170801), 需要最新的JDK版本1.8.0u112以上,但是我的是1.8u65,所以会出现这个警告信息。
经过实际使用,并未发现问题,所以我就没有升级JDK了。
不放心的同学,可以到官网下载最新版本的JDK。
http://www.oracle.com/technetwork/java/javase/downloads/index.html
步骤 2 : 点击create new project
当前(20170801)使用的IDEA是最新版本2017.2, 其所期待的JDK版本也是要高于或者等于1.8.0u112的,而我使用的JDK是1.8u65,所以会有这么一个警告弹出来。
经过一段时间的使用,并没有发现什么问题,所以我就懒得下载最新的JDK了。
不放心的同学,可以到oracle官网下载最新的JDK:http://java.oracle.com
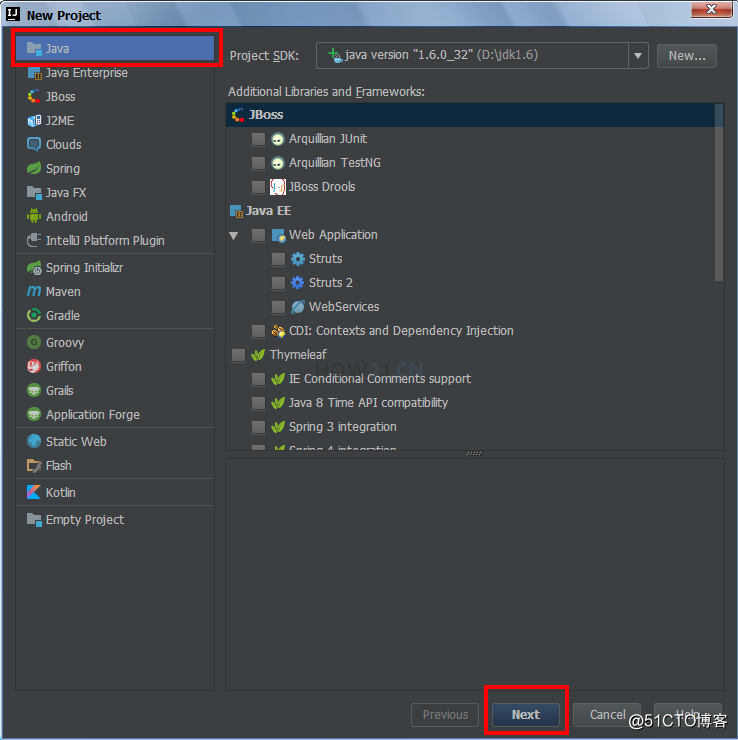
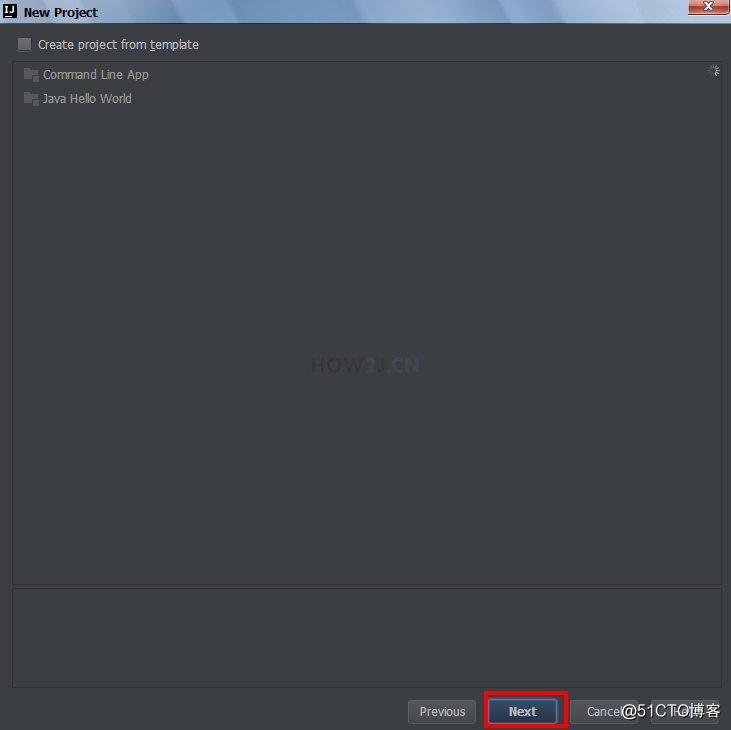
步骤 3 : Java 项目
如图所示,在左侧IDEA提供了很多项目,Java是默认的,右侧是可以采纳的框架,目前不需要,所以直接点击Next
步骤 4 : 选择模板
有两个模板,一个是命令行,一个是Hello World,也不用理睬,直接点Next
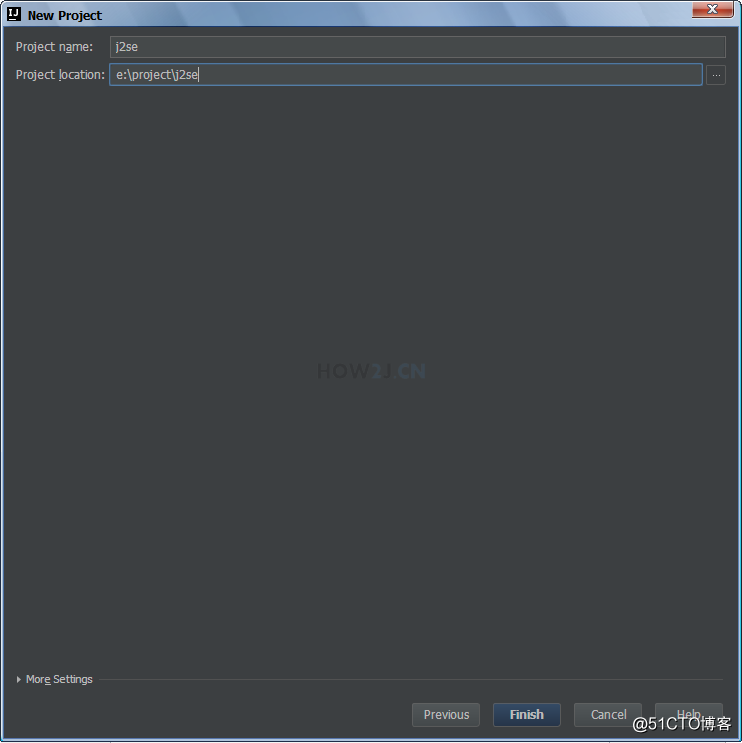
步骤 5 : 设置项目路径
项目目录采用e:\project\j2se,倘若这个目录已经存在,请先删除,以免带来无谓的干扰
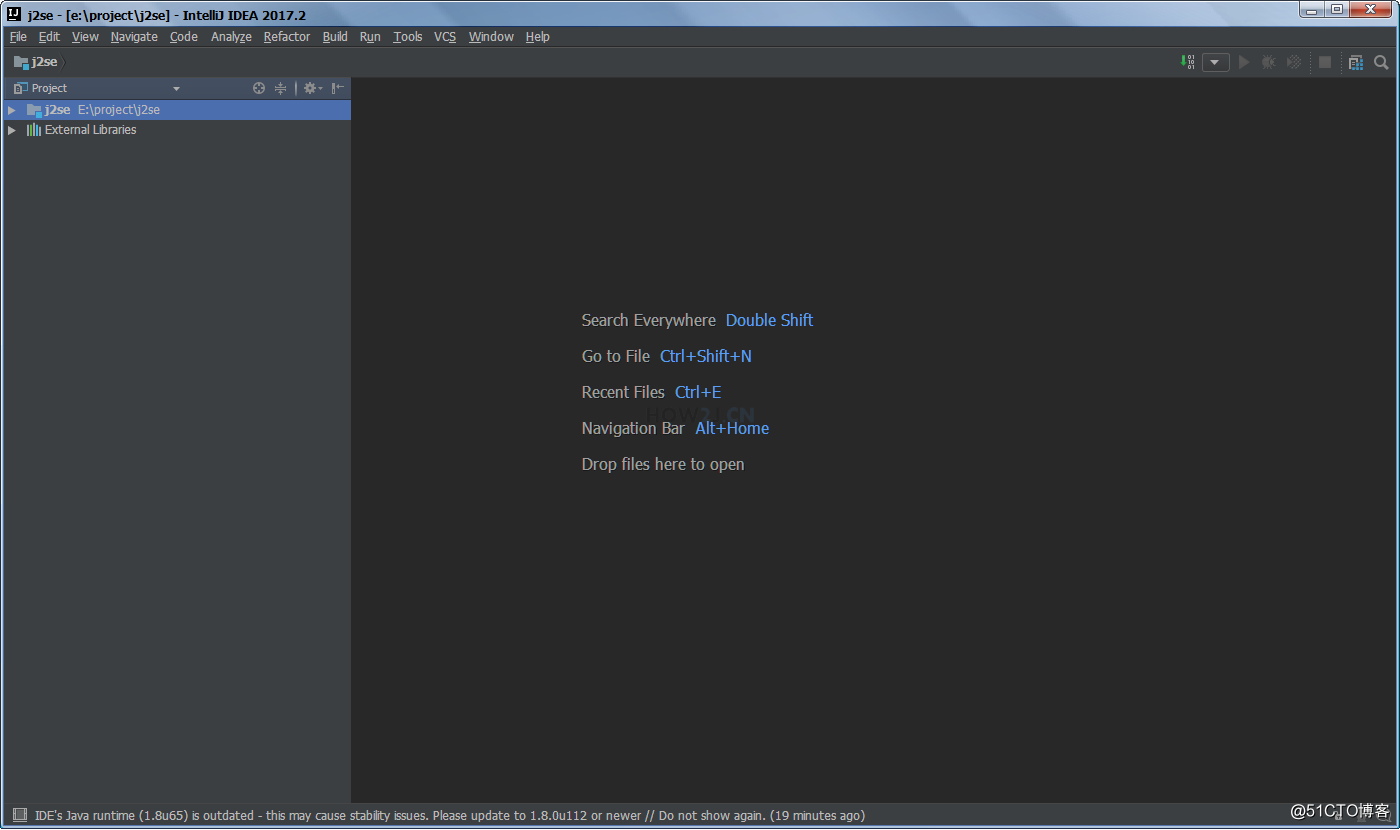
步骤 6 : 项目界面
如图所示,这是第一次映入眼帘的java项目视图。有点光溜溜的,接下来会做一些基本的配置,使得用起来更方便
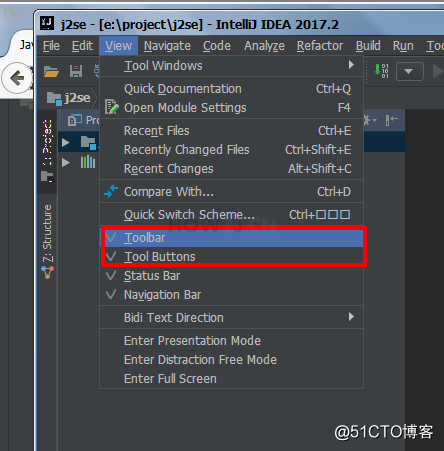
步骤 7 : 显示工具栏和工具按钮
菜单->View->勾选 Toolbar和Tool Buttons
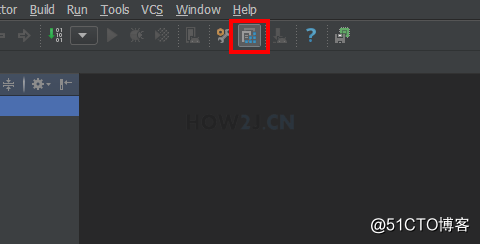
步骤 8 : 设置项目结构
在经过显示工具栏和工具按钮的操作之后,在工具栏就可以看到红框框中的按钮,点击设置项目结构
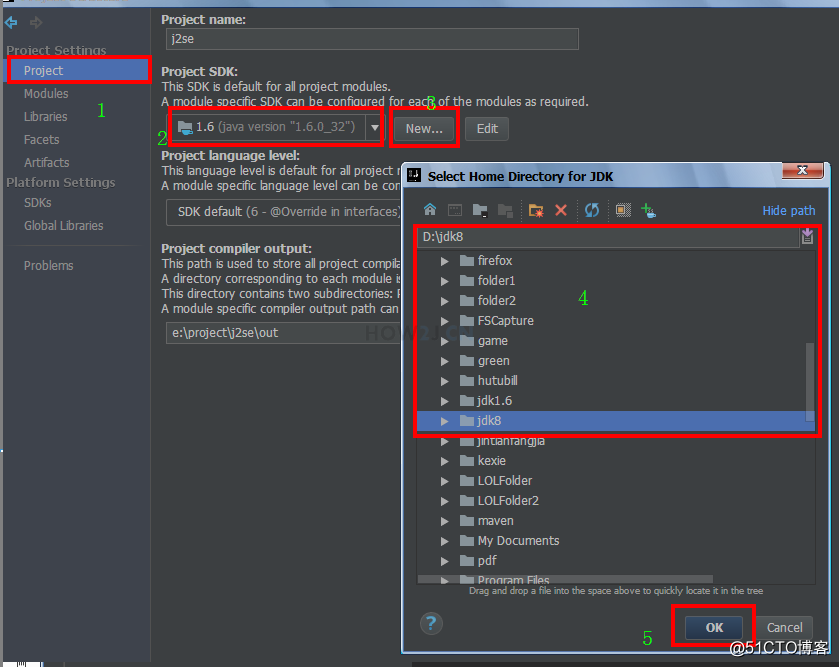
步骤 9 : 设置JDK
项目使用的JDK可能不是1.8的,所以在2这个位置看到的是1.6的,然后点击New ,选择电脑上JDK1.8的位置,然后点击OK,这样就是当前项目使用JDK1.8了
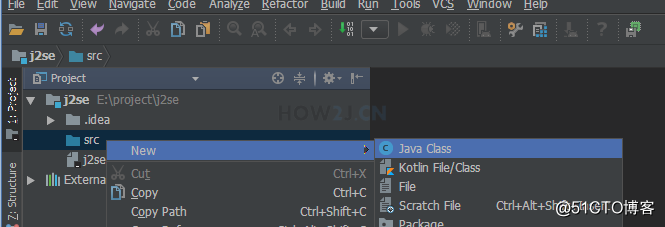
步骤 10 : 新建HelloWorld.java
在IDEA中,新建文件和上下文有关系,所以需要新建类,必须先选中src目录(因为其是JAVA源文件目录),然后点击右键->New ->Java Class
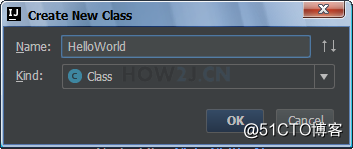
步骤 11 : 输入类名
输入类名 HelloWorld
步骤 12 : 编写代码
编写代码HelloWorld
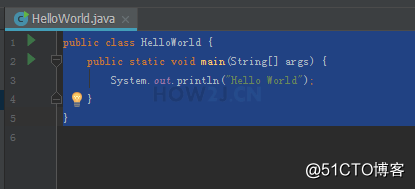
public class HelloWorld { public static void main(String args[]){ System.out.println("Hello World"); } } |
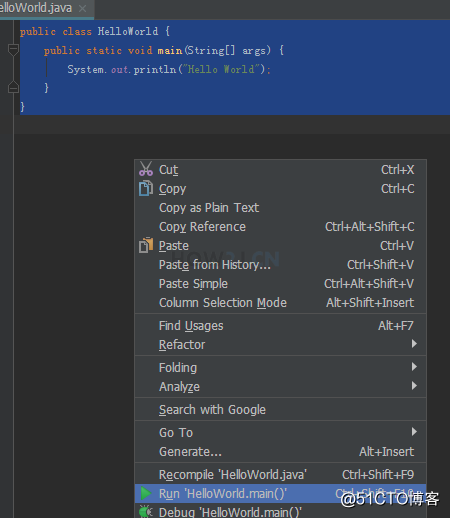
步骤 13 : 运行
在代码区域右键,然后点击Run 'HelloWorld.main()',或者使用如图所示的快捷键 Ctrl+Shift+F10
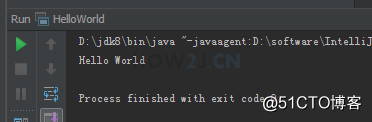
步骤 14 : 执行结果
在下方可以观察到执行结果
Intellij IDEA系列教材 (五)- 基础 - 增加 Jar
步骤 1 : 准备一个需要用到第三方的类
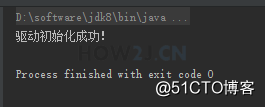
因为用到了第三方的类,同时又没有添加jar包,运行就会有异常抛出

public class TestJDBC { public static void main(String[] args) { try { Class.forName("com.mysql.jdbc.Driver"); System.out.println("驱动初始化成功!"); } catch (ClassNotFoundException e) { e.printStackTrace(); } } } |
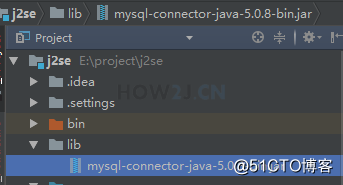
步骤 2 : 下载jar
下载下载区(点击进入)的jar,并复制在lib目录下(lib目录需要自己手动创建)
步骤 3 : 添加jar到路径
右键lib目录->Add as Library... ,弹出个对话框,点击ok

步骤 4 : 再次运行
Intellij IDEA系列教材 (六)- 基础 - Web Project
步骤 1 : 删除j2ee目录
本知识点基于目录e:\project\j2ee进行,为避免其他干扰影响学习,请先删除目录e:\project\j2ee
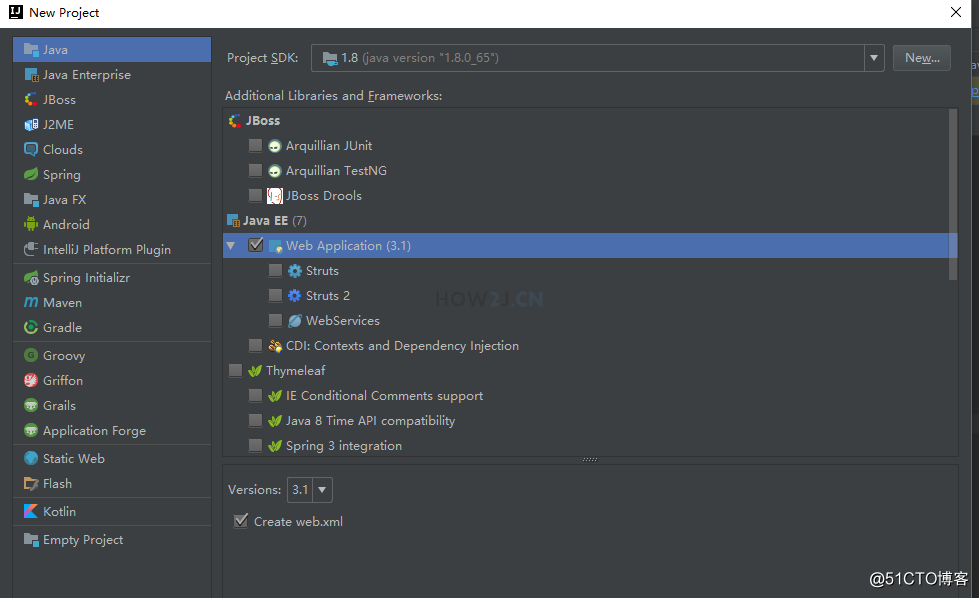
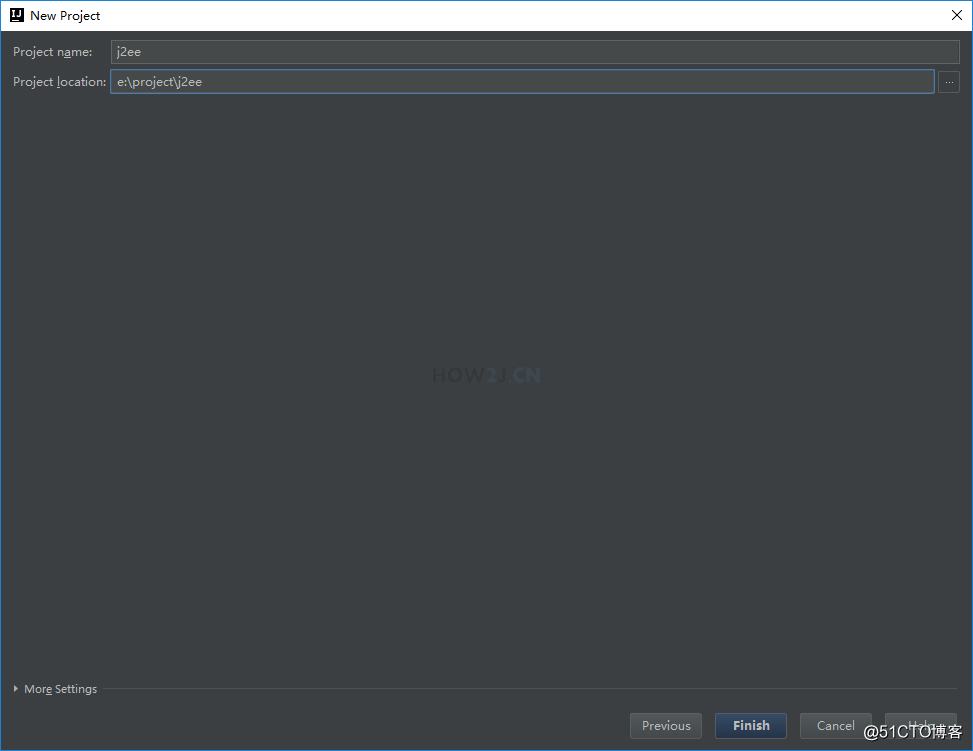
步骤 2 : 新建项目
菜单->File->New->Project->勾上 Web Application(3.1)->OK
步骤 3 : 项目目录
步骤 4 : 新建目录
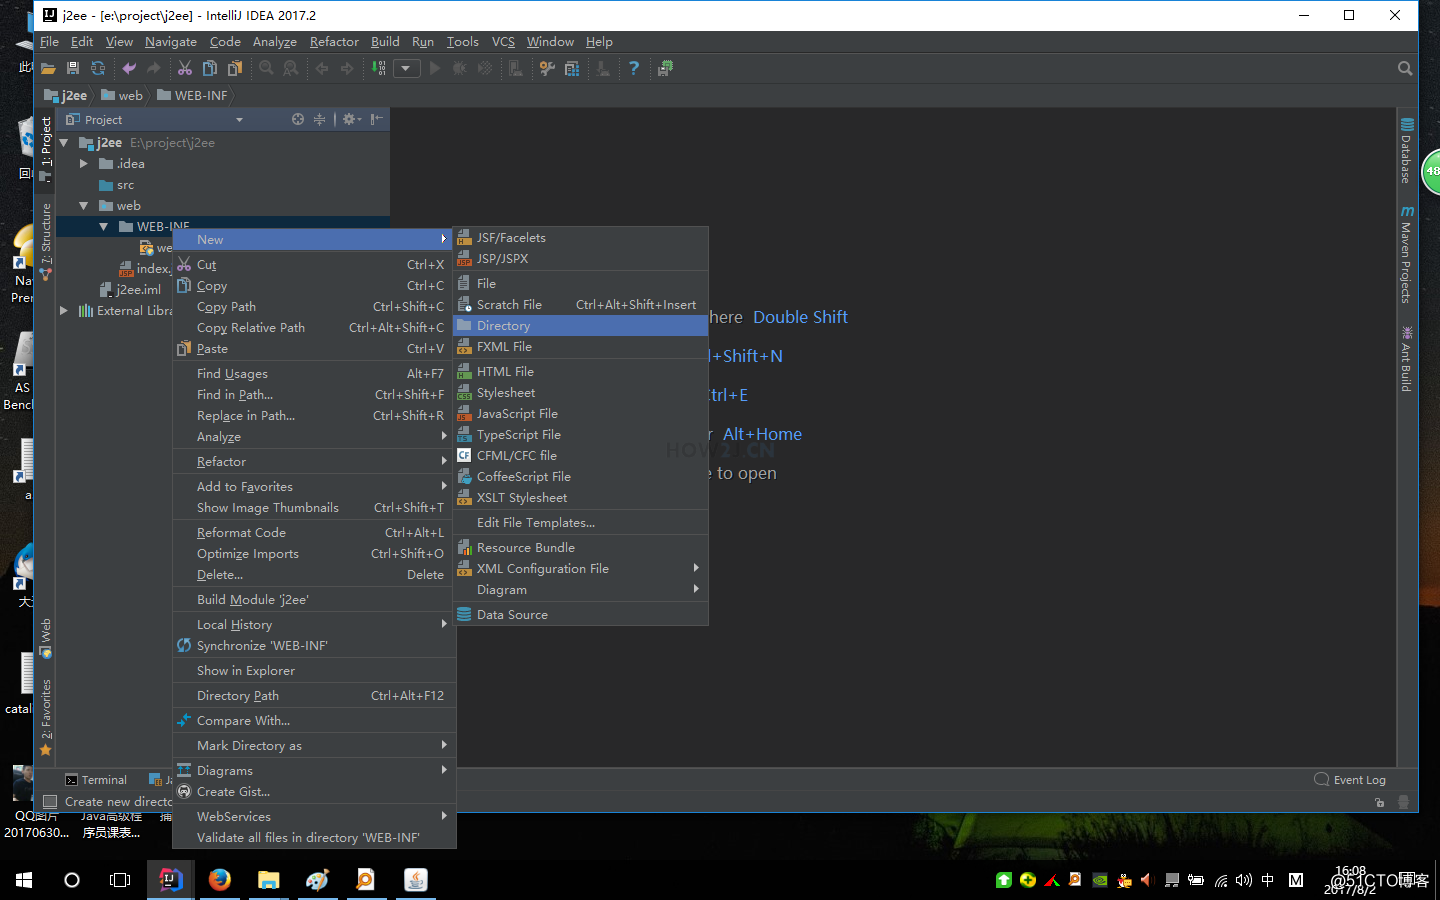
右键WEB-INF->New->Directory 新建两个目录:
classes和lib目录
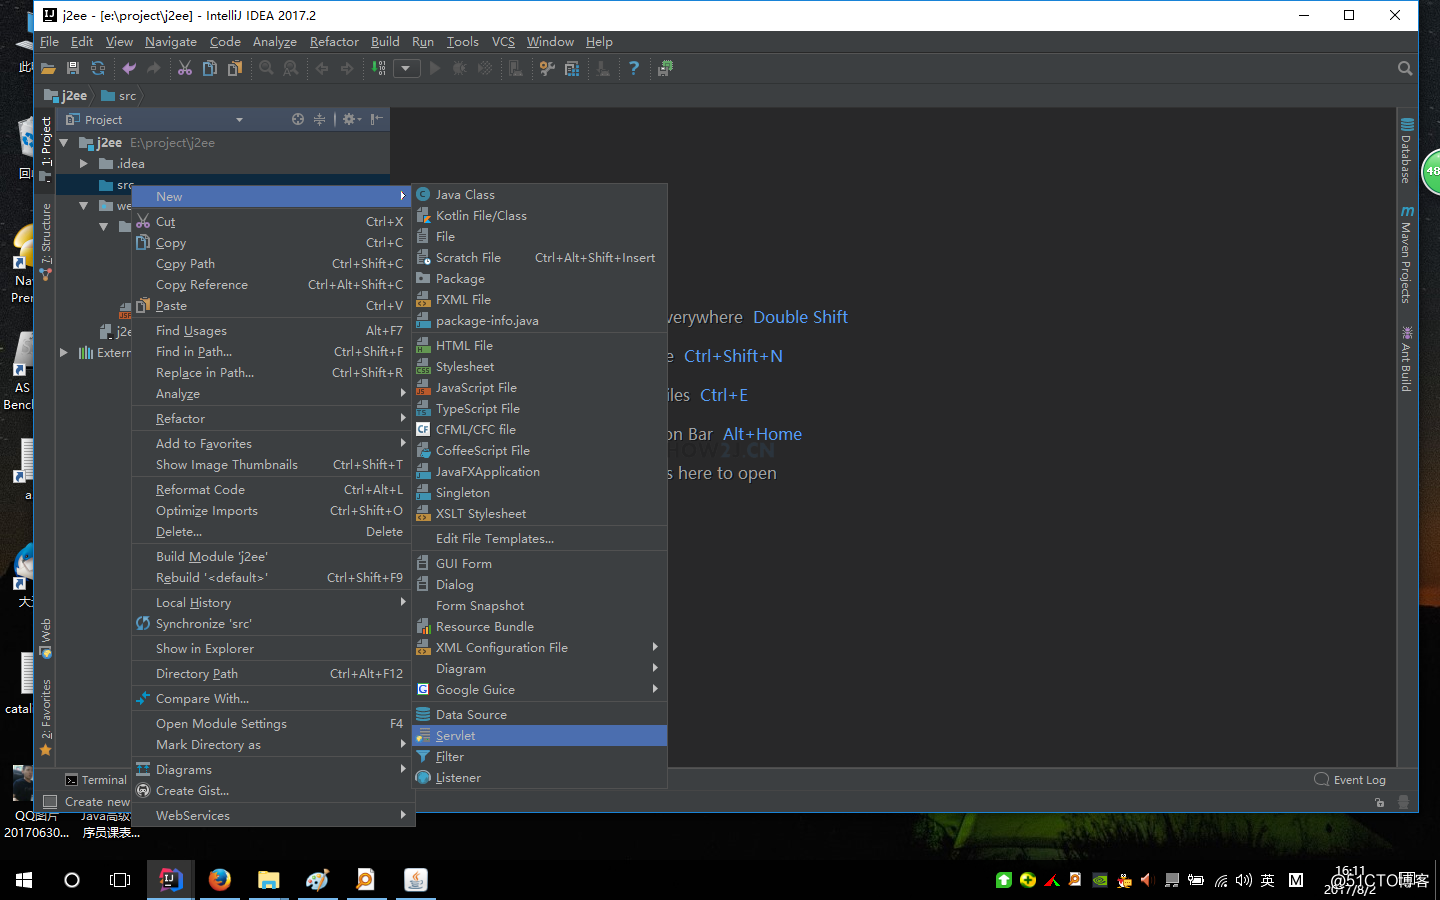
步骤 5 : 新建HelloServlet
选中src目录,然后右键鼠标->New->Servlet->输入HelloServlet
import java.io.IOException; import java.util.Date; import javax.servlet.http.HttpServlet; import javax.servlet.http.HttpServletRequest; import javax.servlet.http.HttpServletResponse; public class HelloServlet extends HttpServlet{ public void doGet(HttpServletRequest request, HttpServletResponse response){ try { response.getWriter().println("<h1>Hello Servlet!</h1>"); response.getWriter().println(new Date().toLocaleString()); } catch (IOException e) { // TODO Auto-generated catch block e.printStackTrace(); } } } |
步骤 6 : 下载jar包
观察此时的HelloServlet,发现很多类都无法识别,所以需要为项目添加jar包。
首先下载下载区(点击进入)的servlet.jar,然后复制到在新建目录步骤中新建的lib目录下

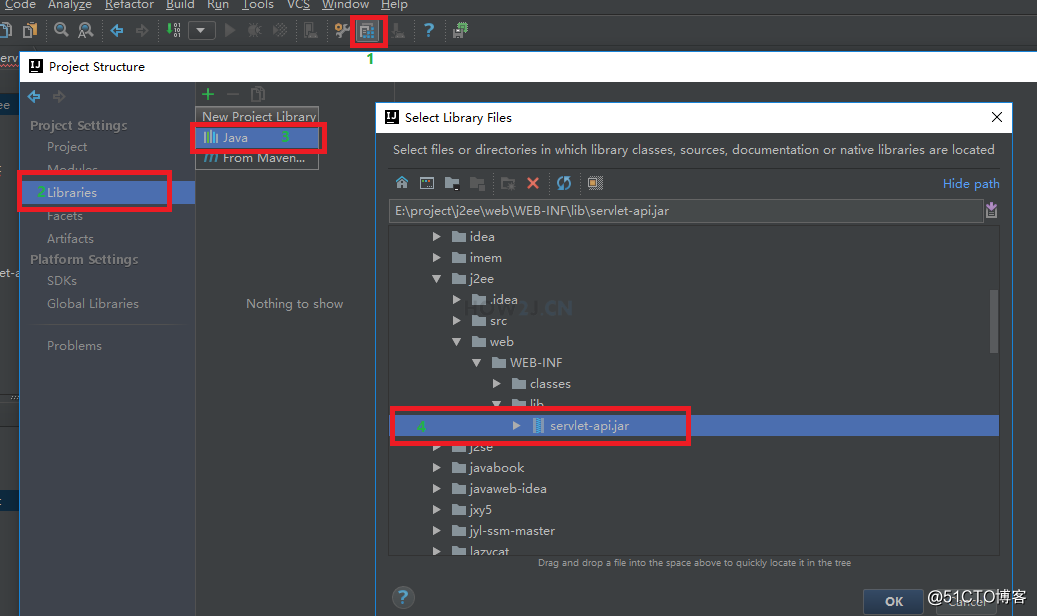
步骤 7 : 导入jar包
与上一个 添加jar到路径,] 教程中的做法不一样的,这里采用另一个做法:
1. 点击 project structure
2. 点击 Libraries
3. 点击加号,选中Java
4. 指定E:\project\j2ee\web\WEB-INF\lib\servlet-api.jar
5. 点击ok
这个行为做过之后服务端HelloServlet的编译错误就消失了
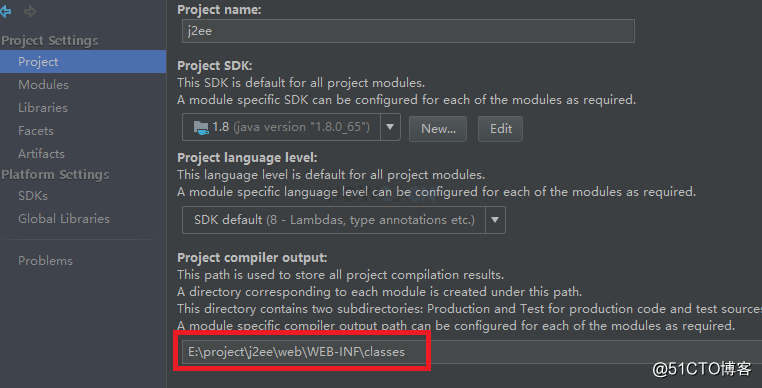
步骤 8 : 指定输出目录
1. 打开project structure
2. 设置 project complier output 为:
E:\project\j2ee\web\WEB-INF\classes |
步骤 9 : 修改web.xml
在web.xml中添加/hello路径的映射
<?xml version="1.0" encoding="UTF-8"?> <web-app xmlns="http://xmlns.jcp.org/xml/ns/javaee" xmlns:xsi="http://www.w3.org/2001/XMLSchema-instance" xsi:schemaLocation="http://xmlns.jcp.org/xml/ns/javaee http://xmlns.jcp.org/xml/ns/javaee/web-app_3_1.xsd" version="3.1"> <servlet> <servlet-name>HelloServlet</servlet-name> <servlet-class>HelloServlet</servlet-class> </servlet> <servlet-mapping> <servlet-name>HelloServlet</servlet-name> <url-pattern>/hello</url-pattern> </servlet-mapping> </web-app> |
步骤 10 : 启动Tomcat
接下来就是配置Tomcat并启动,这个将在下个知识点讲解:配置Tomcat
Intellij IDEA系列教材 (七)- 基础 - 配置Tomcat
步骤 1 : 接着上一个教程
本教材用于演示如何在IDEA中配置,并启动一个web项目。 这需要建立在一个web基础之上,所以请完成上一个知识点在IDEA中创建Web Project
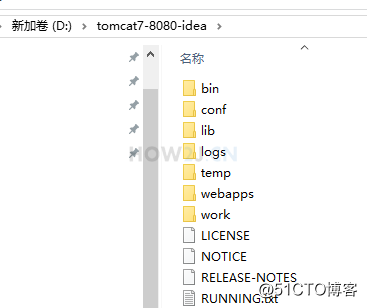
步骤 2 : 下载Tomcat
IDEA本身不带Tomcat,用的是自己下载的。 下载区(点击进入)有一个专门为IDEA准备的Tomcat,请下载并解压到d盘
 正在上传…重新上传取消

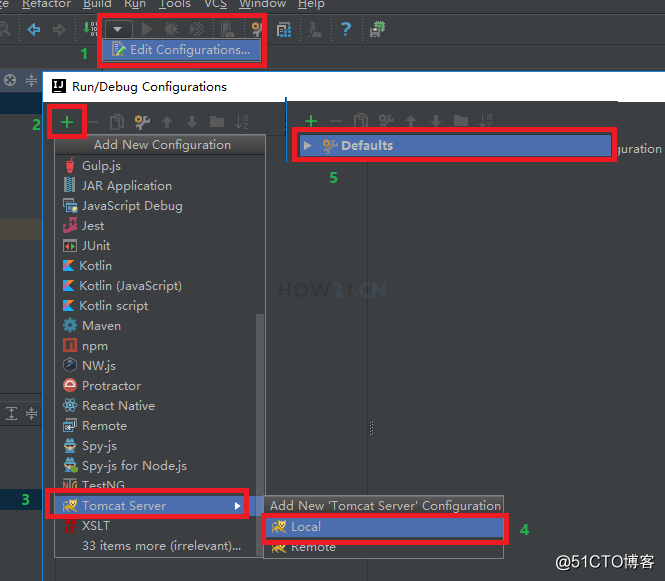
步骤 3 : 打开Tomcat配置
1. 点击红框框1那里的下拉,然后点击 Edit Configurations
2. 然后点击+号: 重要: 不要点到截图里面5的那个Defaults
3. 选Tomcat Servet
4. Local
打开配置页面
注: 步骤3,也许看不到Tomcat Server,那么点击下面那个 33 items more(irrelevant) 里面有Tomcat Server
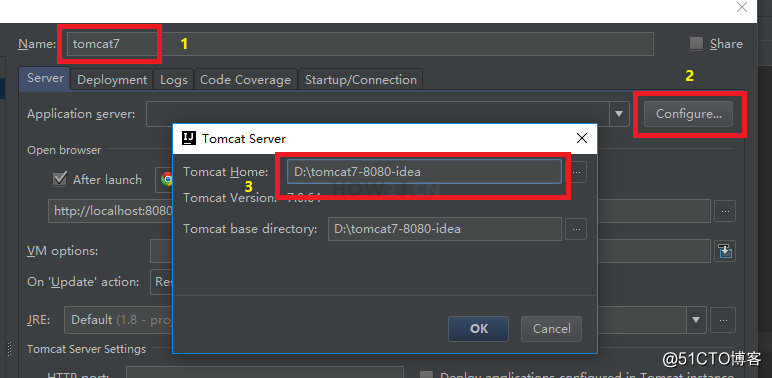
步骤 4 : 指定Tomcat路径
1. 在name这里输入tomcat7
2. 点击Configure..
3. 输入下载Tomcat步骤下载解压的Tomcat Home: d:\tomcat7-8080-idea
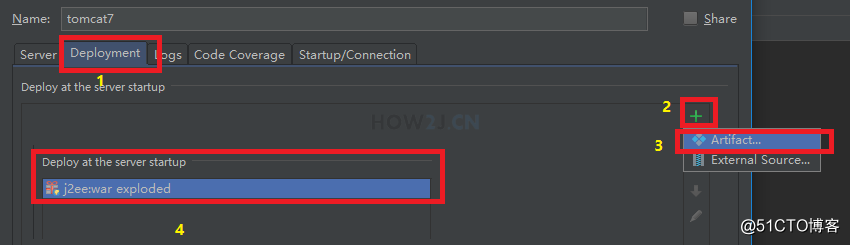
步骤 5 : 设置部署
接下来就需要指定当前项目部署到Tomcat中
1. 点击Deployment
2. 点击加号
3. 点击Artifact...
4. 自动生成 j2ee.war
最后. 点击OK
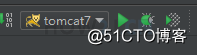
步骤 6 : 运行
点击绿色按钮
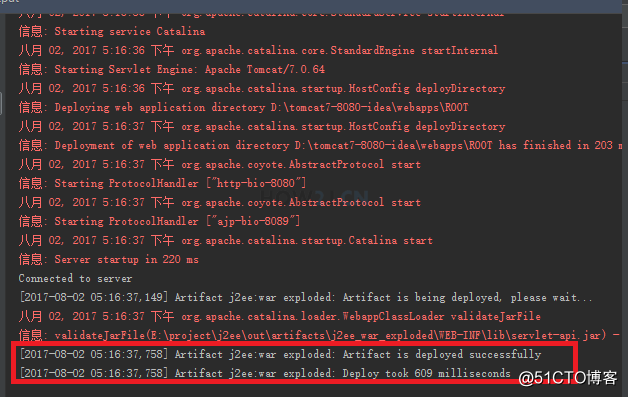
步骤 7 : 运行成功标志
如图所示,当出现j2ee.war deployed successfully的时候,就表示部署成功了
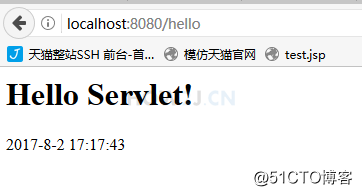
步骤 8 : 测试
输入如下地址,即可看到如图所示的页面效果
http://localhost:8080/hello |


 1万+
1万+

 被折叠的 条评论
为什么被折叠?
被折叠的 条评论
为什么被折叠?
 到【灌水乐园】发言


