


多数据库设置
SpringMVC+myBatis +druid环境
数据库:mysql
原理
借助spring的 org.springframework.jdbc.datasource.lookup.AbstractRoutingDataSource这个抽象类实现。
这是一个路由数据源的东西。有一个方法determineCurrentLookupKey
    /**
     * Determine the current lookup key. This will typically be
     * implemented to check a thread-bound transaction context.
     * <p>Allows for arbitrary keys. The returned key needs
     * to match the stored lookup key type, as resolved by the
     * {@link #resolveSpecifiedLookupKey} method.
     */
    protected abstract Object determineCurrentLookupKey();
每次去连数据库的时候,spring会调用这个方法去找对应的数据源。返回值即对应的数据源的LookUpKey.
我们通过重写这个方法,来实现获取自己想要的数据源来操作数据库。
实现
1、web.xml
<!-- 设置spring配置文件路径,默认为classpath:applicationContext.xml,可不进行配置 -->
<context-param>
    <param-name>contextConfigLocation</param-name>
    <param-value>classpath:spring/spring.xml</param-value>
</context-param>
2、spring.xml
<?xml version="1.0" encoding="UTF-8" ?>
<beans xmlns="http://www.springframework.org/schema/beans"
xmlns:xsi="http://www.w3.org/2001/XMLSchema-instance" xmlns:p="http://www.springframework.org/schema/p"
xmlns:context="http://www.springframework.org/schema/context"
xmlns:aop="http://www.springframework.org/schema/aop" xmlns:tx="http://www.springframework.org/schema/tx"
xsi:schemaLocation="http://www.springframework.org/schema/beans
   http://www.springframework.org/schema/beans/spring-beans.xsd
   http://www.springframework.org/schema/context
   http://www.springframework.org/schema/context/spring-context.xsd
   http://www.springframework.org/schema/tx
   http://www.springframework.org/schema/tx/spring-tx.xsd
   http://www.springframework.org/schema/aop
   http://www.springframework.org/schema/aop/spring-aop.xsd">

<!-- 使用annotation -->
<context:annotation-config />

<!-- 扫描类包,将标注Spring注解的类自动转化Bean,同时完成Bean的注ru -->
<context:component-scan base-package="/com.china" />

<import resource="spring-mybatis.xml"/>
<import resource="spring-security.xml"/>
</beans>
可见数据库配合在spring-mybatis.xml中
3、spring-mybatis.xml
<?xml version="1.0" encoding="UTF-8" ?>
<beans xmlns="http://www.springframework.org/schema/beans"
xmlns:xsi="http://www.w3.org/2001/XMLSchema-instance" xmlns:p="http://www.springframework.org/schema/p"
xmlns:context="http://www.springframework.org/schema/context"
xmlns:aop="http://www.springframework.org/schema/aop" xmlns:tx="http://www.springframework.org/schema/tx"
xsi:schemaLocation="http://www.springframework.org/schema/beans
   http://www.springframework.org/schema/beans/spring-beans.xsd
   http://www.springframework.org/schema/context
   http://www.springframework.org/schema/context/spring-context.xsd
   http://www.springframework.org/schema/tx
   http://www.springframework.org/schema/tx/spring-tx.xsd
   http://www.springframework.org/schema/aop
   http://www.springframework.org/schema/aop/spring-aop.xsd">


<!-- 引进数据库配置信息的properties -->
<bean
    class="com.china.common.WebPropertyPlaceholderConfigurer">
    <property name="locations">
        <value>classpath:conf/jdbc.properties</value>
    </property>
</bean>

<!-- 前台库(读写) -->
<bean id="userDataSource" class="com.alibaba.druid.pool.DruidDataSource"   init-method="init"
        destroy-method="close">
    <property name="driverClassName" value="${jdbc.driverClassName}" />
    <property name="url" value="${jdbc.url}" />
    <property name="username" value="${jdbc.username}" />
    <property name="password" value="${jdbc.password}" />
    <property name="initialSize" value="${pool.initialPoolSize}" />
    <property name="minIdle" value="${pool.minPoolSize}" />
    <property name="maxActive" value="${pool.maxPoolSize}" />
</bean>

<!-- 后台库(读写) -->
<bean id="adminDataSource" class="com.alibaba.druid.pool.DruidDataSource"   init-method="init"
        destroy-method="close">
    <property name="driverClassName" value="${jdbc.admin.driverClassName}" />
    <property name="url" value="${jdbc.admin.url}" />
    <property name="username" value="${jdbc.admin.username}" />
    <property name="password" value="${jdbc.admin.password}" />
    <property name="initialSize" value="${pool.admin.initialPoolSize}" />
    <property name="minIdle" value="${pool.admin.minPoolSize}" />
    <property name="maxActive" value="${pool.admin.maxPoolSize}" />
</bean>

<bean id="dataSource" class="com.china.base.dbsource.ChooseDataSource">
    <property name="targetDataSources">
      <map key-type="java.lang.String">
         <!-- write -->
         <entry key="user" value-ref="userDataSource"/>
         <!-- admin -->
         <entry key="${defaultDataSourceKey}" value-ref="adminDataSource"/>
      </map>
    </property>
    <property name="defaultTargetDataSource" ref="adminDataSource"/>

</bean>

<!-- 配置mybatis -->
<bean id="sqlSessionFactory" class="org.mybatis.spring.SqlSessionFactoryBean">
    <property name="dataSource" ref="dataSource" />
    <!-- 自动扫描映射文件 -->
    <property name="mapperLocations" value="classpath:com/china/*/mybatis/*.xml"></property>
    <property name="plugins">
        <array>
            <bean class="com.github.pagehelper.PageHelper">
                <property name="properties">
                    <value>
                        dialect=mysql
                        reasonable=true
                        supportMethodsArguments=true
                        params=count=countSql
                        autoRuntimeDialect=true
                    </value>
                </property>
            </bean>
        </array>
    </property>
</bean>

<!-- 将映射文件与mapper类关lian -->
<bean class="tk.mybatis.spring.mapper.MapperScannerConfigurer">
    <property name="basePackage" value="com.china.*.mapper" />
    <property name="markerInterface" value="com.china.base.mapper.BaseMapper"/>
</bean>

<bean id="sqlSession" class="org.mybatis.spring.SqlSessionTemplate" scope="prototype">
    <constructor-arg index="0" ref="sqlSessionFactory" />
</bean>

<!-- 事务管理配置 -->
<bean id="transactionManager"
    class="org.springframework.jdbc.datasource.DataSourceTransactionManager"
    p:dataSource-ref="dataSource" />

<!-- 通过AOP配置提供事务增强,让service层中的所有方法拥有事wu -->
<aop:config proxy-target-class="true">
    <aop:pointcut id="serviceMethod" expression=" execution(* com.china.*.service.*.*(..))" />
    <aop:advisor pointcut-ref="serviceMethod" advice-ref="txAdvice" />
</aop:config>
<tx:advice id="txAdvice" transaction-manager="transactionManager">
    <tx:attributes>
        <tx:method name="add*" propagation="REQUIRED"/>
        <tx:method name="save*" propagation="REQUIRED"/>
        <tx:method name="edit*" propagation="REQUIRED"/>
        <tx:method name="insert*" propagation="REQUIRED"/>
        <tx:method name="update*" propagation="REQUIRED"/>
        <tx:method name="delete*" propagation="REQUIRED"/>
    </tx:attributes>
</tx:advice>

<!-- 为业务逻辑层的方法解析@DataSource注解  为当前线程的routeholder注入数据源key -->
<bean id="dataSourceAspect" class="com.china.base.dbsource.DataSourceAspect" />
<aop:config proxy-target-class="true">
    <aop:aspect id="dataSourceAspect" ref="dataSourceAspect" order="1">
        <aop:pointcut id="tx" expression="execution(* com.china.*.service.*.*(..)) "/>
        <aop:before pointcut-ref="tx" method="before" />
    </aop:aspect>
</aop:config>
</beans>
①sqlSessionFactory 配置的是指向 dataSource
②dataSource的com.china.base.dbsource.ChooseDataSource如下:
package com.china.base.dbsource;

import org.springframework.jdbc.datasource.lookup.AbstractRoutingDataSource;

public class ChooseDataSource extends AbstractRoutingDataSource  {
    /**
     * 获取与数据源相关的key
     * 此key是Map<String,DataSource> resolvedDataSources 中与数据源绑定的key值
     * 在通过determineTargetDataSource获取目标数据源时使用
     */
    @Override
    protected Object determineCurrentLookupKey() {
        // TODO Auto-generated method stub
        return HandleDataSource.getDataSource();
    }

}
此方法继承AbstractRoutingDataSource类,并重写determineCurrentLookupKey方法。通过自定义的方法来获取数据源。(HandleDataSource是自己写的方法。)
③通过AOP来设置切换数据源。DataSourceAspect(自己写切换方法)
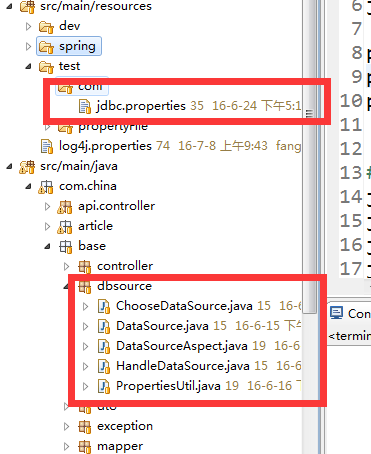
附件
汇总入下图:
1、数据库配置文件jdbc.properties
#只读数据库
jdbc.read.driverClassName=com.mysql.jdbc.Driver
jdbc.read.url=jdbc:mysql://127.0.0.1:3307/read
jdbc.read.username=username
jdbc.read.password=password

pool.read.initialPoolSize=5
pool.read.minPoolSize=5
pool.read.maxPoolSize=200

#读写数据库
jdbc.admin.driverClassName=com.mysql.jdbc.Driver
jdbc.admin.url=jdbc:mysql://127.0.0.1:3307/admin
jdbc.admin.username=username
jdbc.admin.password=password

pool.admin.initialPoolSize=5
pool.admin.minPoolSize=5
pool.admin.maxPoolSize=200

#默认数据源ID(Spring-mybatis.xml里配置)
defaultDataSourceKey = admin
#defaultTargetDataSource = adminDataSource
2、ChooseDataSource.java 重写获取数据源方法
package com.china.base.dbsource;

import org.springframework.jdbc.datasource.lookup.AbstractRoutingDataSource;

public class ChooseDataSource extends AbstractRoutingDataSource  {
    /**
     * 获取与数据源相关的key
     * 此key是Map<String,DataSource> resolvedDataSources 中与数据源绑定的key值
     * 在通过determineTargetDataSource获取目标数据源时使用
     */
    @Override
    protected Object determineCurrentLookupKey() {
        // TODO Auto-generated method stub
        return HandleDataSource.getDataSource();
    }

}
3、DataSource.java 增加注解
package com.china.base.dbsource;

import java.lang.annotation.ElementType;
import java.lang.annotation.Target;
import java.lang.annotation.Retention;
import java.lang.annotation.RetentionPolicy;
/***
 * RUNTIME
 * 编译器将把注释记录在类文件中,在运行时 VM 将保留注释,因此可以反射性地读取。
 * @author jiawenbo
 *
 */
@Retention(RetentionPolicy.RUNTIME)
@Target(ElementType.METHOD)
public @interface DataSource {
    String value();
}
4、DataSourceAspect.java 通过读取@DataSource注解具体实现切换方法
package com.china.base.dbsource;

import java.lang.reflect.Method;

import org.apache.log4j.Logger;
import org.aspectj.lang.JoinPoint;
import org.aspectj.lang.reflect.MethodSignature;


/**
 * 执行dao方法之前的切面
 * 获取datasource对象之前往HandleDataSource中指定当前线程数据源路由的key
 * @author Administrator
 *
 */
public class DataSourceAspect {


    private Logger logger = Logger.getLogger(DataSourceAspect.class);
    /**
     * 在dao层方法之前获取datasource对象之前在切面中指定当前线程数据源路由的key
     */
     public void before(JoinPoint point)
        {


             Object target = point.getTarget();
             System.out.println(target.toString());
             String method = point.getSignature().getName();
             logger.info(method);
             Class<?>[] classz = target.getClass().getInterfaces();
             Class<?>[] parameterTypes = ((MethodSignature) point.getSignature())
                     .getMethod().getParameterTypes();
             try {
                 Method m = classz[0].getMethod(method, parameterTypes);
                 if (m != null && m.isAnnotationPresent(DataSource.class)) {
                     DataSource data = m.getAnnotation(DataSource.class);
                     logger.info("调用方法:"+m.getName());
                     logger.info("用户选择数据库库类型:"+data.value());
                     HandleDataSource.putDataSource(data.value());
                 }else{
                     //默认的数据库源Key
                     String defaultDataSourceKey = PropertiesUtil.getValue("defaultDataSourceKey");
                     //当前线程的数据源key
                     String nowDataSource = HandleDataSource.getDataSource();
                     if(defaultDataSourceKey==null){
                         defaultDataSourceKey = "";
                     }
                     if(nowDataSource!=null&&!nowDataSource.equals(defaultDataSourceKey)){
                         logger.info("无@DataSource默认数据库类型:"+defaultDataSourceKey);
                         HandleDataSource.putDataSource(defaultDataSourceKey);
                     }

                 }

             } catch (Exception e) {
                 e.printStackTrace();
             }
        }
}
5、HandleDataSource 保存当前数据源
package com.china.base.dbsource;

/**
 * 保存当前线程数据源的key
 * @author
 * @version 1.0
 *
 */
public class HandleDataSource {
    public static final ThreadLocal<String> holder = new ThreadLocal<String>();

    /**
     * 绑定当前线程数据源路由的key
     * @param key
     */
    public static void putDataSource(String datasource) {
        holder.set(datasource);
    }

    /**
     * 获取当前线程的数据源路由的key
     * @return
     */
    public static String getDataSource() {
        return holder.get();
    }
}
6、PropertiesUtil读取配置文件。(可有可无)
package com.china.base.dbsource;

import java.io.IOException;
import java.io.InputStream;
import java.util.Properties;

/**
 * 读取jdbc配置文件
 * @author jiawenbo
 *
 */
public class PropertiesUtil {

    public static Properties prop = new Properties();
    static{
        try {
            //编译后目录 在/conf/
            InputStream in = PropertiesUtil.class.getResourceAsStream("/conf/jdbc.properties");
            prop.load(in);
            in.close();
        } catch (IOException e) {
            e.printStackTrace();
        }
    }
    public static String getValue(String key){
        return prop.getProperty(key, "");
    }
}
修改
系统上线后发现数据库链接没有释放,Druid默认的配置没有找到,所以手动配置,修改数据连接池配置如下:
<bean id="dataSource" class="com.alibaba.druid.pool.DruidDataSource"   init-method="init"
            destroy-method="close">
        <property name="driverClassName" value="${jdbc.driverClassName}" />
        <property name="url" value="${jdbc.url}" />
        <property name="username" value="${jdbc.username}" />
        <property name="password" value="${jdbc.password}" />
        <property name="initialSize" value="${pool.initialPoolSize}" />
        <property name="minIdle" value="${pool.minPoolSize}" />
        <property name="maxActive" value="${pool.maxPoolSize}" />
        <property name="timeBetweenEvictionRunsMillis" value="60000" />
        <property name="minEvictableIdleTimeMillis" value="300000" />
    </bean>
增加了
<property name="timeBetweenEvictionRunsMillis" value="60000" />
<property name="minEvictableIdleTimeMillis" value="300000" /> 


 5163
5163

 被折叠的 条评论
为什么被折叠?
被折叠的 条评论
为什么被折叠?
 到【灌水乐园】发言


