


服务端:
创建springBoot 项目
1.步骤 导入在pom.xml中 导入 eureka-server的 jar包
2.步骤 在主方法加注解 @EnableEurekaServer
3. 步骤 在配置config
1.步骤pox.xml:
<?xml version="1.0" encoding="UTF-8"?>
<project xmlns="http://maven.apache.org/POM/4.0.0" xmlns:xsi="http://www.w3.org/2001/XMLSchema-instance"
	xsi:schemaLocation="http://maven.apache.org/POM/4.0.0 https://maven.apache.org/xsd/maven-4.0.0.xsd">
	<modelVersion>4.0.0</modelVersion>
	<parent>
		<groupId>org.springframework.boot</groupId>
		<artifactId>spring-boot-starter-parent</artifactId>
		<version>3.1.3</version>
		<relativePath/> <!-- lookup parent from repository -->
	</parent>

  <!-- Generated by https://start.springboot.io -->
  <!-- 优质的 spring/boot/data/security/cloud 框架中文文档尽在 => https://springdoc.cn -->
	<groupId>com.csdn</groupId>
	<artifactId>springboot-ms-eureka-server</artifactId>
	<version>0.0.1-SNAPSHOT</version>
	<packaging>war</packaging>
	<name>springboot-ms-eureka-server</name>
	<description>eureka服务端</description>
	<properties>
		<java.version>17</java.version>
		<spring-cloud.version>2022.0.4</spring-cloud.version>
	</properties>
	<dependencies>
		<dependency>
			<groupId>org.springframework.boot</groupId>
			<artifactId>spring-boot-starter-web</artifactId>
		</dependency>
		<!-- eureka 1.步骤-->
		<dependency>
			<groupId>org.springframework.cloud</groupId>
			<artifactId>spring-cloud-starter-netflix-eureka-server</artifactId>
		</dependency>

		<dependency>
			<groupId>org.springframework.boot</groupId>
			<artifactId>spring-boot-starter-tomcat</artifactId>
			<scope>provided</scope>
		</dependency>
		<dependency>
			<groupId>org.springframework.boot</groupId>
			<artifactId>spring-boot-starter-test</artifactId>
			<scope>test</scope>
		</dependency>
	</dependencies>
	<dependencyManagement>
		<dependencies>
			<dependency>
				<groupId>org.springframework.cloud</groupId>
				<artifactId>spring-cloud-dependencies</artifactId>
				<version>${spring-cloud.version}</version>
				<type>pom</type>
				<scope>import</scope>
			</dependency>
		</dependencies>
	</dependencyManagement>

	<build>
		<plugins>
			<plugin>
				<groupId>org.springframework.boot</groupId>
				<artifactId>spring-boot-maven-plugin</artifactId>
			</plugin>
		</plugins>
	</build>

</project>
2.步骤 :加注解@EnableEurekaServer
package com.csdn;

import org.springframework.boot.SpringApplication;
import org.springframework.boot.autoconfigure.SpringBootApplication;
import org.springframework.cloud.netflix.eureka.server.EnableEurekaServer;


@SpringBootApplication
@EnableEurekaServer //2步骤 加注解@EnableEurekaServer
public class MainApplication {

	public static void main(String[] args) {
		SpringApplication.run(MainApplication .class, args);
	}

}
3. 步骤 : resources/application.properties 进行配置
# 3. 步骤config 配置
#eureka服务端应用的端口默认是8761
server.port=9000
#表示是否将自己注册到Eureka Server,默认为true,由于当前应用就是Eureka Server,故而设为false
eureka.client.register-with-eureka=false
# 表示是否从Eureka Server获取注册信息,默认为true,因为这是一个单点的Eureka Server,不需要同步其他的Eureka Server节点的数据,故而设为false
eureka.client.fetch-registry=false
#暴露给其他eureka client客户端 的注册地址
eureka.client.service-url.defaultZone: http://localhost:9000/eureka/
客户端:
1.步骤 导入在pom.xml中 导入 eureka-client的 jar包
 <!-- 1.步骤eureka jar 包-->
        <dependency>
            <groupId>org.springframework.cloud</groupId>
            <artifactId>spring-cloud-starter-netflix-eureka-client</artifactId>
        </dependency>
2. 步骤 : resources/application.properties 进行配置
# 3. 步骤config 配置
server.port=8001
#注册到eureka服务端的微服务名称
spring.application.name=ms-consumer-user
#注册到eureka服务端的地址
eureka.client.service-url.defaultZone=http://localhost:9000/eureka/
#点击具体的微服务,右下角是否显示ip
eureka.instance.prefer-ip-address=true
#显示微服务的名称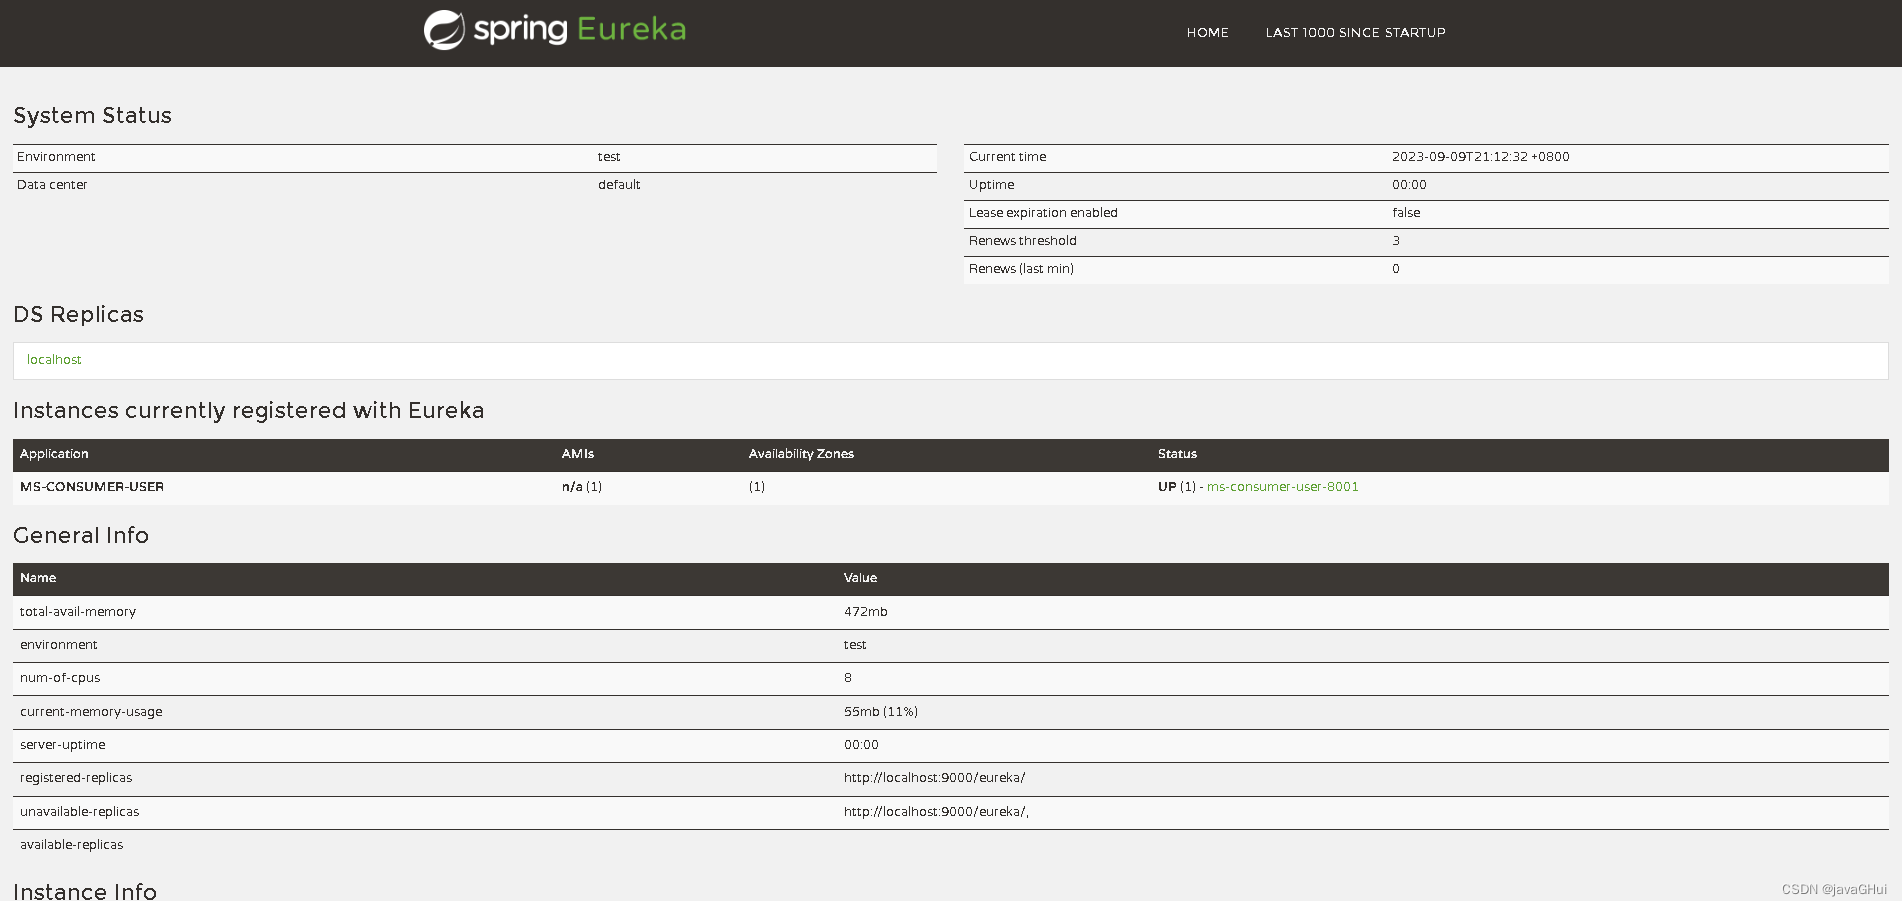
eureka.instance.instance-id=ms-consumer-user-8001URL访问地址:http://localhost:9000/
| Operation | HTTP action | Description |
| Register new application instance | POST /eureka/v2/apps/appID | Input: JSON/XMLpayload HTTP Code: 204 on success |
| De-register application instance | DELETE /eureka/v2/apps/appID/instanceID | HTTP Code: 200 on success |
| Send application instance heartbeat | PUT /eureka/v2/apps/appID/instanceID | HTTP Code: * 200 on success * 404 if instanceIDdoesn’t exist |
| Query for all instances | GET /eureka/v2/apps | HTTP Code: 200 on success Output: JSON/XML |
| Query for all appIDinstances | GET /eureka/v2/apps/appID | HTTP Code: 200 on success Output: JSON/XML |
| Query for a specific appID/instanceID | GET /eureka/v2/apps/appID/instanceID | HTTP Code: 200 on success Output: JSON/XML |
| Query for a specific instanceID | GET /eureka/v2/instances/instanceID | HTTP Code: 200 on success Output: JSON/XML |
| Take instance out of service | PUT /eureka/v2/apps/appID/instanceID/status?value=OUT_OF_SERVICE | HTTP Code: * 200 on success * 500 on failure |
| Move instance back into service (remove override) | DELETE /eureka/v2/apps/appID/instanceID/status?value=UP (The value=UP is optional, it is used as a suggestion for the fallback status due to removal of the override) | HTTP Code: * 200 on success * 500 on failure |
| Update metadata | PUT /eureka/v2/apps/appID/instanceID/metadata?key=value | HTTP Code: * 200 on success * 500 on failure |
| Query for all instances under a particular vip address | GET /eureka/v2/vips/vipAddress | * HTTP Code: 200 on success Output: JSON/XML * 404 if the vipAddress does not exist. |
| Query for all instances under a particular secure vip address | GET /eureka/v2/svips/svipAddress | * HTTP Code: 200 on success Output: JSON/XML * 404 if the svipAddress does not exist. |


 2215
2215


 被折叠的 条评论
为什么被折叠?
被折叠的 条评论
为什么被折叠?
 到【灌水乐园】发言


