


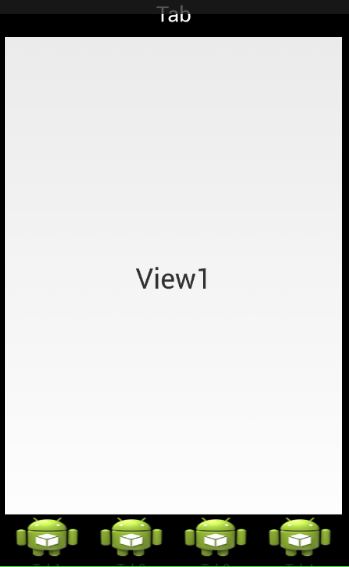
1.效果如下:
2.实现思路:
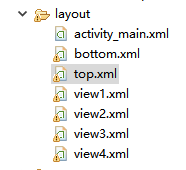
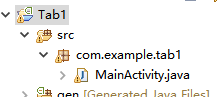
1.目录结构:
2.代码编写:
activity_main.xml:
<LinearLayout xmlns:android="http://schemas.android.com/apk/res/android"
    xmlns:tools="http://schemas.android.com/tools"
    android:layout_width="match_parent"
    android:layout_height="match_parent"
    android:orientation="vertical">

    <include layout="@layout/top"/>

    <android.support.v4.view.ViewPager
        android:layout_width="match_parent"
        android:layout_height="0dp"
        android:layout_weight="1"
        android:id="@+id/id_view_pager"
        >
    </android.support.v4.view.ViewPager>
    <include layout="@layout/bottom"/>
</LinearLayout>
bottom.xml:
只给出前两个
<LinearLayout xmlns:android="http://schemas.android.com/apk/res/android"
    android:layout_width="match_parent"
    android:layout_height="55dp"
    android:orientation="horizontal"
    android:background="#000000"
     >

    <LinearLayout
        android:layout_width="wrap_content"
        android:layout_height="wrap_content"
        android:id="@+id/tab_1"
        android:layout_weight="1"
        android:orientation="vertical"
        >
        <ImageButton
            android:layout_width="fill_parent"
            android:layout_height="wrap_content"
            android:id="@+id/img_1"
            android:background="@drawable/ic_launcher"
            />
        <TextView
            android:layout_width="wrap_content"
            android:layout_height="wrap_content"
            android:text="Tab1"
            android:layout_gravity="center"
            />
    </LinearLayout>
    <LinearLayout
        android:layout_width="wrap_content"
        android:layout_height="wrap_content"
        android:id="@+id/tab_2"
        android:layout_weight="1"
        android:orientation="vertical"
        >
        <ImageButton
            android:layout_width="fill_parent"
            android:layout_height="wrap_content"
            android:id="@+id/img_2"
            android:background="@drawable/ic_launcher"
            />
        <TextView
            android:layout_width="wrap_content"
            android:layout_height="wrap_content"
            android:text="Tab2"
            android:layout_gravity="center"
            />
    </LinearLayout>
view1.xml:
<?xml version="1.0" encoding="utf-8"?>
<LinearLayout xmlns:android="http://schemas.android.com/apk/res/android"
    android:layout_width="match_parent"
    android:layout_height="match_parent"
    android:orientation="vertical" >

    <TextView
        android:id="@+id/view_1"
        android:layout_width="match_parent"
        android:layout_height="match_parent"
        android:text="View1"
        android:gravity="center"
        android:textSize="30sp"
        />
</LinearLayout>
MainActivity.java:
    private ViewPager viewPager;
    private PagerAdapter adapter;
    private List<View> viewList = new ArrayList<View>();
    //img
    private ImageButton img1,img2,img3,img4;
    //tab view
    private LinearLayout tab1,tab2,tab3,tab4;

    @Override
    protected void onCreate(Bundle savedInstanceState) {
        super.onCreate(savedInstanceState);
        requestWindowFeature(Window.FEATURE_NO_TITLE);
        setContentView(R.layout.activity_main);

        initView();
        initEvent();
    }

    private void initEvent() {
        tab1.setOnClickListener(this);
        tab2.setOnClickListener(this);
        tab3.setOnClickListener(this);
        tab4.setOnClickListener(this);

        viewPager.setOnPageChangeListener(new OnPageChangeListener() {

            @Override
            public void onPageSelected(int arg0) {
                int currentItem = viewPager.getCurrentItem();
                switch(currentItem){
                case 0:
                    break;
                case 1:
                    break;
                case 2:
                    break;
                case 3:
                    break;
                }
            }

            @Override
            public void onPageScrolled(int arg0, float arg1, int arg2) {

            }

            @Override
            public void onPageScrollStateChanged(int arg0) {

            }
        });
    }

    private void initView() {
        viewPager = (ViewPager)findViewById(R.id.id_view_pager);
        //tab
        tab1 = (LinearLayout)findViewById(R.id.tab_1);
        tab2 = (LinearLayout)findViewById(R.id.tab_2);
        tab3 = (LinearLayout)findViewById(R.id.tab_3);
        tab4 = (LinearLayout)findViewById(R.id.tab_4);
        //imageButton
        img1 = (ImageButton)findViewById(R.id.img_1);
        img2 = (ImageButton)findViewById(R.id.img_2);
        img3 = (ImageButton)findViewById(R.id.img_3);
        img4 = (ImageButton)findViewById(R.id.img_4);
        //inflate
        LayoutInflater inflater = LayoutInflater.from(this);
        View view1 = inflater.inflate(R.layout.view1, null);
        View view2 = inflater.inflate(R.layout.view2, null);
        View view3 = inflater.inflate(R.layout.view3, null);
        View view4 = inflater.inflate(R.layout.view4, null);

        viewList.add(view1);
        viewList.add(view2);
        viewList.add(view3);
        viewList.add(view4);

        adapter = new PagerAdapter() {

            @Override
            public void destroyItem(ViewGroup container, int position,
                    Object object) {
                container.removeView(viewList.get(position));
            }

            @Override
            public Object instantiateItem(ViewGroup container, int position) {
                View view = viewList.get(position);
                container.addView(view);
                return view;
            }

            @Override
            public boolean isViewFromObject(View arg0, Object arg1) {
                return arg0 == arg1;
            }

            @Override
            public int getCount() {
                return viewList.size();
            }
        };
        viewPager.setAdapter(adapter);
    }

    /**
     * 底部的布局点击事件
     */
    @Override
    public void onClick(View v) {
        switch(v.getId()){
        case R.id.tab_1:
            viewPager.setCurrentItem(0);
            break;
        case R.id.tab_2:
            viewPager.setCurrentItem(1);
            break;
        case R.id.tab_3:
            viewPager.setCurrentItem(2);
            break;
        case R.id.tab_4:
            viewPager.setCurrentItem(3);
            break;
            default:break;
        }
    }


 1748
1748

 被折叠的 条评论
为什么被折叠?
被折叠的 条评论
为什么被折叠?
 到【灌水乐园】发言


