


我们先依照如下方式配置ButterKnife:
1.在Project的 build.gradle 中添加如下代码:
classpath 'com.jakewharton:butterknife-gradle-plugin:8.8.1'

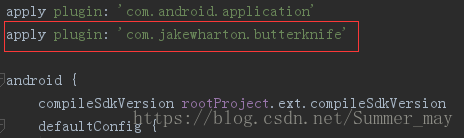
2.在app的 build.gradle 中添加如下代码:
apply plugin: 'com.jakewharton.butterknife'(在顶部添加此行)
3.在app的build.gradle 中的dependencies中添加:
compile 'com.jakewharton:butterknife:8.8.1'
annotationProcessor 'com.jakewharton:butterknife-compiler:8.8.1'
(图片中的方式使用了项目依赖库的统一版本管理的方式,你可以直接写成如上2句的方式)
ps:这种写法推荐一篇geekqian写的项目依赖库的统一版本管理的文章参考下:点击这里

4.此时点击Sync Now出现以下提示:
Error:Unable to find method 'com.android.build.gradle.api.BaseVariant.getOutputs()Ljava/util/List;'.
Possible causes for this unexpected error include:<ul><li>Gradle's dependency cache may be corrupt (this sometimes occurs after a network connection timeout.)
<a href="syncProject">Re-download dependencies and sync project (requires network)</a></li><li>The state of a Gradle build process (daemon) may be corrupt. Stopping all Gradle daemons may solve this problem.
<a href="stopGradleDaemons">Stop Gradle build processes (requires restart)</a></li><li>Your project may be using a third-party plugin which is not compatible with the other plugins in the project or the version of Gradle requested by the project.</li></ul>In the case of corrupt Gradle processes, you can also try closing the IDE and then killing all Java processes.(和图片中提示的一致,粘贴出来只是单纯为了搜索关键词更方便哈(#^.^#))

解决方法:
1.注释或删除掉第2步中添加的如下代码:
//apply plugin: 'com.jakewharton.butterknife'

2.再次点击Sync Now,就可以看到 ,问题解决了.
如果以上还是不能解决问题,刚好我,也遇到新的问题啦——当在module中使用butterknife时,会提示Attribute value must be constant,如下图所示:
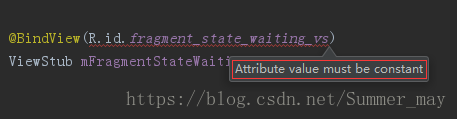
怎么解决呢?在网上查阅了一番,参考了CeleryIce的文章,出处:解决组件化开发butterknife 在 library中使用的坑(里面还有一些注意事项,推荐看看!)
划重点!!最终解决方案:
ps:之前的不能解决问题的,咱们重新开始哈,忘掉分隔线之前的吧!
1.在根目录下的build.gradle中的dependencies添加如下:
这里注意是8.4.0的版本!!
classpath 'com.neenbedankt.gradle.plugins:android-apt:1.8'
classpath 'com.jakewharton:butterknife-gradle-plugin:8.4.0'
buildscript {
    repositories {
        google()
        jcenter()
    }
    dependencies {
        classpath 'com.android.tools.build:gradle:3.0.1'
        classpath 'com.neenbedankt.gradle.plugins:android-apt:1.8'
        classpath 'com.jakewharton:butterknife-gradle-plugin:8.4.0'  //butterknife

        // NOTE: Do not place your application dependencies here; they belong
        // in the individual module build.gradle files
    }
}
2.分隔线之前的第2步中,我们删除或注释掉的apply plugin: 'com.jakewharton.butterknife',在app中,咱们就不要了,把它添加在你module中的build.gradle顶部:

3.最后,我是在module中的build.gradle 中的dependencies中添加:
compile 'com.jakewharton:butterknife:8.8.1'
annotationProcessor 'com.jakewharton:butterknife-compiler:8.8.1'
(图示中的写法参照分隔线之前第3步给出的文章即可)

4.然后在module中使用R2代替R来findViewById即可.
至此,之前的问题就都解决啦!


 1万+
1万+


 被折叠的 条评论
为什么被折叠?
被折叠的 条评论
为什么被折叠?
 到【灌水乐园】发言


