


一、bus总线
上次我们说过父子之间的传值,今天讨论一下bus总线 非父子之间的传值。
例如 当父亲需要传值给儿子的儿子的孙子的朋友的儿子的爸爸的爷爷的孙子的小姨的 时候就不能父传子再传子再传孙再传…… 。这样会很麻烦,当传值的关系远的时候就用到了bus总线传值,下面给大家举个原生写法的例子 万一以后会有面试题呢?
第一步:在Vue原型中 创建一个bus属性,挂载一个新的vue实例 做监听和事件响应,然后给爷爷一个button标签,当被点击之后爷爷触发一个响应事件更改小姨中的值,就利用bus属性添加一个对应的响应,然后小姨创建完成后在里面添加一个bus监听:
**this.bus.$on(“fun”,count=>{
this.count=count
}) **
上面用箭头函数 内部this指向用于等于其产生环境 ,这样大概值就改变了,能懂吗?
然后看代码:
<template id="yy">
<div>
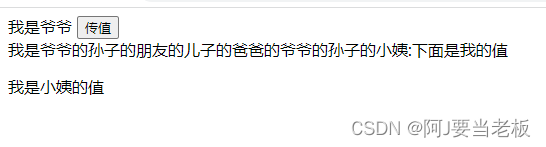
我是爷爷 <button @click="changeCount()">传值</button>
</div>
</template>
<template id="xyz">
<div>
我是爷爷的孙子的朋友的儿子的爸爸的爷爷的孙子的小姨
<p>{{count}}</p>
</div>
</template>
<div id="app">
<yy></yy>
<xyz></xyz>
</div>
<script type="text/javascript">
Vue.prototype.bus=new Vue()
Vue.component("yy",{
template:"#yy",
data(){
return{
count:2
}
},
methods:{
changeCount(){
this.bus.$emit("fun",this.count)
}
}
})
//在xyz创建完成添加一个bus监听
Vue.component("xyz",{
template:"#xyz",
data(){
return{
count:1
}
},
methods:{
change(){
// console.log(1)
}
},
mounted(){
//箭头函数 内部this指向用于等于其产生环境
this.bus.$on("fun",count=>{
this.count=count
})
},
})
let vn=new Vue({
el:"#app"
})
</script>
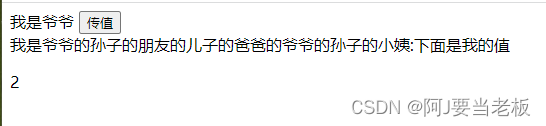
点击后就传值成功了,若是没懂就算了。 投河自尽吧。 哦对了总结一下:非父子关系无法直接使用props和emit,bus总线:就是在整个Vue原型中添加一个监听。
下一位
二、兄弟组件传值
这个好像重要又好像不重要,直接看代码吧!悟到就赚到 悟不到就用bus总线传值,
		<template id="dg">
			<div>
				我是哥哥 <button @click="change()">改变弟弟的count</button>
			</div>
		</template>
		<template id="ld">
			<div>
				我是弟弟
				<p>{{count}}</p>
			</div>
		</template>
		<div id="app">
			<dg @fun="change"></dg> <!-- 父组件监听哥哥里面的点击事件 然后就触发父级的更改事件 -->
			<ld :count="count"></ld> <!-- 弟弟显示父级的值绑定 第一个是父级的第二个是弟弟的 -->
		</div>
		<script type="text/javascript">
			Vue.component("dg",{
				template:"#dg",
				methods:{
					change(){
						// 点击哥哥的button按钮 改变弟弟中的count 改为10
						this.$emit("fun",10)
					}
				}
			})
			//在弟弟创建完成后添加一个bus监听
			Vue.component("ld",{
				props:["count"],//监听父级的值,也相当于弟弟显示父级的值  只要父元素改变了 弟弟里的值也改变了
				template:"#ld",
				data(){
					return{

					}
				}
			})
			//兄弟组件之间的传值:1.有一个共同的父级  共同操作父级元素中的数据
			let vn=new Vue({  //这个相当于父级
				el:"#app",
				data:{
					count:1
				},
				methods:{
					change(count){
						this.count=count
					}
				}
			})
		</script>
三、props限制
其实props就是一个方法,是数据传递类型的限制,例如下面的代码
		<template id="zzb1">
			<div>
				{{title}}
			</div>

		</template>
		<div id="app">
			<zzb1 :title=title></zzb1>
		</div>
		<script type="text/javascript">
			Vue.component("zzb1",{
				props:{
					title:{
						type:[Number,String],
						required:true,  //true是必须传值
						//还有个默认值
						// default:"hello world"
					}
				},
				template:"#zzb1",
			})
			let vn=new Vue({
				el:"#app",
				data:{
					title:"hello"
				}
			})
		</script>
emmm 其实我所表达的只是一点点,但真正用起来怎么用能,后来偶然间我发现有个人总结的还不错,大家有兴趣可以参考一下:https://work.lynchow.com/article/limit_props/
总之解释起来太多了,我嫌麻烦 大家就捡现成的用吧。
好了下一位
四、slot插槽
其实插槽呢也很简单
slot:用于定义过于固定的组件时 留下可更改的组件 灵活。插槽概念:给 组件留出操作空间 方便二次开发过程中进行 结构的添加
		<template id="nami">
			<div>
				<slot name="header"></slot>
				<div class="main">
					main
				</div>
				<slot name="footer"></slot>
			</div>
		</template>
		<div id="app">
			<nami>
				<div class="header" slot="header">
					公司名称
				</div>
				<div class="footer" slot="footer">
					联系方式
				</div>
			</nami>
			<nami>
				<div class="header" slot="header">
					1234
				</div>
				<div class="footer" slot="footer">
					5678
				</div>
			</nami>
		</div>
		<script type="text/javascript">
			Vue.component("nami",{
				template:"#nami"
			})
			let vn=new Vue({
				el:"#app",
			})

		</script>
在app里面添加nami标签之后,然后在头部添加一个
尾部添加一个 记得起个名字在加上slot。五、is 动态组件
什么是动态组件?
就是在不同组件之间进行动态切换,其实这个效果也可以用v-if方法,但有一种也比较方便的方法就是is。
component组件有个 is 属性,它对应谁 自己就等于哪个组件,用于在data数据切换时 进行对应的组件的切换
动态组件:1.具有一定的缓存效果,切换过的组件如果没有变化就直接加载。
2.如果有变化,通常可以和取消双向绑定 v-once一起用 但首先里面的值是不变的
		<template id="nami">
			<div>
				<p v-once>{{title}}</p>
			</div>
		</template>
		<template id="luffy">
			<div>
				<p>luffy</p>
			</div>
		</template>
		<div id="app">
			<component :is="name"></component>
			<!-- <nami></nami> -->
			<luffy></luffy>
		</div>
		<script type="text/javascript">
			Vue.component("nami",{
				template:"#nami",
				data(){
					return{
						title:"mami"
					}
				}
			})
			Vue.component("luffy",{
				template:"#luffy"
			})
			let vn=new Vue({
				el:"#app",
				data:{
					name:"luffy"
				}
			})
		</script>
就也可以这样用
<div id="app">
	<div id="app" v-cloak>
		<component :is="currentView"></component>
		<button @click="handleChangeView('A')">A</button>
		<button @click="handleChangeView('B')">B</button>
		<button @click="handleChangeView('C')">C</button>
	</div>
</div>
<script type="text/javascript">
	var app = new Vue({
		el: '#app',
		components:{
			      comA:{
			         template:`<div>组件A</div>`
			      },
			      comB:{template:`<div>组件B</div>`
			      },
			      comC:{template:`<div>组件C</div>`
			      }
		},
		data:{
			  currentView:'comA'
		},
		methods:{
			    handleChangeView:function(component){
			                       this.currentView='com'+component;
			    }

	});
</script>
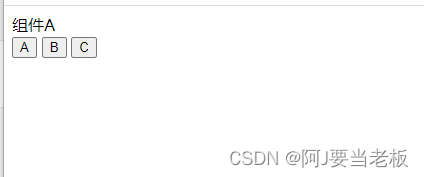
点击谁就显示谁了。
六、点餐页面
在这里我根据基本的语法穿插一个小小的案例,没事的时候可以多练几遍。
代码不长 我不加注释了 自行理解
<!DOCTYPE html>
<html>
	<head>
		<meta charset="utf-8">
		<title>点餐页面</title>
		<script src="js/vue221.js" type="text/javascript" charset="utf-8"></script>
	</head>
	<style type="text/css">
		*{
			margin:0;
			padding: 0;
		}
		li{
			list-style-type: none; /* 清除列表符号 */
		}
		body,html{
			height: 100%;
		}
		#app{
			height: 100%;
		}
		.nav_wrap{
			width: 5%;
			/* 高度100% 相对于其父级 */
			height: 100%;
			background-color: #20A0FF;
			float: left;
		}
		.nav_wrap ul li{
			height: 66px;
			text-align: center;
			line-height: 66px;
			border-bottom: 1px solid white;
			font-size: 24px;
			color: white;
		}
		.order_wrap{
			width: 30%;
			float: left;
			position: relative;
			height: 100%;
		}
		.order_wrap .title{
			border-bottom: 1px solid black;
		}
		.order_wrap ul{
			overflow: hidden; /* 高度塌陷 超出隐藏 取消子集元素对他的影响 */
		}
		.order_wrap ul li{
			width: 60px;
			height: 42px;
			float: left;
			text-align: center;
			line-height: 42px;
		}
		.order_wrap ul .active{
			color: #20A0FF;
		}
		.order_wrap .border{
			width: 60px;
			height: 2px;
			background-color: #20A0FF;
			position: absolute;
			left: 0;
			top: 40px;
			transition: left 0.5s;
		}
		.often_wrap{
			width: 62%;
			float: left;
		}
		h3{
			height: 42px;
			line-height: 42px;
			border-bottom: 1px solid black;
		}
		.often_wrap ul li{
			padding: 8px;
			border: 1px solid #20A0FF;
			float: left;
			margin: 10px;
		}
		.type_wrap{
			width: 62%;
			float: left;
			position: relative;
		}
		.type_wrap ul{
			overflow: hidden;
		}
		.type_wrap ul li{
			width: 60px;
			height: 42px;
			float: left;
			text-align: center;
			line-height: 42px;
		}
		.type_wrap ul .active{
			color: #20A0FF;
		}
		.type_wrap .border{
			width: 60px;
			height: 2px;
			background-color: #20A0FF;
			position: absolute;
			left: 0;
			top: 82px;
			transition:left 0.3s;
		}


	</style>
	<body>
		<template id="leftnav"> <!-- 侧边栏组件 -->
			<div class="nav_wrap">
				<ul>
					<li>收银</li>
					<li>店铺</li>
					<li>商品</li>
					<li>会员</li>
					<li>抢购</li>
					<li>统计</li>
				</ul>
			</div>
		</template>
		<template id="order">   <!-- 订单组件 -->
			<div class="order_wrap">
				<div class="title">
					<ul>
						<li :class="{active:tabIndex==0}" @click="changeIndex(0)">点餐</li>
						<li :class="{active:tabIndex==1}" @click="changeIndex(1)">挂单</li>
						<li :class="{active:tabIndex==2}" @click="changeIndex(2)">外卖</li>
					</ul>
				</div>
				<div class="border" :style="{left:tabIndex*60+'px'}">
				      <!-- 当前的索引值*宽度 -->
				</div>
				<div v-if="tabIndex==0">
					<table>
						<tr>
							<td>商品</td>
							<td>数量</td>
							<td>金额</td>
							<td>操作</td>
						</tr>
						<tr v-for="(item,index) in goodslist" :key="index">
							<td>{{item.goodsName}}</td>
							<td>{{item.count}}</td>
							<td>{{item.count*item.price}}</td>
							<td>
								<button @click="addzj(item)">增加</button>
								<button @click="removeGoods(index)">删除</button>
							</td>
						</tr>
						<tr v-if="goodslist.length==0">
							<td colspan="4">暂无商品</td>
						</tr>
						<tr>
							<td>总价:{{total}}元</td>
						</tr>
					</table>
				</div>
				<div v-if="tabIndex==1">挂单</div>
				<div v-if="tabIndex==2">外卖</div>
			</div>
		</template>
		<template id="oftengoods"> <!-- 常用商品组件 -->
			<div class="often_wrap">
				<h3>常用商品</h3>
				<div>
					<ul>
						<li v-for="item in oftengoods" :key="item.id" @click="addGoods(item)">
							{{item.goodsName}}
							¥
							{{item.price}}
						</li>
					</ul>
				</div>
			</div>
		</template>
		<template id="typegoods">  <!-- 商品分类组件 -->
			<div class="type_wrap">
				<h3>商品分类</h3>
				<ul>
					<li :class="{active:tabIndex==index}" v-for="(item,index) in types" @click="changeIndex(index)" :key="index">
						{{item}}
					</li>
				</ul>
				<div class="border" :style="{left:tabIndex*60+'px'}">

				</div>
				<div v-if="tabIndex==0">
					<div class="item" v-for="item in type0goods" :key="item.goodsId">
						<img :src="item.goodsImg" alt="" width="100">
						<div class="text">{{item.goodsName}}{{item.price}}¥</div>
					</div>
				</div>
				<div v-if="tabIndex==1">小吃</div>
				<div v-if="tabIndex==2">饮料</div>
				<div v-if="tabIndex==3">套餐</div>
			</div>
		</template>
		<div id="app">
			<leftnav></leftnav>
			<order :goodslist="goodsList" @remove="removegoods" @add="addzj"></order>
			<oftengoods :oftengoods="oftenGoods" @add="addgoods"></oftengoods>
			<typegoods :types="types" :type0goods="type0Goods"></typegoods>
		</div>
		<script type="text/javascript">
			//一个侧边栏组件
			Vue.component("leftnav",{
				template:"#leftnav"
			})
			//一个订单组件
			Vue.component("order",{
				props:["goodslist"],
				template:"#order",
				data(){
					return{
						tabIndex:0
					}
				},
				methods:{
					changeIndex(index){
						this.tabIndex=index
					},
					removeGoods(index){
						//事件响应
						this.$emit("remove",index)

					},
					addzj(item){
						//影响一个事件将item传给父级
						this.$emit("add",item)
					}
				},
				computed:{
					total(){

						let sum=0
						this.goodslist.forEach(item=>{
							sum+=item.price*item.count
						})
						return sum
					}
				}
			})
			//常用商品组件
			Vue.component("oftengoods",{
				props:['oftengoods'],
				template:"#oftengoods",
				methods:{
					addGoods(item){
						//影响一个事件将item传给父级
						this.$emit("add",item)
					}
				}
			})
			//商品分类组件
			Vue.component("typegoods",{
				props:["types","type0goods"],
				template:"#typegoods",
				data(){
					return{
						tabIndex:0
					}
				},
				methods:{
					changeIndex(index){
						this.tabIndex=index
					},
				},
			})
			let vn=new Vue({
				el:"#app",
				data:{
					oftenGoods: [
					    {goodsId: 1,goodsName: '香辣鸡腿堡',price: 18},
						{goodsId: 2,goodsName: '田园鸡腿堡',price: 13},
						{goodsId: 3,goodsName: '快乐全家桶',price: 13},
						{goodsId: 4,goodsName: '脆皮炸鸡腿',price: 12},
						{goodsId: 5,goodsName: '魔法鸡块',price: 16},
						{goodsId: 6,goodsName: '可乐大杯',price: 17},
						{goodsId: 7,goodsName: '雪顶咖啡',price: 14},
						{goodsId: 8,goodsName: '大块鸡米花',price: 13},
						{goodsId: 9,goodsName: '香脆鸡柳',price: 12},
						{goodsId: 10,goodsName: '和风汉堡',price: 11},
					],
					types:["汉堡","小吃","饮料","套餐"],
					type0Goods: [
					    {
					        goodsId: 1,
					        goodsImg: "https://img.4008823823.com.cn/kfcios/Version/635_667540.jpg",
					        goodsName: '香辣鸡腿堡',
					        price: 18
					    }, {
					        goodsId: 2,
					        goodsImg: "https://img.4008823823.com.cn/kfcios/Version/635_667540.jpg",
					        goodsName: '田园鸡腿堡',
					        price: 15
					    }, {
					        goodsId: 3,
					        goodsImg: "https://img.4008823823.com.cn/kfcios/Version/635_667540.jpg",
					        goodsName: '和风汉堡',
					        price: 15
					    }

					],
					goodsList:[] //当前选中商品的数组
				},
				methods:{
					addgoods(item){
						//将传递过来的商品插入到 goodslist数值
						//先判断当前数组中是否含有对应的元素
						//如果有 找到数量直接++,如果没有就重新插入
						//some() 判断是否存在
						let result=this.goodsList.filter(goods=>goods.goodsId==item.goodsId)
						if(result.length>0){
							result[0].count++
						}else{
							let goods={
								goodsId:item.goodsId,
								goodsName:item.goodsName,
								price:item.price,
								count:1
							}
							this.goodsList.push(goods)
						}
					},
					addzj(item){
						//将传递过来的商品插入到 goodslist数值
						//先判断当前数组中是否含有对应的元素
						//如果有 找到数量直接++,如果没有就重新插入
						//some() 判断是否存在
						let result=this.goodsList.filter(goods=>goods.goodsId==item.goodsId)
						if(result.length>0){
							result[0].count++
						}else{
							let goods={
								goodsId:item.goodsId,
								goodsName:item.goodsName,
								price:item.price,
								count:1
							}
							this.goodsList.push(goods)
						}
					},
					removegoods(index){
						//判断当前index对应元素的数量
						if(this.goodsList[index].count>1){
							this.goodsList[index].count--
						}else{
							this.goodsList.splice(index,1)
						}
					}
				}
			})
		</script>
	</body>
</html>


 1545
1545


 被折叠的 条评论
为什么被折叠?
被折叠的 条评论
为什么被折叠?
 到【灌水乐园】发言


