< template> < divclass = " xtx-confirm" :class = " {fade}" > < divclass = " wrapper" :class = " {fade}" > < divclass = " header" > < h3> </ h3> < a@click = " cancel" href = " JavaScript:;" > </ a> </ div> < divclass = " body" > < iclass = " iconfont icon-warning" > </ i> < span> </ span> </ div> < divclass = " footer" > < span@click = " cancel" class = " cancel" > </ span> < span@click = " submit" class = " submit" > </ span> </ div> </ div> </ div> </ template> < scriptsetup >
import { onMounted, ref } from 'vue'
const props = defineProps ( {
title : {
type : String,
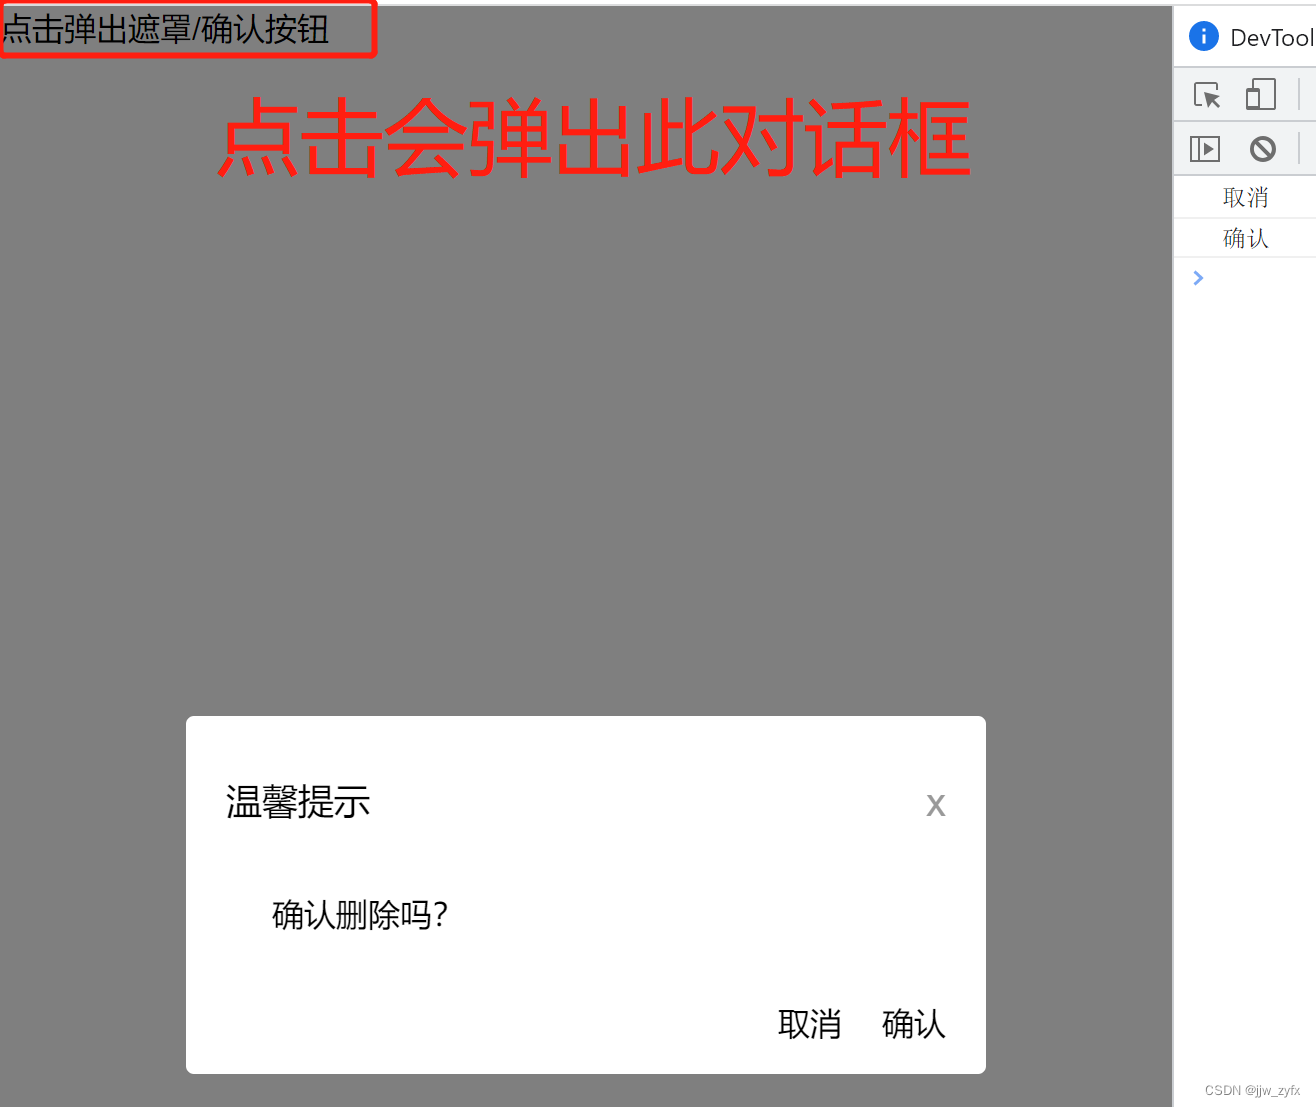
default : '温馨提示'
} ,
text : {
type : String,
default : ''
} ,
cancelCallback : {
type : Function
} ,
submitCallback : {
type : Function
}
} ) ;
const fade = ref ( false )
onMounted ( ( ) => {
setTimeout ( ( ) => {
fade. value = true
} , 0 )
} )
const cancel = ( ) => {
props. cancelCallback ( )
}
const submit = ( ) => {
props. submitCallback ( )
}
</ script> < stylescoped lang = " less" >
.xtx-confirm {
position : fixed;
left : 0;
top : 0;
width : 100%;
height : 100%;
z-index : 8888;
background : rgba ( 0, 0, 0, 0) ;
//background : rgba ( 0, 0, 0, .5) ;
&.fade {
transition : all 0.4s;
background : rgba ( 0, 0, 0, .5) ;
}
.wrapper {
width : 400px;
background : #fff;
border-radius : 4px;
position : absolute;
top : 50%;
left : 50%;
transform : translate ( -50%, -60%) ;
opacity : 0;
//opacity : 1;
&.fade {
transition : all 0.4s;
transform : translate ( -50%, -50%) ;
opacity : 1;
}
.header,.footer {
height : 50px;
line-height : 50px;
padding : 0 20px;
}
.body {
padding : 20px 40px;
font-size : 16px;
.icon-warning {
color : red;
margin-right : 3px;
font-size : 16px;
}
}
.footer {
text-align : right;
cursor : pointer;
.cancel {
margin-right : 20px;
cursor : pointer;
}
.submit {
cursor : pointer;
}
//.xtx-button {
// margin-left : 20px;
//}
}
.header {
position : relative;
h3 {
font-weight : normal;
font-size : 18px;
}
a {
position : absolute;
right : 15px;
top : 15px;
font-size : 20px;
width : 20px;
height : 20px;
line-height : 20px;
text-align : center;
color : #999;
&:hover {
color : #666;
}
}
}
}
}
</ style> import { createVNode, render } from 'vue'
import conform from './components/conform.vue'
const div = document. createElement ( 'div' )
document. body. appendChild ( div)
export default ( { title, text } ) => {
return new Promise ( ( resolve, reject ) => {
const cancelCallback = ( ) => {
render ( null , div)
reject ( "取消" )
}
const submitCallback = ( ) => {
render ( null , div)
resolve ( '确认' )
}
const vn = createVNode ( conform, { title, text, cancelCallback, submitCallback } )
render ( vn, div)
} )
}
< template> < span@click = " sure" > </ span> </ template> < scriptsetup >
import Conform from "@/conform" ;
const sure = ( ) => {
Conform ( { text : "确认删除吗?" } ) . then ( ( e ) => { console. log ( e) } ) . catch ( ( e ) => { console. log ( e) } )
}
</ script> < stylescoped lang = " less" >
</ style>


 3693
3693


 被折叠的 条评论
为什么被折叠?
被折叠的 条评论
为什么被折叠?
 到【灌水乐园】发言


