


Recently, a reader asked me how to add an index list in a UITableView. As some of you may have the same question, I thought it’s better to write a post to share the solution. An indexed table view is more or less as the plain-styled table view that we’ve covered at the very beginning of our iOS programming course. The only difference is that it includes an index on the right side of the table view. Indexed table is very common in iOS apps. The most well-known example is the built-in Contacts app on iPhone. By offering an index scrolling, users are allowed to access a particular section of the table instantly without scrolling through each section.
If you’ve followed our UITableView tutorial, you should know how to implement an UITableView. Basically, to add sections and an index list in the UITableView, you need to deal with these methods as defined in UITableViewDataSource protocol:
- numberOfSectionsInTableView: method – returns the total number of sections in the table view. Usually we set the number of section to 1. If you want to have multiple sections, set this value to a larger number.
- titleForHeaderInSection: method – returns the header titles for different sections. This method is optional if you do not assign titles for the section.
- numberOfRowsInSection: method – returns the total number of rows in a specific section
- cellForRowAtIndexPath: method – this method shouldn’t be new to you if you know how to display data in UITableView. It returns the table data for a particular section.
- sectionIndexTitlesForTableView: method – returns the indexed titles that appear in the index list on the right side of the table view. For example, you can return an array of strings containing “A” to “Z”.
- sectionForSectionIndexTitle: method – returns the section index that the table view should jump to when user taps a particular index.

There’s no better way to explain the implementation than showing an example. As usual, we’ll build a simple app together and you should get a better idea of index list in a minute.
A Brief Look at the Demo App
First, let’s see what we’re going to build for the demo app. It’s a very simple app showing a list of animals in a standard table view. But this time, the app groups the animals into different sections and provides an index list for quick access. The below screenshot displays the final deliverable of the demo app.

To work on the tutorial, you’re expected to have basic knowledge of UITableView. If not, stop right here and check out our UITableView tutorial first.
Download the Xcode Project Template
The focus of the tutorial is on the implementation of sections and index list. Therefore, instead of building the Xcode project from scratch, you can download the Xcode project template from here. The template already includes everything you need to start with. If you build the template, you’ll have an app showing a list of animals in table form as shown below.
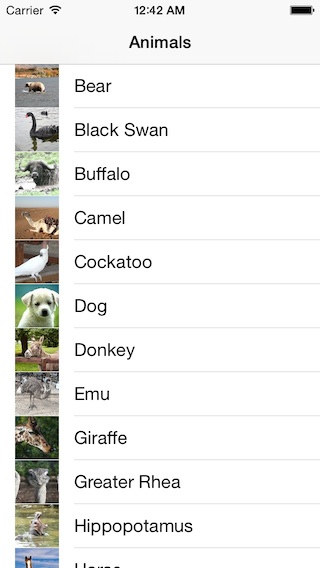
Later, we’ll modify the app, split the data into sections and add an index list to the table.
Displaying Sections in UITableView
Okay, let’s get started and add sections to the table view. Originally, the animal data is stored in an array:
|
1
|
animals
= @
[
@
"Bear",
@
"Black Swan",
@
"Buffalo",
@
"Camel",
@
"Cockatoo",
@
"Dog",
@
"Donkey",
@
"Emu",
@
"Giraffe",
@
"Greater Rhea",
@
"Hippopotamus",
@
"Horse",
@
"Koala",
@
"Lion",
@
"Llama",
@
"Manatus",
@
"Meerkat",
@
"Panda",
@
"Peacock",
@
"Pig",
@
"Platypus",
@
"Polar Bear",
@
"Rhinoceros",
@
"Seagull",
@
"Tasmania Devil",
@
"Whale",
@
"Whale Shark",
@
"Wombat"
];
|
Well, we’re going to organize the data into sections based on the first letter of animal name. There are a lot of ways to do that. But as a demo, we’ll replace the animals array with a NSDictionary. First, declare the animals variable as a NSDictionary and add another array for the section titles in the AnimalTableTableViewController.m:
|
1
2 3 4 |
@interface AnimalTableTableViewController
(
)
{
NSDictionary *animals; NSArray *animalSectionTitles; } |
In the viewDidLoad: method, change the code to the following:
|
1
2 3 4 5 6 7 8 9 10 11 12 13 14 15 16 17 18 19 20 21 |
-
(
void
)viewDidLoad
{ [super viewDidLoad ]; animals = @ { @ "B" : @ [ @ "Bear", @ "Black Swan", @ "Buffalo" ], @ "C" : @ [ @ "Camel", @ "Cockatoo" ], @ "D" : @ [ @ "Dog", @ "Donkey" ], @ "E" : @ [ @ "Emu" ], @ "G" : @ [ @ "Giraffe", @ "Greater Rhea" ], @ "H" : @ [ @ "Hippopotamus", @ "Horse" ], @ "K" : @ [ @ "Koala" ], @ "L" : @ [ @ "Lion", @ "Llama" ], @ "M" : @ [ @ "Manatus", @ "Meerkat" ], @ "P" : @ [ @ "Panda", @ "Peacock", @ "Pig", @ "Platypus", @ "Polar Bear" ], @ "R" : @ [ @ "Rhinoceros" ], @ "S" : @ [ @ "Seagull" ], @ "T" : @ [ @ "Tasmania Devil" ], @ "W" : @ [ @ "Whale", @ "Whale Shark", @ "Wombat" ] }; animalSectionTitles = [ [animals allKeys ] sortedArrayUsingSelector : @selector (localizedCaseInsensitiveCompare : ) ]; } |
In the above code, we create a NSDictionary for the animal variable. The first letter of the animal name is used as key. The value that associates with the corresponding key is an array of animal names.
Additionally, we declare the animalSectionTitles array for storing the section titles. For convenience, we simply use the keys of the animals dictionary as the section titles. To get the keys of a NSDictionary, you can simply call the allKeys: method. On top of that, we sort the titles in alphabetical order.
Next, change the numberOfSectionsInTableView: method and return the total number of sections:
|
1
2 3 4 5 |
-
(NSInteger
)numberOfSectionsInTableView
:
(UITableView
*
)tableView
{ // Return the number of sections. return [animalSectionTitles count ]; } |
To display a header title for each section, we need to implement the titleForHeaderInSection: method. We simply return the section title based on the section index.
|
1
2 3 4 |
-
(
NSString
*
)tableView
:
(UITableView
*
)tableView titleForHeaderInSection
:
(NSInteger
)section
{ return [animalSectionTitles objectAtIndex :section ]; } |
It’s very straightforward, right? Next, we have to tell the table view the number of rows for a particular section. Add the numberOfRowsInSection: method in the AnimalTableTableViewController.m:
|
1
2 3 4 5 6 7 |
-
(NSInteger
)tableView
:
(UITableView
*
)tableView numberOfRowsInSection
:
(NSInteger
)section
{ // Return the number of rows in the section. NSString *sectionTitle = [animalSectionTitles objectAtIndex :section ]; NSArray *sectionAnimals = [animals objectForKey :sectionTitle ]; return [sectionAnimals count ]; } |
When the app starts to render the data in the table view, the numberOfRowsInSection: will be called when a new section is displayed. Here based on the section index, we get the section title and use it as a key to retrieve the animal names for the section, followed by returning the total number of the animal names for that section.
We’re almost done. Lastly, modify the cellForRowAtIndexPath: method as follows:
|
1
2 3 4 5 6 7 8 9 10 11 12 13 |
-
(UITableViewCell
*
)tableView
:
(UITableView
*
)tableView cellForRowAtIndexPath
:
(
NSIndexPath
*
)indexPath
{ UITableViewCell *cell = [tableView dequeueReusableCellWithIdentifier : @ "Cell" forIndexPath :indexPath ]; // Configure the cell... NSString *sectionTitle = [animalSectionTitles objectAtIndex :indexPath.section ]; NSArray *sectionAnimals = [animals objectForKey :sectionTitle ]; NSString *animal = [sectionAnimals objectAtIndex :indexPath.row ]; cell.textLabel.text = animal; cell.imageView.image = [UIImage imageNamed : [self getImageFilename :animal ] ]; return cell; } |
The indexPath contains the current row number, as well as, the current section index. Again, based on the section index, we retrieve the section title (e.g. “B”) and use it as the key to retrieve the animal names for that section. The rest of the code is very straightforward. We simply get the animal name and set it as the cell label. The getImageFilename: method is a helper method bundled in the project template for handy retrieval of the image file name.
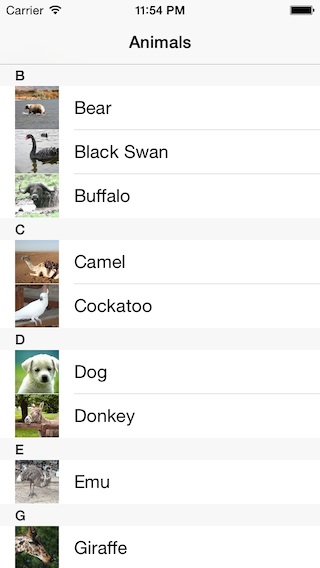
Okay, you’re ready to go! Hit the Run button and you should end up an app like this.
Adding Index List to UITableView
So how can you add an index list to the table view? Again it’s easier than you thought and can be achieved by a few lines of code. Just add the sectionIndexTitlesForTableView: method and return an array of the section indexes. Here we use the section titles as the indexes.
|
1
2 3 4 |
-
(
NSArray
*
)sectionIndexTitlesForTableView
:
(UITableView
*
)tableView
{ return animalSectionTitles; } |
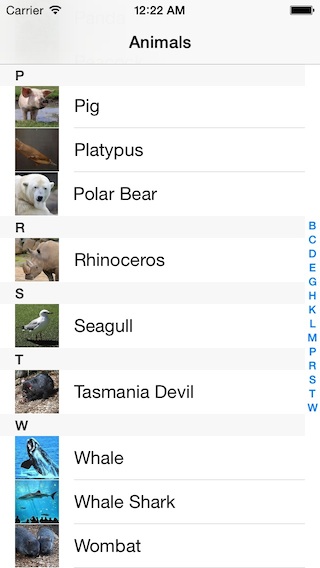
That’s it! Compile and run the app again. You should find the index on the right side of the table. Interestingly, you do not need any implementation and the indexing already works! Try to tap any of index and you’ll be brought to a particular section of the table.
Adding A-Z Index List
Look like we’ve done everything. So what’s the sectionForSectionIndexTitle: method for? Presently, the index list doesn’t contain all alphabets. The app just shows those letters that are defined as the keys of the animals dictionary. For some reasons, you may want to display A-Z in the index list. Let’s declare a new variable named animalIndexTitles. The @interface declaration should look like this:
|
1
2 3 4 5 |
@interface AnimalTableTableViewController
(
)
{
NSDictionary *animals; NSArray *animalSectionTitles; NSArray *animalIndexTitles; } |
In the viewDidLoad: method, add the following line of code to initialize the section index as “A-Z”:
|
1
|
animalIndexTitles
= @
[
@
"A",
@
"B",
@
"C",
@
"D",
@
"E",
@
"F",
@
"G",
@
"H",
@
"I",
@
"J",
@
"K",
@
"L",
@
"M",
@
"N",
@
"O",
@
"P",
@
"Q",
@
"R",
@
"S",
@
"T",
@
"U",
@
"V",
@
"W",
@
"X",
@
"Y",
@
"Z"
];
|
Next, change the sectionIndexTitlesForTableView: method and return the animalIndexTitles array instead of the animalSectionTitles array.
|
1
2 3 4 |
-
(
NSArray
*
)sectionIndexTitlesForTableView
:
(UITableView
*
)tableView
{ return animalIndexTitles; } |
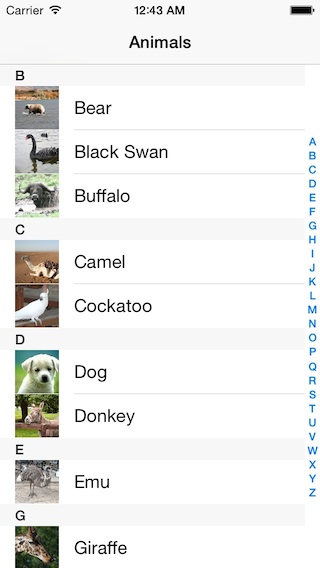
Now, compile and run the app again. Cool! The app displays the index from A to Z. But wait a minute… It doesn’t work properly. Try to tap the index “C” and the app jumps to the “D” section.
Well, as you may notice, the number of indexes is greater than the number of section. The UITableView doesn’t know how to handle the indexing. In this case, you have to implement the sectionForSectionIndexTitle: method and explicitly return the section number when a particular index is tapped. Therefore, add the following lines of code:
|
1
2 3 4 |
-
(NSInteger
)tableView
:
(UITableView
*
)tableView sectionForSectionIndexTitle
:
(
NSString
*
)title atIndex
:
(NSInteger
)index
{ return [animalSectionTitles indexOfObject :title ]; } |
Based on the selected index name (i.e. title), we locate the correct section index from the animalSectionTitles. Compile and run the app again. The index list should now work!
Summary
When you need to display a large number of records, it’ll be great to organize the data into sections and provide an index list for easy access. In this tutorial, we’ve walked you through the implementation of indexed table. By now, I believe you should know how to add sections and an index list to your table view.
For your reference, you can download the complete Xcode project from here. As always, leave me comment and share your feedback about the tutorial.


 339
339

 被折叠的 条评论
为什么被折叠?
被折叠的 条评论
为什么被折叠?
 到【灌水乐园】发言


Pingback: Adding Section and Index List in UITableView | iOS Programming 101 | MUSCLE CODER()
Pingback: Creating a NSDictionary from a NSMutableArray | lonte facebook()
Pingback: Indexed tableView with Array of Unknown Contents? | lonte facebook()
Pingback: Creating NSDictionary with Initial Name to sort()
Pingback: add images from MySQL database on sorted UITableViewCell()
Pingback: Creating contact list with sorted names and images from MySQL()
Pingback: iOS Programming 101: Adding Section and Index List in UITableView | Dinesh Ram Kali.()