


关于AOP的概念这里就不再提及了,上篇博客中都提到了;在我看来切面的切入是为了增强被切入类(也就是连接点Joinpoint),对于增强又有几种在不同位置的增强可以分为:前置增强,后置增强,环绕增强(前+后)下面就来看一下这些增强用代码如何实现吧。
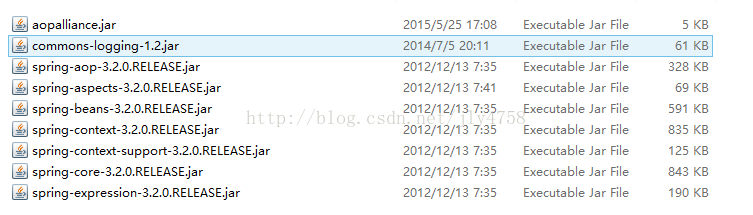
在写代码之前我们需要引入spring关于aop的包:
一、编程式
为了更清晰的看明白AOP的各种增强,我们先来用编程的形式来看一下各种增强是如何实现的。
定义一个前置增强类,其实也就是一个切面类,前置增强类实现了接口:org.springframework.aop.MethodBeforeAdvice
/**
 * 这里是利用spring AOP 需要引入jar包(aopallicance,jar+spring.jar)
 * @author 陈丽娜
 * @version 2015年5月25日下午5:11:35
 */
public class GreetingBeforeAdvice implements MethodBeforeAdvice {

	@Override
	public void before(Method arg0, Object[] arg1, Object arg2)
			throws Throwable {
	   System.out.println("this is before() 前置增强!");
	}
}
定义一个后置增强类,实现了接口:org.springframework.aop.AfterReturningAdvice
/**
 * 后置增强类
 * @author 陈丽娜
 * @version 2015年5月28日上午10:51:34
 */
//@Component
public class GreetingAfterAdvice implements AfterReturningAdvice {

	@Override
	public void afterReturning(Object arg0, Method arg1, Object[] arg2,
			Object arg3) throws Throwable {
		System.out.println("this is after() 后置增强!");
	}
}
我们可以写一个测试类看一下该如何调用:
/**
 * Spring AOP 测试
 * @author 陈丽娜
 * @version 2015年5月25日下午5:56:05
 */
@Test
public void SprinAopTest(){
		ProxyFactory proxyFactory = new ProxyFactory();  // 创建代理工厂

		proxyFactory.setTarget(new GreetingImpl());  // 目标类(被代理的类)

		proxyFactory.addAdvice(new GreetingBeforeAdvice()); // 添加前置增强

		proxyFactory.addAdvice(new GreetingAfterAdvice()); // 添加后置增强


		Greeting greetingProxy = (Greeting) proxyFactory.getProxy();

		greetingProxy.sayHello("陈丽娜Spring AOP");

}
运行结果我们可以看一下:

如果想实现环绕增强也可以写一个类同时实现前置增强和后置增强实现的接口,这样只需要实例化一个对象即可。
同时也可以实现接口org.aopalliance.intercept.MethodInterceptor,这里就不再详细写了。
二、声明式
通过程序式的代码我们可以很清楚的看到AOP的实现原理,但是spring毕竟是spring不会笨到要用编程的方式来实现切入,很显然用声明式也是可以的,可以通过读取配置文件。
来看一下spring配置文件该如何写:
<beans xmlns="http://www.springframework.org/schema/beans"
       xmlns:xsi="http://www.w3.org/2001/XMLSchema-instance"
       xmlns:aop="http://www.springframework.org/schema/aop"
       xmlns:context="http://www.springframework.org/schema/context"
       xsi:schemaLocation="
       http://www.springframework.org/schema/beans
       http://www.springframework.org/schema/beans/spring-beans.xsd
       http://www.springframework.org/schema/beans/aop
       http://www.springframework.org/schema/spring-aop.xsd
       http://www.springframework.org/schema/context
       http://www.springframework.org/schema/context/spring-context.xsd">

     <!-- 在指定的包中(com.tgb.*)扫描@componet注解的类 -->
      <context:component-scan base-package="com.tgb"></context:component-scan>
     <bean id = "greetingImpl" class = "com.tgb.aop.service.impl.GreetingImpl">
         <property name="test">
              <value>你好你好你好呀</value>
         </property>
     </bean>
     <!-- 定义一个代理类 -->
     <bean id = "springProxy" class ="org.springframework.aop.framework.ProxyFactoryBean">
           <property name = "interfaces" value="com.tgb.aop.service.Greeting"/>  <!-- 需要代理的接口 -->
           <property name = "target" ref= "greetingImpl"/>  <!-- 需要代理接口的实现类 -->
          <property name="interceptorNames">    <!-- 增强类 -->
              <list>
                   <value>greetingAfterAdvice</value>
                   <value>greetingBeforeAdvice</value>
                  <!--  <value>greetingThrowAdvice</value>  -->
              </list>
           </property>
     </bean>
  </beans>
这时候需要在增强类上加上注解@Component
测试时的调用情况:
/**
 * 通过xml读取
 * @author 陈丽娜
 * @version 2015年5月26日下午8:35:13
 */
@Test
public void SpringXMLAopTest(){

	//读取xml文件  AOP\src\META-INF
	ApplicationContext context = new ClassPathXmlApplicationContext("springs.xml");

	//Greeting greetingProxy = (Greeting) context.getBean("greetingImpl");
	Greeting greeting = (Greeting) context.getBean("springProxy");
	//greetingProxy.sayHello("陈丽娜,通过读取xml获取代理对象");
	greeting.sayHello("springProxy");
}
运行结果:

从编程式的AOP到声明式的AOP越来越简单,Spring AOP还有更多的改进,下次再谈。


 845
845


 被折叠的 条评论
为什么被折叠?
被折叠的 条评论
为什么被折叠?
 到【灌水乐园】发言


