


重点参考链接:
iOS7 images.xcassets里面放入资源图片
http://www.580114.com/u/ioslearner/Blog/t-43688
1 代码调用
[UIImage imageNamed:@"imageSet的name"]
把我们app的资源图片也放入到images.xcassets里面,也是个不错的选择。目前步骤可用,但不保证是最好的的方案。
首先 new folder,随便起个名字比如 ui,然后把资源图片加入到此文件夹下面,在Xcode工程里面操作。下面看截图吧,so easy。
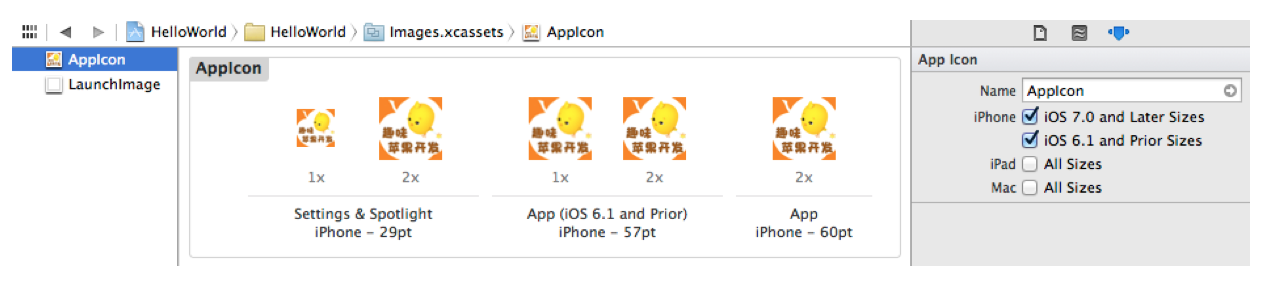
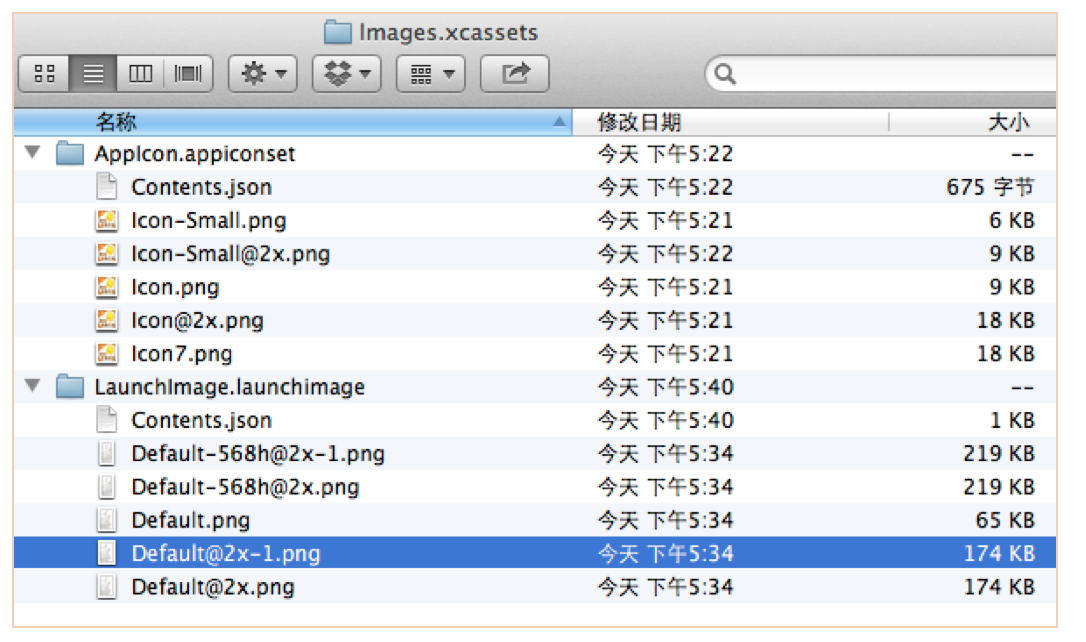
1. 打开此前使用过的HelloWorld项目,然后单击并打开导航区域中的Images.xcassets,看看都有些什么东东:
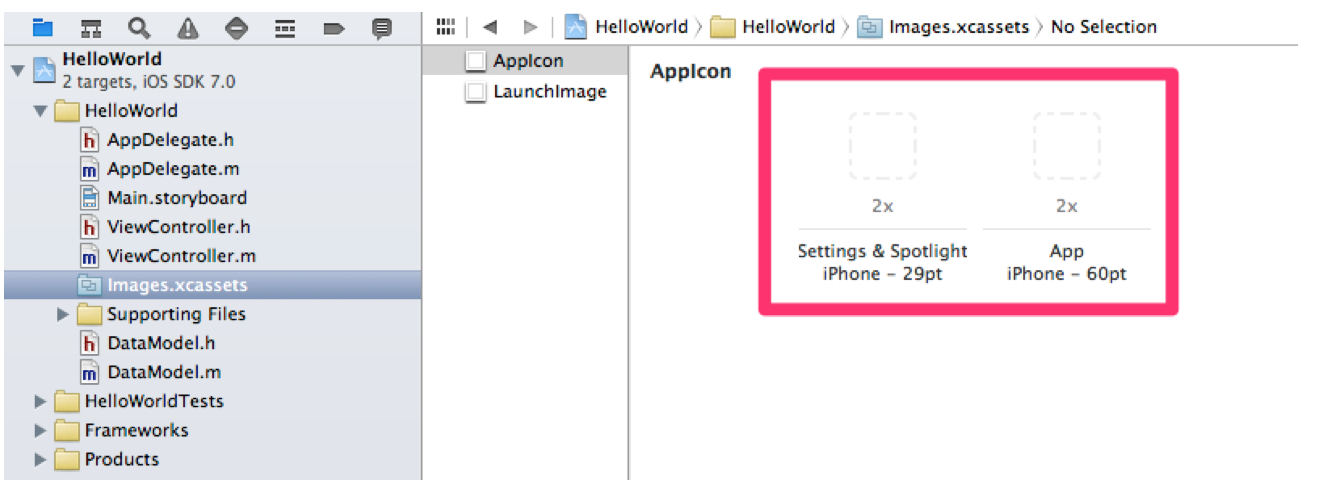
2. 在图中可以看到中间位置有两个虚线框,感觉应该可以直接拖文件进来。OK,那就先准备一下资源文件,如下图所示:
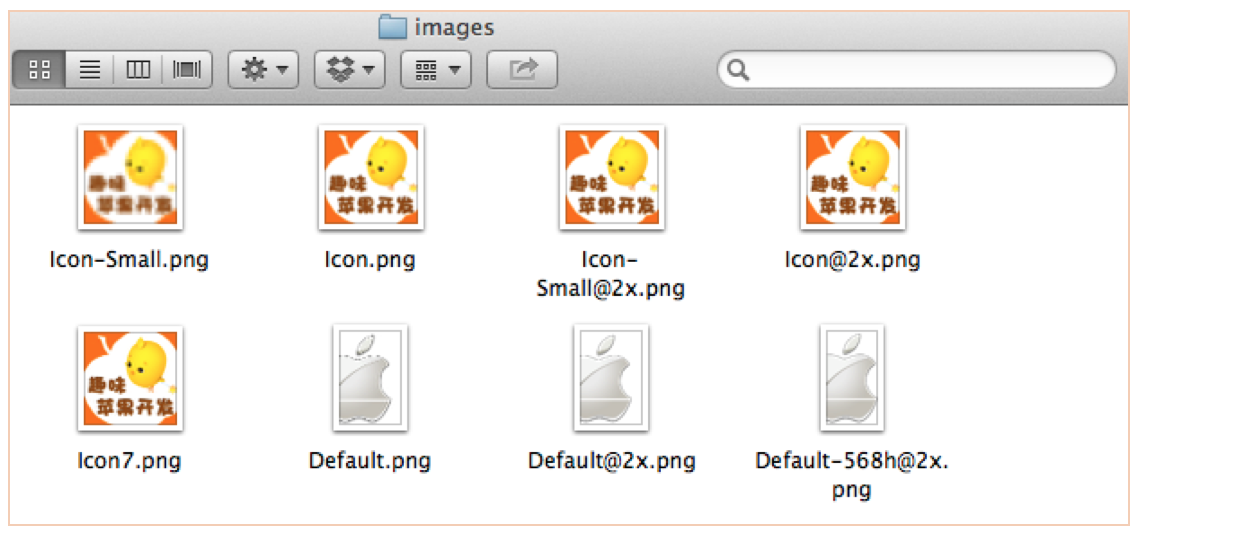
说明:为方便起见,除Icon7.png之外,其他图标的文件名均沿袭了以往iOS图标的命名规则。
3. 将Icon-Small@2x.png拖拽到第一个虚线框中,将Icon7.png拖拽到第二个虚线框中,如下图所示:
说明:Icon-Small@2x.png的尺寸是58*58像素的,而Icon7.png的尺寸是120*120像素的。另外,如果拖入的图片尺寸不正确,Xcode会提示警告信息。
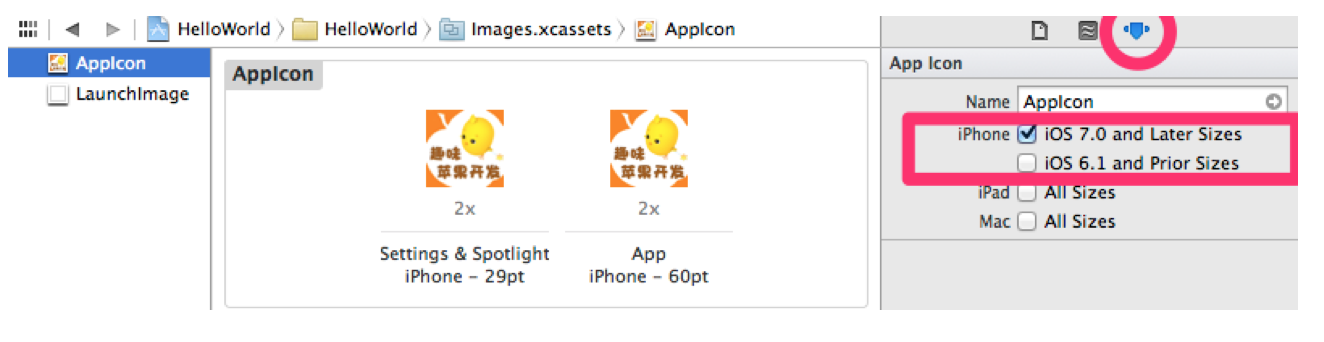
4. 上图中单击实用工具区域的最右侧Show the Attributes inspector(显示属性检查器)图标,能够看到图像集的属性,勾选一下iOS 6.1 and Prior Sizes看看会发生什么变化?
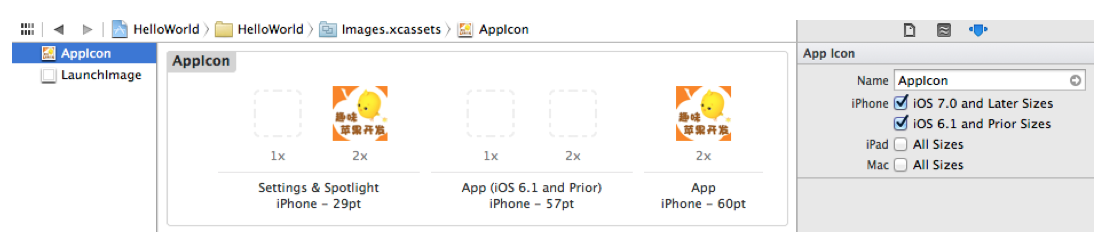
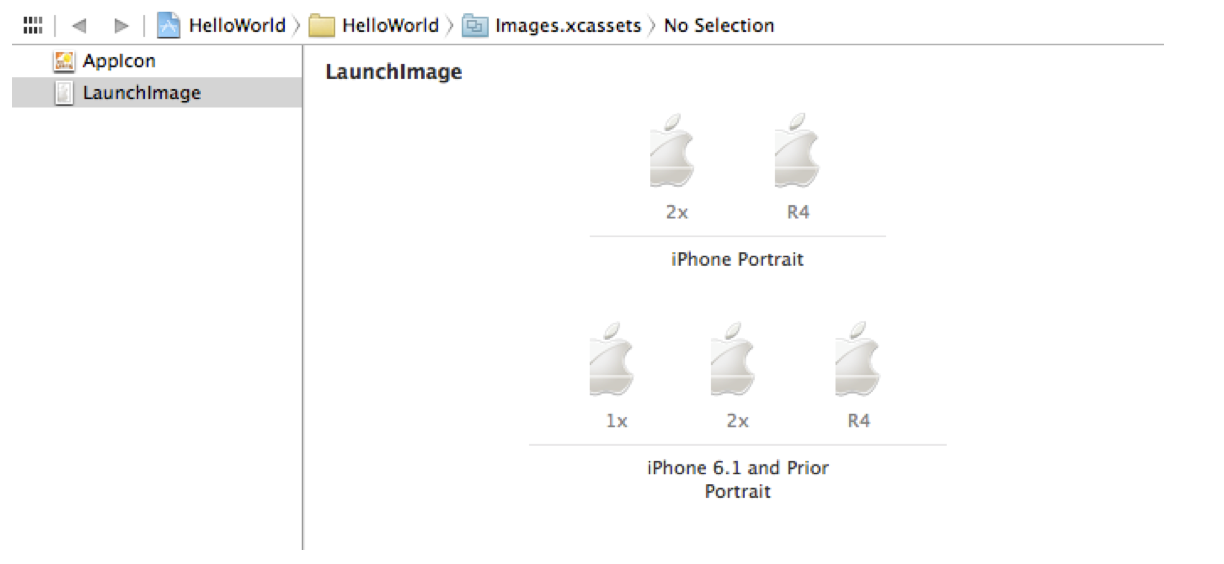
5. 分别将Icon-Small.png、Icon.png和Icon@2x.png顺序拖拽到三个空白的虚线框中,完成之后的效果如下图所示:
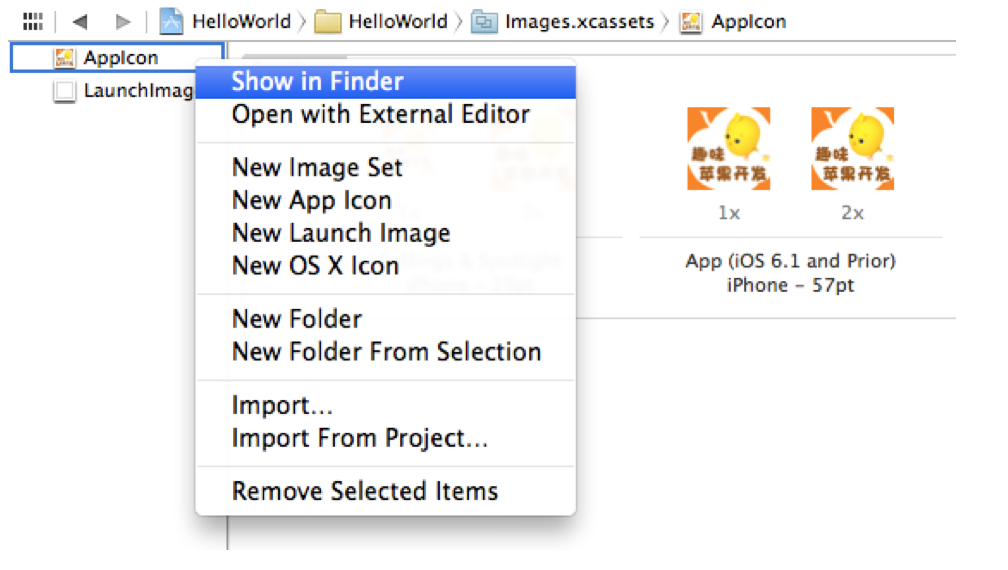
6. 右击左侧的AppIcon,在弹出的辅助菜单中选择Show in Finder,看看刚才拖拽都做了哪些工作:
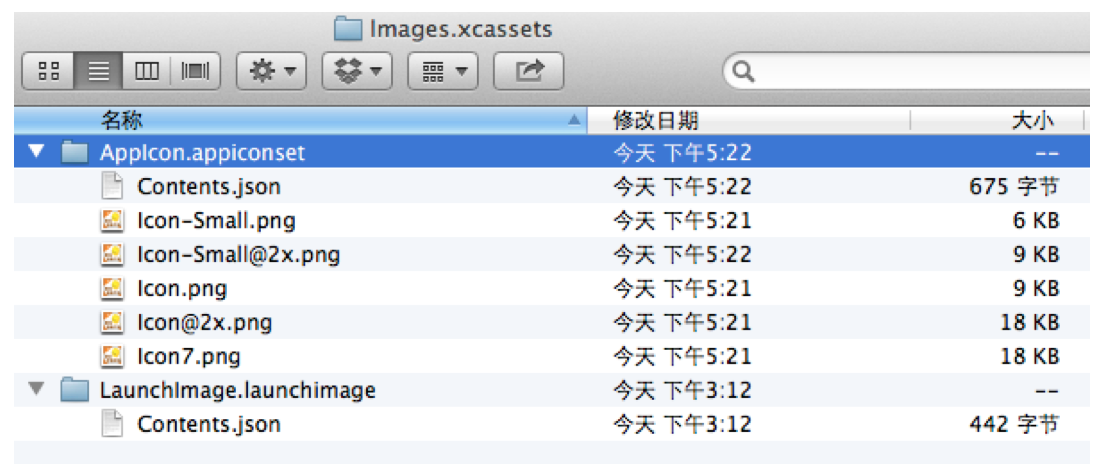
7. 图中除了Contents.json这个文件陌生之外,其他文件都是刚刚拖拽进Xcode的,双击查看一下Contents.json文件内容:
{ "images" : [
{"size" : "29x29", "idiom" : "iphone","filename" : "Icon-Small.png", "scale" :"1x" },
{ "size" : "29x29", "idiom" :"iphone", "filename" : "Icon-Small@2x.png","scale" : "2x" },
{ "size" : "57x57","idiom" : "iphone", "filename" :"Icon.png", "scale" : "1x" },
{ "size": "57x57", "idiom" : "iphone","filename" : "Icon@2x.png", "scale" :"2x" },
{ "size" : "60x60", "idiom" :"iphone", "filename" : "Icon7.png","scale" : "2x" } ],
"info" : {"version" : 1, "author" : "xcode" }
}
内容一目了然啊,哈哈,以后再也不用去特意记住每个尺寸的图标分别应该叫什么名字了,不知道您会不会,反正我每次都是粘贴复制的,呵呵。以后,只要通过拖拖拽拽就搞定了~_~
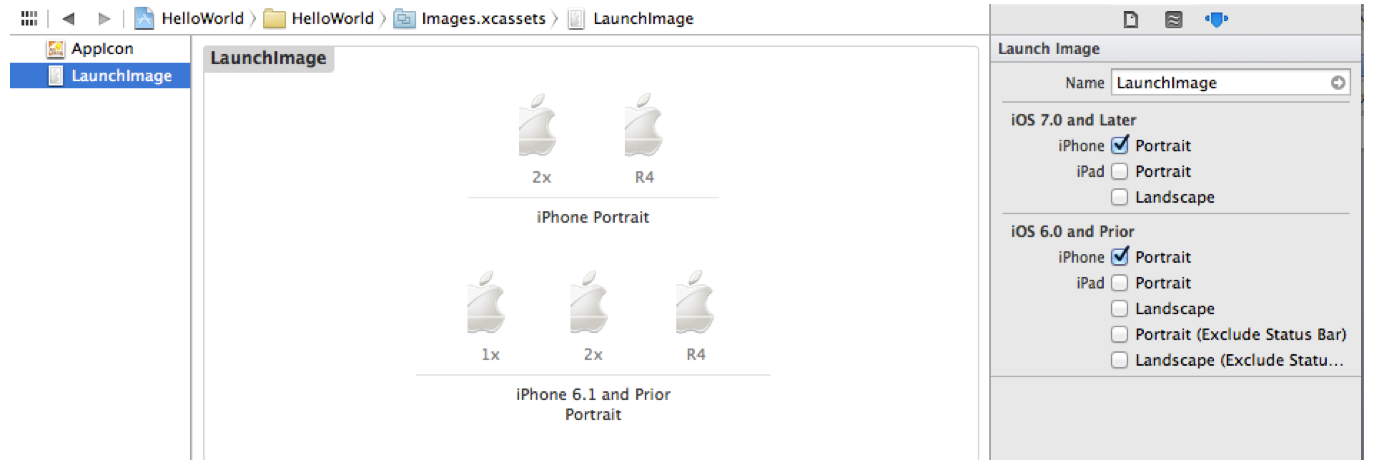
8. 图标搞定了,启动图片照做就OK了,具体操作差别不大,完成之后的示意图如下:
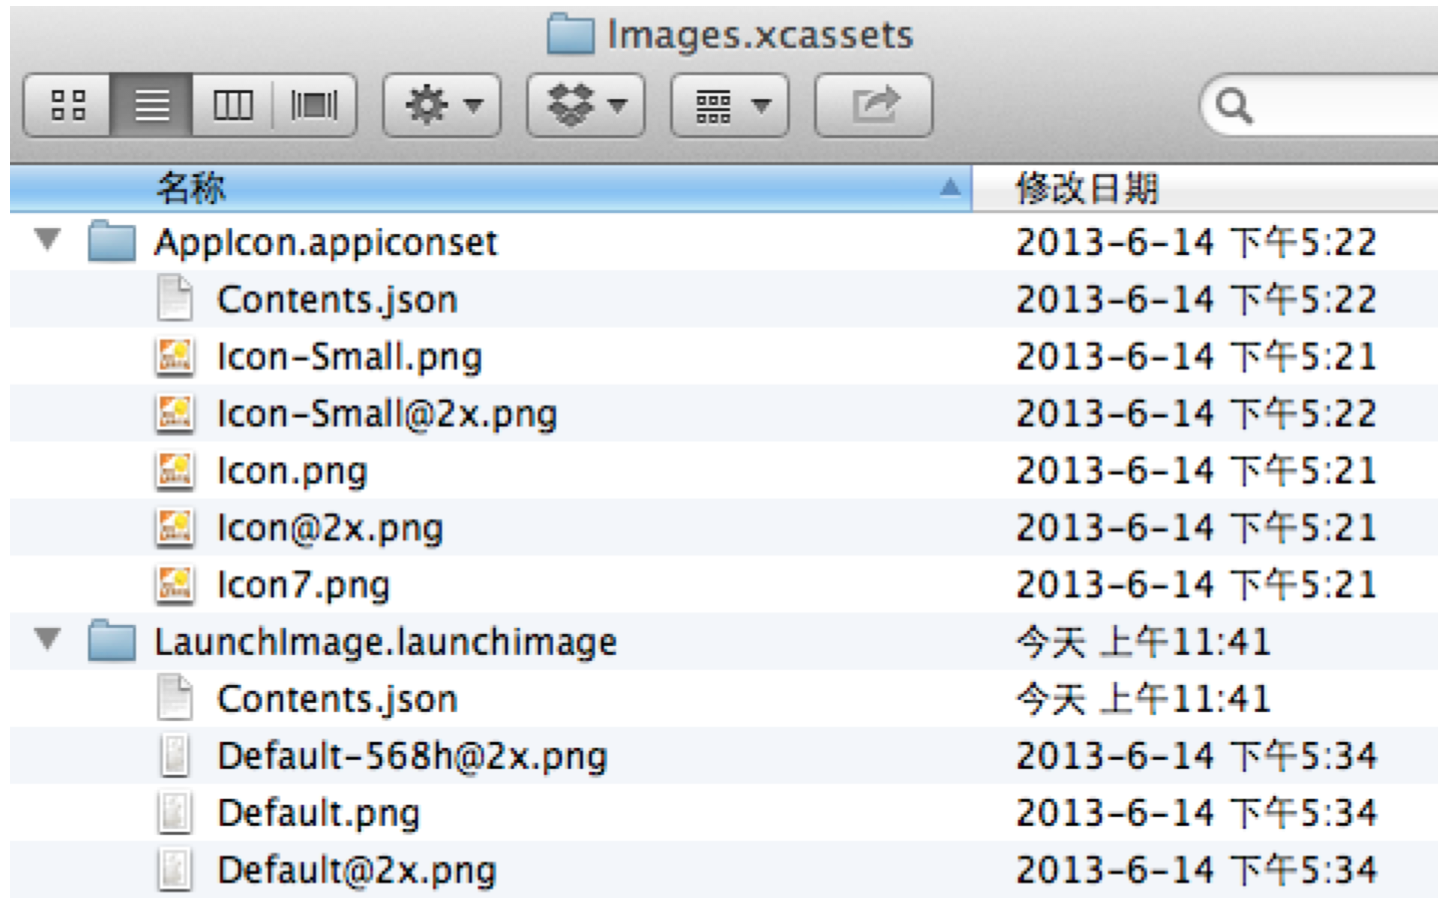
9. 再看一下Finder中的内容,如下所示:
10. 在Finder中不难发现多出了两个文件,分别是:Default@2x-1.png和Default-568h@2x-1.png,双击打开对应的Contents.json文件,内容如下:
{ "images" : [
{ "orientation": "portrait", "idiom" : "iphone","extent" : "full-screen","minimum-system-version" : "7.0", "filename" :"Default@2x.png", "scale" : "2x" },
{"extent" : "full-screen", "idiom" :"iphone", "subtype" : "retina4","filename" : "Default-568h@2x.png","minimum-system-version" : "7.0", "orientation" :"portrait", "scale" : "2x" },
{"orientation" : "portrait", "idiom" :"iphone", "extent" : "full-screen","filename" : "Default.png", "scale" :"1x" },
{ "orientation" : "portrait","idiom" : "iphone", "extent" :"full-screen", "filename" : "Default@2x-1.png","scale" : "2x" },
{ "orientation" :"portrait", "idiom" : "iphone","extent" : "full-screen", "filename" :"Default-568h@2x-1.png", "subtype" : "retina4","scale" : "2x" }
],
"info" : { "version": 1, "author" : "xcode" }
}
11. 将其中的"filename" : "Default@2x-1.png"和"filename" : "Default-568h@2x-1.png"分别改为"filename" : "Default@2x.png"和"filename" : "Default-568h@2x.png",保存并返回Xcode看看会发生什么?

修改后的Contents.json内容如下:
{ "images" : [
{"orientation" : "portrait", "idiom" :"iphone", "extent" : "full-screen","minimum-system-version" : "7.0", "filename" :"Default@2x.png", "scale" : "2x" },
{ "extent": "full-screen", "idiom" : "iphone","subtype" : "retina4", "filename" :"Default-568h@2x.png", "minimum-system-version" :"7.0", "orientation" : "portrait","scale" : "2x" },
{ "orientation" :"portrait", "idiom" : "iphone","extent" : "full-screen", "filename" :"Default.png", "scale" : "1x" },
{"orientation" : "portrait", "idiom" :"iphone", "extent" : "full-screen","filename" : "Default@2x.png", "scale" :"2x" },
{ "orientation" : "portrait","idiom" : "iphone", "extent" :"full-screen", "filename" :"Default-568h@2x.png", "subtype" : "retina4","scale" : "2x" }
],
"info" : {"version" : 1, "author" : "xcode" }
}
12. 分别选中下方的"Default@2x-1.png"和"Default-568h@2x-1.png",按删除键删除这两个文件,删除之后的效果如下图所示:
删除之后Finder中的内容如下所示:
13. 接下来我们新建一个图像试试看如何操作,开始之前我们仍然需要准备一下素材,如下图所示:
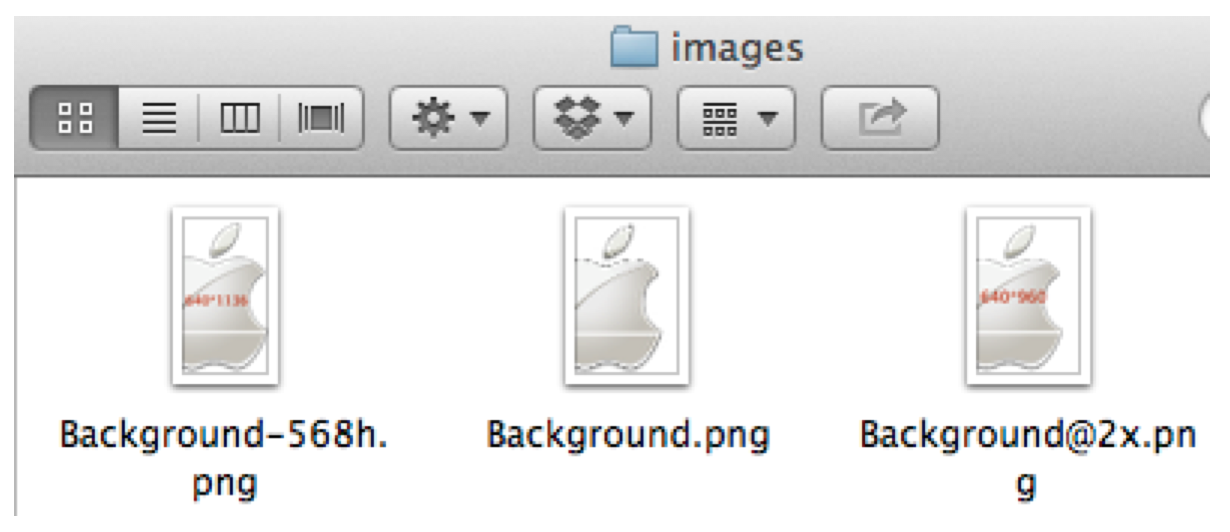
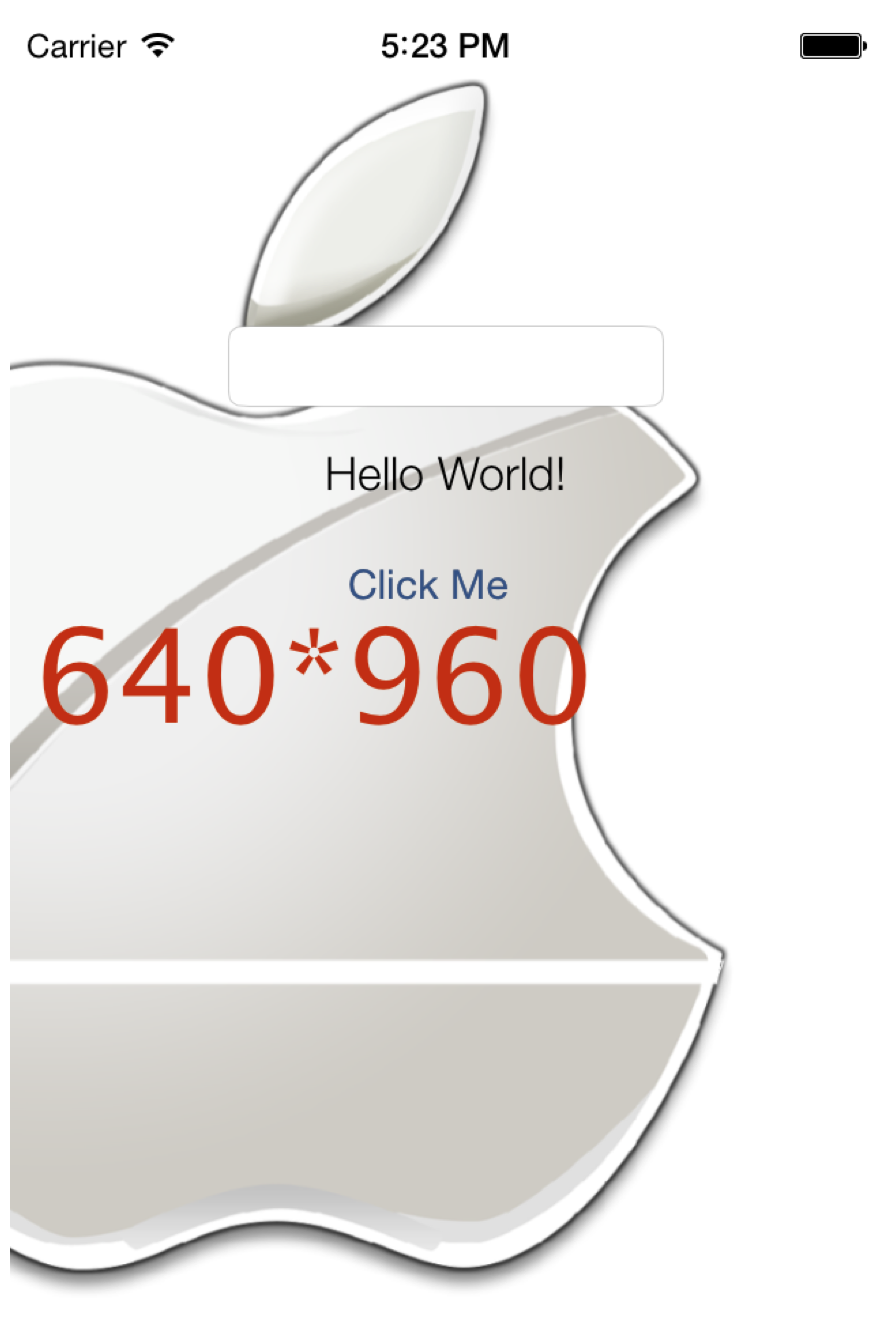
说明:为了方便在运行时看出不同分辨率的设备使用的背景图片不同,我在素材图片中增加了文字标示。
14. 将准备好的三个Background直接拖拽到Xcode中,完成之后如下图所示:
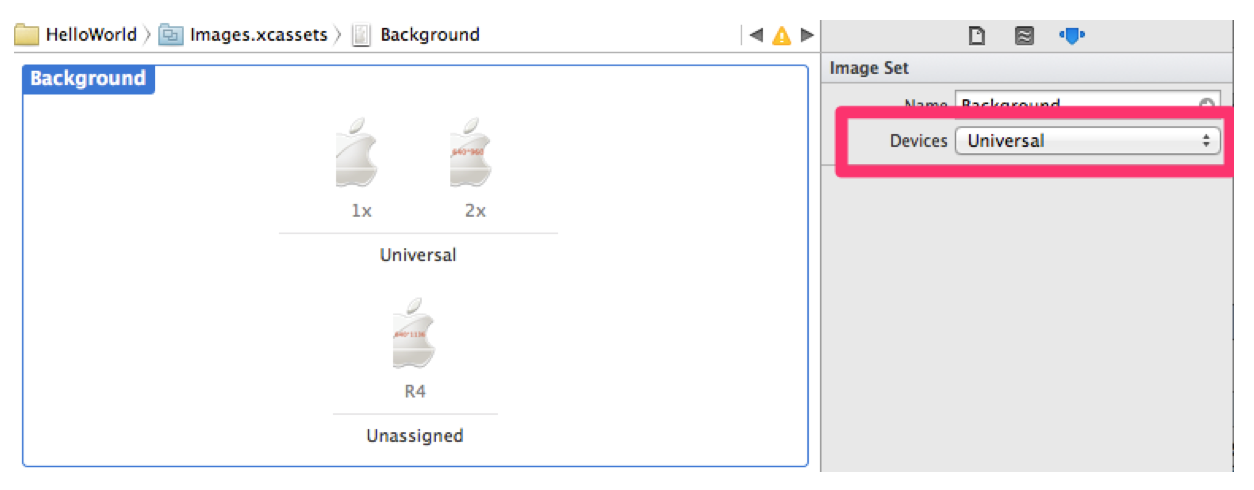
15. 单击右侧Devices中的Universal,并选择Device Specific,然后在下方勾选iPhone和Retina 4-inch,同时取消勾选iPad,完成之后如下图所示:
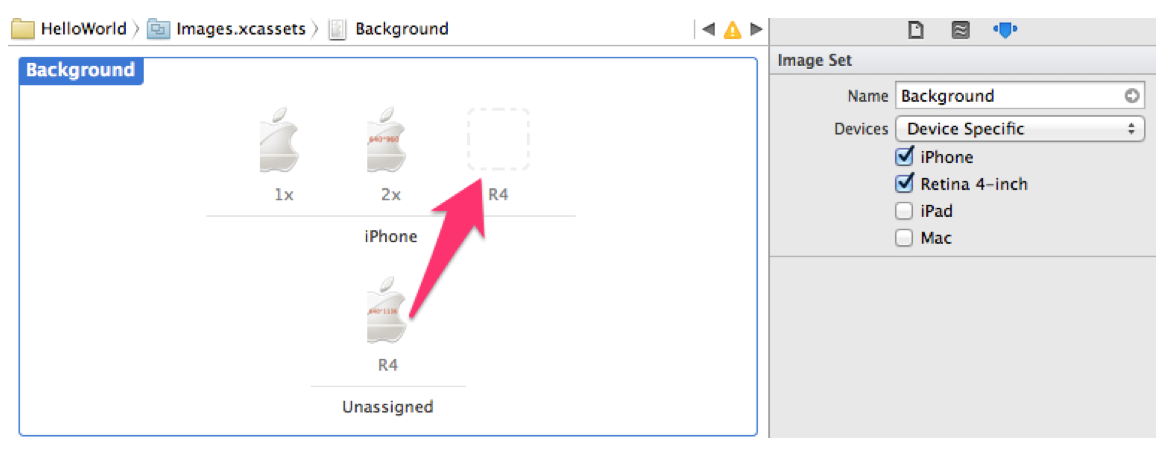
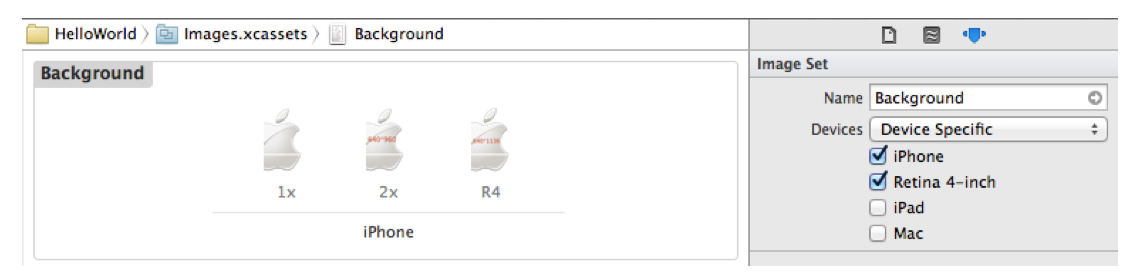
16. 将下方Unassigned中的图片直接拖拽到右上角R4位置,设置视网膜屏使用的背景图片,如下图所示:
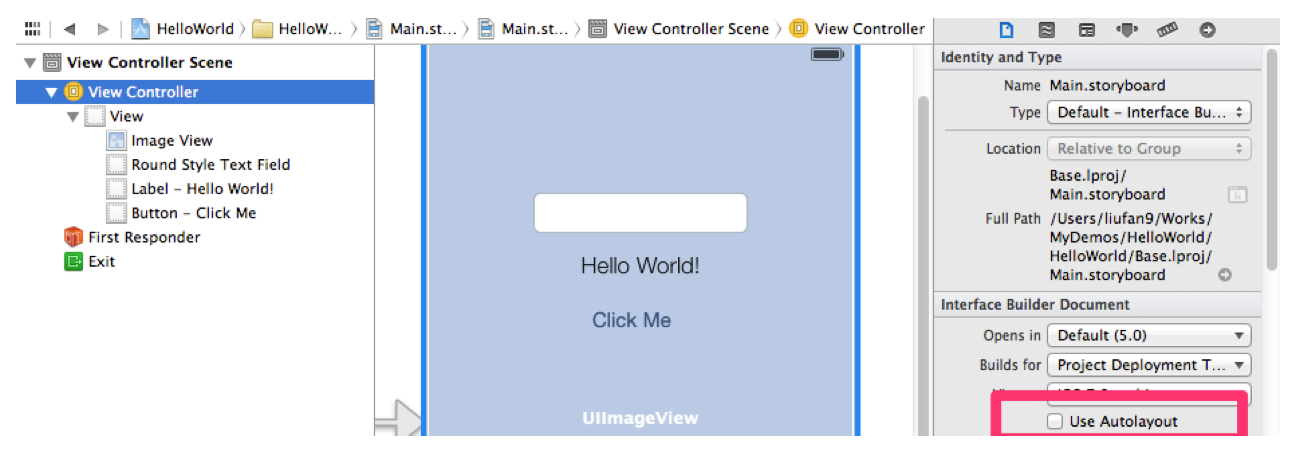
17. 单击并打开Main.storyboard,选中左侧的View Controller,然后在右侧File Inspector中,取消勾选Use Autolayout选项,如下图所示:
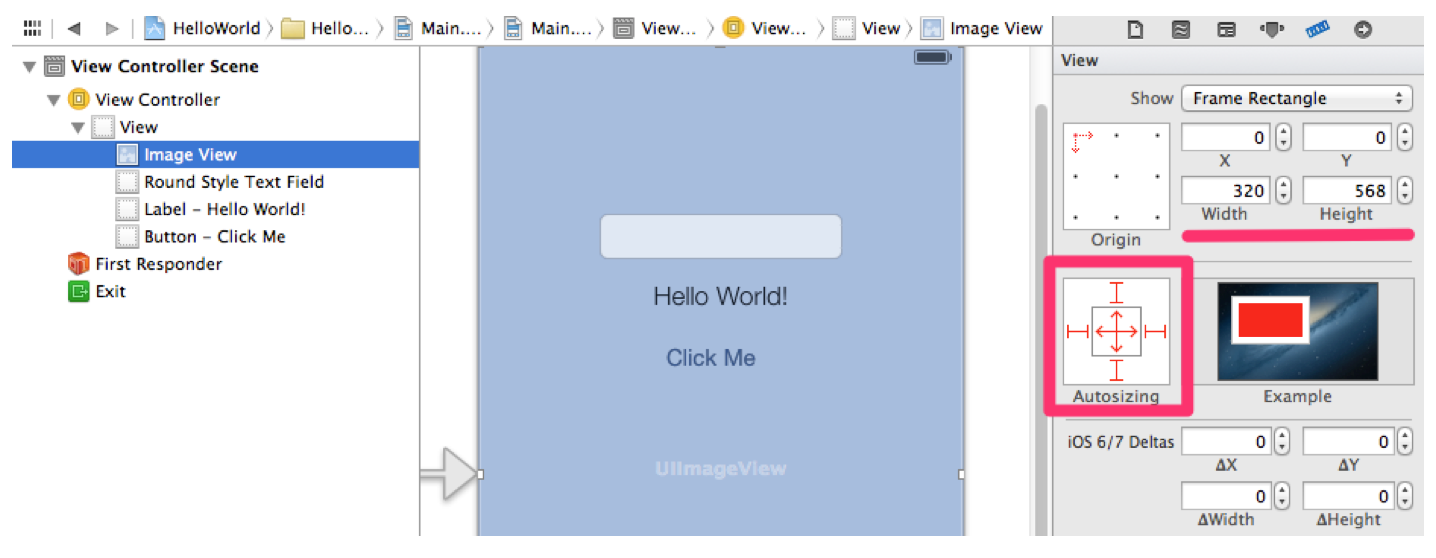
18. 从右侧工具栏中拖拽一个UIImageView至View Controller主视图中,并处于其他控件的最底层,同时调整该UIImageView的尺寸属性,如下图所示:
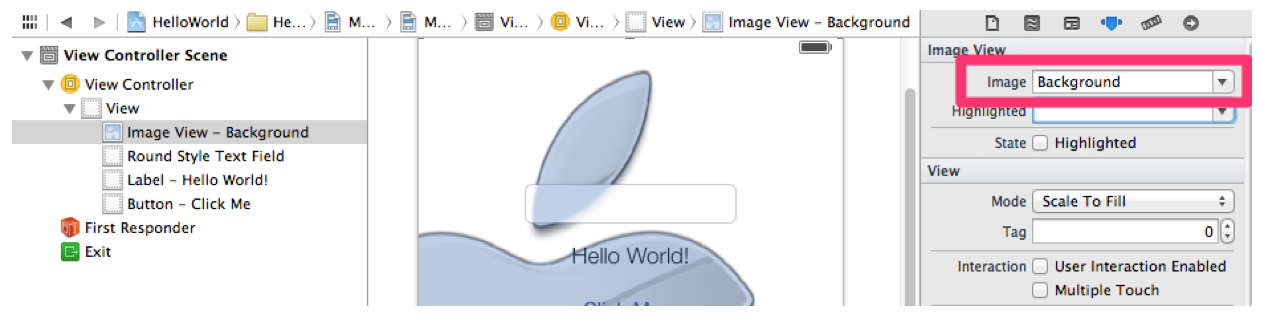
29. 设置该UIImageView使用的图像,如下图所示:
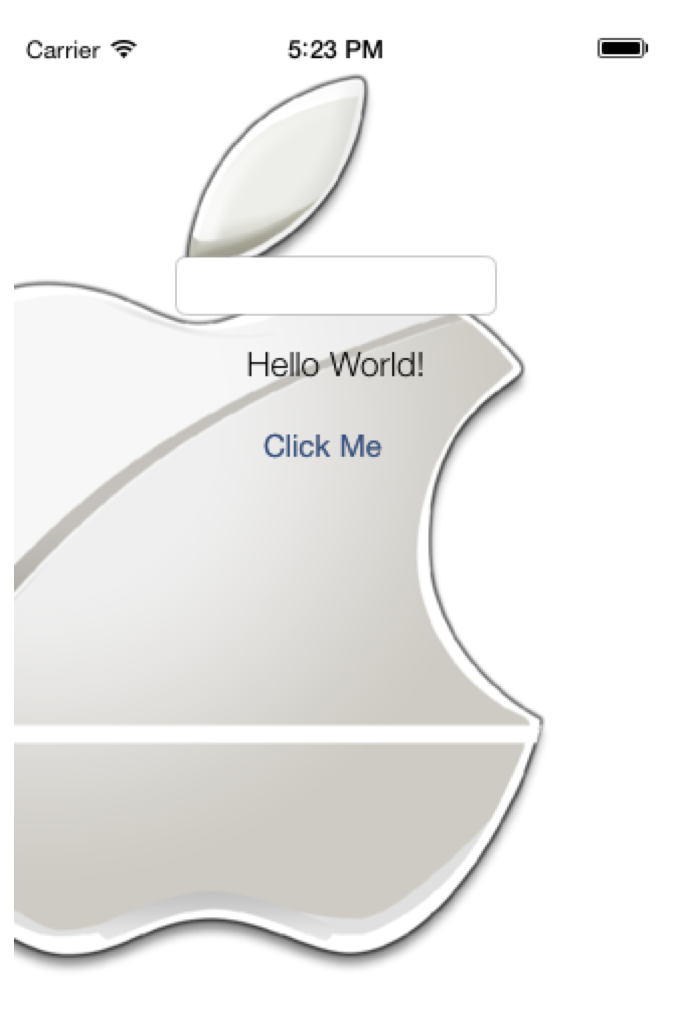
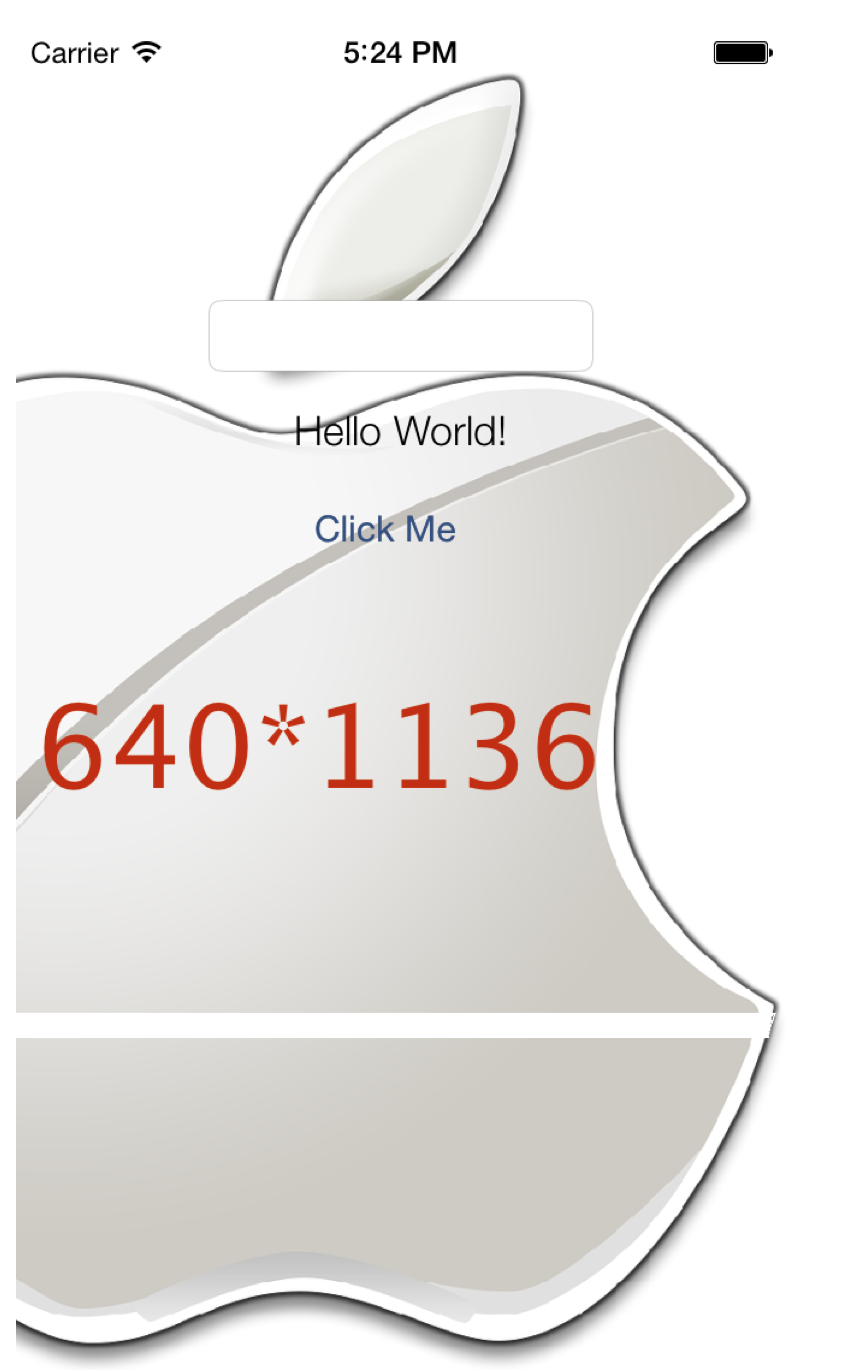
20. 在不同屏幕的模拟器上运行HelloWorld应用,可以看到如下三张图示。
OK!Images.xcassets的初体验一文至此算是告一段落,现做一下简单的小节:
1. 有过Xcode以前版本使用经验的朋友应该会发现,从Xcode 5开始已经无需再去记住Icon.png和Default.png针对不同分辨率使用的文件名了;
2. Xcode 5针对4存视网膜屏的图像提供了单独的支持,解决了以往在兼容四存屏时,有时不得不需要编写专门的代码加载不同的图片;
3. Image.xcassets更加便于管理和维护;
4. 注意:启动图片的PNG图片不要使用透明图片,有兴趣的朋友不妨可以试试看,很丑的,呵呵。


 108
108

 被折叠的 条评论
为什么被折叠?
被折叠的 条评论
为什么被折叠?
 到【灌水乐园】发言


