


 本文档介绍了如何将GeoServer改造为Springboot应用,包括创建Springboot模块、加入配置文件、添加pom.xml等步骤。首先,从源码中提取src目录并命名为geoserver,创建为Springboot模块。接着,将10个模块的applicationContext.xml复制到resources,更新主方法以加载这些配置文件,并配置application.properties和logback-spring.xml。最后,详细说明了pom.xml的修改要点。
GeoServer改造Springboot启动一(创建springboot)
GeoServer改造Springboot启动二(修改源码集成Swagger)
GeoServer改造Springboot启动三(集成jdbcconfig和jdbcstore)
GeoServer改造Springboot启动四(解决post接口方法无法用@requestbody为入参的请求)
GeoServer改造Springboot启动五(解决接口返回xml而不是json)
1、创建springboot模块
1.1将源码的src目录单独提取出来,更改名称为geoserver,如图 1。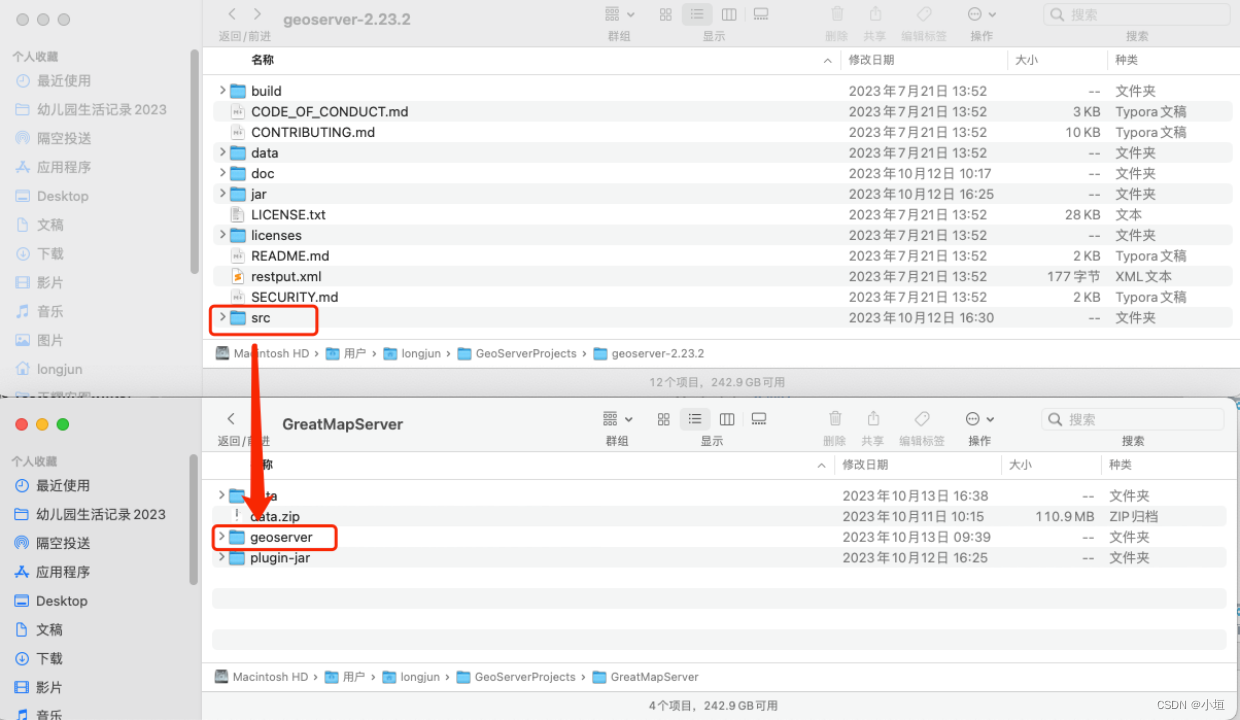
1.2右键geoserver,选择New->Moudle..,出现如图 2,然后填写响应信息创建模块。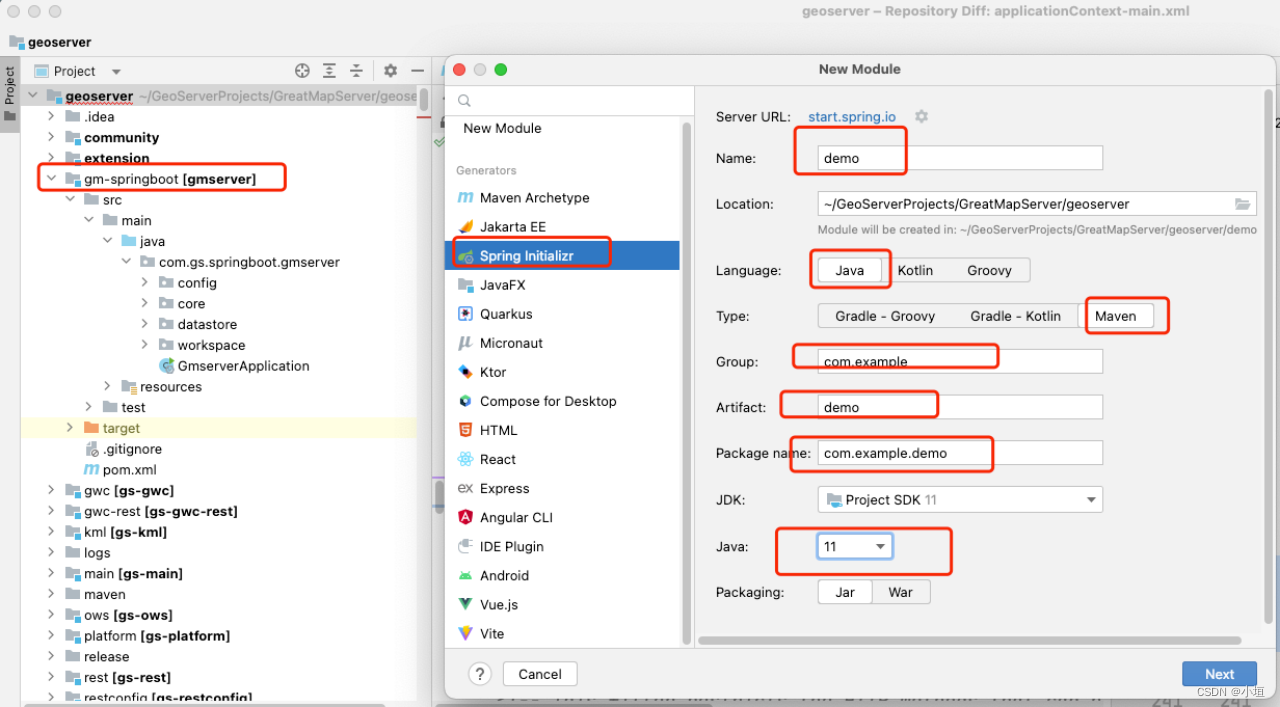
1.3查看模块是否加入父级pom中。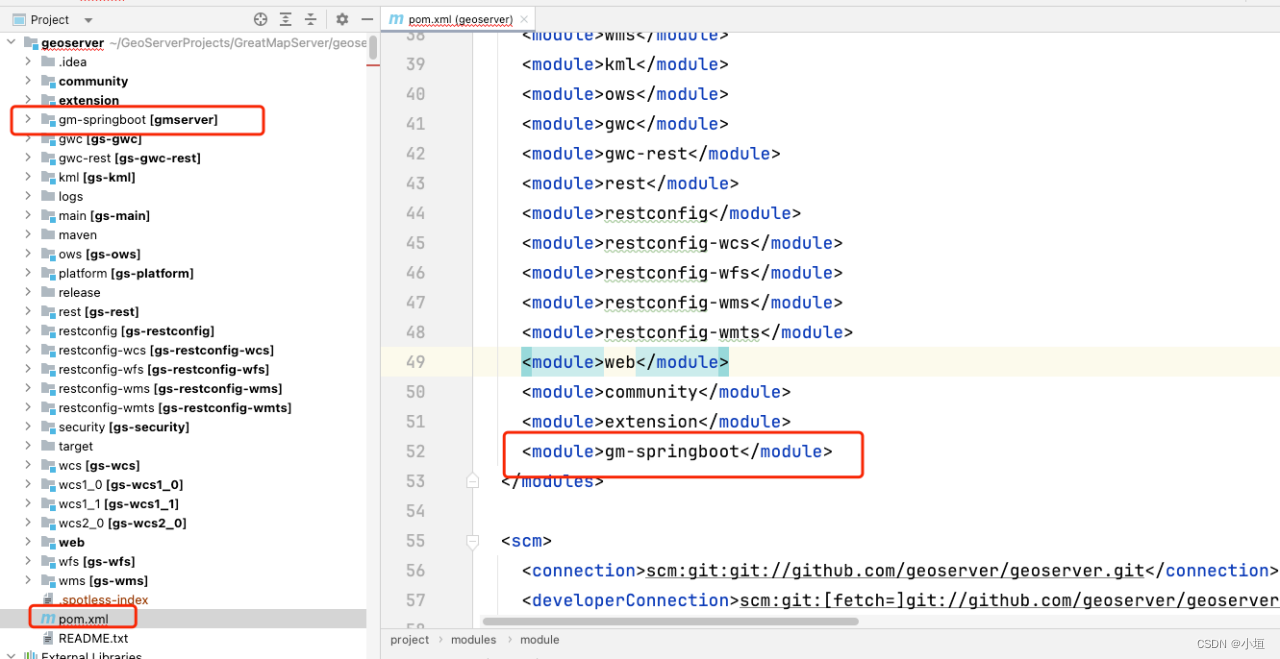
图 3geoserver的pom.xml
2、加入注入配置文件
2.1将以下10个 模块下的applicationContext.xml复制到resources目录下,并对应更改名称。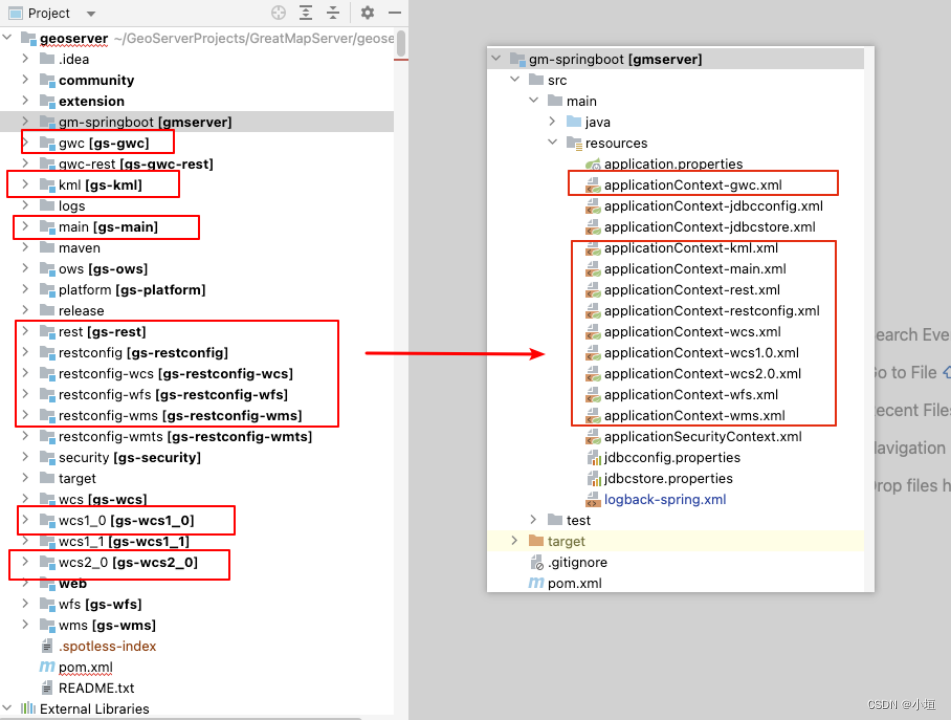
图 410个模块的配置文件
2.2主方法加入以下这10个配置文件。
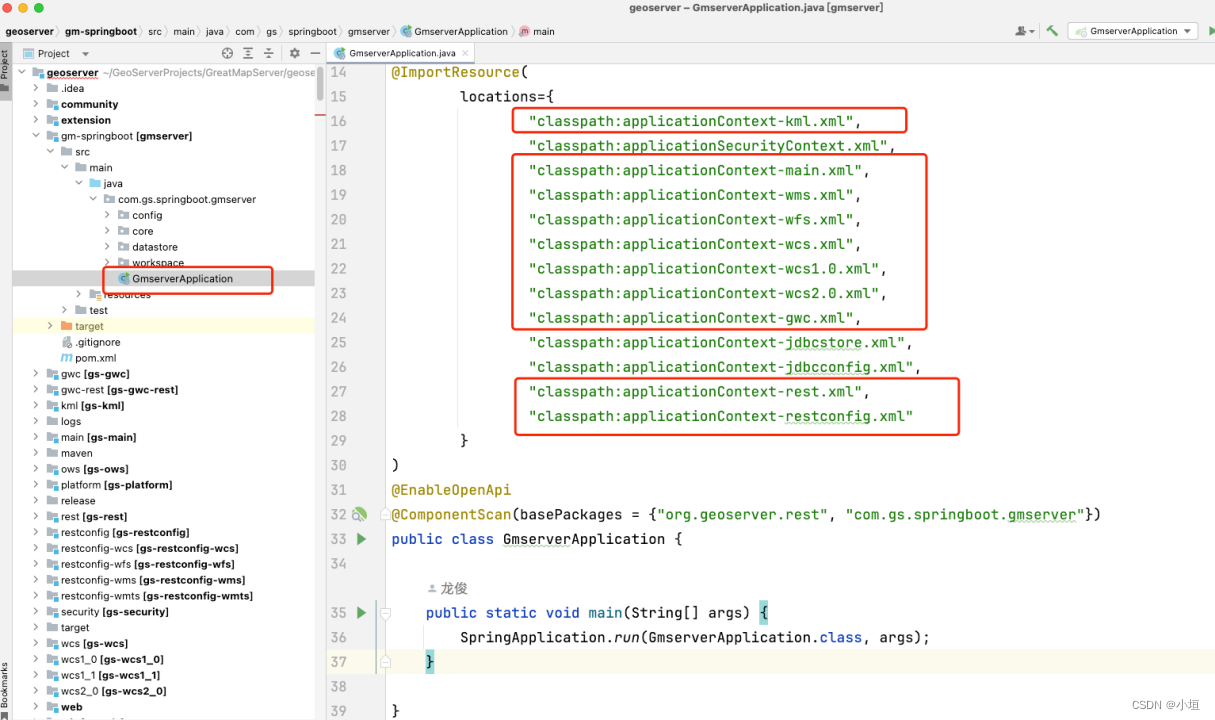
图 5修改主方法
代码如下:
package com.gs.springboot.gmserver;

import org.springframework.boot.SpringApplication;

import org.springframework.boot.autoconfigure.SpringBootApplication;

import org.springframework.boot.autoconfigure.security.servlet.SecurityAutoConfiguration;

import org.springframework.boot.web.servlet.ServletComponentScan;

import org.springframework.context.annotation.ComponentScan;

import org.springframework.context.annotation.ImportResource;

import springfox.documentation.oas.annotations.EnableOpenApi;


@SpringBootApplication(exclude = SecurityAutoConfiguration.class)

@ServletComponentScan

@ImportResource(

        locations={

                "classpath:applicationContext-kml.xml",

                "classpath:applicationSecurityContext.xml",

                "classpath:applicationContext-main.xml",

                "classpath:applicationContext-wms.xml",

                "classpath:applicationContext-wfs.xml",

                "classpath:applicationContext-wcs.xml",

                "classpath:applicationContext-wcs1.0.xml",

                "classpath:applicationContext-wcs2.0.xml",

                "classpath:applicationContext-gwc.xml",

                "classpath:applicationContext-jdbcstore.xml",

                "classpath:applicationContext-jdbcconfig.xml",

                "classpath:applicationContext-rest.xml",

                "classpath:applicationContext-restconfig.xml"

        }

)

@EnableOpenApi

@ComponentScan(basePackages = {"org.geoserver.rest", "com.gs.springboot.gmserver"})

public class GmserverApplication {


    public static void main(String[] args) {

        SpringApplication.run(GmserverApplication.class, args);

    }


}
2.3配置application.properties。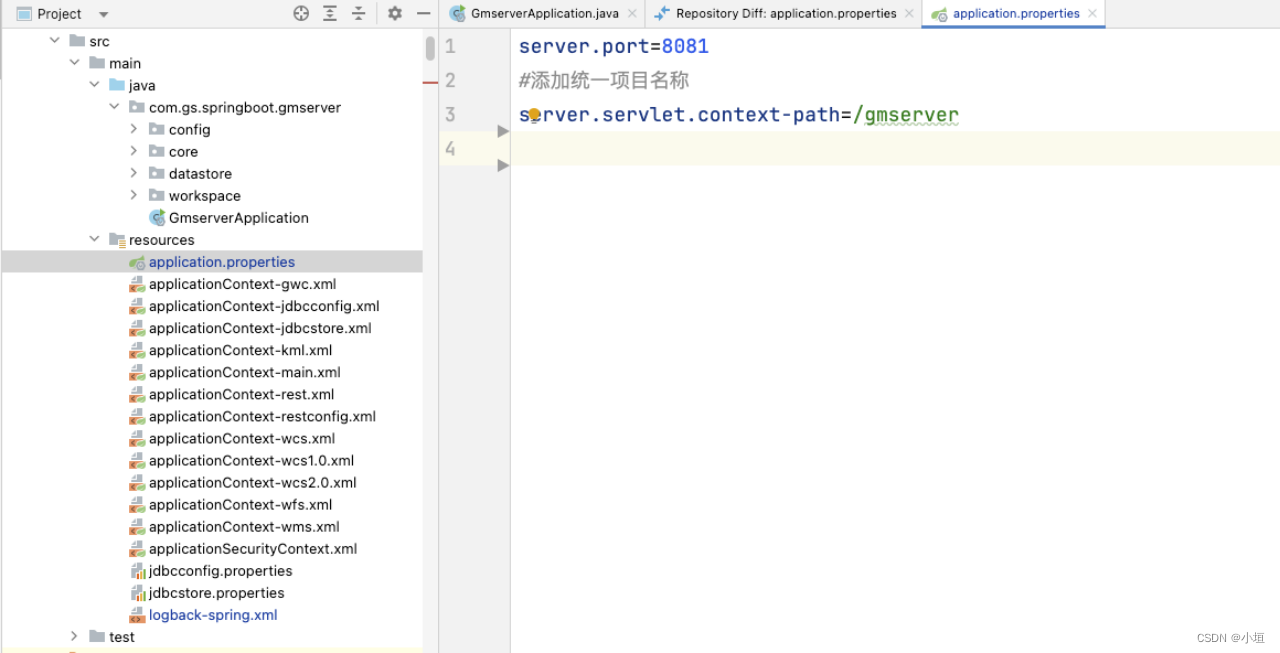
图 6application.properties
- 配置logback-spring.xml。
代码如下:
<?xml version="1.0" encoding="UTF-8"?>

<configuration debug="false" scan="false">

    <springProperty scop="context" name="spring.application.name" source="spring.application.name" defaultValue=""/>

    <property name="log.path" value="logs/${spring.application.name}"/>

    <!-- 彩色日志格式 -->

    <property name="CONSOLE_LOG_PATTERN"

              value="${CONSOLE_LOG_PATTERN:-%clr(%d{yyyy-MM-dd HH:mm:ss.SSS}){faint} %clr(${LOG_LEVEL_PATTERN:-%5p}) %clr(${PID:- }){magenta} %clr(---){faint} %clr([%15.15t]){faint} %clr(%-40.40logger{39}){cyan} %clr(:){faint} %m%n${LOG_EXCEPTION_CONVERSION_WORD:-%wEx}}"/>

    <!-- 彩色日志依赖的渲染类 -->

    <conversionRule conversionWord="clr" converterClass="org.springframework.boot.logging.logback.ColorConverter"/>

    <conversionRule conversionWord="wex"

                    converterClass="org.springframework.boot.logging.logback.WhitespaceThrowableProxyConverter"/>

    <conversionRule conversionWord="wEx"

                    converterClass="org.springframework.boot.logging.logback.ExtendedWhitespaceThrowableProxyConverter"/>

    <!-- Console log output -->

    <appender name="console" class="ch.qos.logback.core.ConsoleAppender">

        <encoder>

            <pattern>${CONSOLE_LOG_PATTERN}</pattern>

        </encoder>

    </appender>


    <!-- Log file debug output -->

    <appender name="debug" class="ch.qos.logback.core.rolling.RollingFileAppender">

        <file>${log.path}/debug.log</file>

        <rollingPolicy class="ch.qos.logback.core.rolling.SizeAndTimeBasedRollingPolicy">

            <fileNamePattern>${log.path}/%d{yyyy-MM, aux}/debug.%d{yyyy-MM-dd}.%i.log.gz</fileNamePattern>

            <maxFileSize>50MB</maxFileSize>

            <maxHistory>30</maxHistory>

   &nb
最低0.47元/天 解锁文章


 533
533

 被折叠的 条评论
为什么被折叠?
被折叠的 条评论
为什么被折叠?
 到【灌水乐园】发言


