


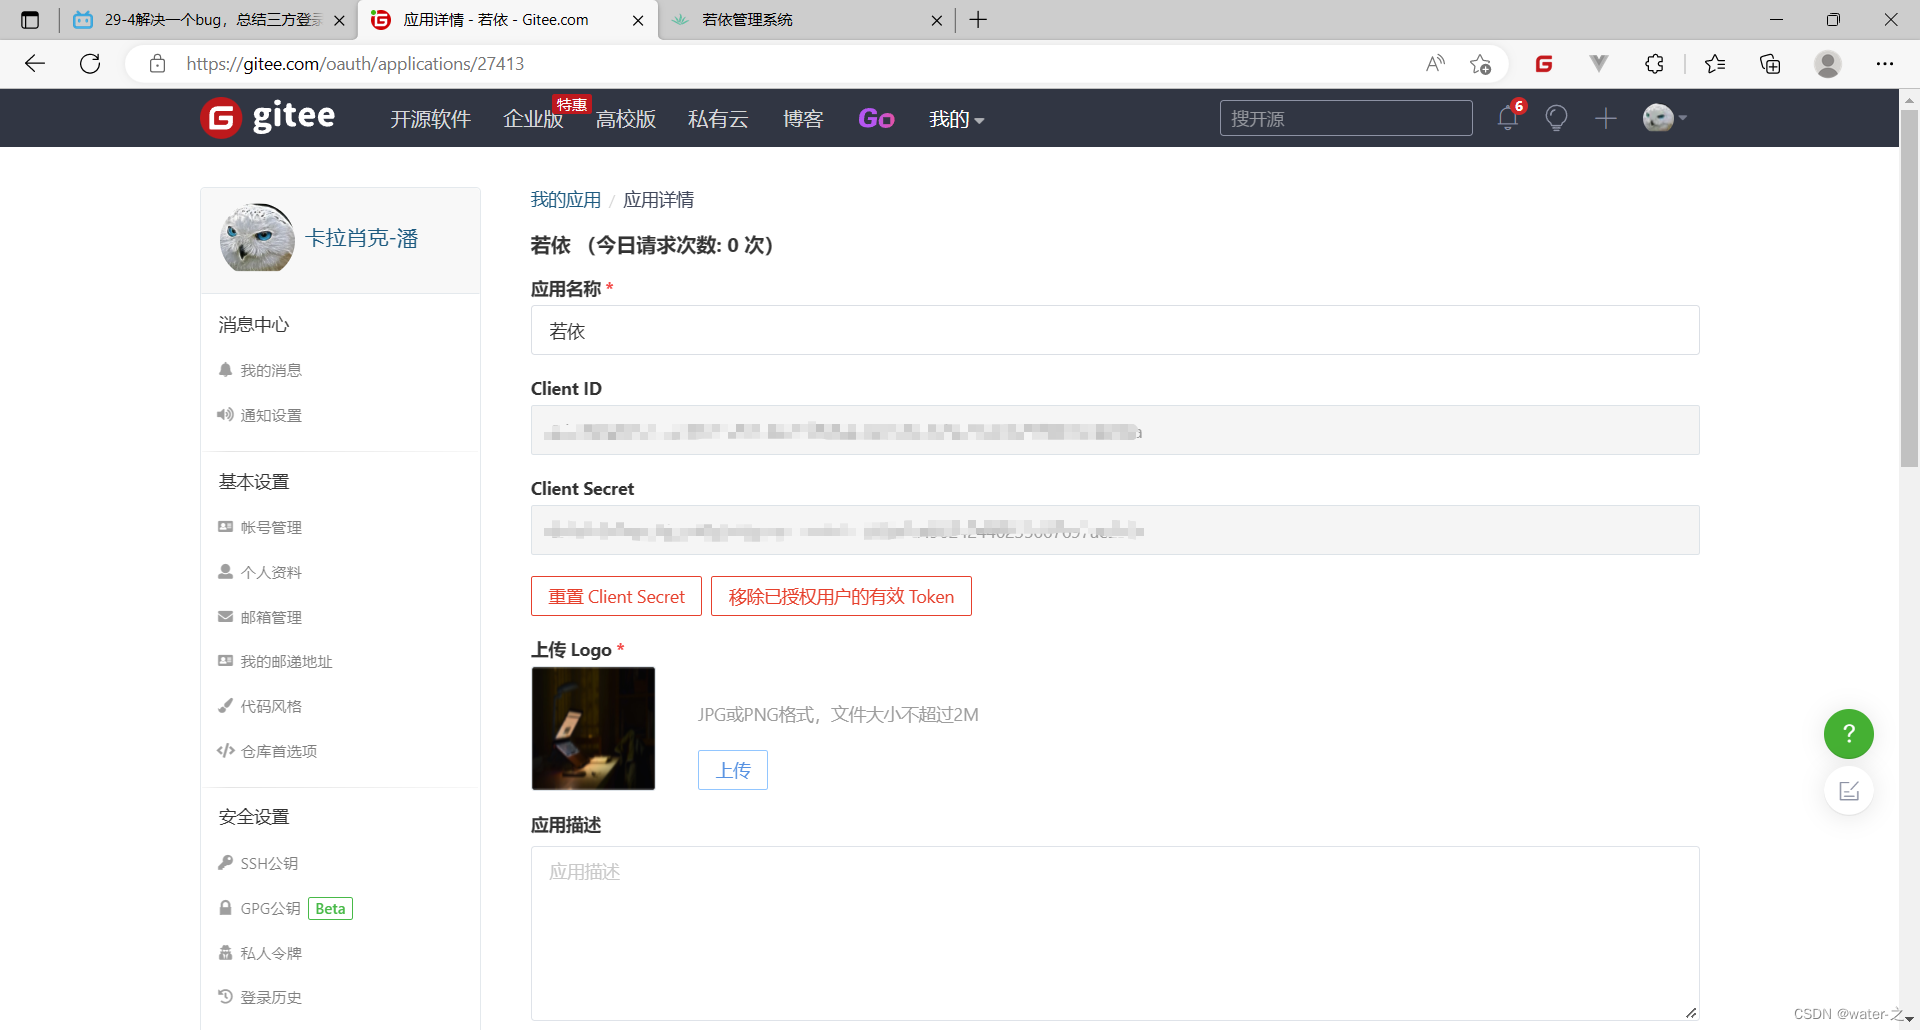
0:以gitee为例,首先开通gitee第三方登录:(在设置里面的第三方应用里面新建)

0.1:后端引入JustAuth第三方登陆框架:
<dependency>
    <groupId>me.zhyd.oauth</groupId>
    <artifactId>JustAuth</artifactId>
    <version>1.15.9</version>
</dependency>
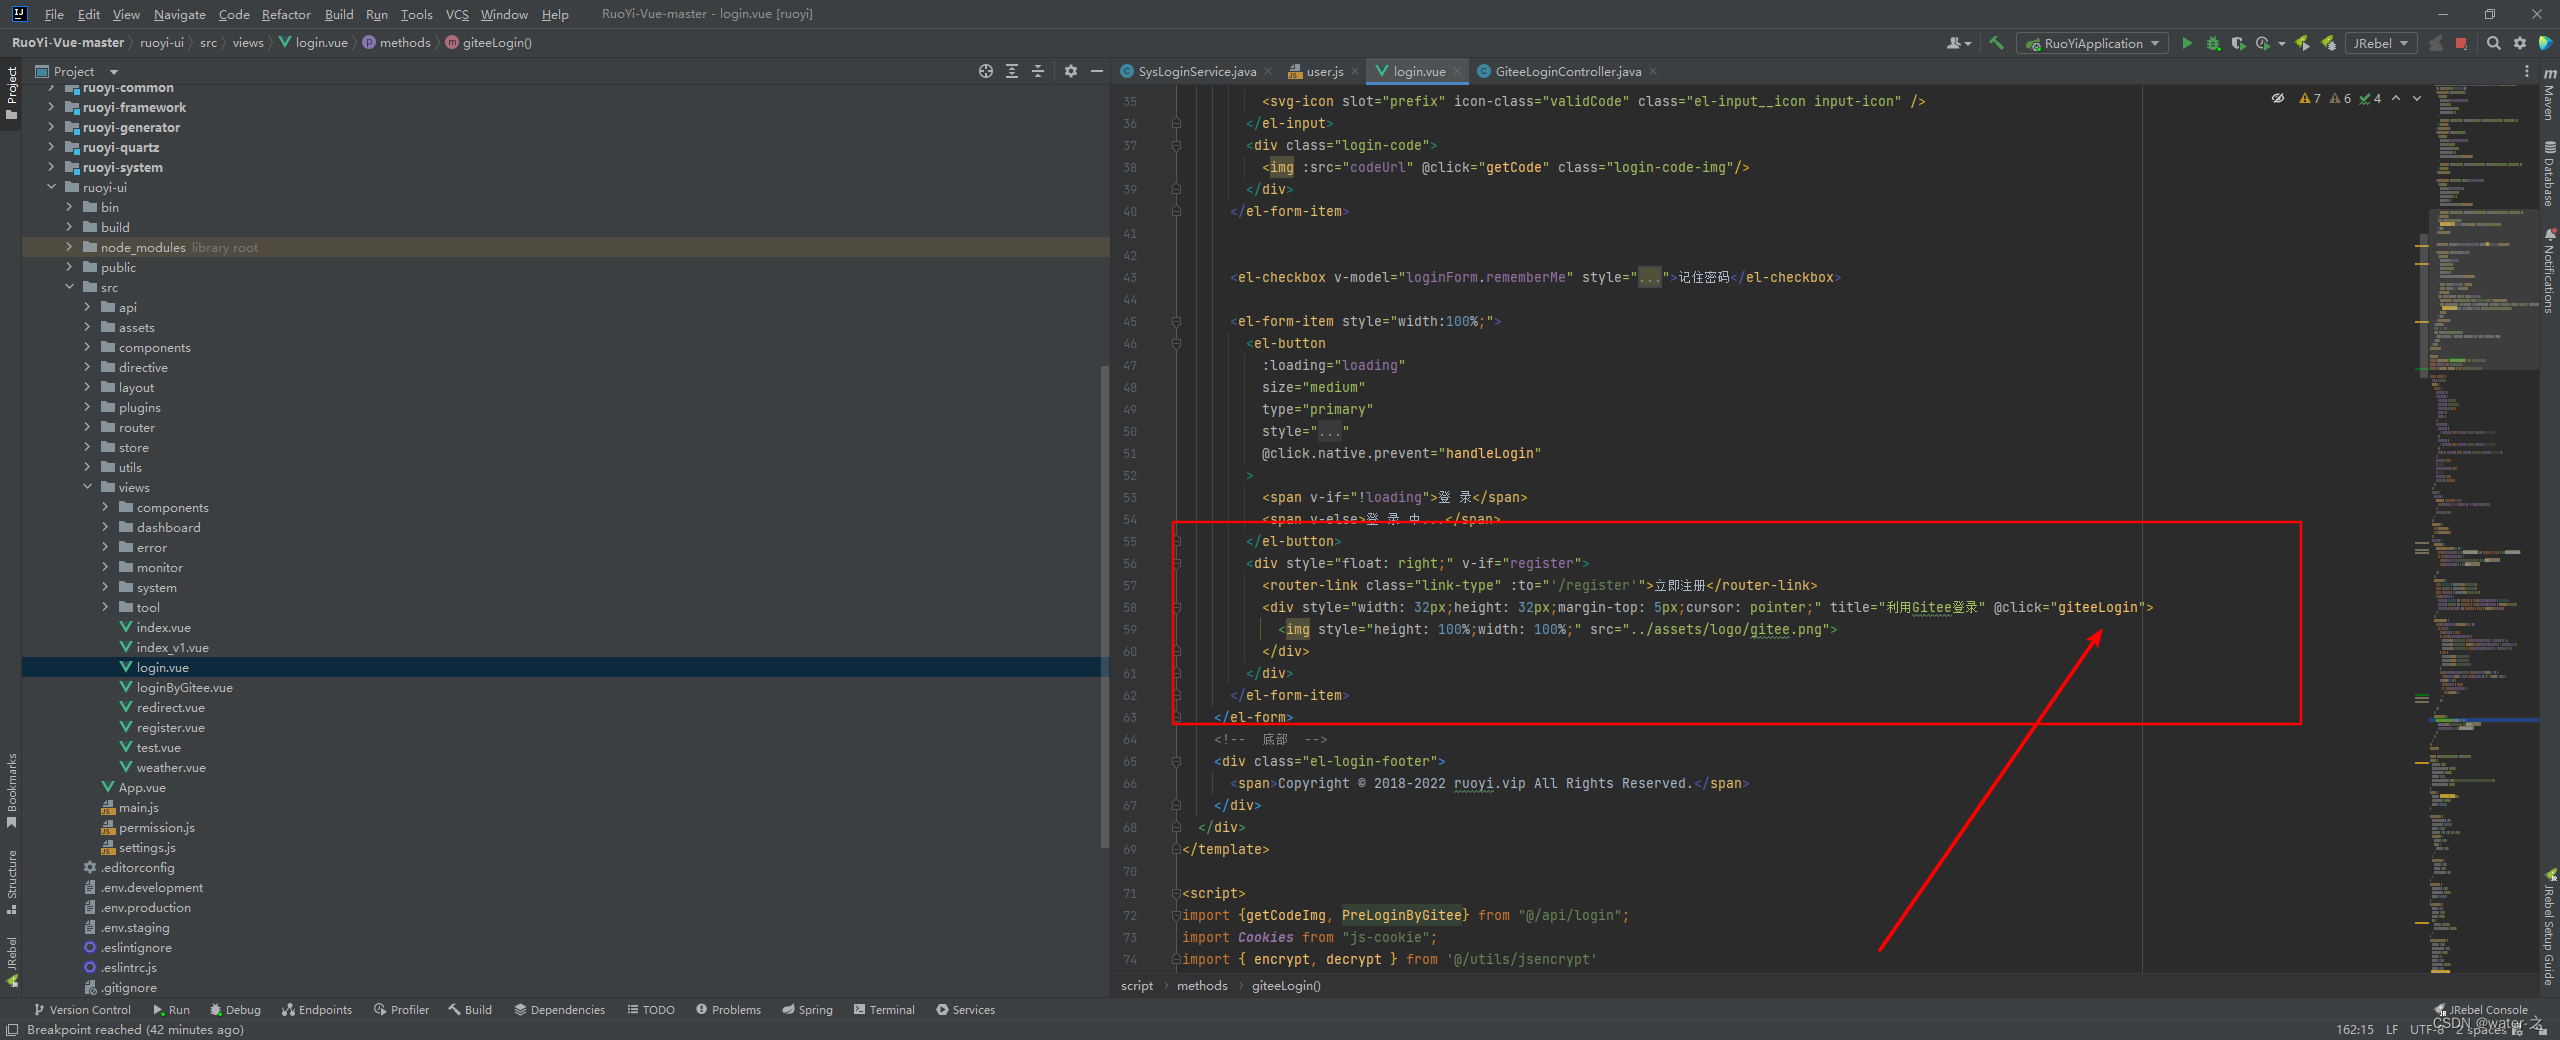
1:在登陆前端加上按钮并且填写登录逻辑
 giteeLogin() {
      PreLoginByGitee().then(res => {
        Cookies.set("user-uuid", res.uuid)
        window.location = res.authorizeUrl
      })
    },
  }
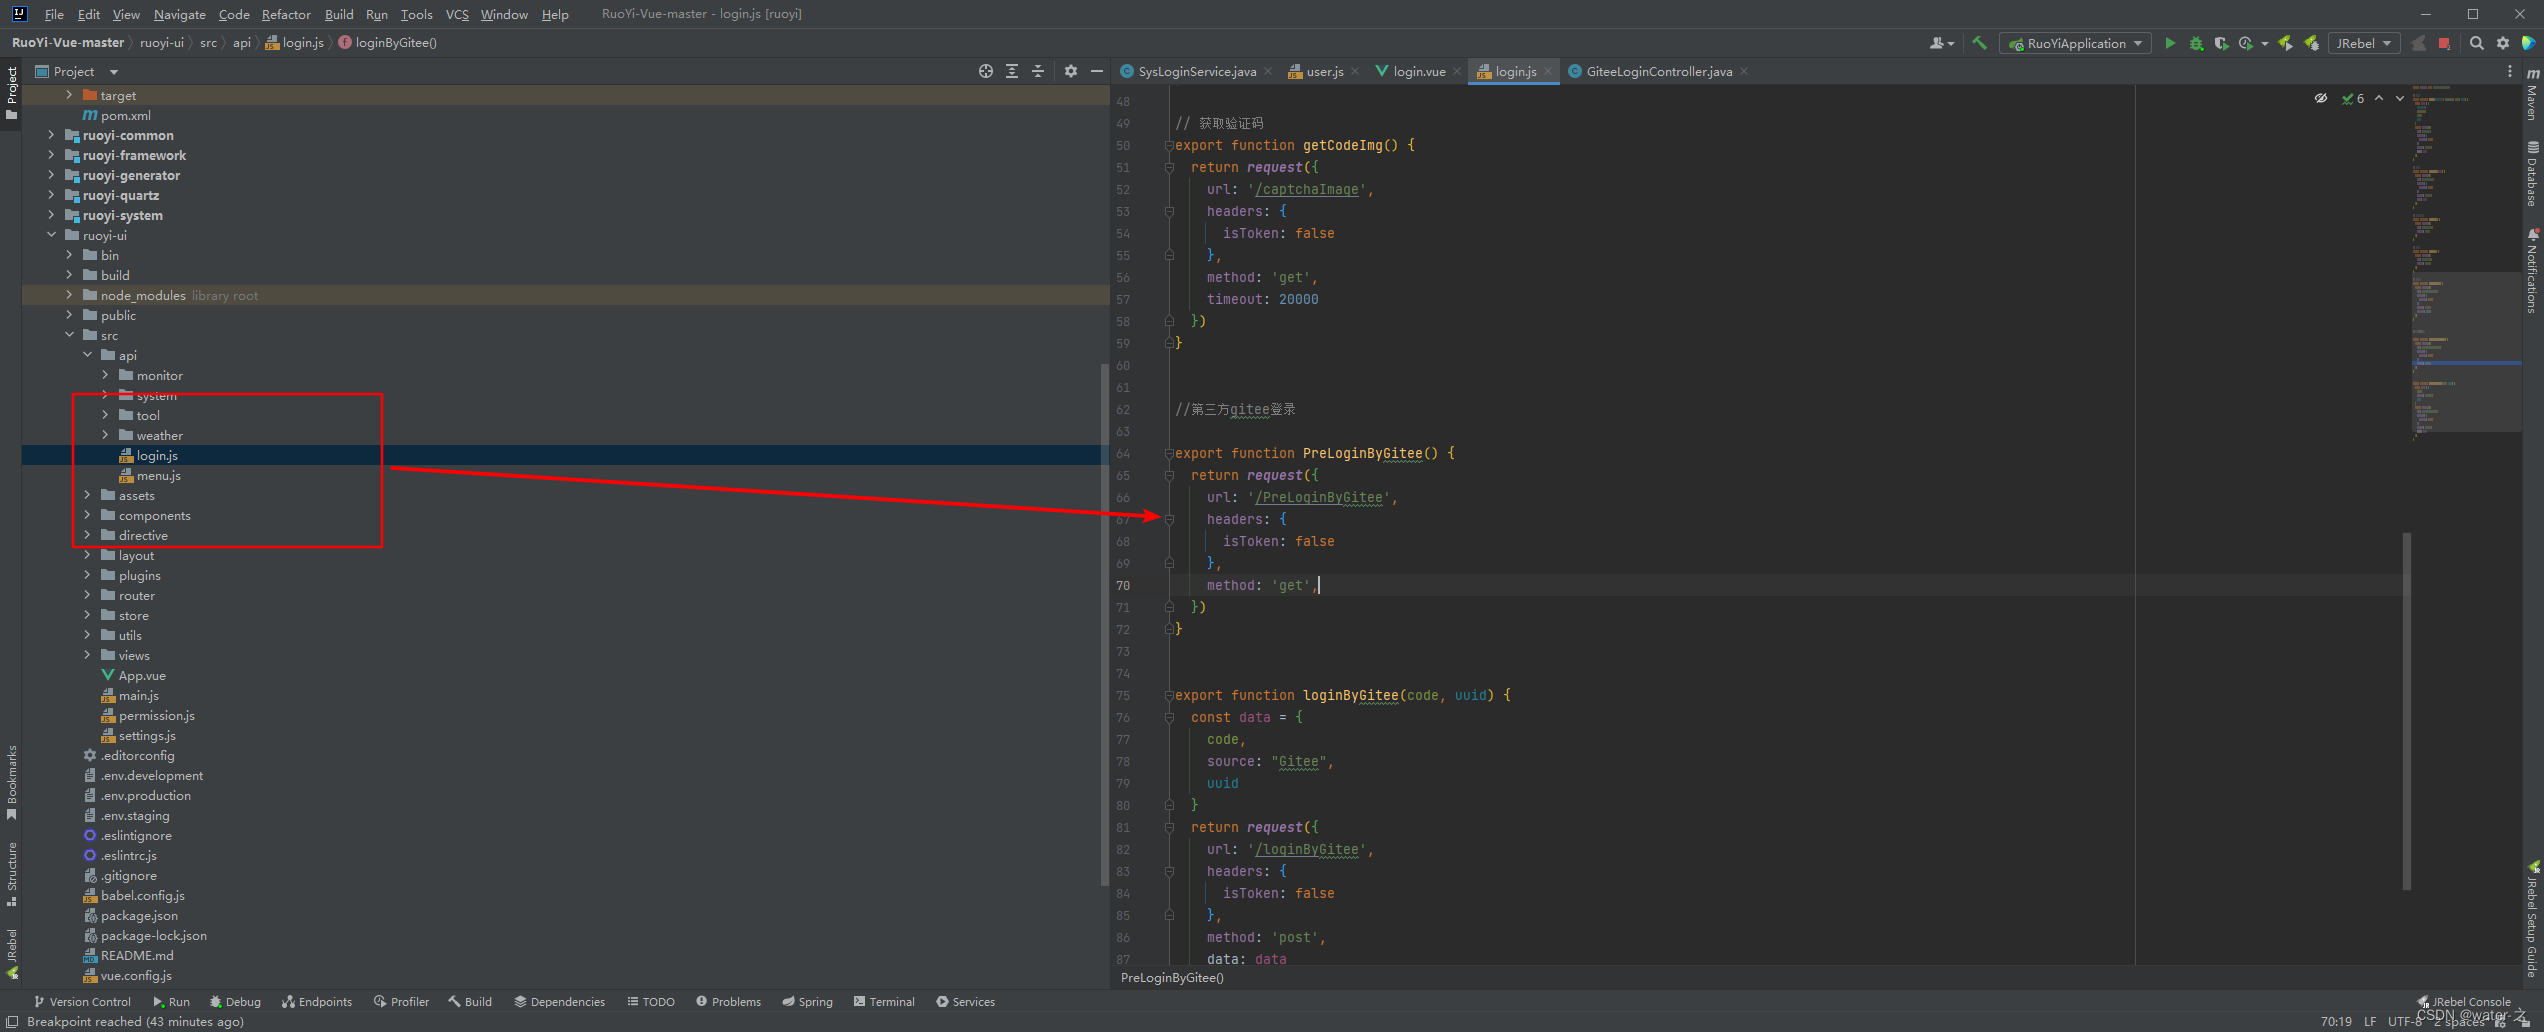
//第三方gitee登录

export function PreLoginByGitee() {
  return request({
    url: '/PreLoginByGitee',
    headers: {
      isToken: false
    },
    method: 'get',
  })
}
2:后端的PreLoginByGitee接口:任务就是生成url,跳到认证url上面
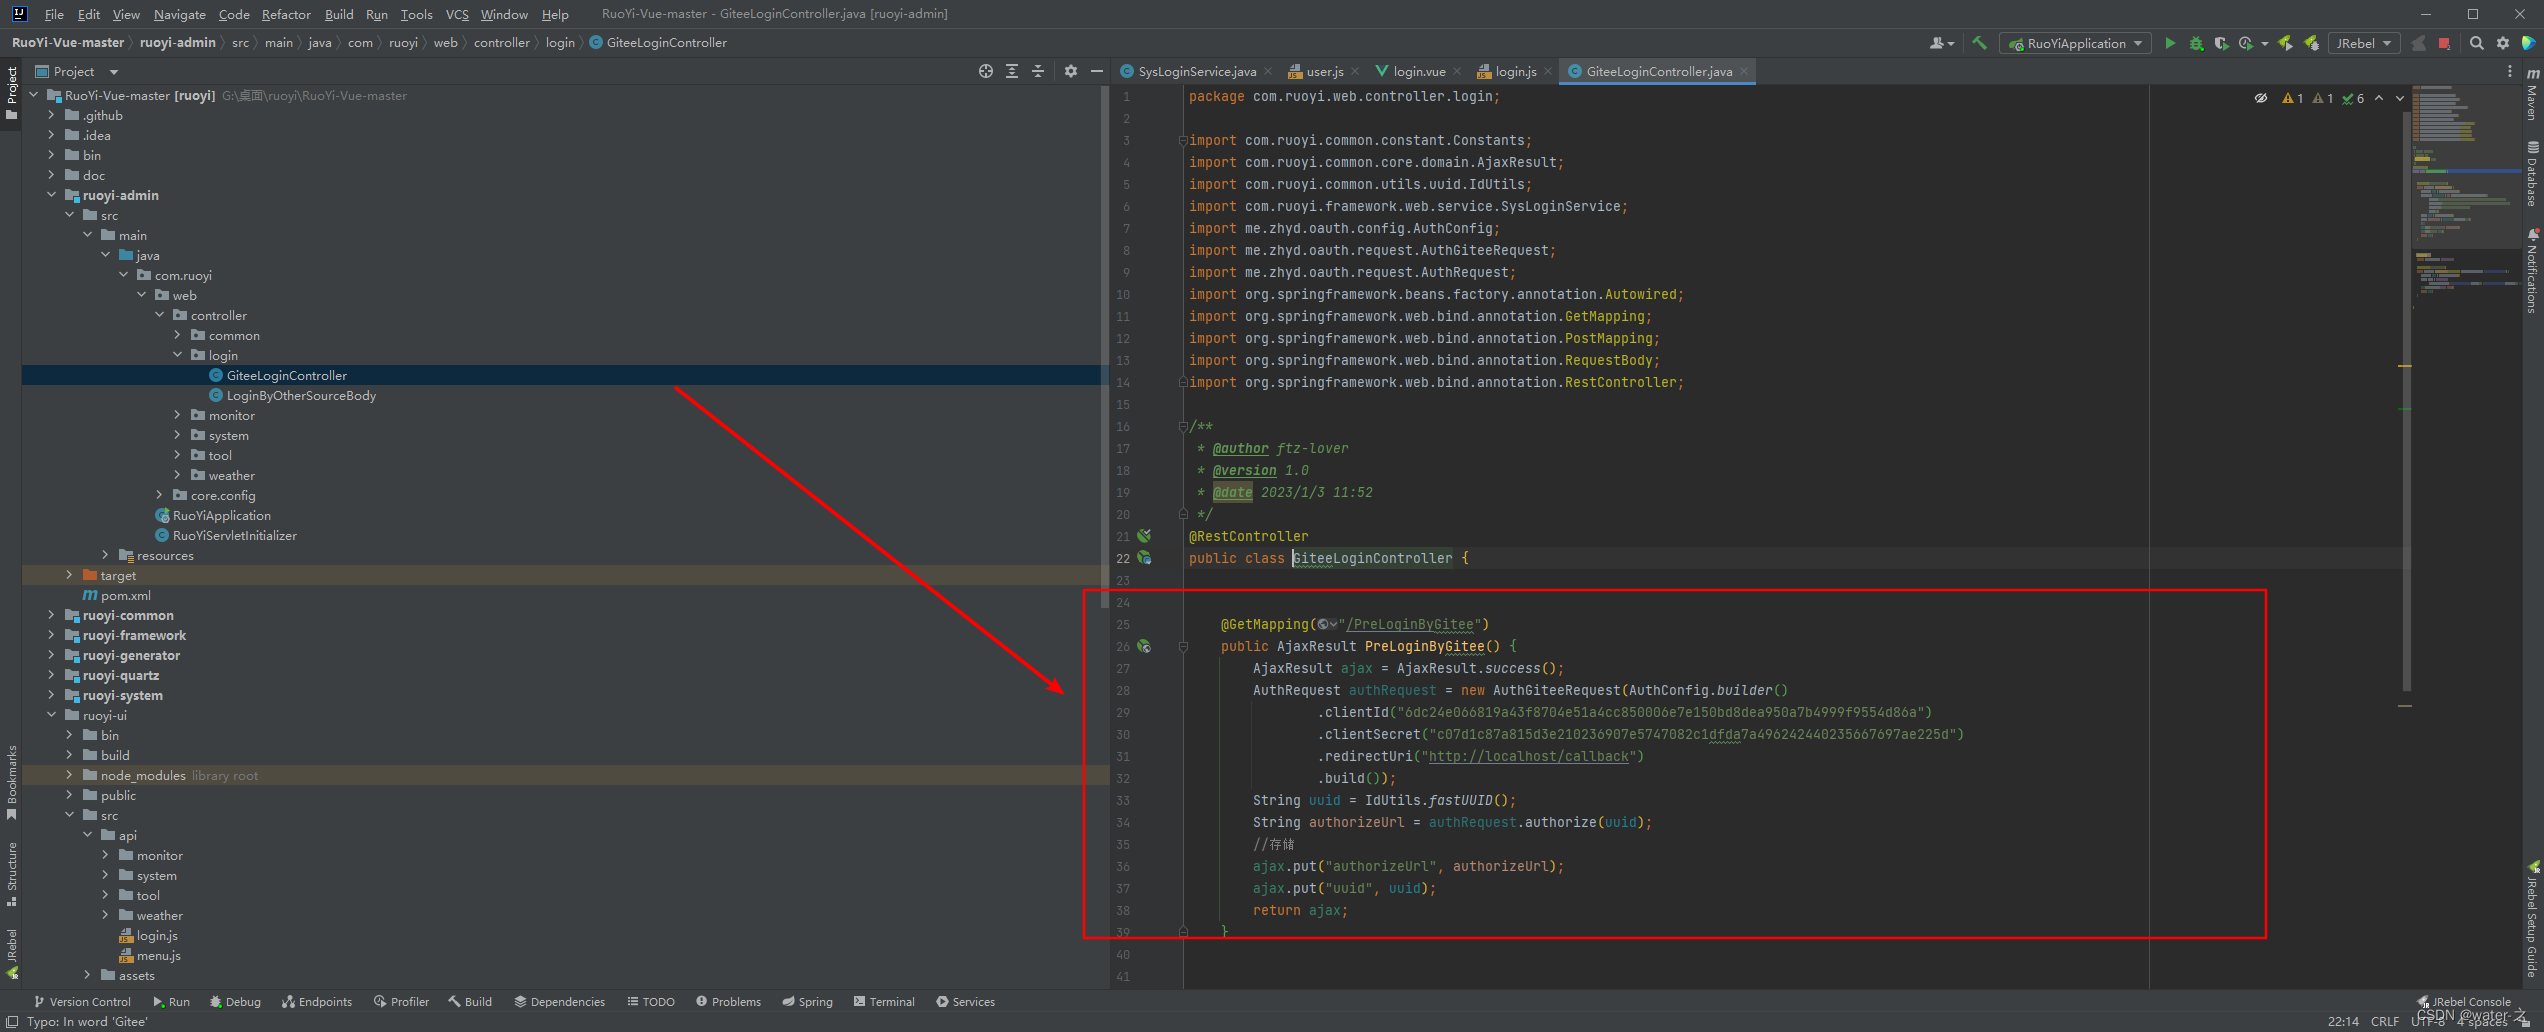
    @GetMapping("/PreLoginByGitee")
    public AjaxResult PreLoginByGitee() {
        AjaxResult ajax = AjaxResult.success();
        AuthRequest authRequest = new AuthGiteeRequest(AuthConfig.builder()
                .clientId("***********************************")
                .clientSecret("************************************")
                .redirectUri("http://localhost/callback")
                .build());
        String uuid = IdUtils.fastUUID();
        String authorizeUrl = authRequest.authorize(uuid);
        //存储
        ajax.put("authorizeUrl", authorizeUrl);
        ajax.put("uuid", uuid);
        return ajax;
    }
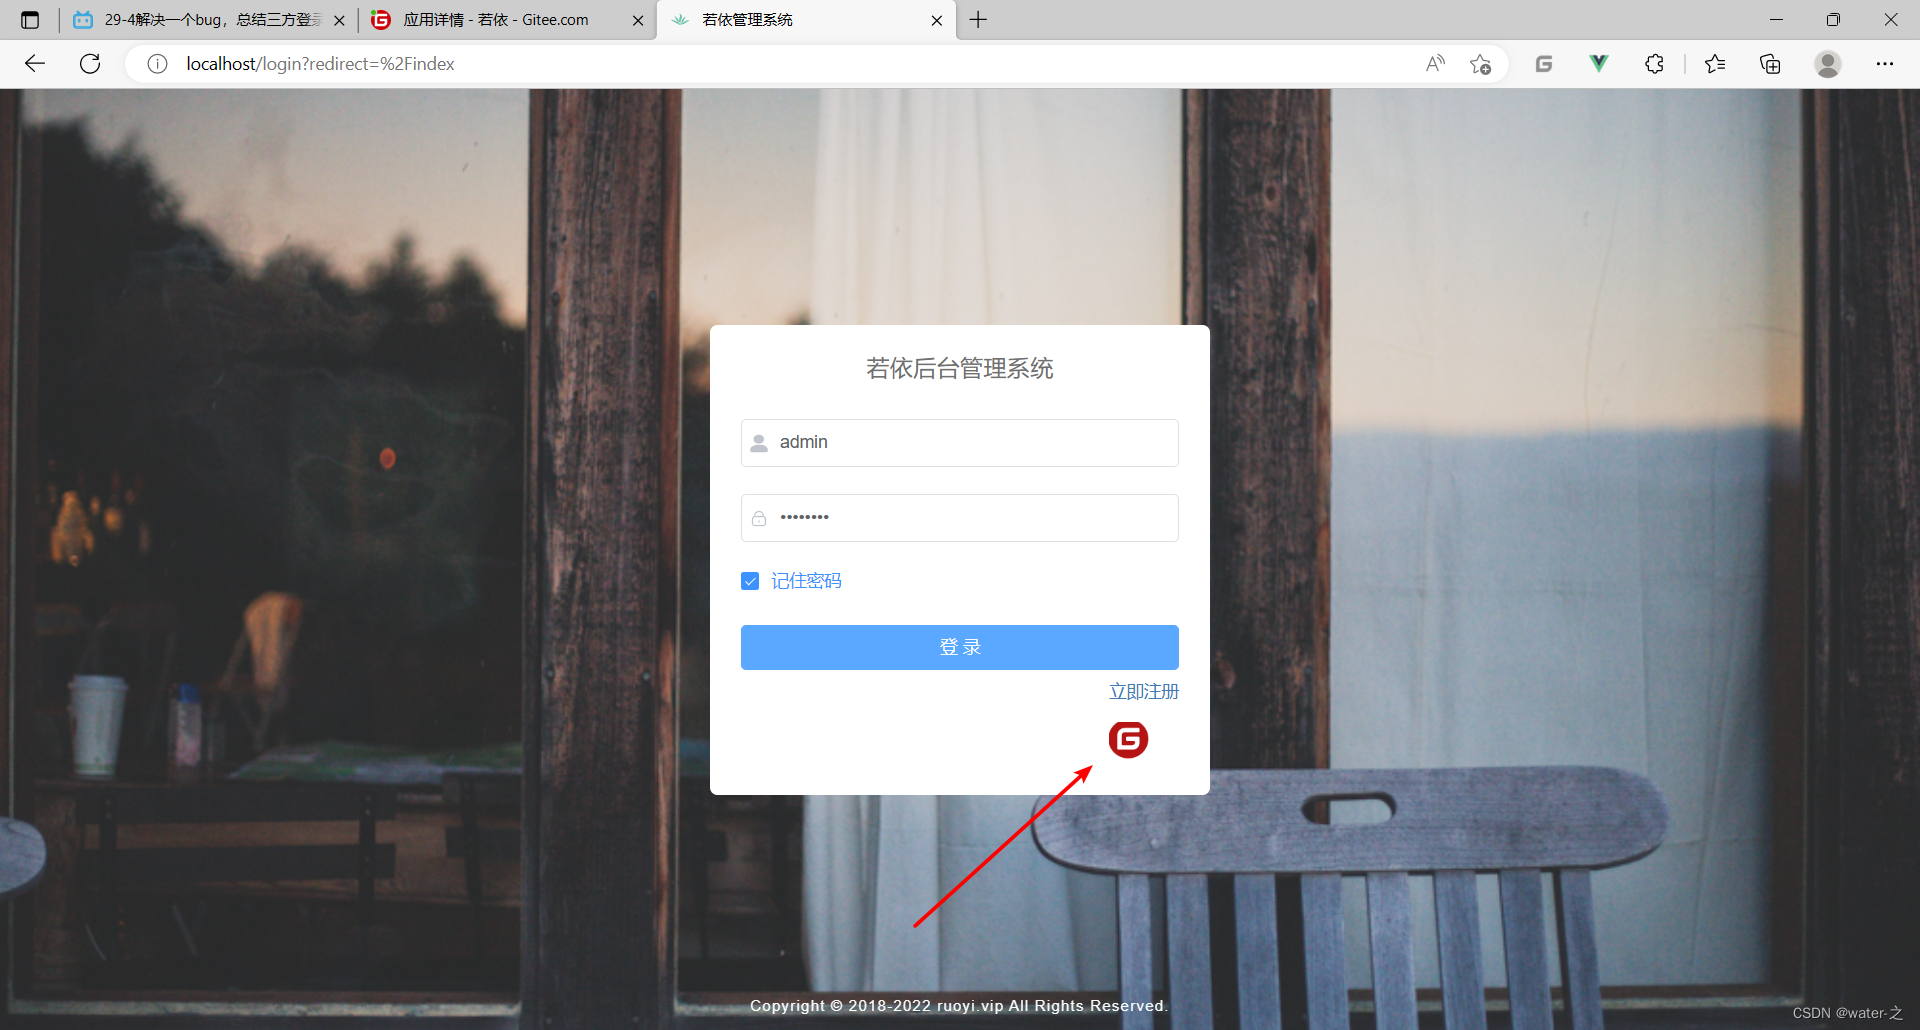
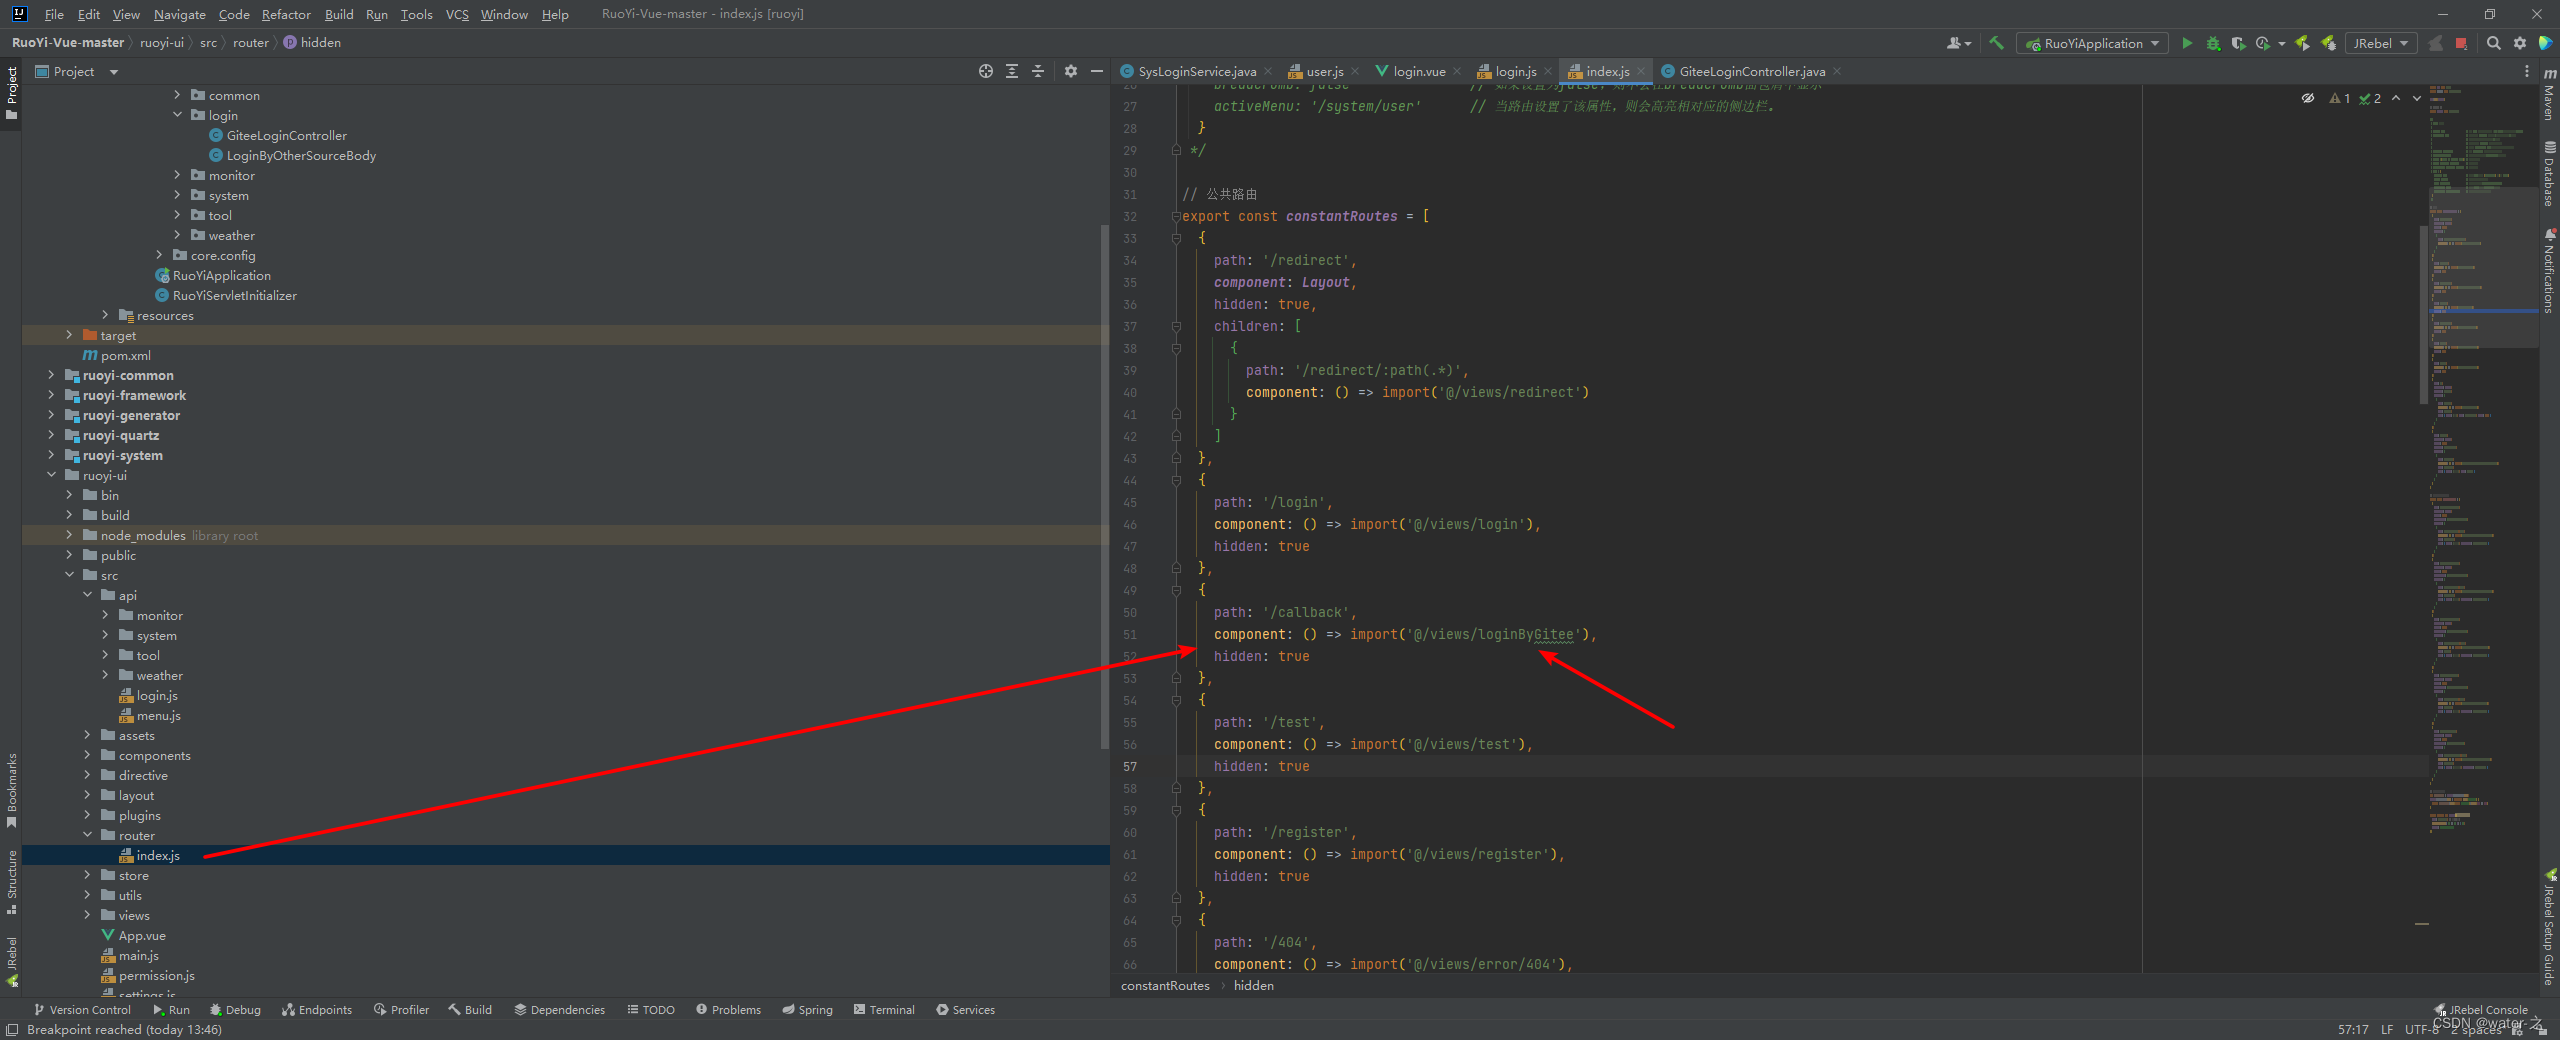
3:再跳到gitee认证地址后授权,成功则会跳到回调地址,失败则一直转圈圈:
回调地址:
loginByGitee组件:mounted钩子函数会在加载开始的时候:在这里面调用LoginByGitee方法:
<template>
  <div v-loading="loading" style="height: 100%;width: 100%;">
    正在加载中...
  </div>
</template>

<script>

import Cookies from "js-cookie";

export default {
  name: "loginByGitee",
  data() {
    return {
      loading: true
    }
  },
  mounted() {
    this.loading = true;
    console.log("uuid", Cookies.get("user-uuid"))
    const formBody = {
      uuid: Cookies.get("user-uuid"),
      code: this.$route.query.code
    }
    this.$store.dispatch("LoginByGitee", formBody).then(() => {
      this.$router.push({path: this.redirect || "/"}).catch(() => {
      });
    }).catch(() => {
      this.loading = false;
    });
  }
}
</script>

<style scoped>

</style>
4:LoginByGitee方法:这方法里面会调用loginByGitee方法

    //根据gitee登录
    LoginByGitee({commit}, body) {
      return new Promise((resolve, reject) => {
        loginByGitee(body.code, body.uuid).then(res => {
          setToken(res.token)
          commit('SET_TOKEN', res.token)
          resolve()
        }).catch(error => {
          reject(error)
        })
      })
    },
5:loginByGitee方法:该方法到后端找loginByGitee接口,并带上code和uuid
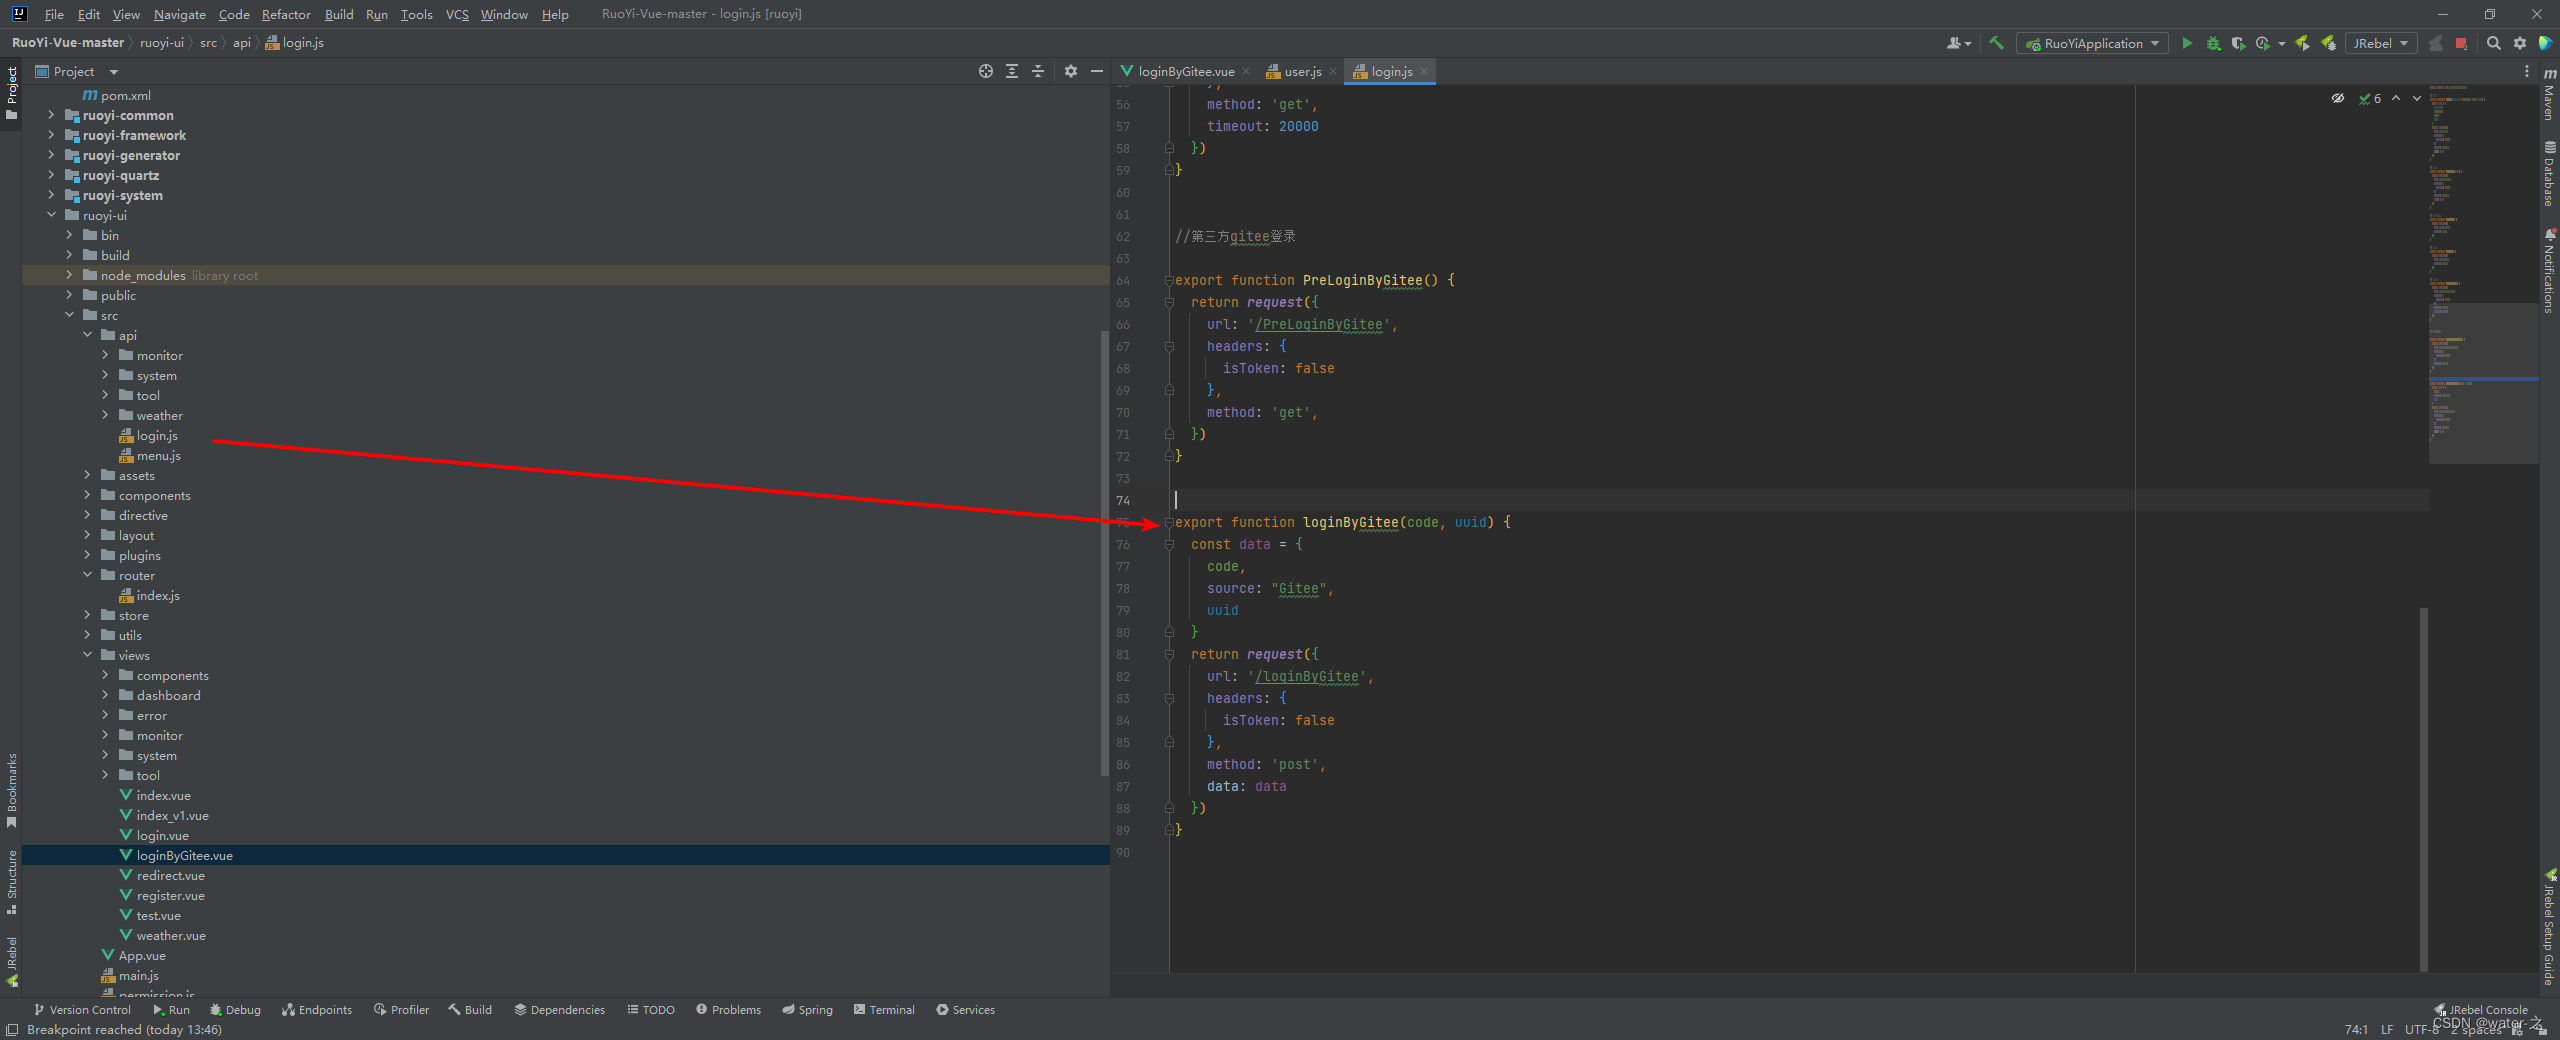
export function loginByGitee(code, uuid) {
  const data = {
    code,
    source: "Gitee",
    uuid
  }
  return request({
    url: '/loginByGitee',
    headers: {
      isToken: false
    },
    method: 'post',
    data: data
  })
}
6:后端接口接收–loginByGitee:然后进入service层的loginByOtherSource方法
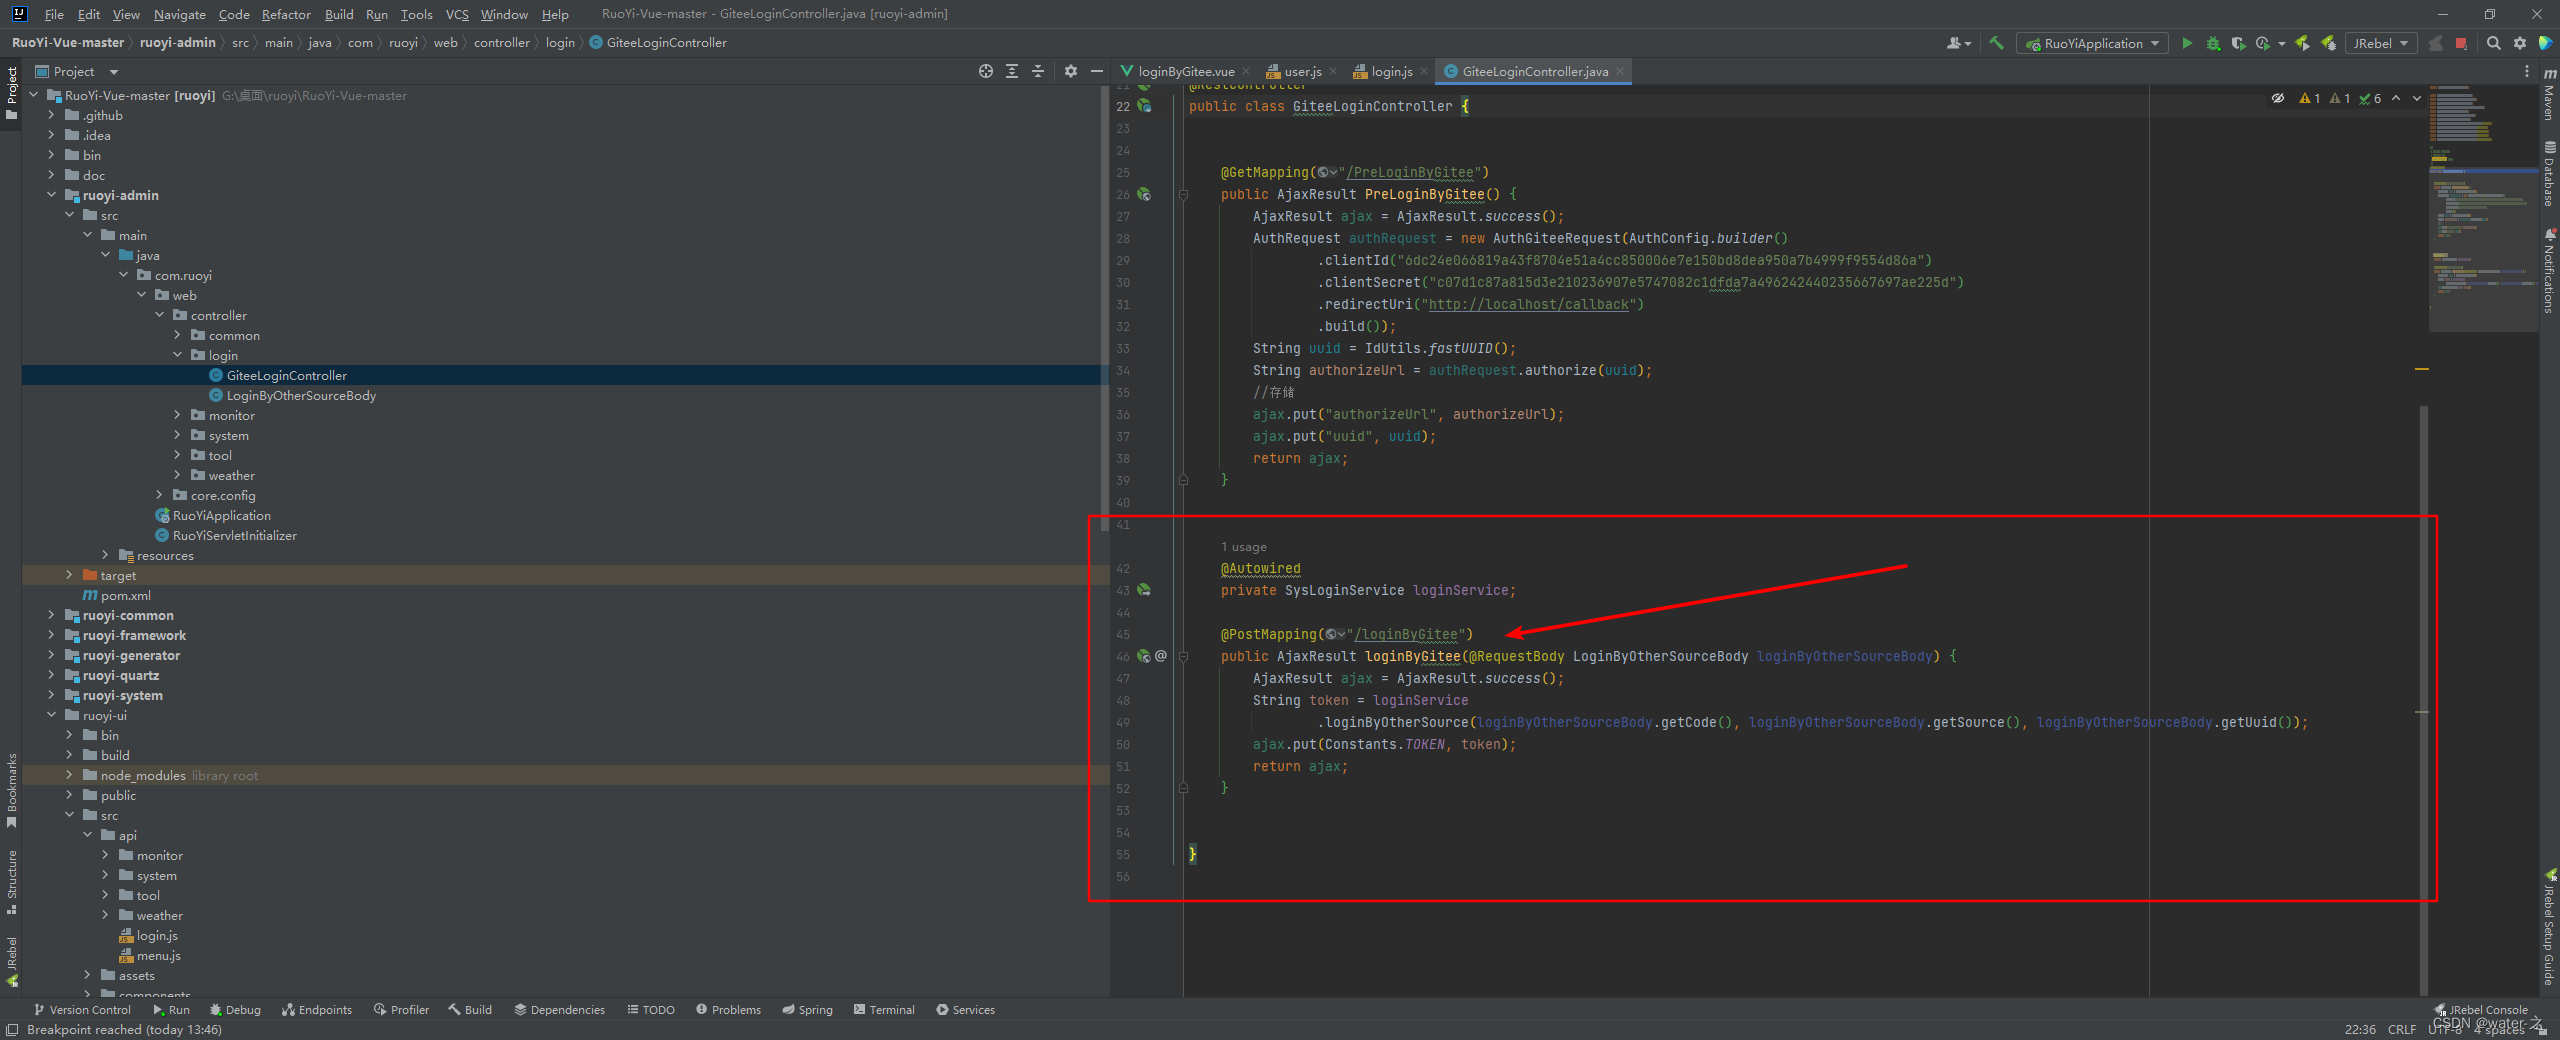
    @Autowired
    private SysLoginService loginService;

    @PostMapping("/loginByGitee")
    public AjaxResult loginByGitee(@RequestBody LoginByOtherSourceBody loginByOtherSourceBody) {
        AjaxResult ajax = AjaxResult.success();
        String token = loginService
                .loginByOtherSource(loginByOtherSourceBody.getCode(), loginByOtherSourceBody.getSource(), loginByOtherSourceBody.getUuid());
        ajax.put(Constants.TOKEN, token);
        return ajax;
    }


}
7:后端loginByOtherSource方法:
   @Autowired
    private  SysPermissionService permissionService;

  public String loginByOtherSource(String code, String source, String uuid) {
        //先到数据库查询这个人曾经有没有登录过,没有就注册
        // 创建授权request
        AuthRequest authRequest = new AuthGiteeRequest(AuthConfig.builder()
                .clientId("***********************************")
                .clientSecret("**************************************************")
                .redirectUri("http://localhost/callback")
                .build());
        AuthResponse<AuthUser> login = authRequest.login(AuthCallback.builder().state(uuid).code(code).build());
        System.out.println(login);
        //先查询数据库有没有该用户
        AuthUser authUser = login.getData();
        SysUser sysUser = new SysUser();
        sysUser.setUserName(authUser.getUsername());
        sysUser.setSource(authUser.getSource());
        List<SysUser> sysUsers = userService.selectUserListNoDataScope(sysUser);
        if (sysUsers.size() > 1) {
            throw new ServiceException("第三方登录异常,账号重叠");
        } else if (sysUsers.size() == 0) {
            //相当于注册
            sysUser.setNickName(authUser.getNickname());
            sysUser.setAvatar(authUser.getAvatar());
            sysUser.setEmail(authUser.getEmail());
            sysUser.setRemark(authUser.getRemark());
            userService.registerUserAndGetUserId(sysUser);
            AsyncManager.me().execute(AsyncFactory.recordLogininfor(sysUser.getUserName(), Constants.REGISTER,
                    MessageUtils.message("user.register.success")));
        } else {
            sysUser = sysUsers.get(0);
        }
        AsyncManager.me().execute(AsyncFactory.recordLogininfor(sysUser.getUserName(), Constants.LOGIN_SUCCESS, MessageUtils.message("user.login.success")));
        //注册成功或者是已经存在的用户
        LoginUser loginUser =
                new LoginUser(sysUser.getUserId(), sysUser.getDeptId(), sysUser, permissionService.getMenuPermission(sysUser));
        recordLoginInfo(loginUser.getUserId());
        // 生成token
        return tokenService.createToken(loginUser);
    }


 2634
2634


 被折叠的 条评论
为什么被折叠?
被折叠的 条评论
为什么被折叠?
 到【灌水乐园】发言


