


前言
通过前面的学习我们可以使用最简单的知识编写我们自己的Java Web项目,但是实际开发并非如此,我们往往会使用一些开源的框架简化我们的开发流程,接下来我就带领大家一起学习框架的前置知识,以便于后面轻松上手使用框架。
学习内容
Maven项目管理
Maven 除了以程序构建能力为特色之外,还提供高级项目管理工具。由于 Maven 的缺省构建规则有较高的可重用性,所以常常用两三行 Maven 构建脚本就可以构建简单的项目。由于 Maven 的面向项目的方法,许多 Apache Jakarta 项目发文时使用 Maven,而且公司项目采用 Maven 的比例在持续增长。
-
下载配置参考文章:maven安装与配置IDEA
-
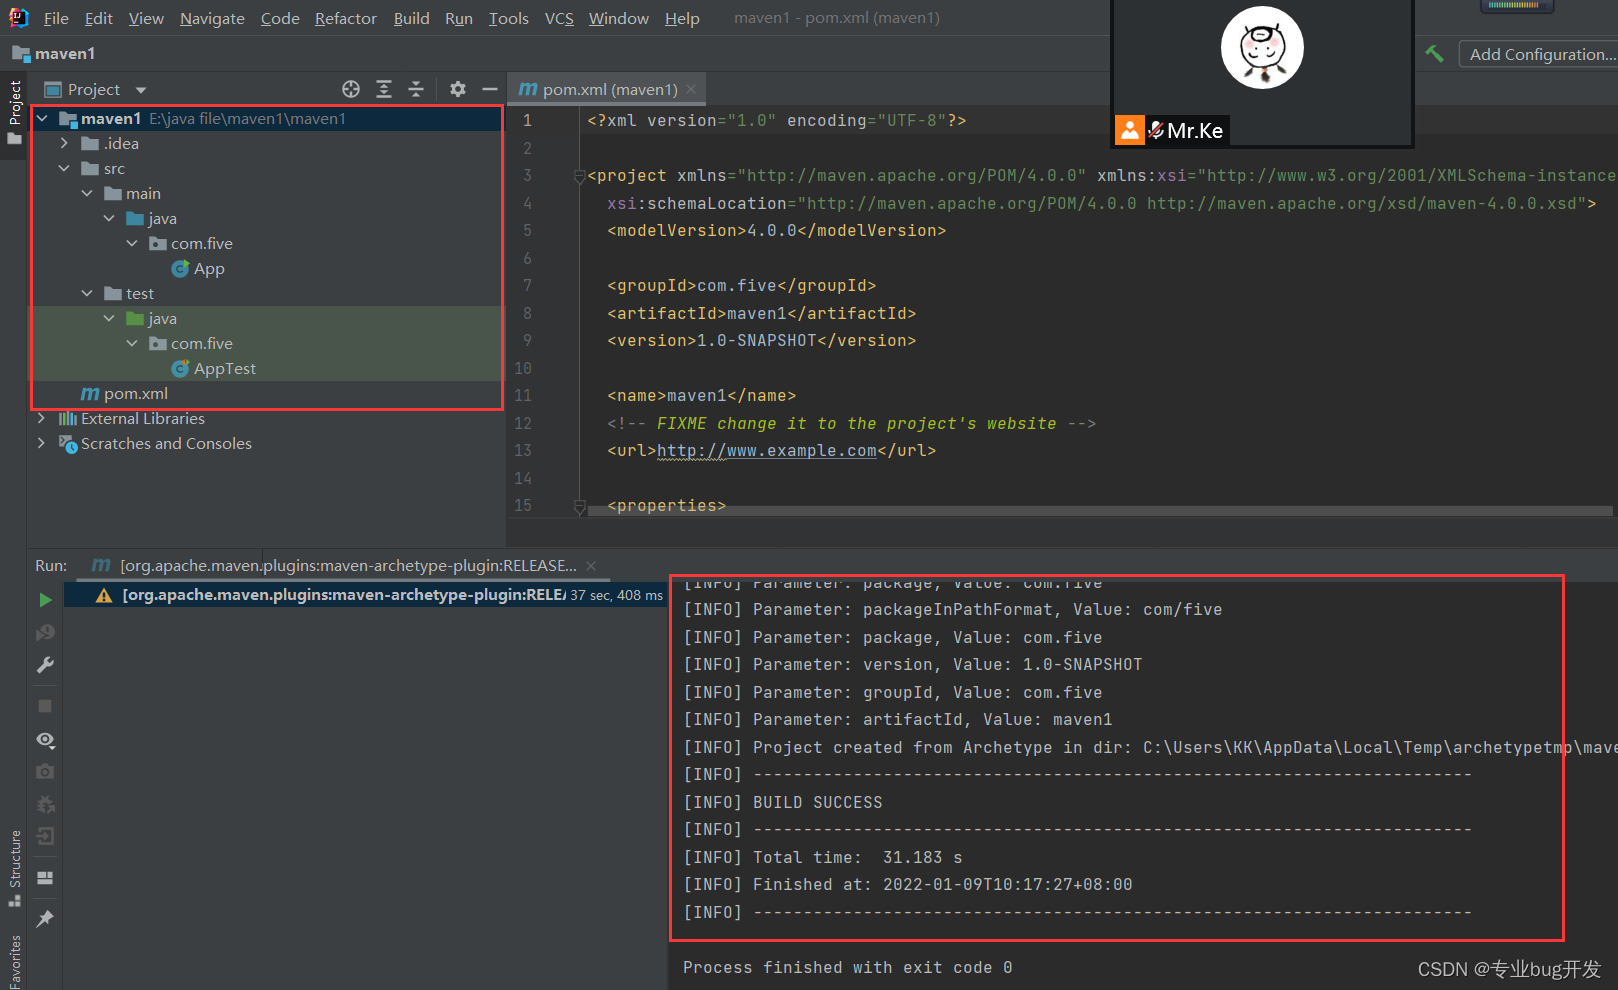
IDEA使用Maven创建项目参考文章:IDEA创建Maven普通Java项目
-
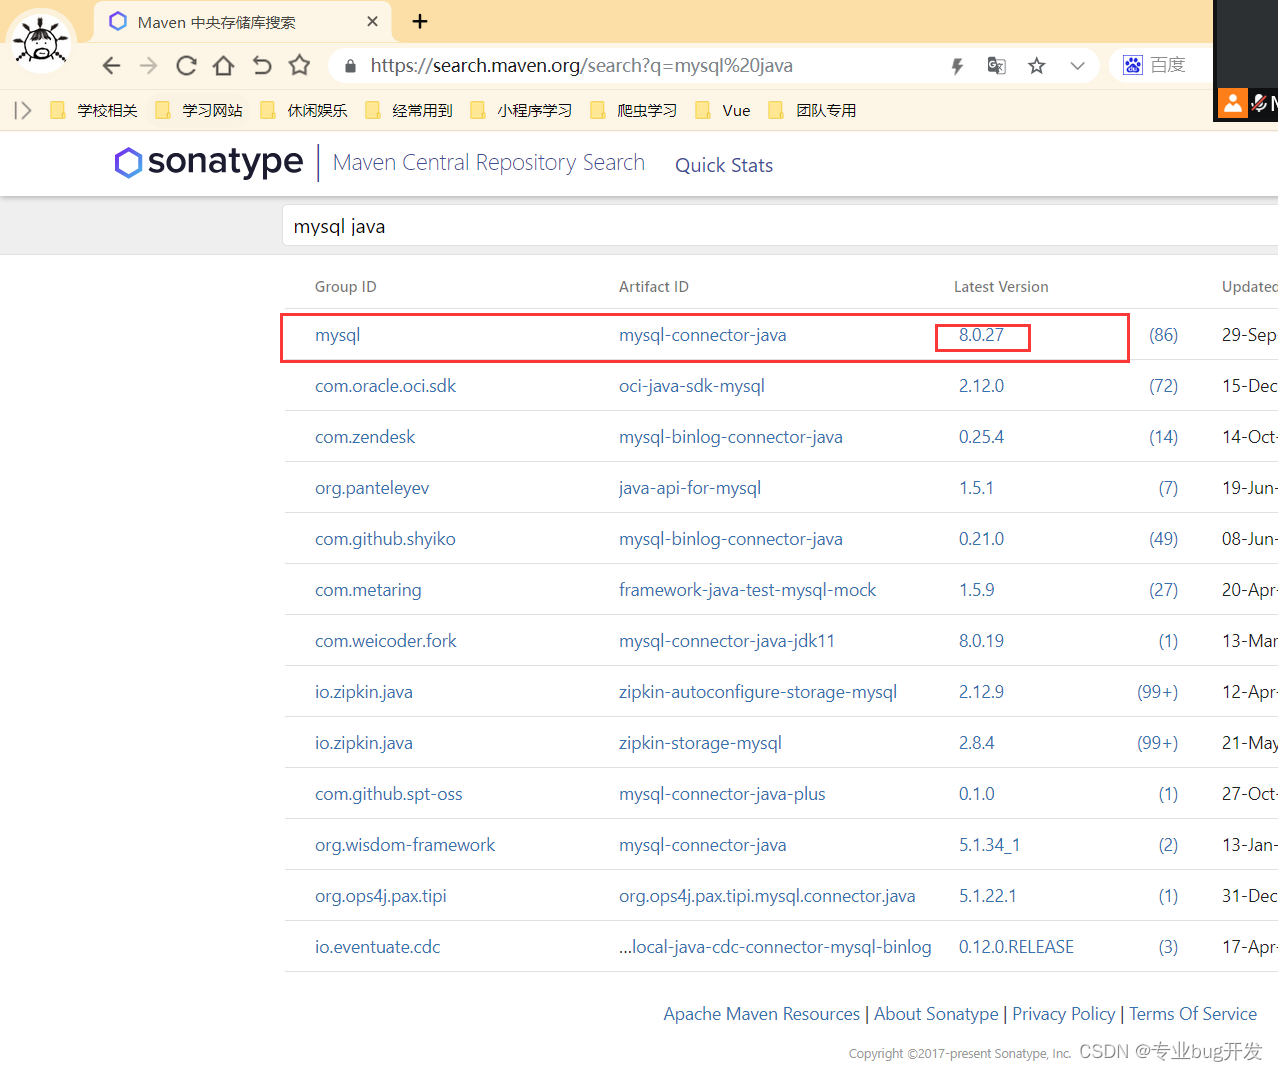
Maven引入jar包,浏览器输入链接地址
输入我们需要的jar包,点击版本号,进入如下页面

-
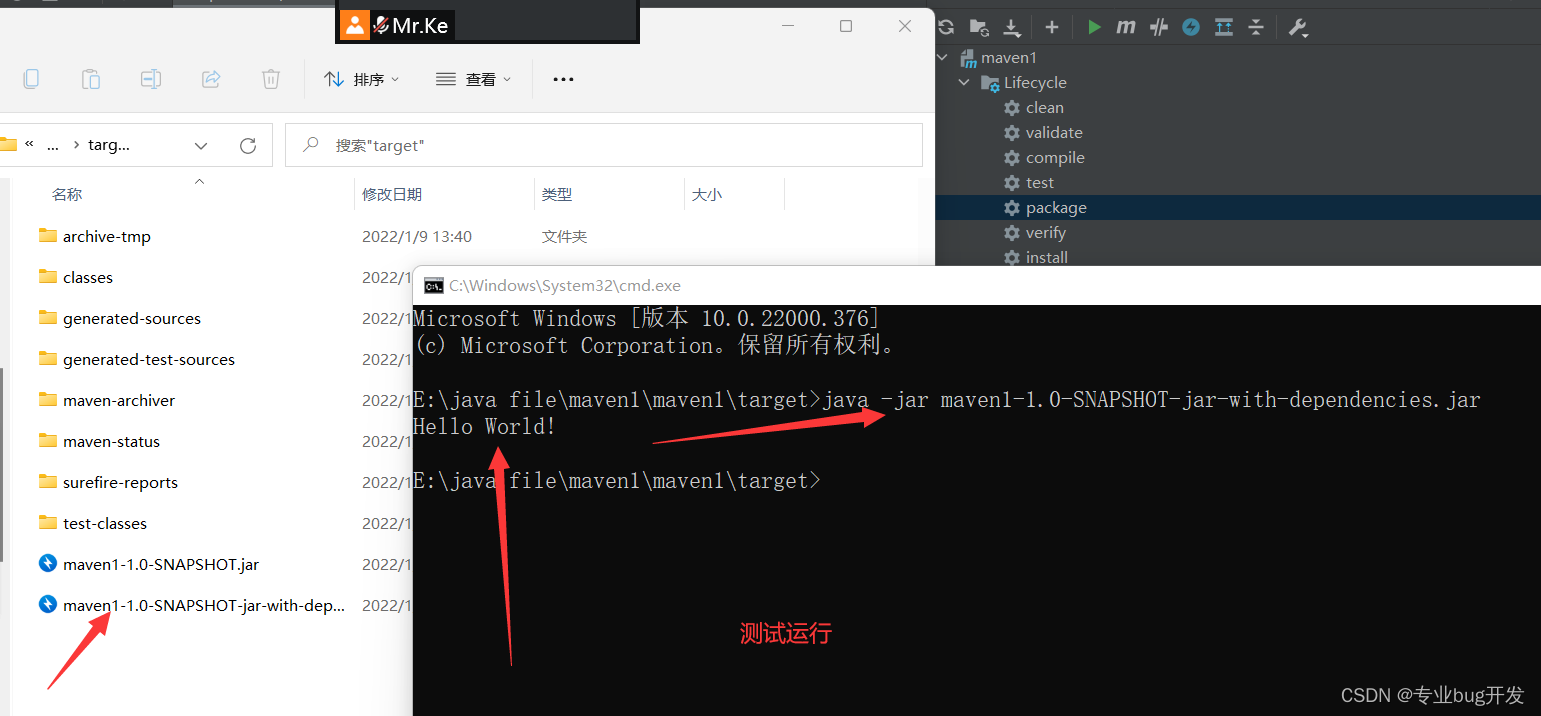
Maven项目打包;
很简单,直接参照这篇文章的方法一即可;
参考文章
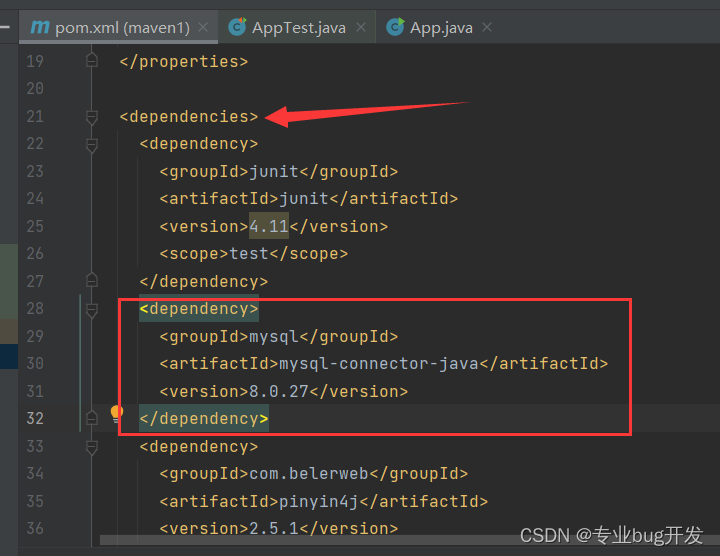
pom.xml
<?xml version="1.0" encoding="UTF-8"?>

<project xmlns="http://maven.apache.org/POM/4.0.0" xmlns:xsi="http://www.w3.org/2001/XMLSchema-instance"
  xsi:schemaLocation="http://maven.apache.org/POM/4.0.0 http://maven.apache.org/xsd/maven-4.0.0.xsd">
  <modelVersion>4.0.0</modelVersion>

  <groupId>com.five</groupId>
  <artifactId>maven1</artifactId>
  <version>1.0-SNAPSHOT</version>

  <name>maven1</name>
  <!-- FIXME change it to the project's website -->
  <url>http://www.example.com</url>

  <properties>
    <project.build.sourceEncoding>UTF-8</project.build.sourceEncoding>
    <maven.compiler.source>1.7</maven.compiler.source>
    <maven.compiler.target>1.7</maven.compiler.target>
  </properties>

  <dependencies>
    <dependency>
      <groupId>junit</groupId>
      <artifactId>junit</artifactId>
      <version>4.11</version>
      <scope>test</scope>
    </dependency>
    <dependency>
      <groupId>mysql</groupId>
      <artifactId>mysql-connector-java</artifactId>
      <version>8.0.27</version>
    </dependency>
    <dependency>
      <groupId>com.belerweb</groupId>
      <artifactId>pinyin4j</artifactId>
      <version>2.5.1</version>
    </dependency>
  </dependencies>

  <build>
    <plugins>
      <plugin>
        <artifactId>maven-assembly-plugin</artifactId>
        <configuration>
          <descriptorRefs>
            <descriptorRef>jar-with-dependencies</descriptorRef>
          </descriptorRefs>
          <archive>
            <manifest>
              <mainClass>com.five.App</mainClass>
            </manifest>
          </archive>
        </configuration>
        <executions>
          <execution>
            <id>make-assembly</id>
            <phase>package</phase>
            <goals>
              <goal>single</goal>
            </goals>
          </execution>
        </executions>
      </plugin>
    </plugins>
  </build>
</project>
Maven构建Web工程
上一小节我们使用Maven构建了标准的Java的Maven工程,这一节我们学习如何使用Maven构建Web工程。
- 创建Maven的Java Web项目;
具体的创建方法参照上一节的方法中创建时选择web项目即可;

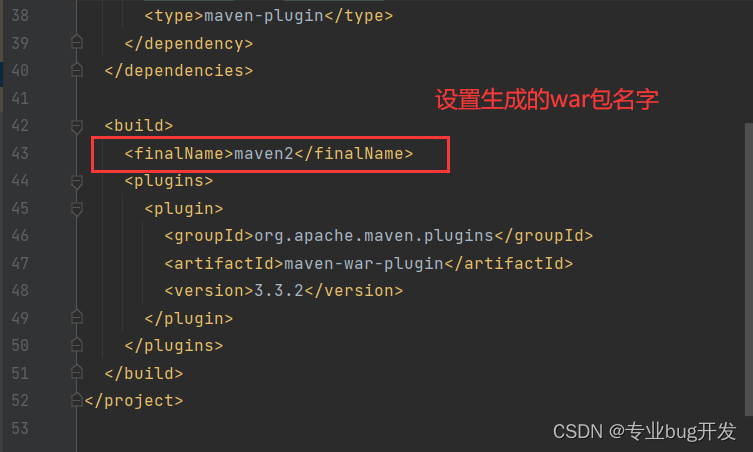
- Maven创建的Web项目打包;pom.xml修改成如下内容;
<?xml version="1.0" encoding="UTF-8"?>

<project xmlns="http://maven.apache.org/POM/4.0.0" xmlns:xsi="http://www.w3.org/2001/XMLSchema-instance"
  xsi:schemaLocation="http://maven.apache.org/POM/4.0.0 http://maven.apache.org/xsd/maven-4.0.0.xsd">
  <modelVersion>4.0.0</modelVersion>

  <groupId>com.five</groupId>
  <artifactId>maven2</artifactId>
  <version>1.0-SNAPSHOT</version>
  <packaging>war</packaging>

  <name>maven2 Maven Webapp</name>
  <!-- FIXME change it to the project's website -->
  <url>http://www.example.com</url>

  <properties>
    <project.build.sourceEncoding>UTF-8</project.build.sourceEncoding>
    <maven.compiler.source>1.7</maven.compiler.source>
    <maven.compiler.target>1.7</maven.compiler.target>
  </properties>

  <dependencies>
    <dependency>
      <groupId>junit</groupId>
      <artifactId>junit</artifactId>
      <version>4.11</version>
      <scope>test</scope>
    </dependency>
    <dependency>
      <groupId>javax.servlet</groupId>
      <artifactId>jstl</artifactId>
      <version>1.2</version>
    </dependency>
    <dependency>
      <groupId>org.apache.maven.plugins</groupId>
      <artifactId>maven-war-plugin</artifactId>
      <version>3.3.2</version>
      <type>maven-plugin</type>
    </dependency>
  </dependencies>

  <build>
    <plugins>
      <plugin>
        <groupId>org.apache.maven.plugins</groupId>
        <artifactId>maven-war-plugin</artifactId>
        <version>3.3.2</version>
      </plugin>
    </plugins>
  </build>
</project>
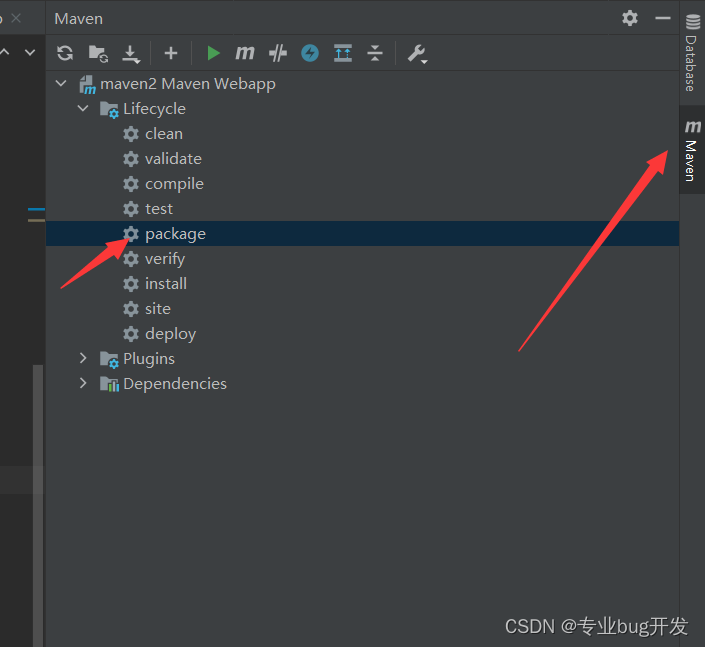
右键选择run,我们的项目中就会出现打包后的war文件;

工厂模式实现多端应用切换
- 新建文件夹存放PC端和手机端页面;
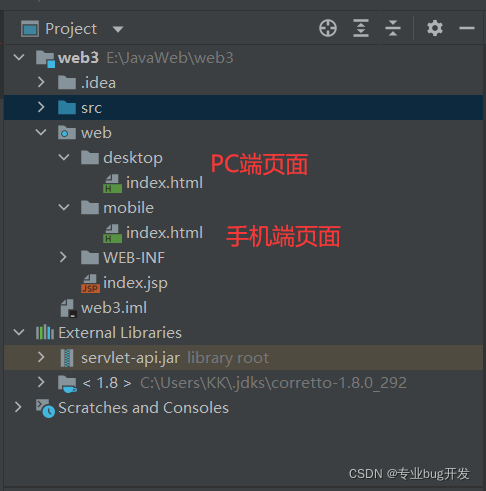
- 创建不同客户端类,抽象出一个接口;
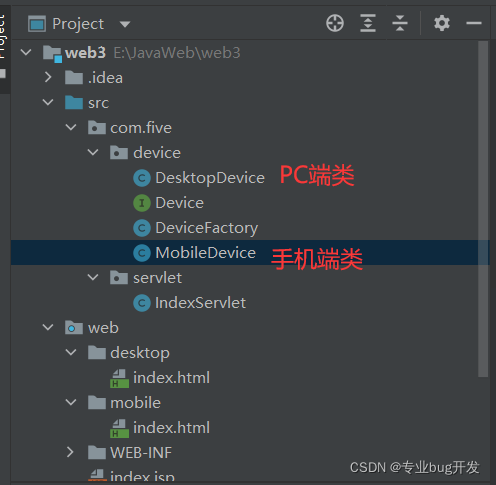
- DesktopDevice
package com.five.device;

/**
 * Description:
 *
 * @Author: kk(专业bug开发)
 * DateTime: 2022-01-09 18:02
 */
public class DesktopDevice implements Device{
    public String getIndex(){
        return "/desktop/index.html";
    }
}
- MobileDevice
package com.five.device;

/**
 * Description:
 *
 * @Author: kk(专业bug开发)
 * DateTime: 2022-01-09 18:03
 */
public class MobileDevice implements Device{
    //该方法返回手机端页面地址
    public String getIndex(){
        return "/mobile/index.html";
    }
}
- Device
package com.five.device;

/**
 * Description:这是抽象出来的一个接口
 *
 * @Author: kk(专业bug开发)
 * DateTime: 2022-01-09 18:06
 */
public interface Device {
    //抽象方法
    public String getIndex();
}
- 创建工厂类;
package com.five.device;

import javax.servlet.http.HttpServletRequest;


/**
 * Description:
 *
 * @Author: kk(专业bug开发)
 * DateTime: 2022-01-10 12:22
 */
public class DeviceFactory {
    public static Device getDevice(HttpServletRequest request){
        String userAgent = request.getHeader("user-agent");
        System.out.println(userAgent);
        if(userAgent.contains("Windows NT")){
            return new DesktopDevice();
        }else if(userAgent.contains("iPhone") || userAgent.contains("Android")){
            return new MobileDevice();
        }else{
            return null;
        }
    }
}
- 编写测试类;
package com.five.servlet; /**
 * Description:
 *
 * @Author: kk(专业bug开发)
 * DateTime: 2022-01-09 17:58
 */

import com.five.device.Device;
import com.five.device.DeviceFactory;

import javax.servlet.*;
import javax.servlet.http.*;
import javax.servlet.annotation.*;
import java.io.IOException;

@WebServlet(name = "IndexServlet", value = "/index.html")
public class IndexServlet extends HttpServlet {
    @Override
    protected void doGet(HttpServletRequest request, HttpServletResponse response) throws ServletException, IOException {
        Device d = DeviceFactory.getDevice((request));
        request.getRequestDispatcher(d.getIndex()).forward(request,response);
    }
}
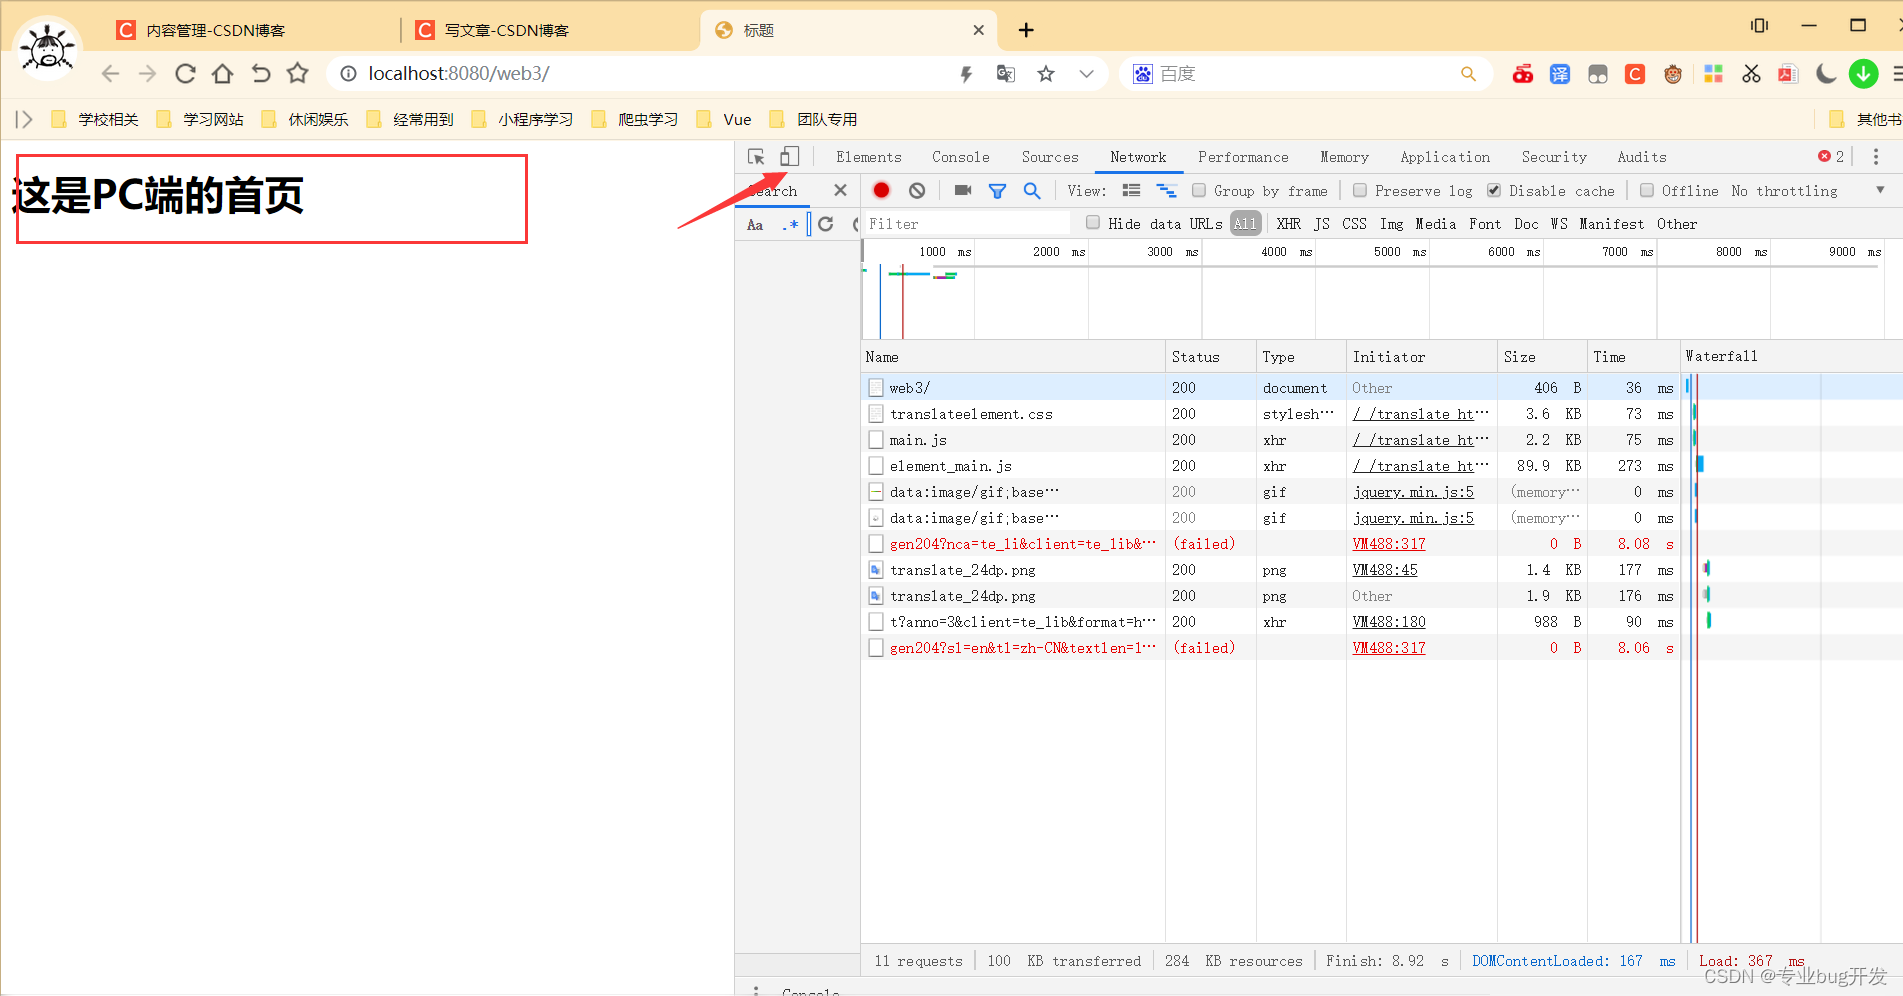
- 测试结果分析;

总结
这一节学习的知识大多是为了后面的框架做铺垫,本来这部分还有Lambda和反射的,但是这部分理解的不是很透彻,没办法整理东西,所以暂时忽略~


 2万+
2万+


 被折叠的 条评论
为什么被折叠?
被折叠的 条评论
为什么被折叠?
 到【灌水乐园】发言


