


要求
1、前端1台Nginx,均衡后端2台php-fpm,均衡后端2台Tomcat,2台MYSQL采用主主架构,用户通过域名访问前端Nginx 域名v1.jd.com v2.jd.com访问到Discuz和Jforum不同的网站。
2、将第一道题目的部署步骤和架构图画出来。架构图上要划出7台服务器分布图。
1、架构
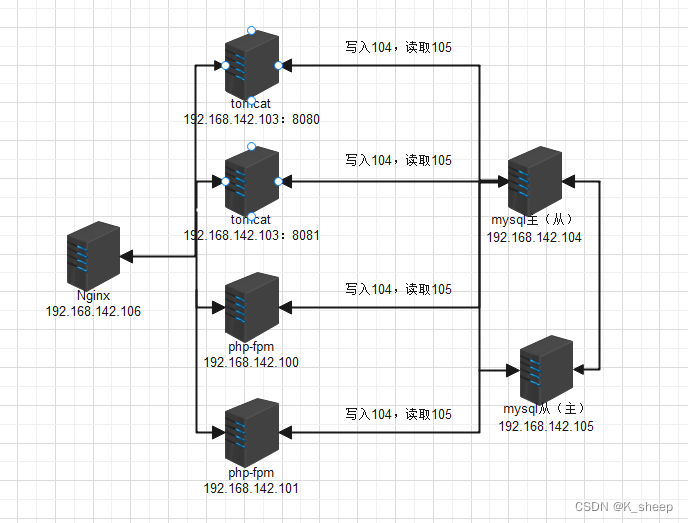
| 服务 | 服务器ip | 服务器名称 |
|---|---|---|
| nginx | 192.168.142.106 | node6 |
| php-fpm | 192.168.142.100 | node1 |
| php-fpm | 192.168.142.101 | node2 |
| tomcat01、tomcat02 | 192.168.142.103 | node3 |
| mariadb主 | 192.168.142.104 | node4 |
| mariadb从 | 192.168.142.105 | node5 |
2、yum安装部署mariadb(node4:192.168.142.104、node5:192.168.142.105)
yum install -y mariadb*
#注意:安装前查看进程以及端口,避免其他版本mysql启动
#192.168.142.104
server-id=1
log-bin=jfedu1-bin-log

#192.168.142.105
server-id=2
log-bin=jfedu2-bin-log

#启动数据库
systemctl start mariadb
ls /var/lib/mysql

#192.168.142.104
aria_log.00000001  ib_logfile1            jfedu1-bin-log.index
aria_log_control   jfedu1-bin-log.000001  mysql
ibdata1            jfedu1-bin-log.000002  performance_schema
ib_logfile0        jfedu1-bin-log.000003  test

#192.168.142.105
aria_log.00000001  ib_logfile1            jfedu2-bin-log.index
aria_log_control   jfedu2-bin-log.000001  mysql
ibdata1            jfedu2-bin-log.000002  performance_schema
ib_logfile0        jfedu2-bin-log.000003  test
1、配置192.168.142.104为主库
#授权
MariaDB [(none)]> grant all privileges on *.* to 'jfedu1'@'192.168.142.%' identified by '123456';
Query OK, 0 rows affected (0.00 sec)

#查看192.168.142.104为主库时候状态
MariaDB [jfedu01]> show master status;
+-----------------------+----------+--------------+------------------+
| File                  | Position | Binlog_Do_DB | Binlog_Ignore_DB |
+-----------------------+----------+--------------+------------------+
| jfedu1-bin-log.000004 |      745 |              |                  |
+-----------------------+----------+--------------+------------------+
1 row in set (0.00 sec)
#192.168.142.105为从库配置
MariaDB [(none)]> change master to
    -> master_host='192.168.142.104',
    -> master_user='jfedu1',
    -> master_password='123456',
    -> master_log_file='jfedu1-bin-log.000004',
    -> master_log_pos=745;
Query OK, 0 rows affected (0.01 sec)
MariaDB [(none)]> start slave;
Query OK, 0 rows affected (0.00 sec)
MariaDB [(none)]> show slave status\G
*************************** 1. row ***************************
               Slave_IO_State: Waiting for master to send event
                  Master_Host: 192.168.142.104
                  Master_User: jfedu1
                  Master_Port: 3306
                Connect_Retry: 60
              Master_Log_File: jfedu1-bin-log.000004
          Read_Master_Log_Pos: 745
               Relay_Log_File: mariadb-relay-bin.000002
                Relay_Log_Pos: 534
        Relay_Master_Log_File: jfedu1-bin-log.000004
             Slave_IO_Running: Yes
            Slave_SQL_Running: Yes
              Replicate_Do_DB:
          Replicate_Ignore_DB:
           Replicate_Do_Table:
...
1 row in set (0.00 sec)
2、配置192.168.142.105为主库
#授权
grant all privileges on *.* to 'jfedu2'@'192.168.142.%' identified by '123456';
Query OK, 0 rows affected (0.00 sec)
#查看192.168.142.105为主库时候状态
MariaDB [jfedu01]> show master status;
+-----------------------+----------+--------------+------------------+
| File                  | Position | Binlog_Do_DB | Binlog_Ignore_DB |
+-----------------------+----------+--------------+------------------+
| jfedu2-bin-log.000004 |      473 |              |                  |
+-----------------------+----------+--------------+------------------+
1 row in set (0.00 sec)

#192.168.142.104为从库配置
MariaDB [jfedu01]> change master to
    -> master_host='192.168.142.105',
    -> master_user='jfedu2',
    -> master_password='123456',
    -> master_log_file='jfedu2-bin-log.000004',
    -> master_log_pos=473;
Query OK, 0 rows affected (0.00 sec)

MariaDB [jfedu01]> start slave;
Query OK, 0 rows affected (0.00 sec)
MariaDB [jfedu01]> show slave status \G
*************************** 1. row ***************************
               Slave_IO_State: Waiting for master to send event
                  Master_Host: 192.168.142.105
                  Master_User: jfedu2
                  Master_Port: 3306
                Connect_Retry: 60
              Master_Log_File: jfedu2-bin-log.000004
          Read_Master_Log_Pos: 473
               Relay_Log_File: mariadb-relay-bin.000002
                Relay_Log_Pos: 534
        Relay_Master_Log_File: jfedu2-bin-log.000004
             Slave_IO_Running: Yes
            Slave_SQL_Running: Yes
...
#此刻互为104和105已经互为主从

#授权用户mysql-proxy权限
MariaDB [jfedu01]> grant all on *.* to 'root'@'192.168.142.%' identified by '123456';
#修改root@localhost的密码
MariaDB [jfedu01]> set password=password('123456');
MariaDB [jfedu01]> flush privileges;
2、yum安装部署php-fpm(node1:192.168.142.100、node2:192.168.142.101)
#安装PHP-FPM软件服务;
yum install -y php-fpm php php-devel php-mysql
#启动PHP-FPM服务;
systemctl start php-fpm
#查看FPM服务进程;
ps -ef|grep fpm
#查看FPM监听端口;
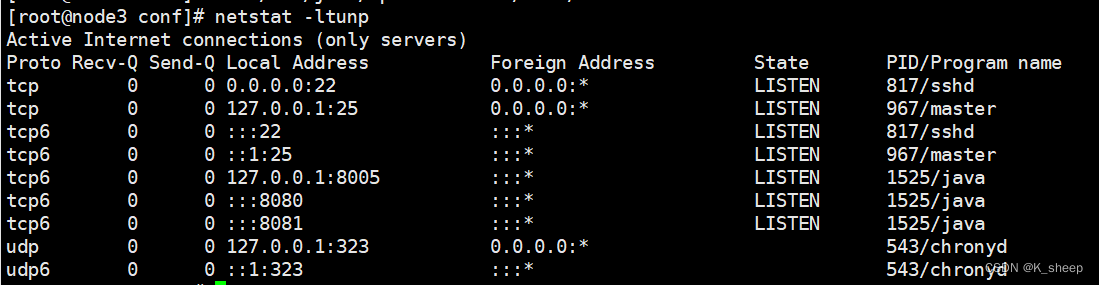
netstat -tnlp|grep 9000
#配置文件位置,并拷贝
cd /etc/php-fpm.d/
cp www.conf www.conf.bak
#过滤多余空格以及;追加至文件并覆盖原有配置未见
grep -vE "^$|;" www.conf > 1.conf
mv 1.conf www.conf
vim www.conf
listen = 127.0.0.1:9000
listen.allowed_clients = 127.0.0.1
user = apache
group = apache
修改为
listen = 0.0.0.0:9000 #允许外部访问
listen.allowed_clients = 127.0.0.1,192.168.142.106 #增加nginx访问地址
user = www
group = www
#创建www用户
useradd www -s /sbin/nologin -M
#到php的网页目录上床Discuz包解压并移动upload
cd /usr/share/php/
rz Discuz_X3.2_SC_UTF8.zip
unzip Discuz_X3.2_SC_UTF8.zip
chown -R www:www /usr/share/php
#启动php-fpm
systemctl start php-fpm
3、安装Tomcat
- 上传jdk包、更改变量、并启动tomcat
cd /usr/java
rz jdk-8u321-linux-x64.tar.gz
tar xf jdk-8u321-linux-x64.tar.gz
mv jdk1.8.0_321/ jdk1.8
#配置java环境变量,vim /etc/profile 添加如下语句:
#vim /etc/profile
export JAVA_HOME=/usr/java/jdk1.8
export PATH=$JAVA_HOME/bin:$JAVA_HOME/jre/bin:$PATH:$HOMR/bin
export CLASSPATH=.:$JAVA_HOME/jre/lib/rt.jar:$JAVA_HOME/lib/dt.jar:$JAVA_HOME/lib/tools.jar
source /etc/profile #使环境变量立刻生效
java -version #查看java版本
java version "1.8.0_321"
Java(TM) SE Runtime Environment (build 1.8.0_321-b07)
Java HotSpot(TM) 64-Bit Server VM (build 25.321-b07, mixed mode)
#上传tomcat包,并且解压移动到位置
tar xf apache-tomcat-8.5.73.tar.gz
mv apache-tomcat-8.5.73 apache-tomcat
#修改tomcat的配置文件(由于tomcat在同一台机器上,所以需要需改)
vim /usr/java/apache-tomcat/conf/server.xml
<Connector port="8080" protocol="HTTP/1.1"
connectionTimeout="20000"
redirectPort="8443" />
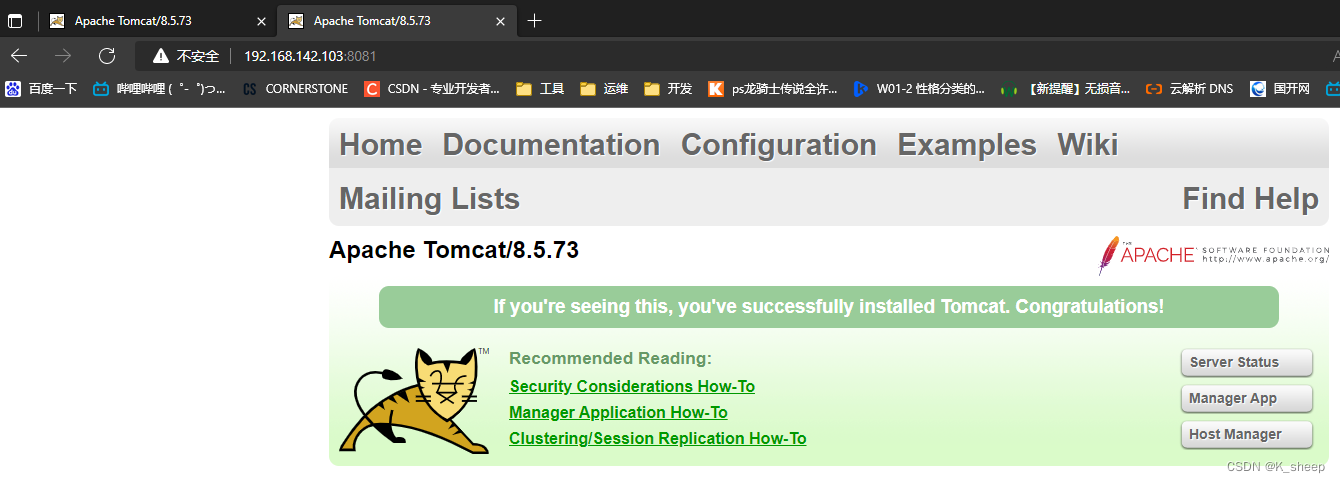
<Connector port="8081" protocol="HTTP/1.1"
connectionTimeout="20000"
redirectPort="8443" />
#启动tomcat
/usr/java/apache-tomcat/bin/startup.sh

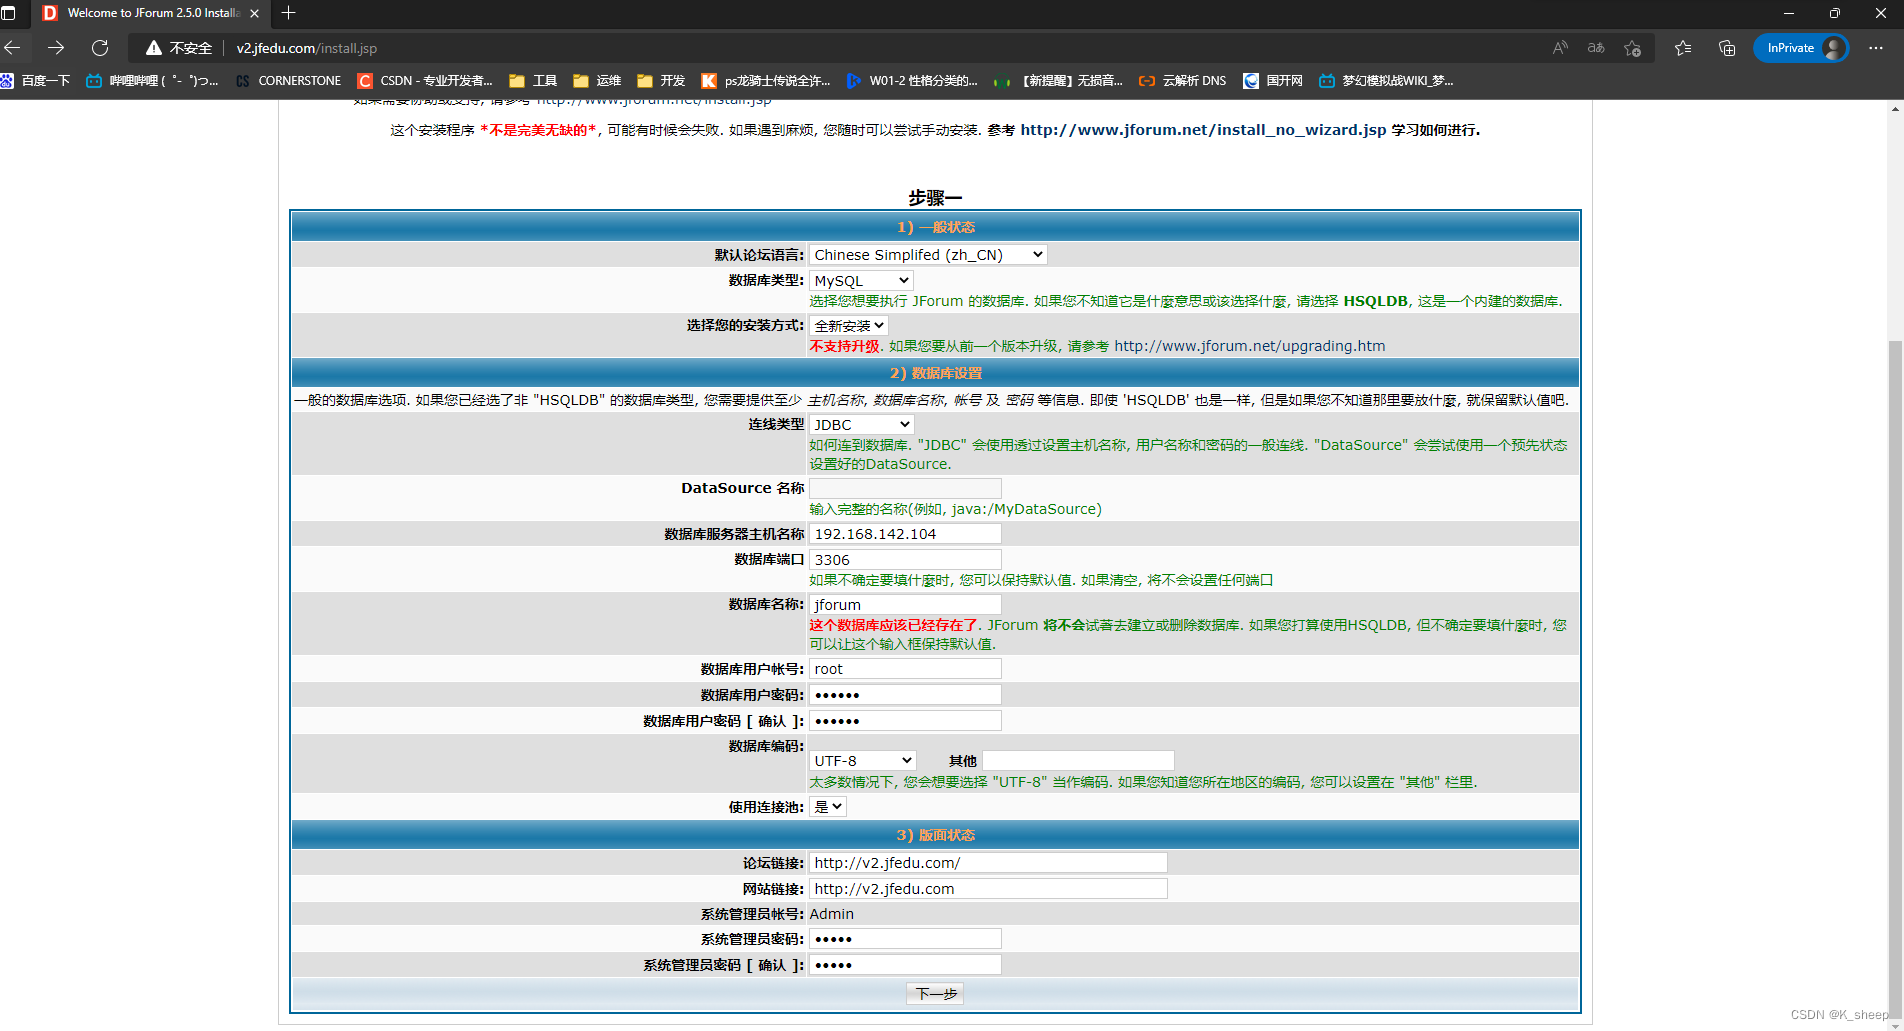
#上传jforum包
cd /usr/java/apache-tomcat/webapps
rz jforum-2.5.0.war
#启动了tomcat会自动跑war包生成一个jforum-2.5.0文件目录,停止tomcat
[root@node3 webapps]# ls
docs  examples  host-manager  jforum-2.5.0  jforum-2.5.0.war  manager  ROOT
#把jforum-2.5.0改为ROOT才能变为默认目录,操作如下
[root@node3 webapps]# mv jforum-2.5.0 ../
[root@node3 webapps]# ls
docs  examples  host-manager  jforum-2.5.0.war  manager  ROOT
[root@node3 webapps]# rm -rf ./*
[root@node3 webapps]# ls
[root@node3 webapps]# mv ../jforum-2.5.0 ./
[root@node3 webapps]# ls
jforum-2.5.0
[root@node3 webapps]# mv jforum-2.5.0/ ROOT
[root@node3 webapps]# ls
ROOT
4、yum安装部署nginx(node6:192.168.142.106)
#yum安装nginx依赖
yum install gcc-c++ pcre pcre-devel zlib zlib-devel openssl openssl--devel -y
#yum安装nginx
yum install nginx -y
#创建www用户
useradd www -s /sbin/nologin -M
#上传程序文件并修改所属用户
cd /usr/share/nginx/html
rz Discuz_X3.2_SC_UTF8.zip
unzip Discuz_X3.2_SC_UTF8.zip
chown -R www:www /usr/share/nginx/html
#修改配置文件
vim /etc/nginx/nginx.conf
user www;
worker_processes auto;
error_log /var/log/nginx/error.log;
pid /run/nginx.pid;

# Load dynamic modules. See /usr/share/doc/nginx/README.dynamic.
include /usr/share/nginx/modules/*.conf;

events {
    worker_connections 1024;
}

http {
    log_format  main  '$remote_addr - $remote_user [$time_local] "$request" '
                      '$status $body_bytes_sent "$http_referer" '
                      '"$http_user_agent" "$http_x_forwarded_for"';

    access_log  /var/log/nginx/access.log  main;

    sendfile            on;
    tcp_nopush          on;
    tcp_nodelay         on;
    keepalive_timeout   65;
    types_hash_max_size 4096;

    include             /etc/nginx/mime.types;
    default_type        application/octet-stream;

    include /etc/nginx/conf.d/*.conf;
}
#v1.jfedu.conf
upstream php {
    server 192.168.142.100:9000;
    server 192.168.142.101:9000;
}

server {
    listen       80;
    server_name  v1.jfedu.com;
    root         /usr/share/nginx/html/upload;
    index        index.php index.html index.htm;

    access_log /var/log/nginx/v1.jfedu/v1_access.log main;
    error_log  /var/log/nginx/v1.jfedu/v1_error.log error;

    # Load configuration files for the default server block.
    include /etc/nginx/default.d/*.conf;
    location ~ \.php$ {
        root           /usr/share/php/upload;
        fastcgi_pass   php;
        fastcgi_index  index.php;
        fastcgi_param  SCRIPT_FILENAME  $document_root$fastcgi_script_name;
        include        fastcgi_params;
    }
}
#v2.jfedu.conf
upstream tomcat {
    server 192.168.142.103:8080;
    server 192.168.142.103:8081;
}

server {
    listen       80;
    server_name  v2.jfedu.com;

    location / {
        root         /usr/share/nginx/html;
        proxy_pass   http://tomcat;
        proxy_set_header   host $host;
        index        index.jsp index.html index.htm;
    }
    access_log /var/log/nginx/v2.jfedu/v2_access.log main;
    error_log  /var/log/nginx/v2.jfedu/v2_error.log error;

    # Load configuration files for the default server block.
}
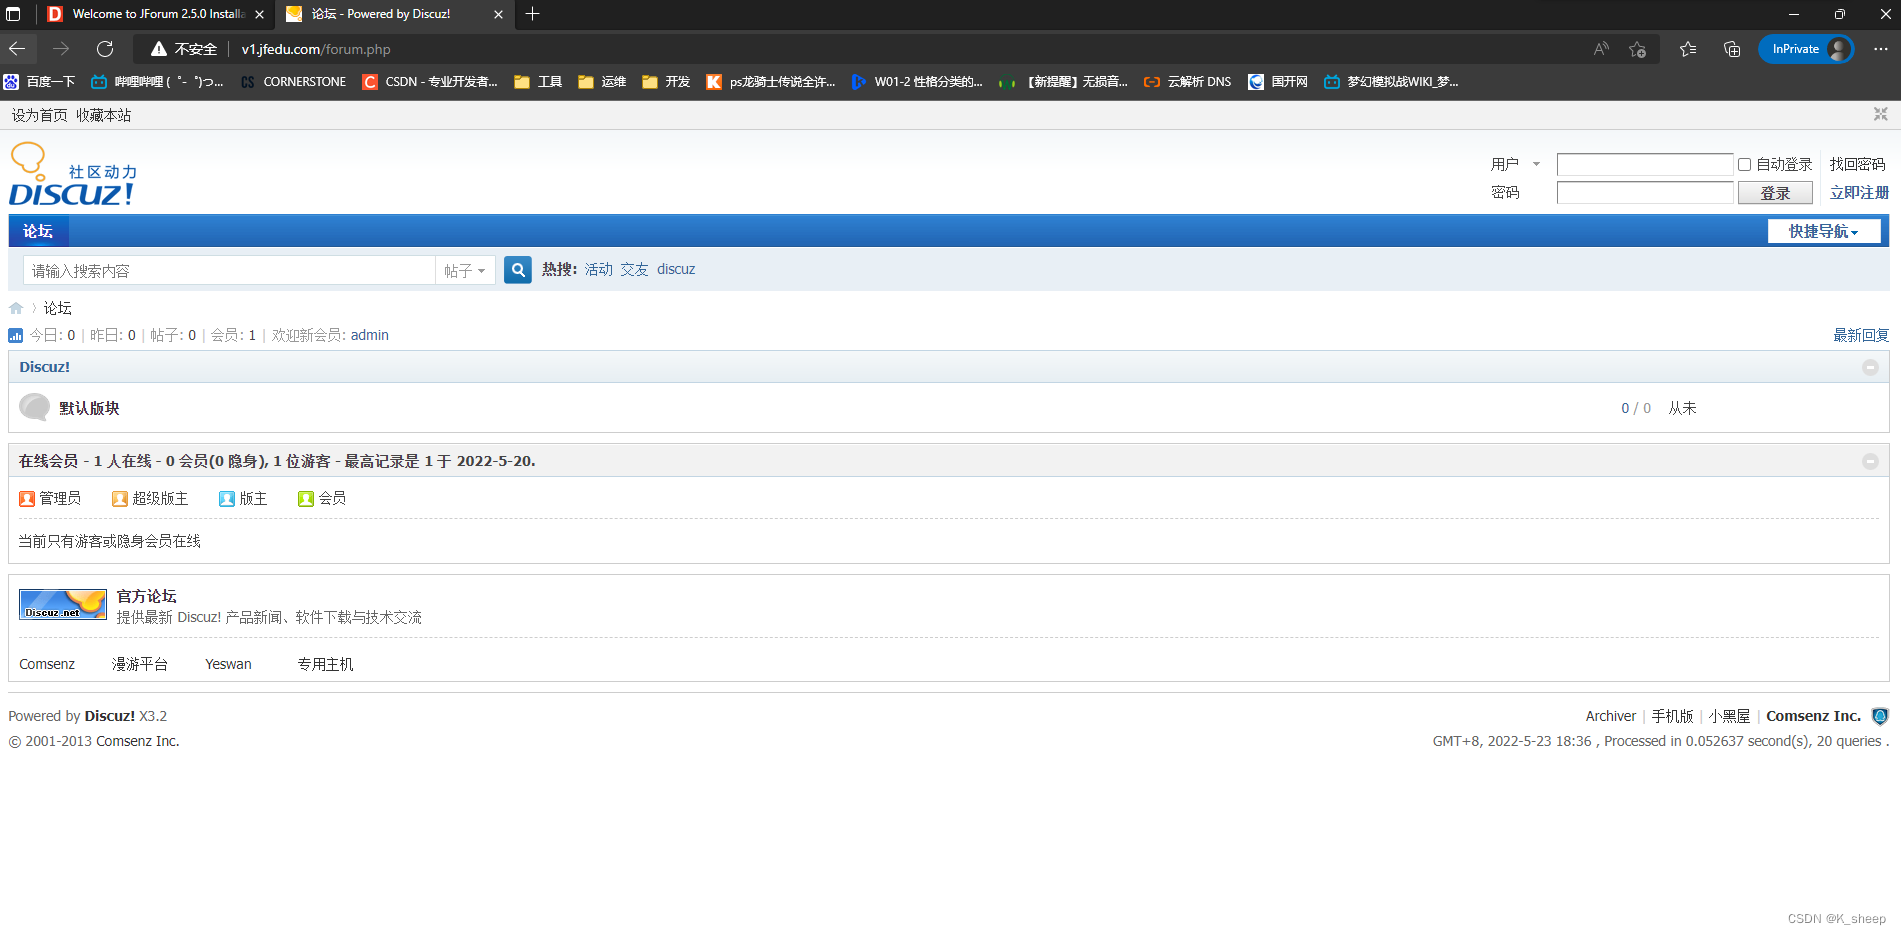
- 启动nginx,并查看Discuz和jorum,并安装
5、修改其他参数
#添加hosts
192.168.142.106 v1.jfedu.com v2.jfedu.com
C:\Windows\System32\drivers\etc\hosts
192.168.142.106 v1.jfedu.com v2.jfedu.com


 560
560


 被折叠的 条评论
为什么被折叠?
被折叠的 条评论
为什么被折叠?
 到【灌水乐园】发言


