


1.去这里下载固件
https://nodemcu-build.com/
勾选如下

邮箱中收到固件的下载地址
2.使用 固件下载器 刷固件

3.软件使用
ESPlorer编辑编译器中文版,需要Java运行环境。
ESPlorer编辑编译器英文版 需要Java运行环境。

4.代码:
在oneNET 多协议中 添加两台设备 记录下 设备ID 产品ID 鉴权信息 一台用于开发板,一台用于APP等客户端。
wifi.setmode(wifi.STATION)
cfg={}
cfg.ssid="Hono_10"
cfg.pwd="123456"
wifi.sta.config(cfg)
wifi.sta.connect()
print(wifi.sta.getip())
led1 = 3
led_pin=4
gpio.mode(led1, gpio.OUTPUT)
--设置为输出模式
gpio.mode(led2, gpio.OUTPUT)
--设置为低电平
gpio.write(led_pin,gpio.LOW)
-- onenet 设备ID 产品ID 鉴权信息
DeviceId = "631690747"
ProductId = "333543"
AuthoInfo = "ledkf"
host = "183.230.40.39"
port = 6002
--创建动态计时器对象。
timer = tmr.create()
function con()
--功能:获取Station模式下的IP地址,网络掩码和网关地址
--语法:wifi.sta.getip()
--参数:无
    if wifi.sta.getip() == nil then
        print("coneting........")
        else
            timer:stop()
            print("success!~")
            print(wifi.sta.getip())

--创建mqtt客户端 --新建一个mqtt对象
            client_hum = mqtt.Client(DeviceId,120,ProductId,AuthoInfo)
--尝试连接指定服务器
            client_hum:connect(host,port,0,
                function(client)
                    print("connect success!")
                end)
function h()
--订阅 app_topic主题
            client_hum:subscribe("app_topic",0,
                function(client)
                    print("subscribe success")
                end)
--返回message
            client_hum:on("message",
            function(client,topic,message)

                    if message == "1" then
                        gpio.write(led_pin,gpio.HIGH)
                        print(message)
                    end
                    if message == "0" then
                        gpio.write(led_pin,gpio.LOW)
                        print(message)
                    end

            end)
end
--语法:tmr.alarm(id, interval,mode, function ())
--闹钟函数相当于定时器。  mode: 定时器的模式,0或tmr.ALARM_SINGLE:一次性定时;1或tmr.ALARM_AUTO:重复定时。 定时 1000 毫秒 重复执行
timer:alarm(1000,tmr.ALARM_AUTO,h)

        end
    end
timer:alarm(1000,tmr.ALARM_AUTO,con)
01. 使用网络调试助手模拟链接APP端,发布主题app_topic 消息 1 关闭LET 0打开LED
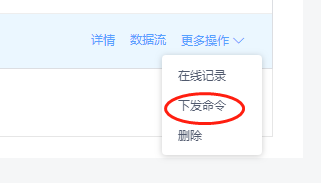
02.或者登陆oneNET 管理设备 使用下面命令 输入0 或 1控制LED 关闭打开
NodeMCU 文档
https://nodemcu.readthedocs.io/en/release/modules/mqtt/#mqttclientconnect


 3088
3088


 被折叠的 条评论
为什么被折叠?
被折叠的 条评论
为什么被折叠?
 到【灌水乐园】发言


