


SpringMVC
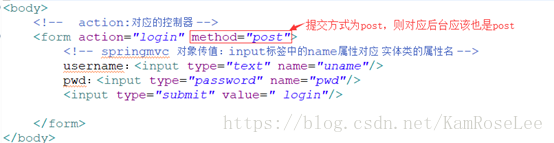
表单提交方式
页面
Login控制器
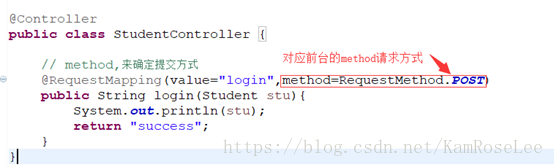
@ReuqestMapping--Metod
@RequestMapping() 注解,如果不写method属性,则默认接受所有请求!如果在@RequestMapping()注解中,加入了method属性,则必须按照method的方式请求!
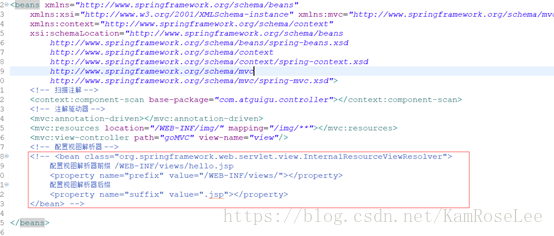
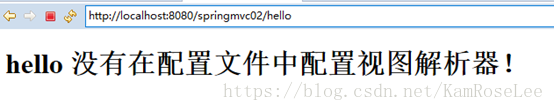
不配置试图解析器
在springmvc.xml 中可以不用配置视图解析器

对象传值---层级对象
publicclass Student { private Integer id; private String uname; private String pwd; // 对象中又对象 private Address ads; } |
<!-- action:对应的控制器 --> <form action="login" method="post"> <!-- springmvc 对象传值:input标签中的name属性对应实体类的属性名 --> username:<input type="text" name="uname"/> pwd:<input type="password" name="pwd"/> <!-- 取得Student 中address的值 --> addr: <input type="text" name="ads.name"/> <input type="submit" value=" login"/> </form> |
@Controller publicclass StudentController {
// method,来确定提交方式 @RequestMapping(value="login",method=RequestMethod.POST) public String login(Student stu){ System.out.println(stu); // 适配器,这给我们提供一个视图名,并不是真正的jsp。等 // 真正的视图名称是由试图解析器来完成。前缀,后缀。 return"success"; } } |
九大内置对象复习
1.九大内置对象
名称 | 类型 | 含义 | 获取方式 |
request | HttpSevletRequest | 封装所有请求信息 | 方法参数 |
response | HttpServletResponse | 封装所有响应信息 | 方法参数 |
session | HttpSession | 封装所有会话信息 | req.getSession() |
application | ServletContext | 所有信息 | getServletContext(); request.getServletContext(); |
out | PrintWriter | 输出对象 | response.getWriter() |
exception | Exception | 异常对象 |
|
page | Object | 当前页面对象 |
|
pageContext | PageContext | 获取其他对象 |
|
config | ServletConfig | 配置信息 |
|
2.四大作用域
2.1 page
2.1.1 在当前页面不会重新实例化.
2.2 request
2.2.1 在一次请求中同一个对象,下次请求重新实例化一个request对象.
2.3 session
2.3.1 一次会话.
2.3.2 只要客户端Cookie中传递的Jsessionid不变,Session不会重新实例化(不超过默认时间.)
2.3.3 实际有效时间:
2.3.3.1 浏览器关闭.Cookie失效.
2.3.3.2 默认时间.在时间范围内无任何交互.在tomcat的web.xml中配置
<session-config> <session-timeout>30</session-timeout> </session-config> |
2.4 application
2.4.1 只有在tomcat启动项目时才实例化.关闭tomcat时销毁application
SpringMVC作用域传值的几种方式
使用原生的servlet
@Controller publicclass DemoController {
@RequestMapping("demo1") public String demo1(HttpServletRequest abc,HttpSession sessionParam){ System.out.println("demo 来了!"); //request作用域 abc.setAttribute("req", "req的值"); //session作用域 sessionParam.setAttribute("sessionParam", "sessionParam的值"); //appliaction作用域 ServletContext application = abc.getServletContext(); application.setAttribute("application", "application的值");
return"hello";
} } |
Hello.jsp 页面 <h1>req ${requestScope.req }</h1> <h1>sessionParam ${sessionScope.sessionParam }</h1> <h1>application ${applicationScope.application }</h1>
|
使用Map传值
<h1>map ${requestScope.map}</h1> 放在request作用域中
@RequestMapping("demo2") public String demo2(Map<String,Object> map){ System.out.println(map.getClass()); map.put("map","map的值"); return"index"; } |
使用Model传值
@RequestMapping("demo3") public String demo3(Model model){ model.addAttribute("model", "model的值"); return"index"; } |
使用ModelAndView 传值
@RequestMapping("demo4") public ModelAndView demo4(){ //参数,跳转视图 ModelAndView mav = new ModelAndView("/index.jsp"); mav.addObject("mav", "mav的值"); returnmav; } |
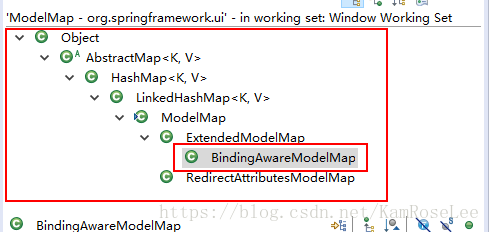
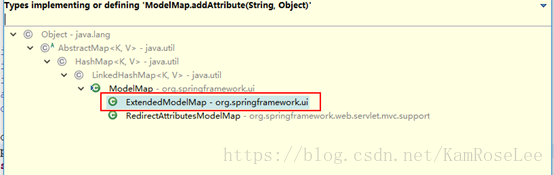
Map :public interface Map<K,V> {}
Model :public interface Model {} ----ModelMap LinkedHashMap<String,Object>
文件下载
分析
访问资源时响应头如果没有设置Content-Disposition,浏览器默认按照inline值进行处理
只需要修改相应头中Context-Disposition=”attachment;filename=文件名”
attachment 下载,以附件形式下载.
filename=值就是下载时显示的下载文件名
实现步骤:
导入jar包
commons-fileupload-1.3.1.jar
commons-io-2.2.jar
编写页面
<a href="download?fileName=show.rar">下载</a> |
控制器
@Controller publicclass DemoController { @RequestMapping("download") publicvoid download(String fileName,HttpServletResponse res,HttpServletRequest req) throws IOException{ //设置响应流中文件进行下载 res.setHeader("Content-Disposition", "attachment;filename="+fileName); //res.setHeader("Content-Disposition", "inline"); //把二进制流放入到响应体中. ServletOutputStream os = res.getOutputStream(); // 获取到文件路径 String path = req.getServletContext().getRealPath("files"); File file = new File(path, fileName); // 将文件进行转换成字节数组 byte[] bytes = FileUtils.readFileToByteArray(file); // 写文件 os.write(bytes); os.flush(); os.close(); } } |
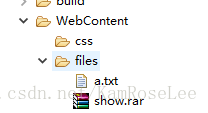
项目结构
文件上传
分析:
Springmvc中MultipartResovler来进行文件上传
表单设置:
在<form>的enctype属性控制表单类型
默认值application/x-www-form-urlencoded,普通表单数据.(少量文字信息)
text/plain 大文字量时使用的类型.邮件,论文
multipart/form-data表单中包含二进制文件内容.
实现步骤:
页面代码
<form action="upload" enctype="multipart/form-data" method="post"> 姓名:<input type="text" name="name" /><br />文件:<input type="file" name="file" /><br /><input type="submit" value="提交" /> </form> |
Springmvc.xml
<!-- MultipartResovler解析器 --> <bean id="multipartResolver" class="org.springframework.web.multipart.commons.CommonsMultipartResolver"> <property name="defaultEncoding" value="utf-8"></property> <property name="maxUploadSize" value="30"></property> </bean> <!-- 异常解析器 --> <bean id="exceptionResolver" class="org.springframework.web.servlet.handler.SimpleMappingExceptionResolver"> <property name="exceptionMappings"> <props> <prop key="org.springframework.web.multipart.MaxUploadSizeExceededException">/error</prop> </props> </property> </bean> |
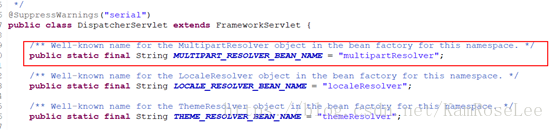
此处id不能随意更改! 如果此id 不是multipartResolver 则会抛出异常! 因为DispatcherServlet 在启动的时候,已经将multipartResolver 定义为常量了!
因为DispatcherServlet在启动的时候,已经将multipartResolver 定义为常量了! DispatcherServlet 类中 Springmvc 初始化加载的所有组件信息 控制器
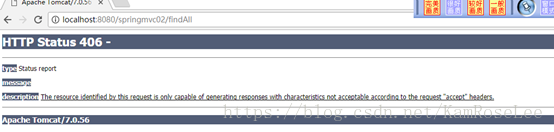
SpringMVC的ajax请求@ResponseBody页面
后台
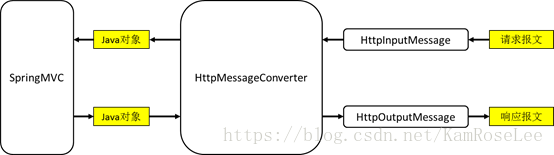
该注解底层使用Jackson进行json转换。所以在使用ajax的时候必须要导入相应jar包。 如果没有jar包,则会抛出异常406 实现原理:HttpMessageConverter<T>接口
springMVC 获取请求体信息—了解@RequestBody页面
第二种用法:将请求信息转换成json对象
控制器
注意此处Jackson的版本不能太高,高版本不支持此功能! SpringMVC获取请求头信息@RequestHeader
SpringMVC 获取cookie信息@CookieValue
接收数据
发送数据 |


 3953
3953


 被折叠的 条评论
为什么被折叠?
被折叠的 条评论
为什么被折叠?
 到【灌水乐园】发言


