


SpringBoot-自定义注解AOP实现及拦截器示例
一、四大元注解
当你在编写自定义注解时,@Target、@Retention、@Documented 和 @Inherited 是四个你可能会用到的元注解,它们可以帮助你更好地定义和使用注解。
1、@Target
@Target 注解用于指定注解可以应用的程序元素类型。它的值是一个 ElementType 数组,表示该注解可以应用到哪些地方,包括类、接口、方法、字段等。常用的 ElementType 类型包括:
ElementType.TYPE:类、接口、枚举ElementType.METHOD:方法ElementType.FIELD:字段ElementType.PARAMETER:方法参数ElementType.CONSTRUCTOR:构造方法ElementType.LOCAL_VARIABLE:局部变量ElementType.ANNOTATION_TYPE:注解类型ElementType.PACKAGE:包
例如,如果你希望你的注解只能应用在方法上,你可以这样定义:
@Target(ElementType.METHOD)
2、@Retention
@Retention 注解用于指定注解的保留策略,即注解在编译时、运行时或者在类文件中都保留。它的值是一个 RetentionPolicy 枚举,包括:
RetentionPolicy.SOURCE:注解仅保留在源代码中,在编译时丢弃RetentionPolicy.CLASS:注解保留到类文件中,在运行时丢弃(默认值)RetentionPolicy.RUNTIME:注解保留到运行时,可以通过反射获取
例如,如果你希望你的注解在运行时可用,你可以这样定义:
@Retention(RetentionPolicy.RUNTIME)
3、@Documented
@Documented 注解表示该注解应该被 javadoc 工具记录,因此可以在生成的文档中看到该注解及其说明。它没有任何属性,只需将其放在注解声明之前即可。
例如:
@Documented
@Target(ElementType.METHOD)
@Retention(RetentionPolicy.RUNTIME)
public @interface MyAnnotation {
    // 注解的定义
}
在生成的文档中,你将能够看到使用了 MyAnnotation 的地方以及相关说明。
4、@Inherited
@Inherited 注解表示该注解可以被子类继承。当一个类使用了被 @Inherited 注解的注解时,其子类也会继承该注解。需要注意的是,@Inherited 只对类的继承有效,对接口、方法、字段等不起作用。
例如:
@Inherited
@Target(ElementType.TYPE)
@Retention(RetentionPolicy.RUNTIME)
public @interface MyAnnotation {
    // 注解的定义
}
在这个例子中,如果一个父类被 @MyAnnotation 注解修饰,在子类中同样会被继承。
这些元注解可以帮助你更灵活地定义和使用自定义注解,根据具体需求选择合适的元注解来控制注解的行为。
二、自定义注解实现
1、创建注解
自定义注解:CustomAnnotation
package com.kdz.demo.annotation;

import java.lang.annotation.ElementType;
import java.lang.annotation.Retention;
import java.lang.annotation.RetentionPolicy;
import java.lang.annotation.Target;

@Target(ElementType.METHOD)
@Retention(RetentionPolicy.RUNTIME)
public @interface CustomAnnotation {
    String value1() default "";
    String value2() default "";
}
2、AOP实现
创建AOP切面类CustomAspect,指定自定义注解为切入点
指定自定义注解为切入点,定义了切入点表达式和前后通知
package com.kdz.demo.Aspect;

import com.kdz.demo.annotation.CustomAnnotation;
import lombok.extern.slf4j.Slf4j;
import org.aspectj.lang.ProceedingJoinPoint;
import org.aspectj.lang.annotation.*;
import org.slf4j.Logger;
import org.slf4j.LoggerFactory;
import org.springframework.stereotype.Component;
@Slf4j
@Aspect
@Component
public class CustomAspect {

    private static final Logger logger = LoggerFactory.getLogger(CustomAspect.class);

    //指定自定义注解为切入点
    @Pointcut("@annotation(customAnnotation)")
    public void customAnnotationPointcut(CustomAnnotation customAnnotation) {}

    @Before("@annotation(customAnnotation)")
    public void beforeAdvice(CustomAnnotation customAnnotation) {
        System.out.println("Before advice: " + customAnnotation.value1() + " - " + customAnnotation.value2());
    }

    @After("@annotation(customAnnotation)")
    public void afterAdvice(CustomAnnotation customAnnotation) {
        System.out.println("After advice: " + customAnnotation.value1() + " - " + customAnnotation.value2());
    }

    @Around("@annotation(customAnnotation)")
    public Object aroundAdvice(ProceedingJoinPoint joinPoint, CustomAnnotation customAnnotation) throws Throwable {
        long startTime = System.currentTimeMillis();

        Object result = joinPoint.proceed();

        long endTime = System.currentTimeMillis();
        long executionTime = endTime - startTime;

        logger.info("Method: " + joinPoint.getSignature().getName());
        logger.info("Execution Time: " + executionTime + "ms");
        Object[] args = joinPoint.getArgs();
        for (int i = 0; i < args.length; i++) {
            logger.info("Parameter " + (i + 1) + ": " + args[i]);
        }
        logger.info("Annotation: " + customAnnotation.value1() + " - " + customAnnotation.value2());

        return result;
    }
}
在这个更新后的切面类中,我们使用了@Around通知来围绕目标方法的执行。在方法执行前记录了开始时间,在方法执行后记录了结束时间,并计算了方法的执行时间。我们还获取了方法的参数,并将这些信息都记录在日志中。
3、使用自定义注解
package com.kdz.demo.service;

import com.kdz.demo.annotation.CustomAnnotation;
import org.springframework.stereotype.Service;

@Service
public class DemoService {

    @CustomAnnotation(value1 = "湖人总冠军", value2 = "666LBJ666")
    public void doSomething() {
        System.out.println("Doing something...");
    }
}
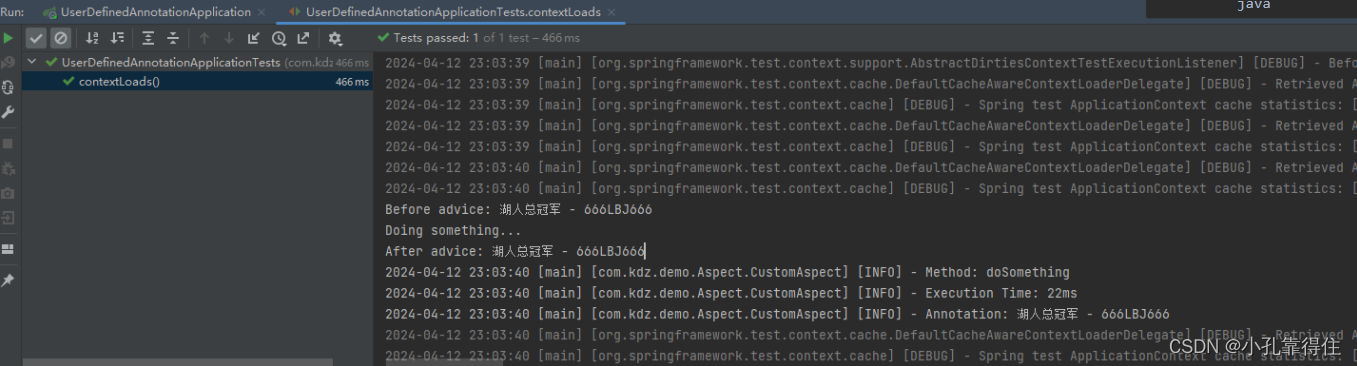
4、测试
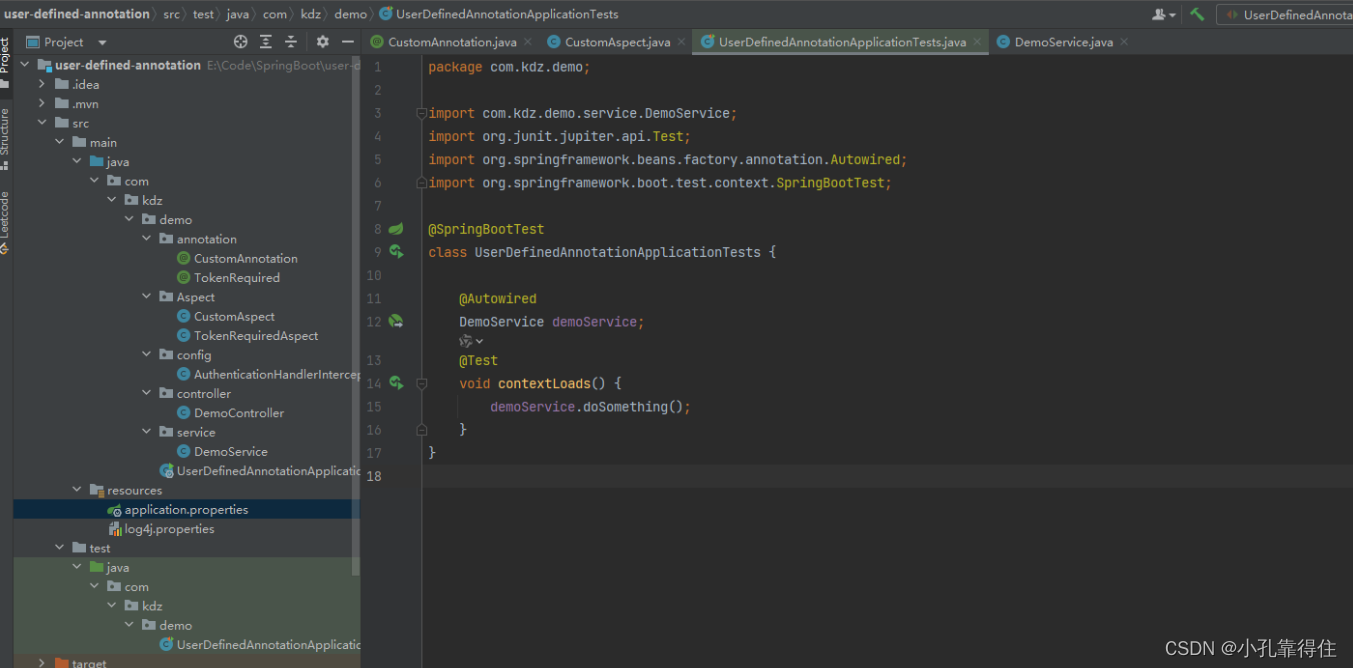
package com.kdz.demo;

import com.kdz.demo.service.DemoService;
import org.junit.jupiter.api.Test;
import org.springframework.beans.factory.annotation.Autowired;
import org.springframework.boot.test.context.SpringBootTest;

@SpringBootTest
class UserDefinedAnnotationApplicationTests {

    @Autowired
    DemoService demoService;
    @Test
    void contextLoads() {
        demoService.doSomething();
    }
}
三、配合MVC拦截器判断是否携带token
1、创建注解
自定义注解:TokenRequired
package com.kdz.demo.annotation;

import java.lang.annotation.ElementType;
import java.lang.annotation.Retention;
import java.lang.annotation.RetentionPolicy;
import java.lang.annotation.Target;

@Target(ElementType.METHOD)
@Retention(RetentionPolicy.RUNTIME)
public @interface TokenRequired {
}
2、AOP实现
创建AOP切面类TokenRequiredAspect,指定自定义注解为切入点
指定自定义注解为切入点,定义了切入点表达式前置通知
package com.kdz.demo.Aspect;
import org.aspectj.lang.annotation.Aspect;
import org.aspectj.lang.annotation.Before;
import org.slf4j.Logger;
import org.slf4j.LoggerFactory;
import org.springframework.stereotype.Component;
@Aspect
@Component
public class TokenRequiredAspect {
private static final Logger logger = LoggerFactory.getLogger(TokenRequiredAspect.class);
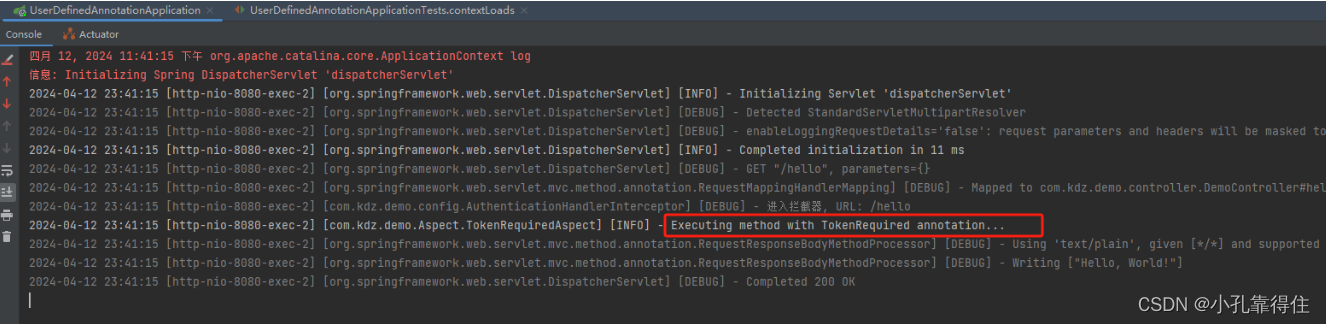
@Before("@annotation(com.kdz.demo.annotation.TokenRequired)")
public void beforeTokenRequiredMethod() {
logger.info("Executing method with TokenRequired annotation...");
}
}
3、使用自定义注解
package com.kdz.demo.controller;

import com.kdz.demo.annotation.TokenRequired;
import org.springframework.web.bind.annotation.GetMapping;
import org.springframework.web.bind.annotation.RestController;


@RestController
public class DemoController {

    @GetMapping("/hello")
    @TokenRequired
    public String hello() {
        return "Hello, World!";
    }
}
4、配置启动类
package com.kdz.demo;

import com.kdz.demo.config.AuthenticationHandlerInterceptor;
import org.springframework.boot.SpringApplication;
import org.springframework.boot.autoconfigure.SpringBootApplication;
import org.springframework.context.annotation.ComponentScan;
import org.springframework.web.servlet.config.annotation.InterceptorRegistry;
import org.springframework.web.servlet.config.annotation.WebMvcConfigurer;

@SpringBootApplication
public class UserDefinedAnnotationApplication implements WebMvcConfigurer {

    public static void main(String[] args) {
        SpringApplication.run(UserDefinedAnnotationApplication.class, args);
    }

    @Override
    public void addInterceptors(InterceptorRegistry registry) {
        registry.addInterceptor(new AuthenticationHandlerInterceptor());
    }

}
我们的应用程序的启动类 UserDefinedAnnotationApplication 上添加了 @SpringBootApplication 注解,并实现了 WebMvcConfigurer 接口,并重写了 addInterceptors 方法,在这个方法中注册了我们的拦截器 AuthenticationHandlerInterceptor。这样,拦截器就会被正确地加载和注册到应用程序中。
5、拦截器实现
拦截器判断是否使用注解及是否携带特定token
package com.kdz.demo.config;
import javax.servlet.http.HttpServletRequest;
import javax.servlet.http.HttpServletResponse;

import com.kdz.demo.annotation.TokenRequired;
import org.slf4j.Logger;
import org.slf4j.LoggerFactory;
import org.springframework.stereotype.Component;
import org.springframework.web.method.HandlerMethod;
import org.springframework.web.servlet.HandlerInterceptor;
import org.springframework.web.servlet.ModelAndView;


@Component
public class AuthenticationHandlerInterceptor implements HandlerInterceptor {

    private static final Logger logger = LoggerFactory.getLogger(AuthenticationHandlerInterceptor.class);

    @Override
    public boolean preHandle(HttpServletRequest request, HttpServletResponse response, Object handler) throws Exception {
        logger.debug("进入拦截器, URL: {}", request.getServletPath());

        if (!(handler instanceof HandlerMethod)) {
            return true;
        }

        HandlerMethod handlerMethod = (HandlerMethod) handler;

        // 检查请求的方法是否添加了 TokenRequired 注解
        if (!handlerMethod.hasMethodAnnotation(TokenRequired.class)) {
            logger.debug("接口未添加 TokenRequired 注解,直接放行");
            return true;
        }

        // 获取请求中的 token
        String token = request.getHeader("Authorization");

        // 进行 token 验证
        if (token != null && token.equals("Bearer LBJ666")) {
            return true; // Token 验证通过,允许请求通过
        } else {
            // Token 验证失败,返回未授权错误
            response.sendError(HttpServletResponse.SC_UNAUTHORIZED, "Unauthorized");
            return false;
        }
    }

    @Override
    public void postHandle(HttpServletRequest request, HttpServletResponse response, Object handler, ModelAndView modelAndView) throws Exception {
    }

    @Override
    public void afterCompletion(HttpServletRequest request, HttpServletResponse response, Object handler, Exception ex) throws Exception {
    }
}
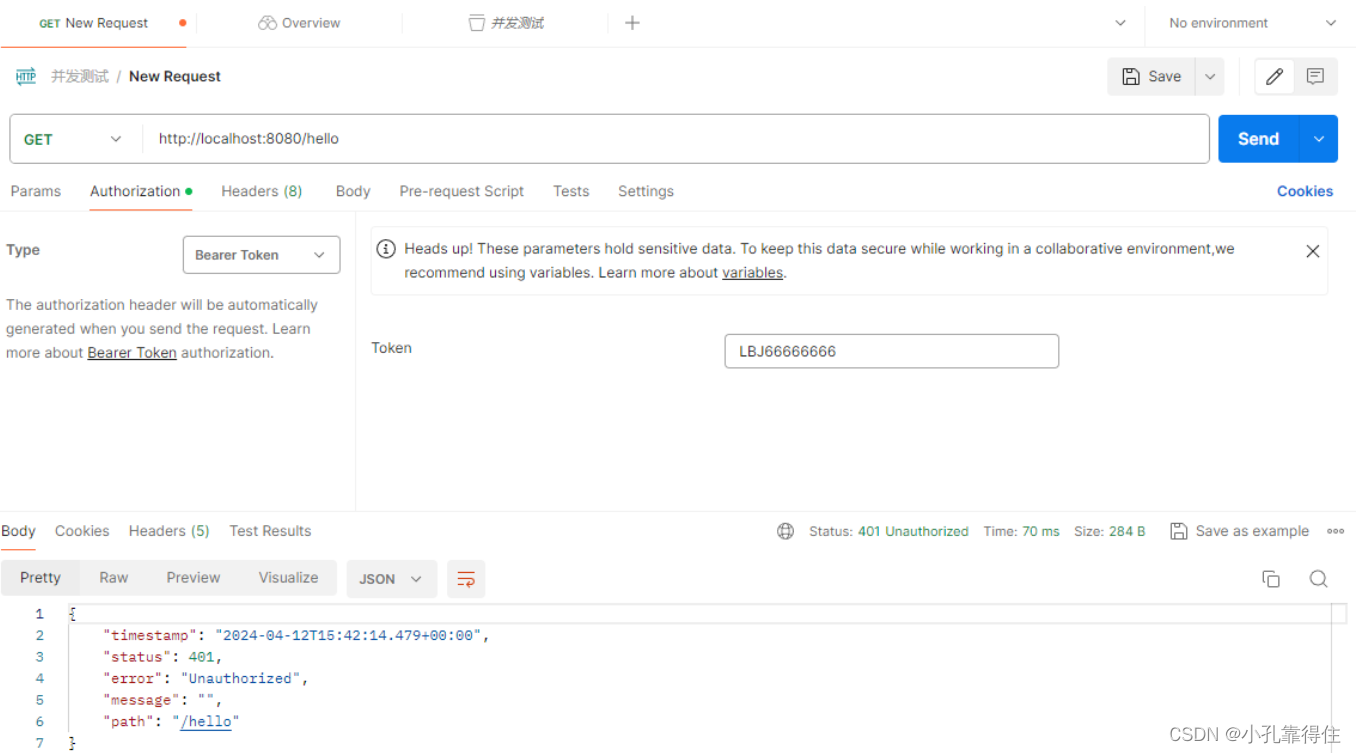
6、测试效果
1)未使用自定义注解TokenRequired


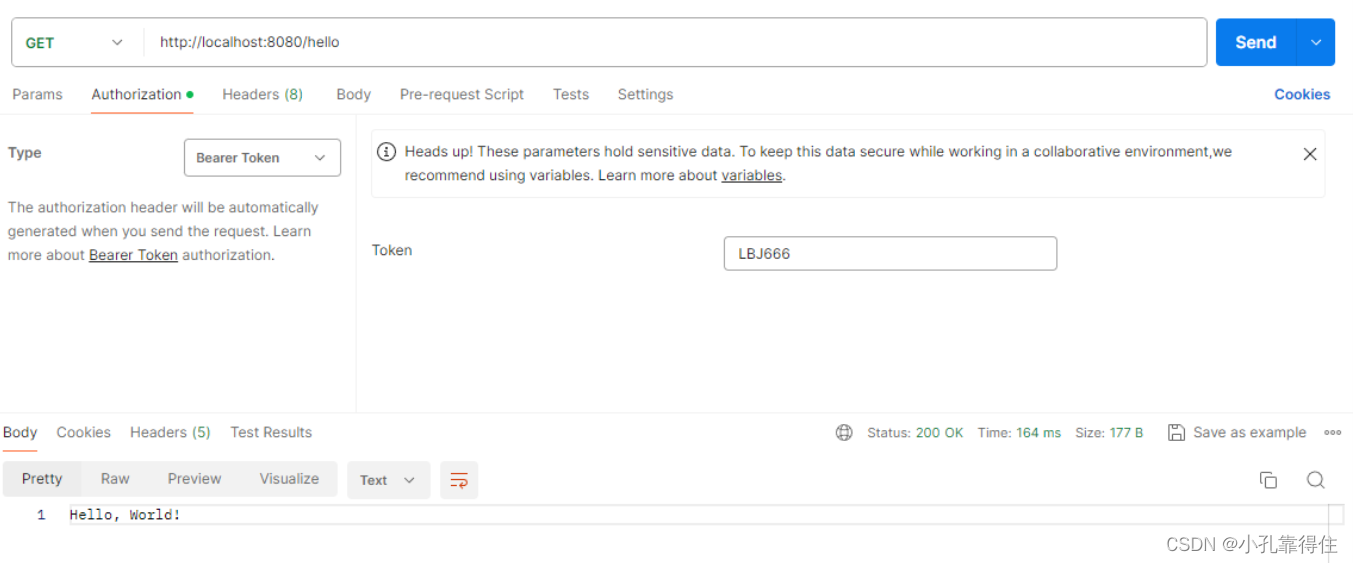
2)使用注解
使用正确token
使用错误token

SpringBoot-自定义注解AOP实现及拦截器示例 到此完结,笔者归纳、创作不易,大佬们给个3连再起飞吧


 715
715


 被折叠的 条评论
为什么被折叠?
被折叠的 条评论
为什么被折叠?
 到【灌水乐园】发言


