


@Async原理、使用及自定义线程池
SpringBoot-异步编程
在Spring Boot中,使用@Async注解进行异步编程是一种非常实用的特性,它可以帮助我们提升应用的响应速度,尤其是在执行一些耗时操作(如大文件处理、网络请求、数据库批量操作等)时。异步方法可以在后台线程中执行,而不需要阻塞主线程,从而提高了应用的并发能力和用户体验。
一、@Async原理
当一个方法被@Async标记时,Spring会通过其内部的TaskExecutor(任务执行器,默认是SimpleAsyncTaskExecutor或者基于ThreadPoolTaskExecutor的变体)来异步执行这个方法。这意味着调用该方法后,控制权会立即返回给调用者,而实际的方法逻辑会在另外的线程中并行执行。
SimpleAsyncTaskExecutor
SimpleAsyncTaskExecutor是Spring框架提供的一个简易的任务执行器,主要用于简单的异步任务执行场景。尽管它的名字中包含"Simple",但它在Spring异步处理机制中扮演着基础角色。以下是关于SimpleAsyncTaskExecutor的一些关键特点和注意事项:
特点:
-
非线程池模型:与常见的线程池(如
ThreadPoolTaskExecutor)不同,SimpleAsyncTaskExecutor每次执行一个任务时都会创建一个新的线程。这意味着对于每个异步方法调用,它都会生成一个新的线程来执行该任务,执行完后,这个线程不会被复用,而是会被JVM的线程管理机制回收。 -
适用场景:由于其不复用线程的特性,
SimpleAsyncTaskExecutor特别适合用于那些执行次数不多、且对线程创建开销不敏感的轻量级异步任务。如果任务执行频繁且持续时间短,频繁创建和销毁线程可能会导致性能问题和资源浪费。 -
无限制:它没有核心线程数、最大线程数、队列等概念,因此不会受到线程池大小或队列容量的限制。这对于某些特定场景可能是有利的,例如当不确定任务的数量或不想受限于固定大小的线程池时。
注意事项:
-
资源消耗:由于每次执行任务都新建线程,如果异步任务被频繁调用,可能会迅速消耗大量系统资源(如内存),导致性能下降甚至系统崩溃。
-
不适合高并发:对于高并发场景,不建议使用
SimpleAsyncTaskExecutor,因为它缺乏有效的线程管理和任务排队机制,可能会引发大量的线程创建,严重时会导致OutOfMemoryError。 -
单次使用:
SimpleAsyncTaskExecutor设计初衷是针对那些执行后不再复用的异步任务。如果你的应用需要处理大量并发或频繁的异步请求,应考虑使用基于线程池的ThreadPoolTaskExecutor或其他更高级的线程管理策略。综上所述,虽然
SimpleAsyncTaskExecutor简单易用,但在大多数生产环境中,出于性能和资源管理的考虑,推荐使用基于线程池的执行器来替代它,除非你能确定应用的负载和场景适合使用这种非池化的线程创建方式。
二、必要配置
-
启用异步支持:首先需要在配置类上使用
@EnableAsync注解来启用异步方法执行的支持。 -
配置TaskExecutor:虽然Spring Boot默认提供了一个简单的TaskExecutor,但根据具体需求,你可能需要自定义线程池配置。这可以通过实现
AsyncConfigurer接口并在其configureAsyncExecutor方法中提供自定义的ThreadPoolTaskExecutor实例来完成。
三、示例
假设我们有一个服务,它需要处理用户上传的图片,包括压缩、格式转换等操作,这些操作可能会比较耗时,我们希望这些操作能在后台异步执行,以快速响应用户的上传请求。
未使用的效果:
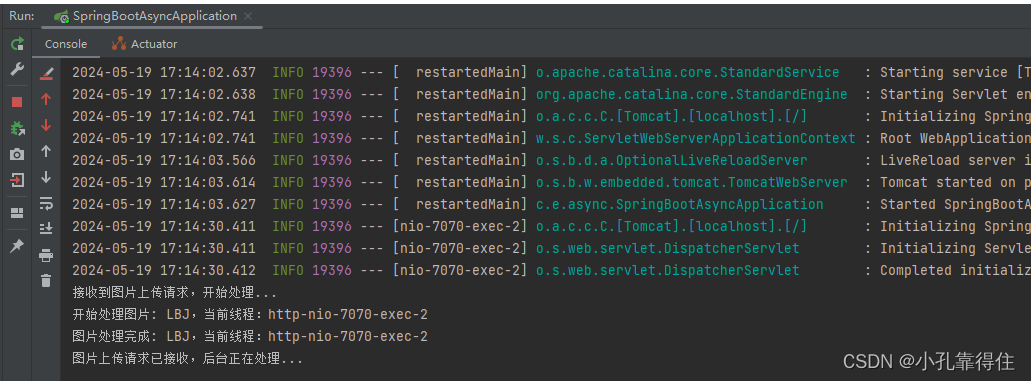
按照处理顺序,同步执行。
1. 启用异步支持
import org.springframework.scheduling.annotation.EnableAsync;
import org.springframework.boot.SpringApplication;
import org.springframework.boot.autoconfigure.SpringBootApplication;

@SpringBootApplication
@EnableAsync // 启用异步方法支持
public class AsyncExampleApplication {
    public static void main(String[] args) {
        SpringApplication.run(AsyncExampleApplication.class, args);
    }
}
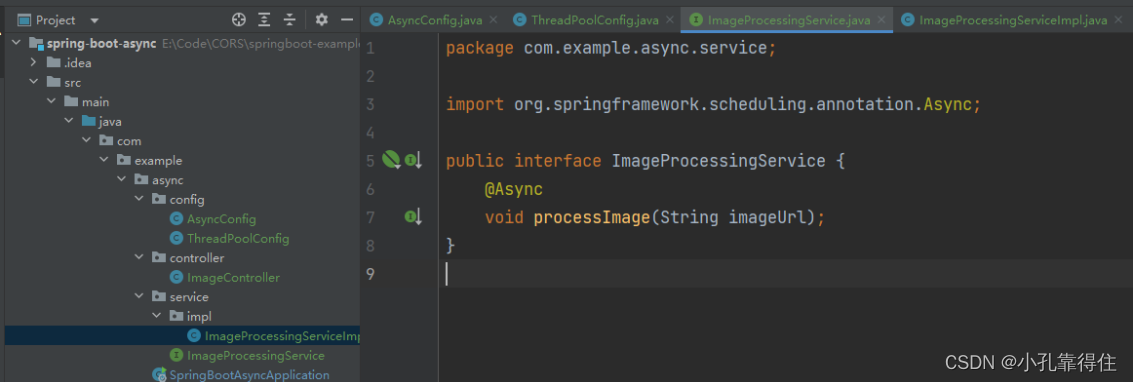
2. 定义异步服务
public interface ImageProcessingService {
	@Async
    void processImage(String imageUrl);
}

@Service
public class ImageProcessingServiceImpl implements ImageProcessingService {
    @Override
    public void processImage(String imageUrl) {
        System.out.println("开始处理图片: " + imageUrl + ",当前线程:" + Thread.currentThread().getName());
        // 模拟耗时操作,比如压缩、转换等
        try {
            Thread.sleep(3000); // 模拟耗时3秒
        } catch (InterruptedException e) {
            Thread.currentThread().interrupt();
        }
        System.out.println("图片处理完成: " + imageUrl + ",当前线程:" + Thread.currentThread().getName());
    }
}
3. 控制器中调用异步方法
import org.springframework.beans.factory.annotation.Autowired;
import org.springframework.web.bind.annotation.PostMapping;
import org.springframework.web.bind.annotation.RequestParam;
import org.springframework.web.bind.annotation.RestController;

@RestController
public class ImageController {

    @Autowired
    private ImageProcessingService imageProcessingService;

    @PostMapping("/upload")
    public String handleImageUpload(@RequestParam("image") String imageUrl) {
        System.out.println("接收到图片上传请求,开始处理...");
        imageProcessingService.processImage(imageUrl); // 异步处理图片
        System.out.println("图片上传请求已接收,后台正在处理...");
        return "上传成功,图片处理将在后台继续...";
    }
}
效果如下:
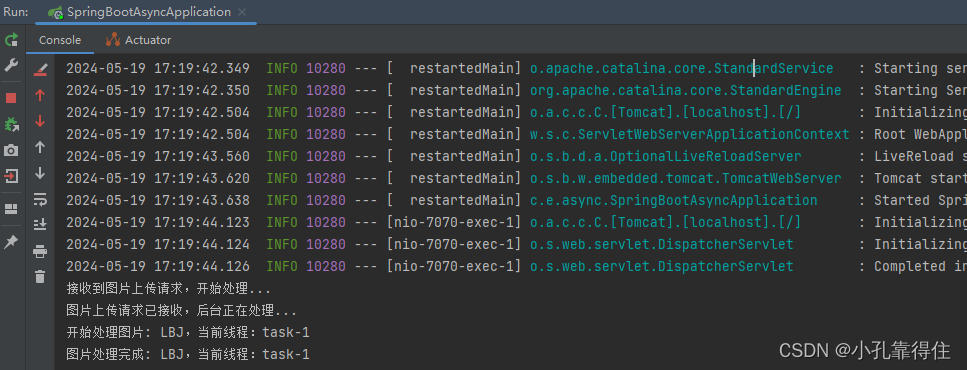
在这个例子中,当用户通过/upload端点上传图片时,handleImageUpload方法会被调用。它随后调用ImageProcessingService中的processImage方法,由于该方法被@Async注解,所以它将在一个单独的线程中执行,而主线程会立即返回“上传成功,图片处理将在后台继续…”,不会等待图片处理完成,从而实现了异步处理,提高了应用的响应速度。
四、配置自定义线程池
有3种常见方式:
- 实现
AsyncConfigurer接口来自定义线程池配置 - 继承
AsyncConfigurerSupport - 直接注入自定义的
TaskExecutor到bean中并让Spring使用
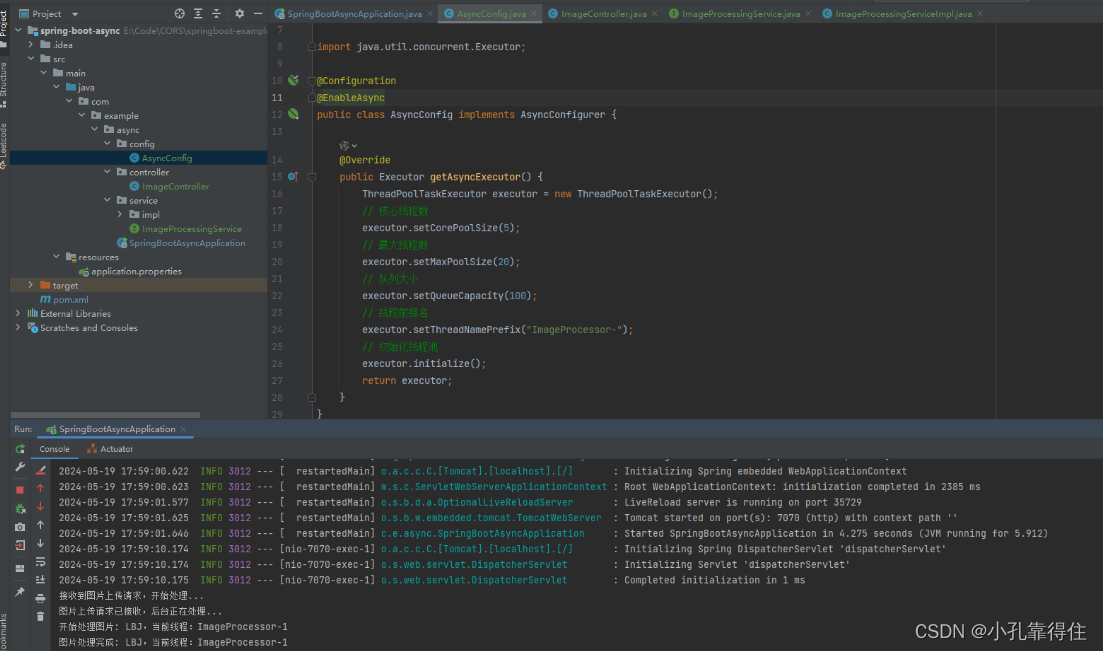
1.实现AsyncConfigurer接口来自定义线程池配置
import org.springframework.context.annotation.Configuration;
import org.springframework.scheduling.annotation.AsyncConfigurer;
import org.springframework.scheduling.concurrent.ThreadPoolTaskExecutor;

import java.util.concurrent.Executor;

@Configuration
@EnableAsync
public class AsyncConfig implements AsyncConfigurer {

    @Override
    public Executor getAsyncExecutor() {
        ThreadPoolTaskExecutor executor = new ThreadPoolTaskExecutor();
        // 核心线程数
        executor.setCorePoolSize(5);
        // 最大线程数
        executor.setMaxPoolSize(20);
        // 队列大小
        executor.setQueueCapacity(100);
        // 线程前缀名
        executor.setThreadNamePrefix("ImageProcessor-");
        // 初始化线程池
        executor.initialize();
        return executor;
    }
}
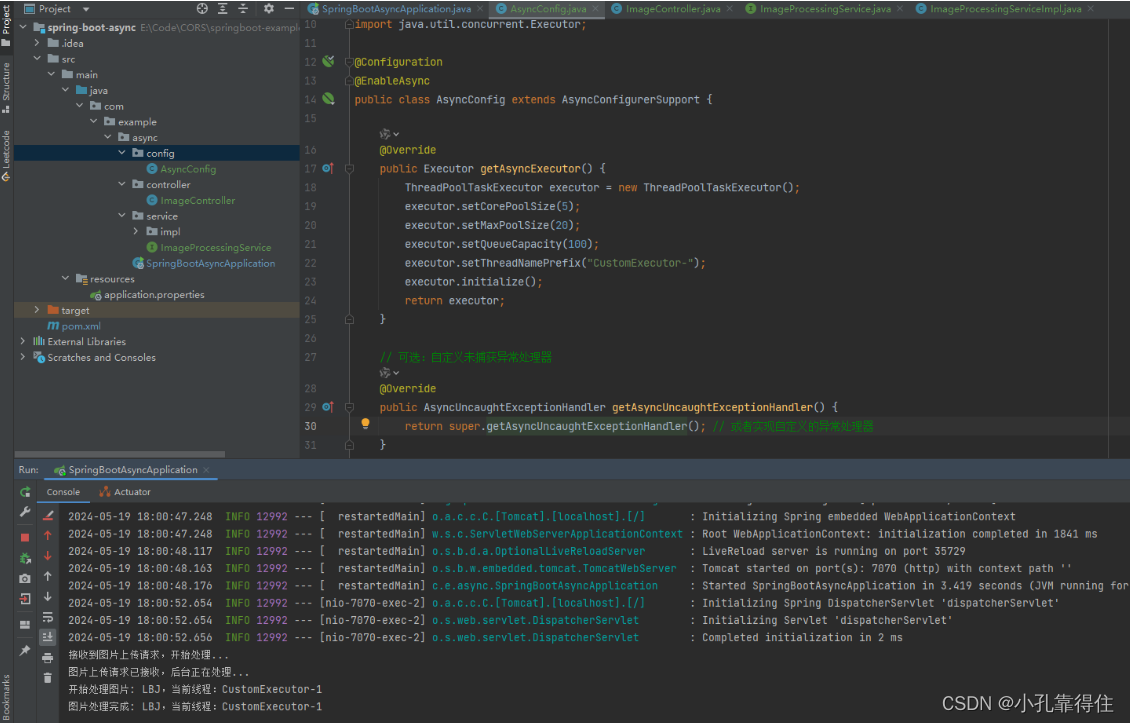
2.继承AsyncConfigurerSupport
继承AsyncConfigurerSupport类是一种简便的方式,它提供了默认的实现,你只需覆盖你想要自定义的部分。这种方式减少了需要重写的方法数量,代码更加简洁。
import org.springframework.aop.interceptor.AsyncUncaughtExceptionHandler;
import org.springframework.context.annotation.Configuration;
import org.springframework.scheduling.annotation.AsyncConfigurerSupport;
import org.springframework.scheduling.concurrent.ThreadPoolTaskExecutor;

@Configuration
@EnableAsync
public class AsyncConfig extends AsyncConfigurerSupport {

    @Override
    public Executor getAsyncExecutor() {
        ThreadPoolTaskExecutor executor = new ThreadPoolTaskExecutor();
        executor.setCorePoolSize(5);
        executor.setMaxPoolSize(20);
        executor.setQueueCapacity(100);
        executor.setThreadNamePrefix("CustomExecutor-");
        executor.initialize();
        return executor;
    }

    // 可选:自定义未捕获异常处理器
    @Override
    public AsyncUncaughtExceptionHandler getAsyncUncaughtExceptionHandler() {
        return super.getAsyncUncaughtExceptionHandler(); // 或者实现自定义的异常处理器
    }
}
3.直接注入自定义的TaskExecutor到bean中并让Spring使用
如果你的应用中已经存在一个自定义的TaskExecutor bean,你可以直接告诉Spring使用这个bean作为异步任务的执行器,而无需通过实现AsyncConfigurer接口。这种方法适用于希望在多个地方复用同一个线程池配置的情况。
首先,定义你的ThreadPoolTaskExecutor bean:
@Configuration
public class ThreadPoolConfig {

    @Bean(name = "customExecutor")
    public ThreadPoolTaskExecutor taskExecutor() {
        ThreadPoolTaskExecutor executor = new ThreadPoolTaskExecutor();
        executor.setCorePoolSize(5);
        executor.setMaxPoolSize(20);
        executor.setQueueCapacity(100);
        executor.setThreadNamePrefix("ThreadPoolTaskExecutor-");
        executor.initialize();
        return executor;
    }
}

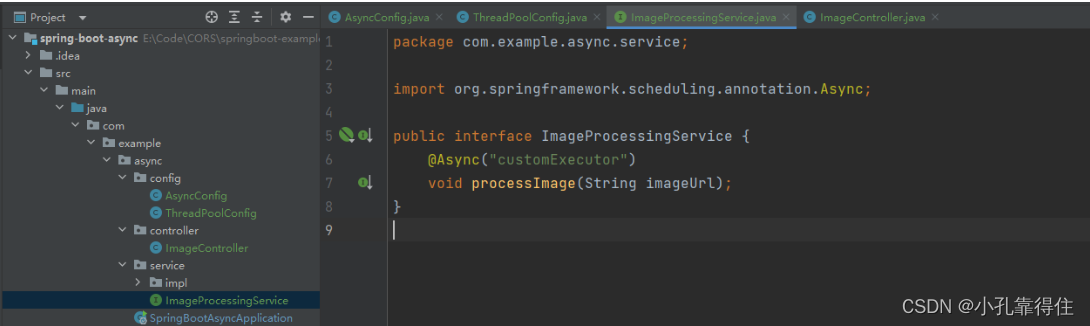
然后,在你的异步服务类或配置类中,通过@Async的value属性指定使用哪个bean作为执行器:
// 如果你的服务类需要指定线程池
@Service
public class ImageProcessingService {
@Async("customExecutor")
public void processImage(String imageUrl) {
// ... 处理逻辑
}
}
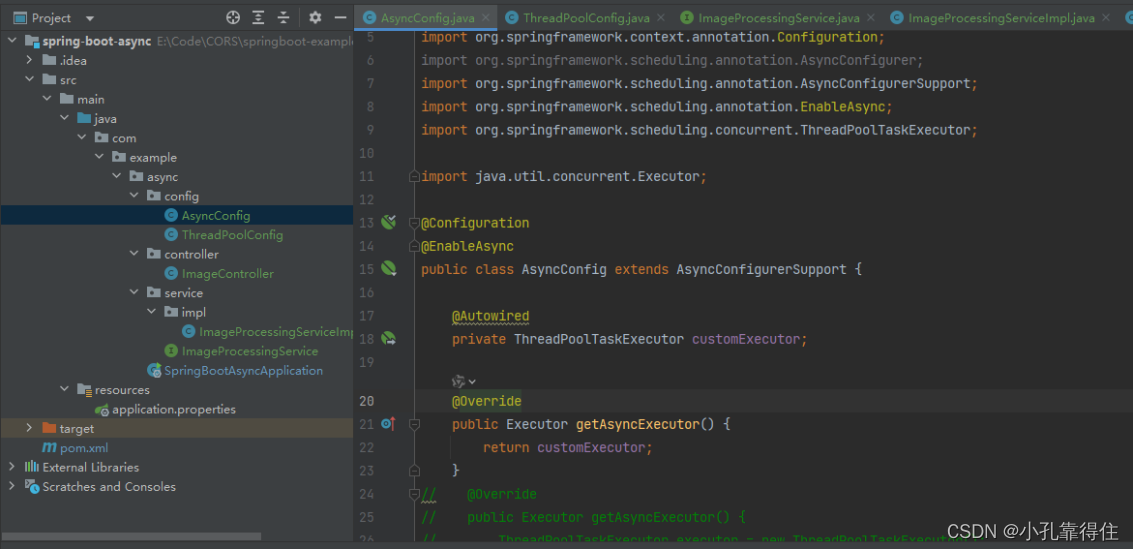
// 或者在AsyncConfigurer中指定默认的Executor Bean
@Configuration
@EnableAsync
public class AsyncConfig {
@Autowired
private ThreadPoolTaskExecutor customExecutor;
@Override
public Executor getAsyncExecutor() {
return customExecutor;
}
}
在服务类方法上@Async(“customExecutor”)
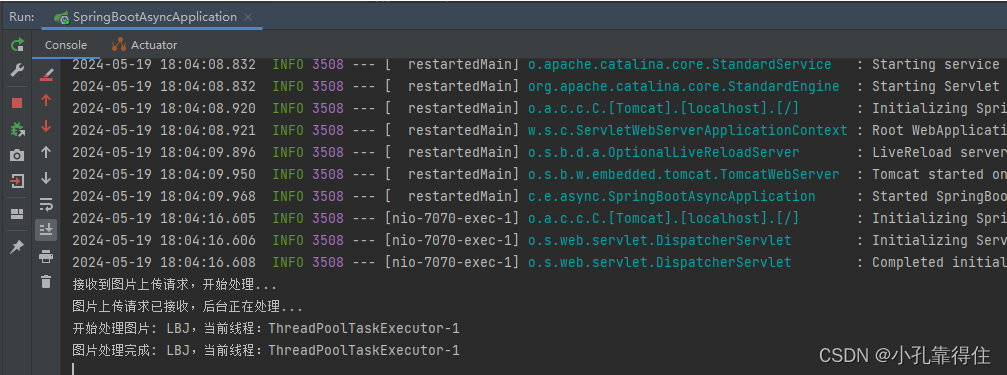
在AsyncConfigurer中指定默认的Executor Bean
效果:


 1032
1032

 被折叠的 条评论
为什么被折叠?
被折叠的 条评论
为什么被折叠?
 到【灌水乐园】发言


