


Environment:
Ubuntu 18
Python3
Docker
Minio
Setup DeepRacer environment on Ubuntu
Download the DeepRacer repo
You can use git to clone the repo from github:
git clone --recurse-submodules https://github.com/crr0004/deepracer.gitor download from Baidu Pan:
Baidu Pan: https://pan.baidu.com/s/1SPW4cmZdk4eHRj5oh2iD5Q 提取码: cjw1
Run Minio
$docker run -it -p 9000:9000 -v /mnt/data:/data minio/minio server /dataif you see this message, you minio has been startted successfully.
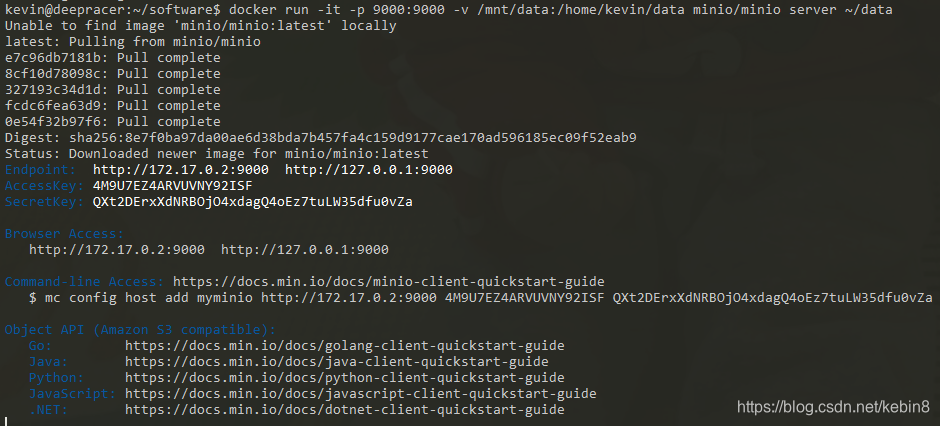
After the Minio startted, you can view the s3 bucket in your browser: http://[VMIP]:9000, the default AccessKey and SecretKey are below, you also can get it when run the command above.
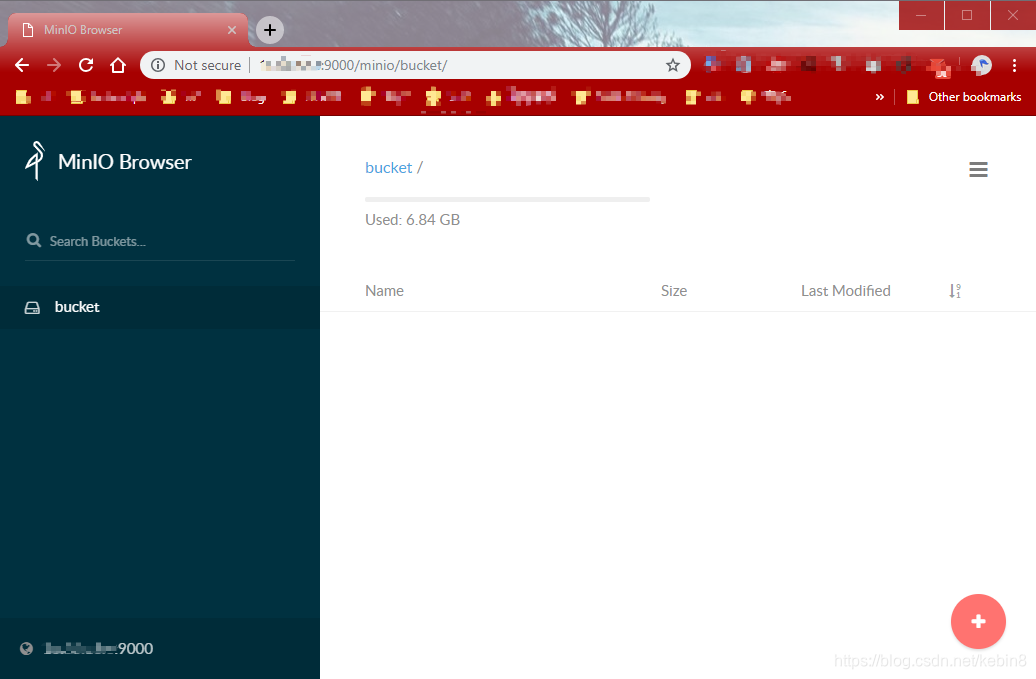
You need to create a bucket name "bucket" in it, DeepRacer will retrieve and save data in this bucket.
Config DeepRacer
- unzip deepracer.zip to your local path such as ~/deepracer
- Edit the deepracer/rl_coach/env.sh file, change the MINIO_ACCESS_KEY, AWS_ACCESS_KEY_ID's value to the AccessKey, change MINIO_SECRET_KEYand AWS_SECRET_ACCESS_KEY's values to SecretKey of Minio.
- Run `source deepracer/rl_coach/env.sh` to get some reasonable defaults for your environemnt. You should source that
env.shfor every terminal you open when interacting with the deepracer instances because it helps keep everything consistent. - Then copy the folder custom_files into your new bucket as that's where the defaults expect them to be, there are 2 files in the custom_files folder (reward.py, the rewoard function, model_metadata.json, the action space settings), you can change it as you want.
- Edit robomaker.env, change AWS_ACCESS_KEY_ID, AWS_SECRET_ACCESS_KEY, WORLD_NAME and S3_ENDPOINT_URL.
- The WORLD_NAME can be:
- AWS_track
- Bowtie_track
- easy_track
- hard_loopy_track
- hard_speed_track
- hard_track
- medium_track
- Oval_track
- reinvent_base
- Straight_track
- Tokyo_Training_track
- The WORLD_NAME can be:
-
make a directory (.sagemaker) under your user, and copy the config.yaml file to the folder.
$mkdir -p ~/.sagemaker
$cp ~/deepracer/config.yaml ~/.sagemaker/
Install required packages:
-
$sudo apt install python3-venv $python3 -m venv sagemaker_venv # please notice that you need to run the following command under the repo's root path. # Invalid requirement: 'sagemaker-python-sdk/' # It looks like a path. Does it exist ? $pip install -U sagemaker-python-sdk/ awscli pandas $pip install -U urllib3==1.24.* $pip install -U PyYAML==3.13 $pip install -U IPython $docker pull crr0004/sagemaker-rl-tensorflow:console $docker pull crr0004/deepracer_robomaker:console -
Start sagemaker
7.1 You might meet some pkg_resources.ContextualVersionConflict exception when running the command, please install the consistent version of the 2 python packages to fix this issue.$cd ~/deepracer/rl_coach/ $python rl_deepracer_coach_robomaker.py # Sometimes you may run into an issue as blow, you need to do $tr -d '\r' < env.sh > newenv.sh and source newenv.sh before run the $python rl_deepracer_coach_robomaker.py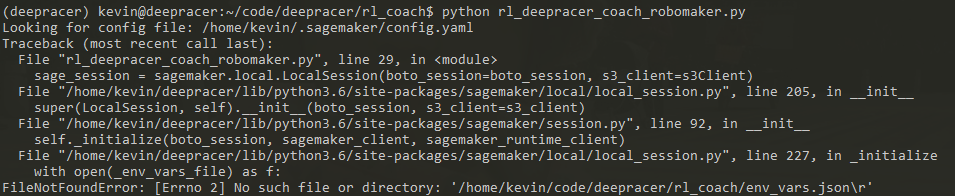
- If you are seeing the training log in the terminal, congratulations! You have successfully running the DeepRacer on your local environment.
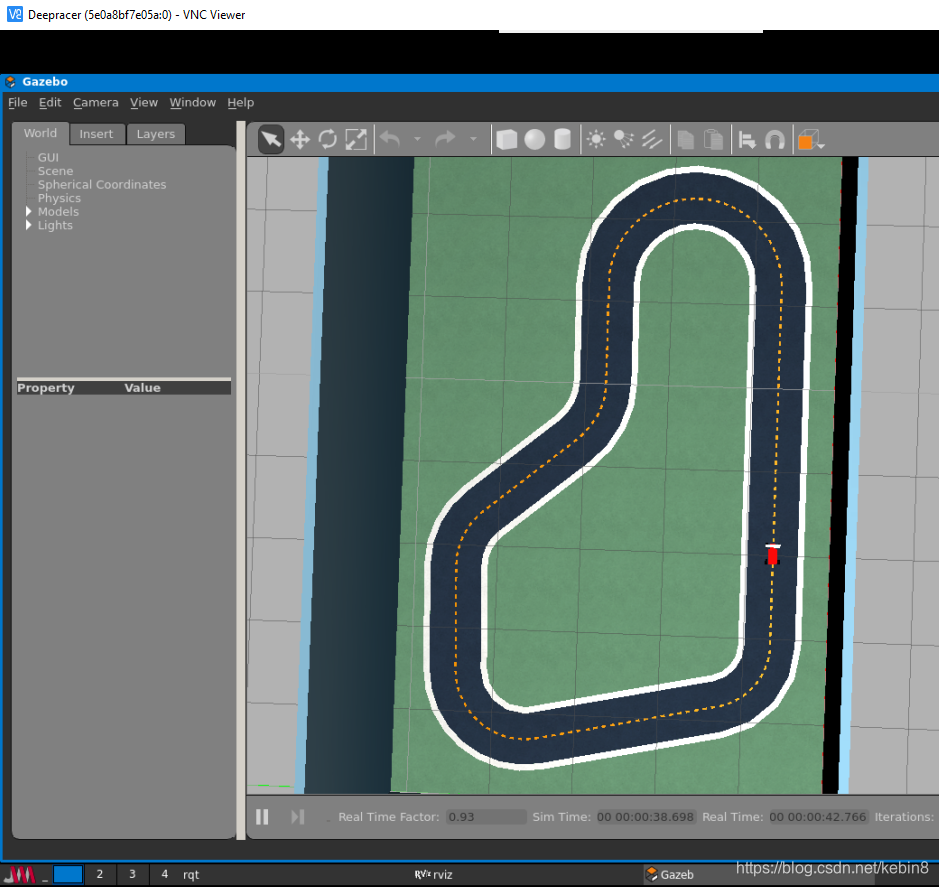
$cd ~/deepracer/ $docker run --rm --name dr --env-file ./robomaker.env --network sagemaker-local -p 8080:5900 -it crr0004/deepracer_robomaker:console - You can download a VNC Viewer to watch how the car beening trainned. https://www.realvnc.com/en/connect/download/viewer/windows/
Change the Hyperparameters:
Please edit the file `rl_coach/rl_deepracer_coach_robomaker.py`, e.g.
estimator = RLEstimator(entry_point="training_worker.py",
                        source_dir='src',
                        dependencies=["common/sagemaker_rl"],
                        toolkit=RLToolkit.COACH,
                        toolkit_version='0.11',
                        framework=RLFramework.TENSORFLOW,
                        sagemaker_session=sage_session,
                        #bypass sagemaker SDK validation of the role
                        role="aaa/",
                        train_instance_type=instance_type,
                        train_instance_count=1,
                        output_path=s3_output_path,
                        base_job_name=job_name_prefix,
                        image_name="crr0004/sagemaker-rl-tensorflow:console",
                        train_max_run=job_duration_in_seconds, # Maximum runtime in seconds
                        hyperparameters={"s3_bucket": s3_bucket,
                                         "s3_prefix": s3_prefix,
                                         "aws_region": aws_region,
                                         "model_metadata_s3_key": "s3://{}/custom_files/model_metadata.json".format(s3_bucket),
                                         "RLCOACH_PRESET": RLCOACH_PRESET,
                                         "loss_type": "huber", # Change the Loss type
                                         "batch_size": 256 # Gradient descent batch size
                                      },
                        metric_definitions = metric_definitions,
                        s3_client=s3Client
                    )
Evaluate the model:
Add an environment NUMBER_OF_TRIALS=3 to the robomaker.env file, and them run the command to start the evaluation:
$docker run --rm --name dr --env-file ./robomaker.env --network sagemaker-local -p 8080:5900 -it crr0004/deepracer_robomaker :console "./run.sh build evaluation.launch"
Change world in evaluation:
You can change the world by passing -e "WORLD_NAME=<track_name>" into the container command.
$docker run --rm --name dr_e --env-file ./robomaker.env --network sagemaker-local -p 8080:5900 -it -e "WORLD_NAME=Tokyo_Training_track" crr0004/deepracer_robomaker:console "./run.sh build evaluation.launch"
Retraining a Model
In the file rl_deepracer_coach_robomaker.py, uncomment both line 116 and 117 as below.
#"pretrained_s3_bucket": "{}".format(s3_bucket),
#"pretrained_s3_prefix": "rl-deepracer-pretrained"
estimator = RLEstimator(entry_point="training_worker.py",
                        source_dir='src',
                        dependencies=["common/sagemaker_rl"],
                        toolkit=RLToolkit.COACH,
                        toolkit_version='0.11',
                        framework=RLFramework.TENSORFLOW,
                        sagemaker_session=sage_session,
                        #bypass sagemaker SDK validation of the role
                        role="aaa/",
                        train_instance_type=instance_type,
                        train_instance_count=1,
                        output_path=s3_output_path,
                        base_job_name=job_name_prefix,
                        image_name="crr0004/sagemaker-rl-tensorflow:console",
                        train_max_run=job_duration_in_seconds, # Maximum runtime in seconds
                        hyperparameters={"s3_bucket": s3_bucket,
                                         "s3_prefix": s3_prefix,
                                         "aws_region": aws_region,
                                         "model_metadata_s3_key": "s3://{}/custom_files/model_metadata.json".format(s3_bucket),
                                         "RLCOACH_PRESET": RLCOACH_PRESET,
                                         "loss_type": "huber", # Change the Loss type
                                         "batch_size": 256, # Gradient descent batch size
                                         "pretrained_s3_bucket": "{}".format(s3_bucket),
                                         "pretrained_s3_prefix": "rl-deepracer-pretrained"
                                      },
                        metric_definitions = metric_definitions,
                        s3_client=s3Client
                    )
This will set it to look for checkpoints in that bucket and the folder. In the folder that minio is using to serve your data, in the bucket, create a folder called rl-deepracer-pretrained, and in that folder, create a folder model, so it the whole path looks like bucket/rl-deepracer-pretrained/model.
Now copy the *.chk* and checkpoint files from the currently trained model folder into the pretrained model folder. When launching the sagemaker container you should see a log entry on the lines of Using pretrained checkpoint: ...
Training:


 被折叠的 条评论
为什么被折叠?
被折叠的 条评论
为什么被折叠?
 到【灌水乐园】发言


