


周一回归!
这次是记录拼图的项目
目录
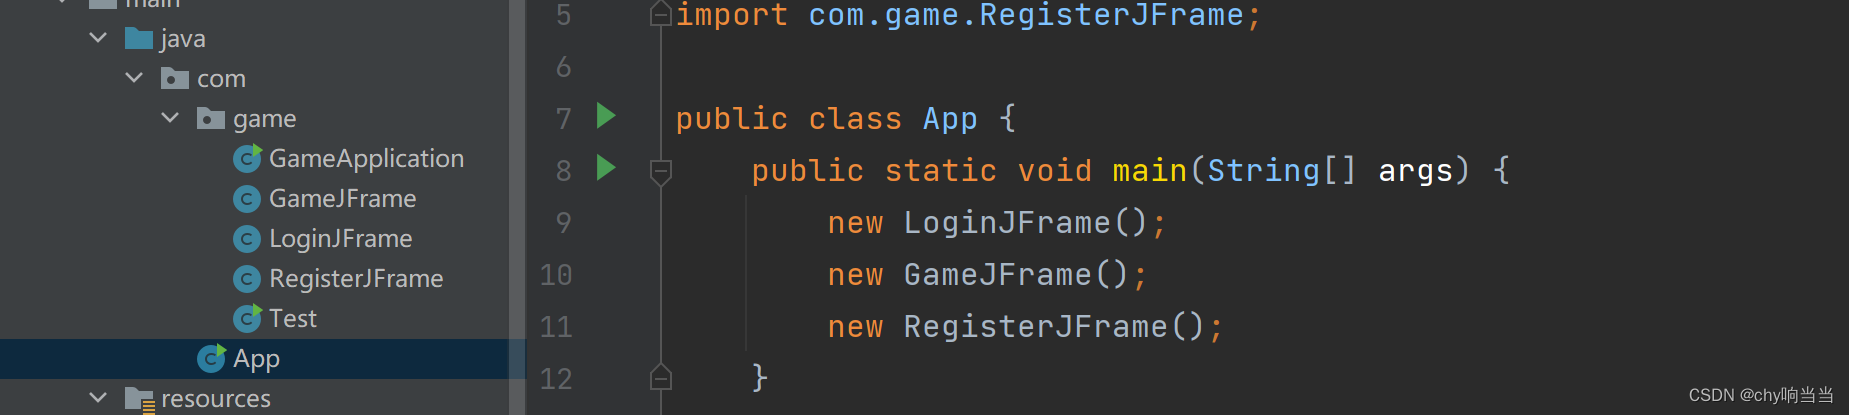
1.一些基础的窗口设置及生成:(注意关闭这里的各种选项,根据需求选择)
1.一些基础的窗口设置及生成:(注意关闭这里的各种选项,根据需求选择)
以其中一个为例
public class GameJFrame extends JFrame {
    //JFrame的子类也是界面窗体
    //规定:GameFrame这个界面为游戏主界面,和游戏相关逻辑写在这里
    public GameJFrame() {
        //宽度
        this.setSize(605, 682);
        //标题
        this.setTitle("拼图游戏");
        //设置页面置顶于idea
        this.setAlwaysOnTop(true);
        //让页面居中
        this.setLocationRelativeTo(null);
        //设置关闭模式:
        this.setDefaultCloseOperation(WindowConstants.DO_NOTHING_ON_CLOSE);
        //让他显示
        this.setVisible(true);
    }


}
2.菜单:逻辑思路

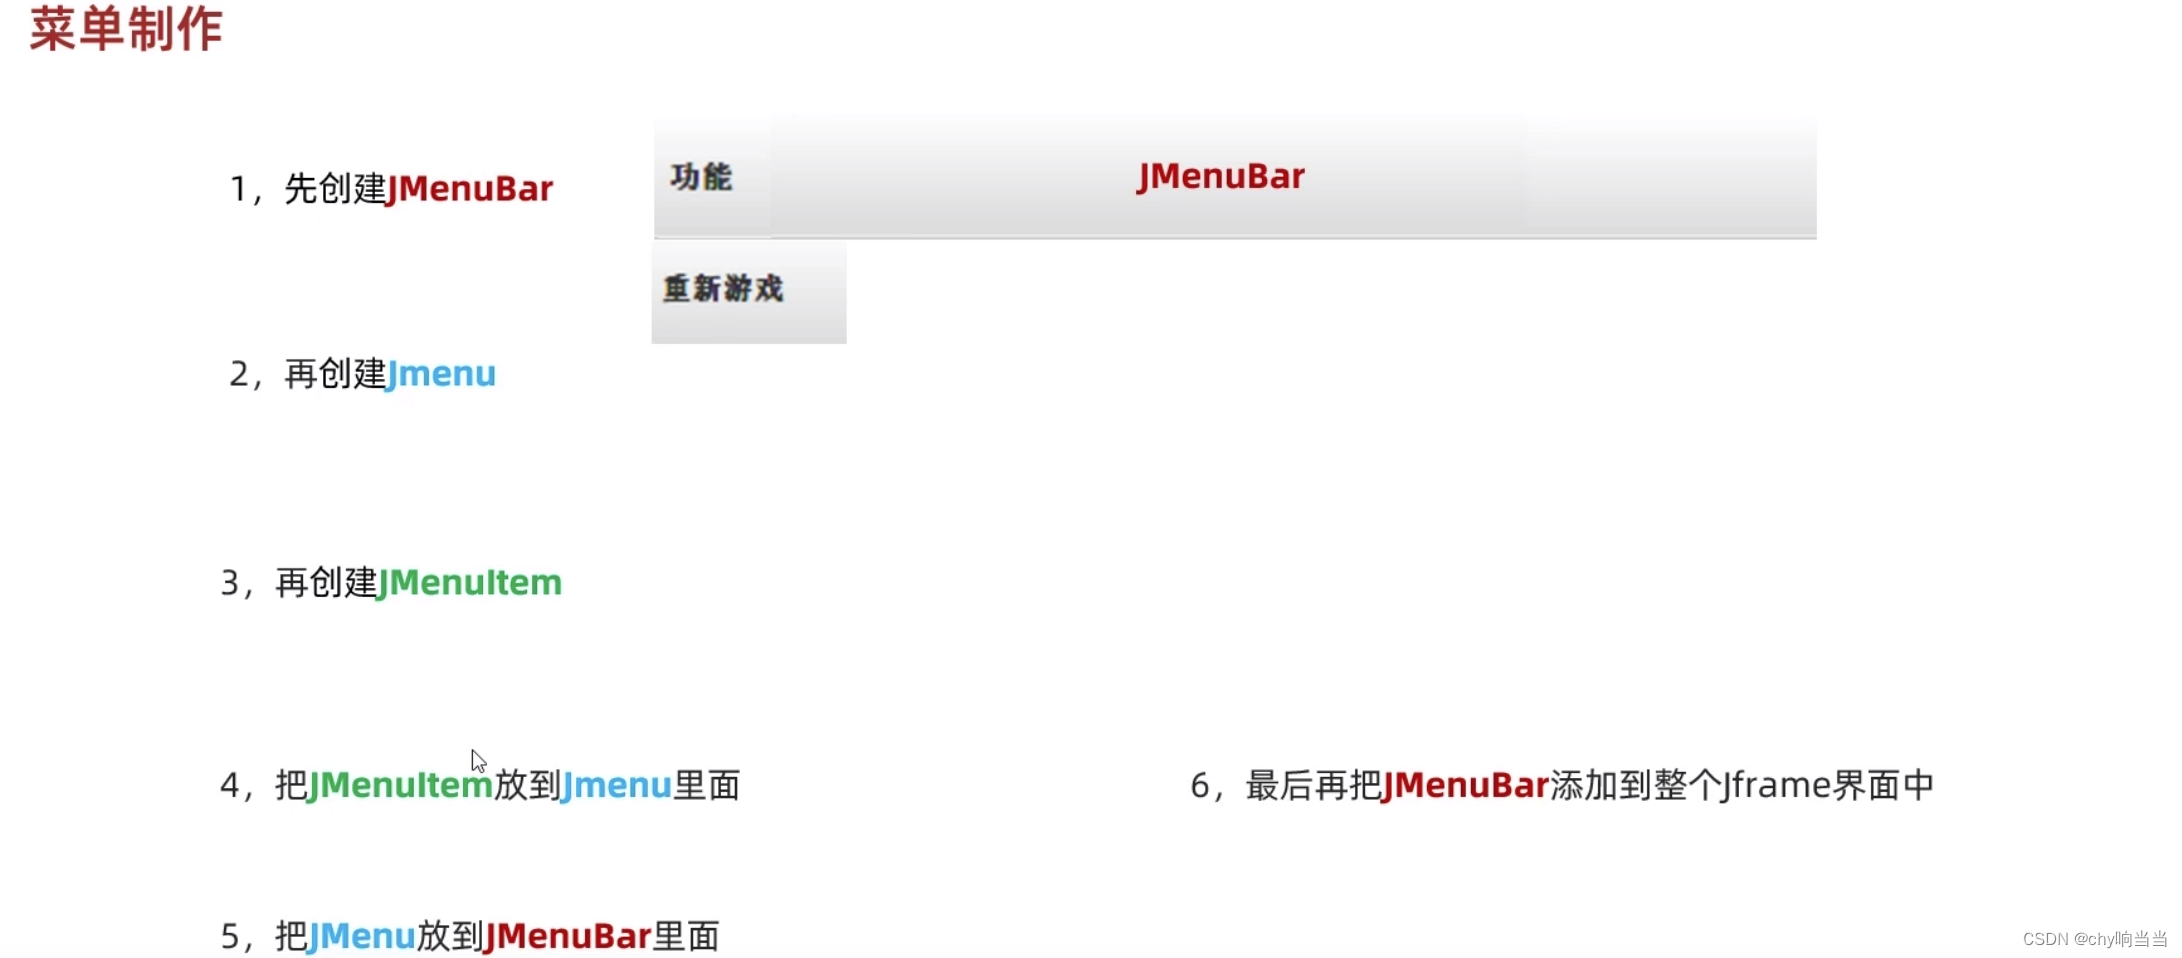
private void initJMenuBar() {
        //初始化菜单:
        //创建菜单对象:
        //Font font1=new Font("宋体", Font.BOLD,15);
        JMenuBar jMenuBar = new JMenuBar();
        Dimension d = new Dimension(60, 50);
        jMenuBar.setSize(d);
        //创建菜单上两个选项(功能、关于我们)
        JMenu functionJMenu = new JMenu(" 功能");
        JMenu aboutJMenu = new JMenu(" 关于我们");
        //创建选项的条目对象:
        JMenuItem replayItem = new JMenuItem("重新游戏");
        JMenuItem reLoginItem = new JMenu("重新登录");
        JMenuItem closeItem = new JMenuItem("关闭游戏");
        JMenuItem helpItem = new JMenuItem("帮助");
        //将每一个选项的条目分别添加到对应选项中
        functionJMenu.add(replayItem);
        functionJMenu.add(reLoginItem);
        functionJMenu.add(closeItem);
        aboutJMenu.add(helpItem);

        //将两个选项添加到菜单
        jMenuBar.add(functionJMenu);
        jMenuBar.add(aboutJMenu);
        //给界面设置菜单:
        this.setJMenuBar(jMenuBar);
    }
但这里很遗憾的是,JMenuBar的setsize似乎不起作用了,试了很多种都不行

可以看到字体大小始终无法改变 ,这里查了很多,应该是这样字改变默认字体:
        //变换字体,这可真难,有些方法失效的,终于找到一个可以的
        Font f = new Font("sans-serif", Font.PLAIN, 27);
        UIManager.put("MenuItem.font",f);
        UIManager.put("Menu.font",f);
3.添加图片:JLabel
PS:除了看API帮助文档,用ctrl+n然后ctrl+fn+f12看源码也是不错的
初步思路:
        //创建图片ImageIcon对象
        //这里先暂时绝对路径
        ImageIcon icon = new ImageIcon("路径");

        //创建一个JLabel对象(管理容器)
        JLabel jLabel = new JLabel(icon);

        //把管理容器添加到界面
        this.add(jLabel);
注意:要指定与图片位置,一定要有窗口句柄的思想,要先取消内部默认设置,然后再自己去设置位置。
然后优化后的代码如下所示:(相对路径)
    private void initImg() {
        //创建图片ImageIcon对象
        //这里先暂时绝对路径
        //创建一个JLabel对象(管理容器)
        //指定图片位置:
        //把管理容器添加到界面,但是要通过这个隐藏容器才行
        //优化后
        int number = 1;
        for (int j = 0; j < 4; j++) {
            for (int i = 0; i < 4; i++) {
                //最好还是相对路径,同一个项目的目录下即可
                JLabel jLabel = new JLabel(new ImageIcon("image\\image\\animal\\animal3\\" + number + ".jpg"));
                jLabel.setBounds(105 * i, 105 * j, 105, 105);
                this.getContentPane().add(jLabel);
                number++;
            }
        }
    }
4.打乱图片顺序:
二维数组维护坐标顺序,或者集合嵌套即可(list<list>,vector<vector>)
//把0-15打乱存入二维数组
int[] tempArr = {0, 1, 2, 3, 4, 5, 6, 7, 8, 9, 10, 11, 12, 13, 14, 15};
//打乱
Random r = new Random();
for (int i = 0; i < tempArr.length; i++) {
int index = r.nextInt(tempArr.length);
int temp = tempArr[i];
tempArr[i] = tempArr[index];
tempArr[index] = temp;
}
//变成二维
int[][] data = new int[4][4];
/*法一
int n = 0;
for (int i = 0; i < 4; ++i)
for (int j = 0; j < 4; ++j) {
data[i][j] = tempArr[n++];
}*/
//法二:
for (int i = 0; i < tempArr.length; i++) {
data[i / 4][i % 4] = tempArr[i];
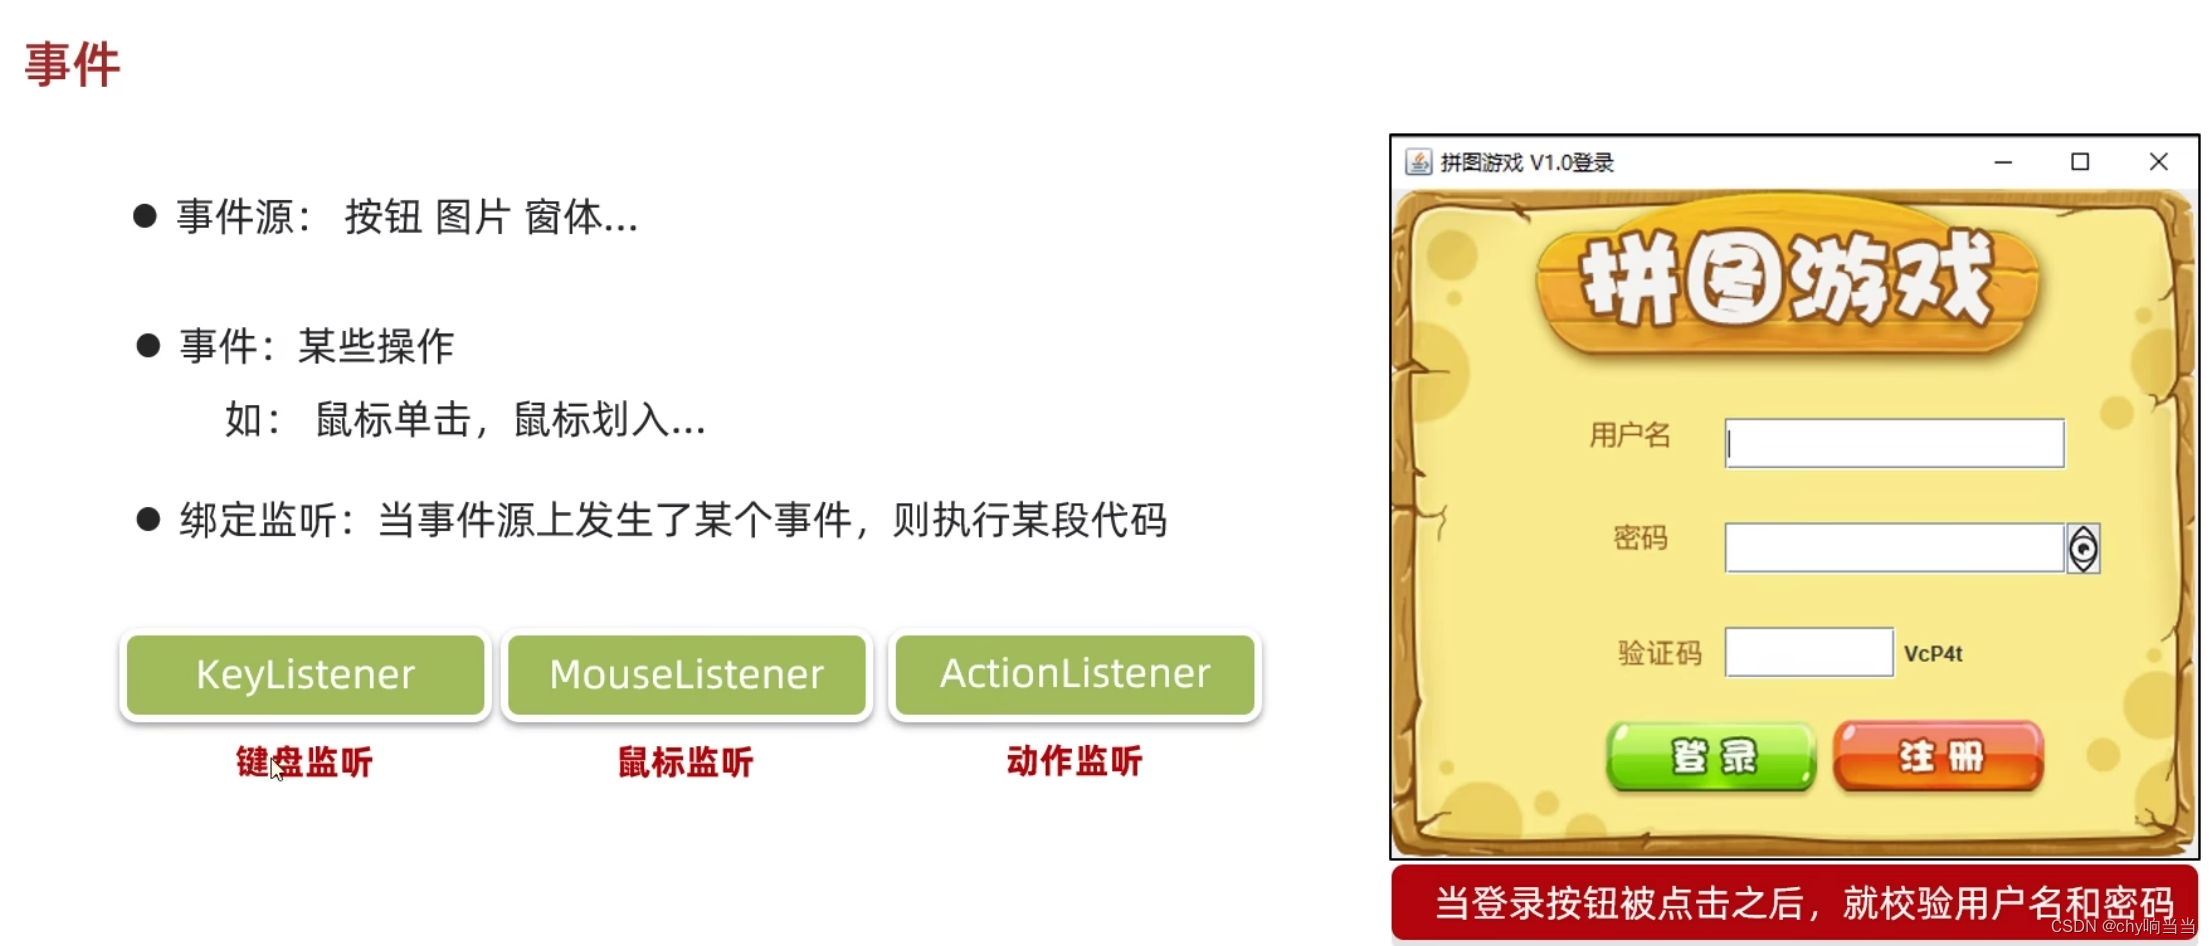
}5.事件:
事件解析:
(1)如何创建动作监听?法一:

实际上这个实现类,用的很少,没必要多写一个类文件,可以选择匿名内部类(的对象)

法二:直接成为实现类
![]()
传递的是this

在这个类里面重写接口


然后这样在主类中执行:

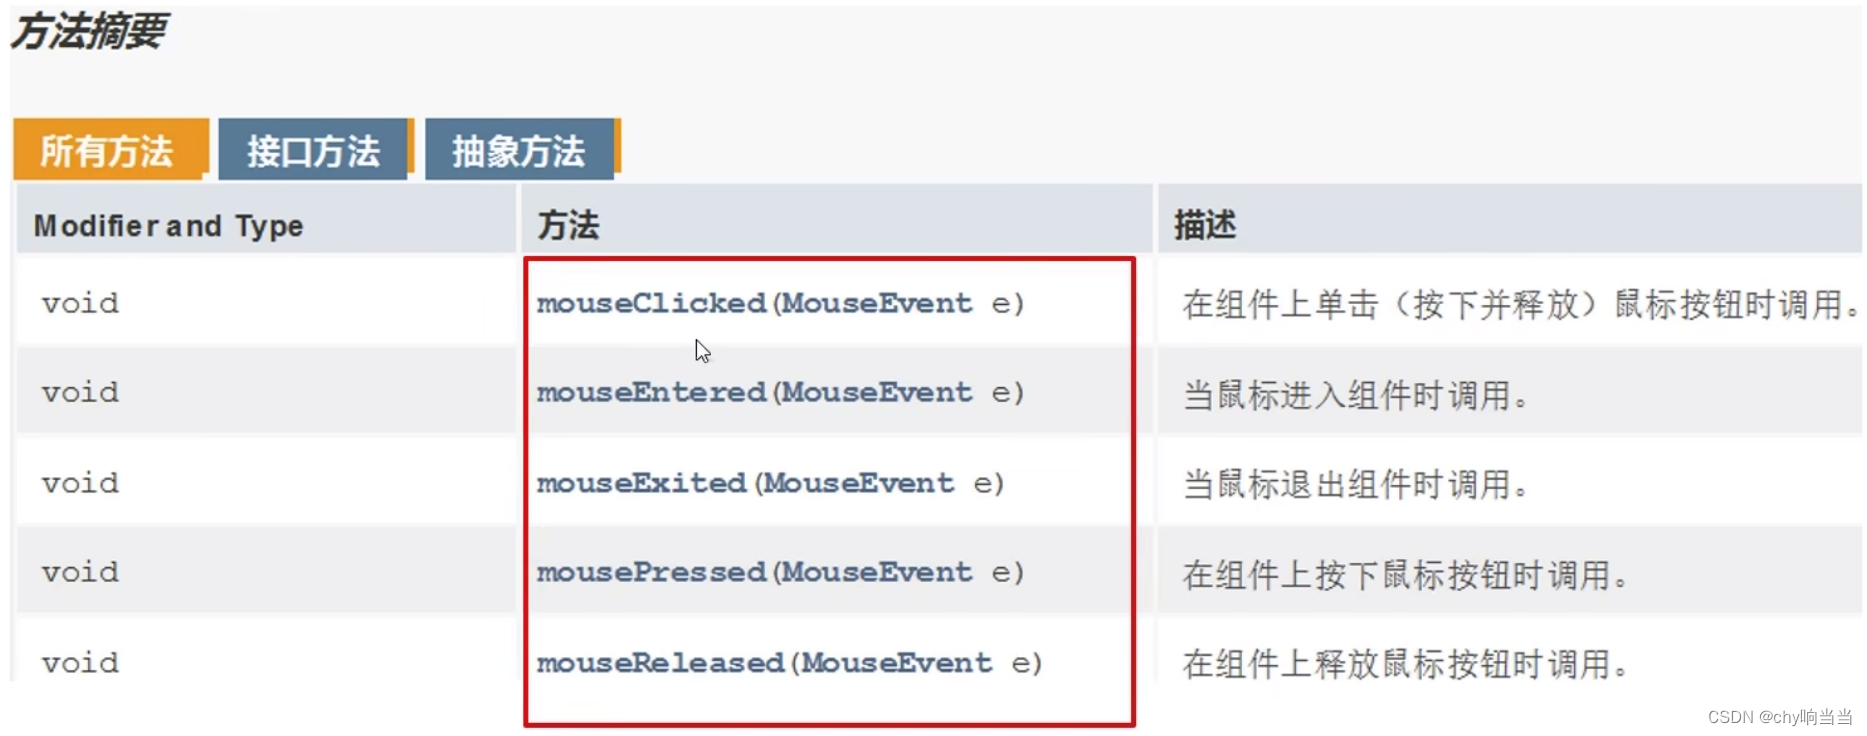
(2)鼠标监听:


具体创建和上面一样,两种方法选一个
不过有5个要重写:
(3)键盘监听:(不是最常用)

创建方法也是那两个:

然后重写3个:


细节:
6.完善美化:
PS:添加背景图片,注意先加载的上层,后加载的在下层。
加边框加背景:
 for (int j = 0; j < 4; j++) {
            for (int i = 0; i < 4; i++) {
                int num=data[i][j];
                //最好还是相对路径,同一个项目的目录下即可
                JLabel jLabel = new JLabel(new ImageIcon("image\\image\\animal\\animal3\\" + num + ".jpg"));
                jLabel.setBounds(105 * i+110, 105 * j+103, 105, 105);
                //给图片加边框BevelBorder
                jLabel.setBorder(new BevelBorder(BevelBorder.LOWERED));//让图片凹下去
                this.getContentPane().add(jLabel);
            }
        }
        //添加背景图片,注意先加载的上层,后加载的在下层。
        ImageIcon bg = new ImageIcon("D:\\java\\programs\\game\\image\\image\\background.png");
        JLabel background =new JLabel(bg);
        background.setBounds(65,8,508,560);
        this.getContentPane().add(background);
效果:

7.移动图片:
这里规定移动方式:
![]()
向下就是把空白方块上方的图片下移,向左移动是把空白方块右边的图片向左移动,有点难玩先凑合一下
这就要增加键盘监听:
![]()

按键控制:
public void keyReleased(KeyEvent e) {
        int code = e.getKeyCode();
        //左37,上38,右39,下40
        switch (code) {
            case 37:
                System.out.println("左");
                if (y == 3) {
                    break;
                }
                data[x][y] = data[x][y + 1];
                data[x][y + 1] = 0;
                y++;
                initImg();
                break;
            case 38:
                System.out.println("上");
                if (x == 3) {
                    break;
                }
                data[x][y] = data[x + 1][y];
                data[x + 1][y] = 0;
                x++;
                initImg();
                break;
            case 39:
                System.out.println("右");
                if (y == 0) {
                    break;
                }
                data[x][y] = data[x][y - 1];
                data[x][y - 1] = 0;
                y--;
                initImg();
                break;
            case 40:
                System.out.println("下");
                if(x==0){
                    break;
                }
                data[x][y] = data[x - 1][y];
                data[x - 1][y] = 0;
                x--;
                initImg();
                break;
            default:
                break;
        }
PS:到时候帮助就是按a可以看原图,然后规则说一声,w一键通关
下面是按下a不松可以看原图帮助你拼图:
    @Override
    public void keyPressed(KeyEvent e) {
        int code = e.getKeyCode();
        if (code == 65) {
            //把界面中所有的图片都删除
            this.getContentPane().removeAll();
            //加载第一张完整的图片;
            JLabel all = new JLabel(new ImageIcon("image\\image\\animal\\animal3\\all.jpg"));
            all.setBounds(110, 103, 420, 420);
            all.setBorder(new BevelBorder(BevelBorder.LOWERED));
            this.getContentPane().add(all);
            //加载背景图片
            ImageIcon bg = new ImageIcon("image\\image\\background.png");
            JLabel background = new JLabel(bg);
            background.setBounds(65, 8, 508, 560);
            this.getContentPane().add(background);
            this.getContentPane().repaint();
        }
    }
8.优化路径:

9.判断胜利:

    public boolean isVictory() {
        for (int i = 0; i < data.length; i++) {
            //data[i]代表一个一维数组
            for (int j = 0; j < data[i].length; j++) {
                if (data[i][j] != win[i][j]) {
                    return false;
                }
            }
        }
        return true;
    }
然后再需要判断的地方用这个方法,但是注意这个一直循环嘛,要是调用多了也挺慢的
10.计步功能

        //计步
        JLabel stepCount=new JLabel("步数:"+count);
        stepCount.setLayout(null);
        stepCount.setBounds(30,15,100,20);
        //改变字体大小
        stepCount.setFont(new Font("宋体",Font.BOLD,20));

        this.getContentPane().add(stepCount);
11.菜单栏功能实现
        //给条目绑定事件
        replayItem.addActionListener(this);
        reLoginItem.addActionListener(this);
        closeItem.addActionListener(this);
        helpItem.addActionListener(this);
@Override
public void actionPerformed(ActionEvent e) {
Object source = e.getSource();
//判断
if (source == replayItem) {
//必须先清零步数:
count = 0;
//再次打乱二维数组数据
//这里注意,可能会导致空白块给整没了,自己去读一读这个initdata,所以把else删了
initData();
//重新加载图片
initImg();
} else if (source == reLoginItem) {
//关闭当前界面
this.setVisible(false);
//打开登录界面
new LoginJFrame();
} else if (source == helpItem) {
//创建弹窗对象
JDialog jDialog = new JDialog();
//创建管理图片的容器
JLabel jLabel = new JLabel(new ImageIcon("image\\image\\help.jpg"));
//设置位置
jLabel.setBounds(0,0,100,100);
//把图片加到弹窗
jDialog.getContentPane().add(jLabel);//一定要获得隐藏窗口对象用get才行
//给弹窗设置大小:
jDialog.setSize(1039,784);
//让弹窗置顶
jDialog.setAlwaysOnTop(true);
//让弹窗居中:
jDialog.setLocationRelativeTo(null);
//弹窗不关闭则无法操作其他界面
jDialog.setModal(true);
//最后,让弹窗显示
jDialog.setVisible(true);
} else if (source == closeItem) {
//直接关闭虚拟机
System.exit(0);
}
}


 250
250


 被折叠的 条评论
为什么被折叠?
被折叠的 条评论
为什么被折叠?
 到【灌水乐园】发言


