


一.环境
1.docker 运行一个hyperf的镜像,一个console镜像
- hyperf镜像
docker run --name hyperf1 -v E:\Web\Docker\Hyperf\:/data/project -p 9501:9501 -p 9502:9502 -p 9503:9503 -it --privileged -u root --entrypoint /bin/sh hyperf/hyperf:8.0-alpine-v3.14-swoole
- consul镜像
docker pull consul
docker run --name=consul -p 8500:8500 -d consul
使用ipconfig查看本机的ip,然后用<font color="red">公网ip+端口的方式</font>访问
2.下载框架
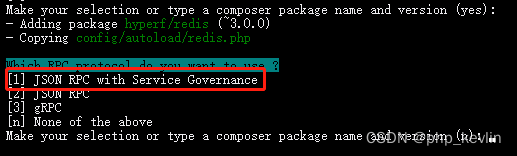
composer create-project hyperf/hyperf-skeleton
选择json-rpc组件
3.安装所需要的各个依赖(很多安装包 ,最好全部都安装一次,因为少安装依赖包中间出了很多bug)
composer require hyperf/service-governance-consul
# 我忘记了,只写composer.json文件
#provider(服务提供者的composer.json)
 "require": {
        "php": ">=8.0",
        "hyperf/cache": "~2.2.0",
        "hyperf/command": "~2.2.0",
        "hyperf/config": "~2.2.0",
        "hyperf/consul": "*",
        "hyperf/database": "~2.2.0",
        "hyperf/db-connection": "~2.2.0",
        "hyperf/framework": "~2.2.0",
        "hyperf/guzzle": "~2.2.0",
        "hyperf/http-server": "~2.2.0",
        "hyperf/json-rpc": "*",
        "hyperf/logger": "~2.2.0",
        "hyperf/memory": "~2.2.0",
        "hyperf/process": "~2.2.0",
        "hyperf/redis": "~2.2.0",
        "hyperf/rpc": "~2.2.0",
        "hyperf/rpc-client": "*",
        "hyperf/rpc-server": "*",
        "hyperf/service-governance": "*",
        "hyperf/service-governance-consul": "*"
    },
   # (consu)服务消费者的composer.json
    "require": {
        "php": ">=8.0",
        "hyperf/cache": "~3.0.0",
        "hyperf/command": "~3.0.0",
        "hyperf/config": "~3.0.0",
        "hyperf/consul": "*",
        "hyperf/database": "~3.0.0",
        "hyperf/db-connection": "~3.0.0",
        "hyperf/di": "*",
        "hyperf/framework": "~3.0.0",
        "hyperf/guzzle": "~3.0.0",
        "hyperf/http-server": "~3.0.0",
        "hyperf/json-rpc": "*",
        "hyperf/logger": "~3.0.0",
        "hyperf/memory": "~3.0.0",
        "hyperf/process": "~3.0.0",
        "hyperf/redis": "~3.0.0",
        "hyperf/rpc": "~3.0.0",
        "hyperf/rpc-client": "*",
        "hyperf/rpc-server": "*",
        "hyperf/service-governance": "*",
        "hyperf/service-governance-consul": "*"
    },
二.服务提供者
- 通过
@RpcService注解对一个类进行定义即可发布这个服务
- provider/app/JsonRpc/CalculatorServiceInterface.php
<?php
declare(strict_types=1);
namespace App\JsonRpc;
interface CalculatorServiceInterface{
    public function add(int $a,int $b);
}
- provider/app/JsonRpc/CalculatorService.php
<?php

namespace App\JsonRpc;

use Hyperf\RpcServer\Annotation\RpcService;

/**
 * @RpcService(name="CalculatorService", protocol="jsonrpc-http", server="jsonrpc-http", publishTo="consul")
 */
class CalculatorService implements CalculatorServiceInterface
{
    // 实现一个加法方法,这里简单的认为参数都是 int 类型
    public function add(int $a, int $b): int
    {
        // 这里是服务方法的具体实现
        return $a + $b;
    }
}
@RpcService 共有 4 个参数:
name 属性为定义该服务的名称,这里定义一个全局唯一的名字即可,Hyperf 会根据该属性生成对应的 ID 注册到服务中心去;
protocol 属性为定义该服务暴露的协议,目前仅支持 jsonrpc-http, jsonrpc, jsonrpc-tcp-length-check ,分别对应于 HTTP 协议和 TCP 协议下的两种协议,默认值为 jsonrpc-http,这里的值对应在 Hyperf\Rpc\ProtocolManager 里面注册的协议的 key,它们本质上都是 JSON RPC 协议,区别在于数据格式化、数据打包、数据传输器等不同。
server属性为绑定该服务类发布所要承载的 Server,默认值为 jsonrpc-http,该属性对应config/autoload/server.php文件内 servers 下所对应的 name,这里也就意味着我们需要定义一个对应的 Server;
publishTo 属性为定义该服务所要发布的服务中心,目前仅支持 consul、nacos 或为空,为空时代表不发布该服务到服务中心去,但也就意味着您需要手动处理服务发现的问题,要使用此功能需安装 hyperf/service-governance 组件及对应的驱动依赖,具体可参考 服务注册 章节;
- 使用 @RpcService 注解需 use Hyperf\RpcServer\Annotation\RpcService; 命名空间。
- 定义server
- provider/config/autoload/server.php
<?php

declare(strict_types=1);
/**
 * This file is part of Hyperf.
 *
 * @link     https://www.hyperf.io
 * @document https://hyperf.wiki
 * @contact  group@hyperf.io
 * @license  https://github.com/hyperf/hyperf/blob/master/LICENSE
 */
use Hyperf\Server\Event;
use Hyperf\Server\Server;
use Swoole\Constant;

return [
    'mode' => SWOOLE_PROCESS,
    'servers' => [
//        [
//            'name' => 'http',
//            'type' => Server::SERVER_HTTP,
//            'host' => '0.0.0.0',
//            'port' => 9501,
//            'sock_type' => SWOOLE_SOCK_TCP,
//            'callbacks' => [
//                Event::ON_REQUEST => [Hyperf\HttpServer\Server::class, 'onRequest'],
//            ],
//        ],

        [
            'name' => 'jsonrpc-http',
            'type' => Server::SERVER_HTTP,
            'host' => '0.0.0.0',
            'port' => 9501,
            'sock_type' => SWOOLE_SOCK_TCP,
            'callbacks' => [
                Event::ON_REQUEST => [\Hyperf\JsonRpc\HttpServer::class, 'onRequest'],
            ],
        ]


    ],
    'settings' => [
        Constant::OPTION_ENABLE_COROUTINE => true,
        Constant::OPTION_WORKER_NUM => swoole_cpu_num(),
        Constant::OPTION_PID_FILE => BASE_PATH . '/runtime/hyperf.pid',
        Constant::OPTION_OPEN_TCP_NODELAY => true,
        Constant::OPTION_MAX_COROUTINE => 100000,
        Constant::OPTION_OPEN_HTTP2_PROTOCOL => true,
        Constant::OPTION_MAX_REQUEST => 100000,
        Constant::OPTION_SOCKET_BUFFER_SIZE => 2 * 1024 * 1024,
        Constant::OPTION_BUFFER_OUTPUT_SIZE => 2 * 1024 * 1024,
    ],
    'callbacks' => [
        Event::ON_WORKER_START => [Hyperf\Framework\Bootstrap\WorkerStartCallback::class, 'onWorkerStart'],
        Event::ON_PIPE_MESSAGE => [Hyperf\Framework\Bootstrap\PipeMessageCallback::class, 'onPipeMessage'],
        Event::ON_WORKER_EXIT => [Hyperf\Framework\Bootstrap\WorkerExitCallback::class, 'onWorkerExit'],
    ],
];
3.安装consul扩展包,修改配置文件
composer require hyperf/consul
#服务治理组件,不然 publishTo 不会生效
composer require hyperf/service-governance
#发布consul组件的配置到app,config目录会生成一个consul.php文件
php bin/hyperf.php vendor:publish hyperf/consul
- provider/config/autoload/services.php
<?php
return [
    'enable' => [
        'discovery' => true,
        'register' => true,
    ],
    'providers' => [],
    'drivers' => [
        'consul' => [
            'uri' => 'http://10.68.47.88:8500', #注意这个地址填写127.0.0.1访问不到,当然配置同一个网络然后使用consul:8500端口也可以(我没试过)
            'token' => '',
            'check' => [
                'deregister_critical_service_after' => '90m',
                'interval' => '1s',
            ],
        ],

    ],
];
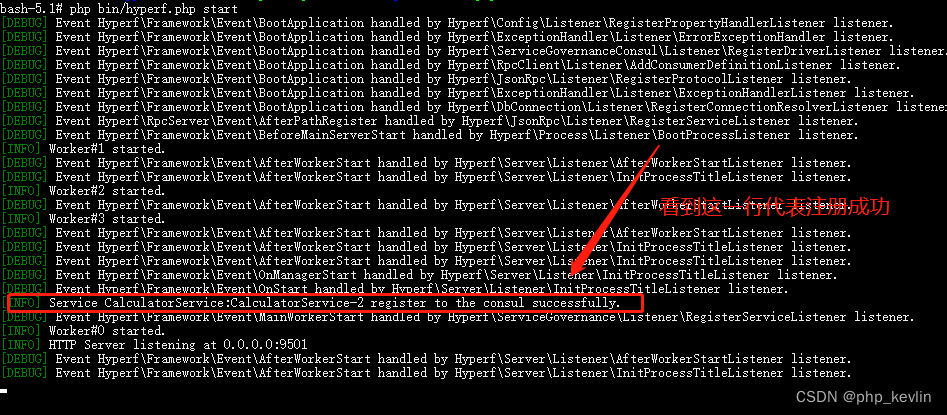
直接使用php bin/hyperf.php start启动,如图所示:
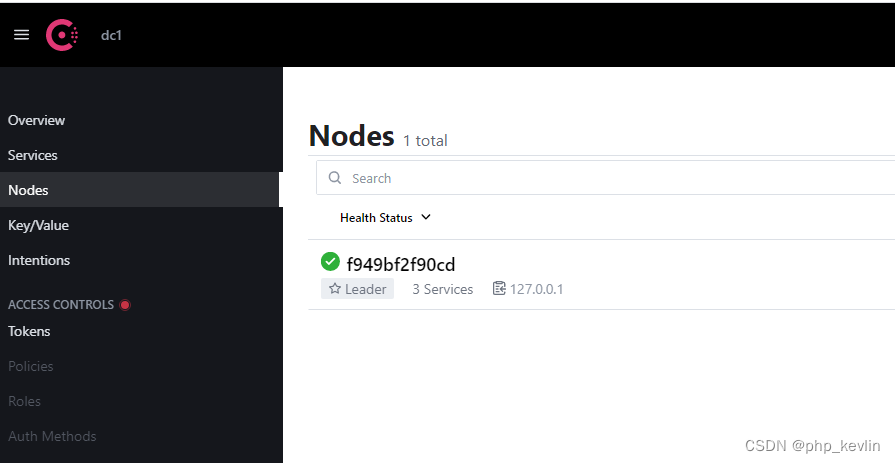
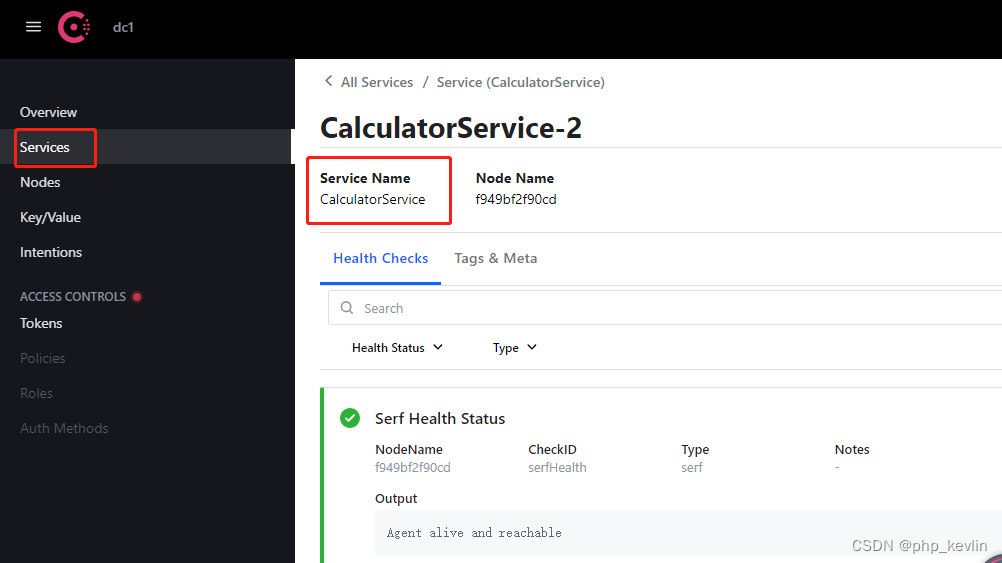
进入consul控制台查看
三. 服务消费者
1.在 config/autoload/services.php 配置文件内进行一些简单的配置,即可通过动态代理自动创建消费者类
- consumer/config/autoload/services.php
<?php
use App\JsonRpc\CalculatorServiceInterface;
return [
 //服务消费者相关配置
    'consumers' =>[
        //name和服务提供者name相同
        [
            'name' => 'CalculatorService',
        //服务接口名,可选,默认值等于name配置的值,如果name直接定义为接口类可忽略此行配置
        'service' => CalculatorServiceInterface::class,
        //对应容器镜像id,可选,默认值等于service配置的值,用于定义依赖注入的key
        'id' =>\App\JsonRpc\CalculatorServiceInterface::class,
        //服务提供者的服务协议
         'protocol' => 'jsonrpc-http',
        //负载均衡算法
         'load_balancer' => 'random',
        //从哪个服务中心获取节点信息,如不配置则不会从服务中心获取节点信息
        'registry' => [
            'protocol' => 'consul',
            'address' => 'http://10.68.47.88:8500'
        ],
//
        // 如果没有指定上面的 registry 配置,即为直接对指定的节点进行消费,通过下面的 nodes 参数来配置服务提供者的节点信息
//        'nodes' => [
//            ['host' => '127.0.0.1', 'port' => 9502],
//        ],


        'options' => [
            'connect_timeout' => 5.0,
            'recv_timeout' => 5.0,
            'settings'  => [
                'open_eof_split' =>  true,
                'package_eof' => "\r\n",
            ],
            'retry_count' => 2,
            'retyr_interval' => 100,
            'heartbeat'  => 30,
            'pool' => [
                'min_connections' => 1,
                'max_connections' => 32,
                'connect_timeout' => 10.0,
                'wait_timeout' => 3.0,
                'heartbeat' => -1,
                'max_idle_time' => 60.0,
            ]
        ]
        ],
    ],

];
2.在应用启动时会自动创建客户端类的代理对象,并在容器中使用配置项 id 的值(如果未设置,会使用配置项 service 值代替)来添加绑定关系,这样就和手工编写的客户端类一样,通过注入 CalculatorServiceInterface 接口来直接使用客户端。
- consumer/app/JsonRpc/CalculatorServiceInterface.php
<?php
declare(strict_types=1);
namespace App\JsonRpc;
interface CalculatorServiceInterface{
    public function add(int $a,int $b);
}
3.控制器中直接调用
- consumer/app/Controller/IndexController.php
<?php

declare(strict_types=1);
/**
 * This file is part of Hyperf.
 *
 * @link     https://www.hyperf.io
 * @document https://hyperf.wiki
 * @contact  group@hyperf.io
 * @license  https://github.com/hyperf/hyperf/blob/master/LICENSE
 */
namespace App\Controller;

use App\JsonRpc\CalculatorServiceInterface;
use Hyperf\Utils\ApplicationContext;
use Hyperf\Di\Annotation\Inject;
class IndexController extends AbstractController
{


     /**
      * @Inject()
      * @var CalculatorServiceInterface
      */
    public $calculatorService;

    public function index()
    {

//        return $this->calculatorService->add(1,2); //add()方法不存在
          $client = ApplicationContext::getContainer()->get(CalculatorServiceInterface::class);
           var_dump(get_class($client));
          $value = $client->add(10,20);
          return $value;
    }
}
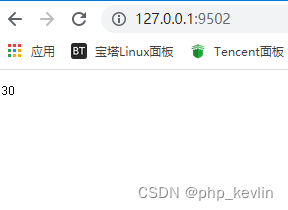
启动项目,访问127.0.0.1:9502,success!


 31
31


 被折叠的 条评论
为什么被折叠?
被折叠的 条评论
为什么被折叠?
 到【灌水乐园】发言


