


http://www.codeproject.com/Articles/36694/Creation-of-a-Word-document-using-the-Open-XM
Introduction
On April 2009, Microsoft published the Open XML Format SDK 2.0 CTP. Open XML is an open ECMA 376 standard, and is also approved as the ISO/IEC 29500 standard that defines a set of XML schemas for representing spreadsheets, charts, presentations, and word processing documents. Microsoft Office Word 2007, Excel 2007, and PowerPoint 2007 all use Open XML as the default file format. This SDK provides the functionality for easy creation, modification, and verification of Open XML files. In this article, I want to focus on the creation of Word 2007 (docx) documents using the Open XML Format SDK 2.0 CTP.
The Open XML Format SDK provides a simple API that allows to create and manipulate Open XML documents using one of the available languages from the .NET platform. Thanks to this SDK, a knowledge about XML and WordprocessingML is not required to work on Open XML documents (however, sometimes it is very useful). The SDK makes it easier for you to build solutions using the Open XML Format by allowing you to perform complex operations, such as creating Open XML Format packages (including easy support for internal documents, styles, themes, etc ...), or working with text and formatting like adding and deleting headers, paragraphs, tables, comments, etc…, with just a few lines of code.
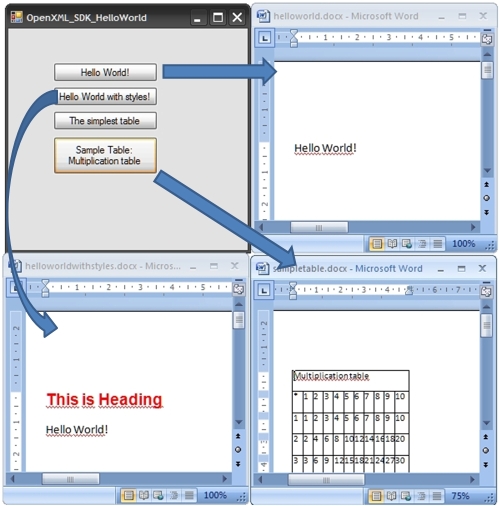
First Application ("Hello World!" in Open XML)
Let’s start from an easy task: creation of a Word document that contains a sample and well known text: "Hello World!". For those who are familiar with WordprocessingML, we are going to crate a document with the following content:
<?xml version="1.0" encoding="utf-8"?>
<w:document xmlns:w="http://schemas.openxmlformats.org/wordprocessingml/2006/main">
  <w:body>
   <w:p>
   <w:r>
   <w:t>Hello World!</w:t>
   </w:r>
   </w:p>
  </w:body>
</w:document>
But the question is: how to do it in the Open XML Format SDK?
It is quite easy. At the beginning, it is required to add the following references to the project:
DocumentFormat.OpenXmlWindowsBase-
(如果你使用的是vs2010的话)
C:\Program Files\Reference Assemblies\Microsoft\Framework\.NETFramework\v4.0\Profile\Client\WindowsBase.dllC:\Program Files\Open XML SDK\V2.0\lib\DocumentFormat.OpenXml.dll
The next step is adding the following namespaces (as using) to the code file:
DocumentFormat.OpenXmlDocumentFormat.OpenXml.PackagingDocumentFormat.OpenXml.Wordprocessing
Now focus on the function that prepares the Word document containing "Hello World":
private void HelloWorld(string documentFileName)
{
    // Create a Wordprocessing document.
    using (WordprocessingDocument myDoc =
           WordprocessingDocument.Create(documentFileName,
                         WordprocessingDocumentType.Document))
    {
        // Add a new main document part.
        MainDocumentPart mainPart = myDoc.AddMainDocumentPart();
        //Create Document tree for simple document.
        mainPart.Document = new Document();
        //Create Body (this element contains
        //other elements that we want to include
        Body body = new Body();
        //Create paragraph
        Paragraph paragraph = new Paragraph();
        Run run_paragraph = new Run();
        // we want to put that text into the output document
        Text text_paragraph = new Text("Hello World!");
        //Append elements appropriately.
        run_paragraph.Append(text_paragraph);
        paragraph.Append(run_paragraph);
        body.Append(paragraph);
        mainPart.Document.Append(body);
        // Save changes to the main document part.
        mainPart.Document.Save();
    }
}
The code above creates a Word Document file (according to the caller arguments), which contains a paragraph with the text: Hello World!”. Just like in the previously shown XML, the text is embedded inside theRun element, that is embedded in Paragraph, that is added to thebody and to the document.
SaveFileDialog mySaveFileDialog=new SaveFileDialog();
mySaveFileDialog.Filter = "Word 2007 file (DOCX)|*.docx";
//save dialog display:
if (mySaveFileDialog.ShowDialog() == DialogResult.OK)
{
    //call creation of Hello World document
    HelloWorld(mySaveFileDialog.FileName);
    // let's open this document in Word:
    Process.Start(mySaveFileDialog.FileName);
}
Styles in Open XML SDK
In the previous section, we created a simple document. The font and style were default, but here comes the questions: How to change the font? How to change the size of the font? How to create a heading? The answer (for all of those questions) is styles (just like in Word), but how to do it in the SDK?
Let’s take a look at the example of creation of a document that will consist of two lines. The first line will be the heading of the paragraph (in this example, the font is red, bold, and the height is 28). The second one will be a standard paragraph. I have already described how to prepare an ordinary paragraph, so let’s focus on the first line (formatted according to our requirements).
The first task is the addition of the style definition part (StyleDefinitionsPart) to the document. It should be added to the main document part:
WordprocessingDocument myDoc =
  WordprocessingDocument.Create(documentFileName, WordprocessingDocumentType.Document)
MainDocumentPart mainPart = myDoc.AddMainDocumentPart();
StyleDefinitionsPart stylePart = mainPart.AddNewPart<StyleDefinitionsPart>();
Now, we have to define the font that we want to use (red, bold, and the height is 28):
// we have to set the properties
RunProperties rPr = new RunProperties();
Color color = new Color() { Val = "FF0000" }; // the color is red
RunFonts rFont = new RunFonts();
rFont.Ascii = "Arial"; // the font is Arial
rPr.Append(color);
rPr.Append(rFont);
rPr.Append(new Bold()); // it is Bold
rPr.Append(new FontSize() { Val = 28 }); //font size (in 1/72 of an inch)
Now, it is time for the style definition. Let’s call it "My Heading 1", the identifier is "MyHeading1" (this identifier will be used directly in the Word document). The sample code below illustrates how to do it:
//creation of a style
Style style = new Style();
style.StyleId = "MyHeading1"; //this is the ID of the style
style.Append(new Name() { Val = "My Heading 1" }); //this is name
// our style based on Normal style
style.Append(new BasedOn() { Val = "Heading1" });
// the next paragraph is Normal type
style.Append(new NextParagraphStyle() { Val = "Normal" });
style.Append(rPr);//we are adding properties previously defined
After the creation of the style, we have to add this to the style document:
// we have to add style that we have created to the StylePart
stylePart.Styles = new Styles();
stylePart.Styles.Append(style);
stylePart.Styles.Save(); // we save the style part
The code above prepares the following style definition file in WordprocessingML:
<?xml version="1.0" encoding="utf-8"?>
<w:styles xmlns:w="http://schemas.openxmlformats.org/wordprocessingml/2006/main">
    <w:style w:styleId="MyHeading1">
        <w:name w:val="My Heading 1" />
        <w:basedOn w:val="Heading1" />
        <w:next w:val="Normal" />
        <w:rPr>
        <w:color w:val="FF0000" />
        <w:rFonts w:ascii="Arial" />
        <w:b />
        <w:sz w:val="28" />
        </w:rPr>
    </w:style>
</w:styles>
We have finished the work that refers to the style creation; now, we have to assign the style to the selected paragraph. To do it, we will use theParagraphProperties class and its ParagraphStyleId property:
Paragraph heading = new Paragraph();
Run heading_run = new Run();
Text heading_text = new Text("This is Heading");
ParagraphProperties heading_pPr = new ParagraphProperties();
// we set the style
heading_pPr.ParagraphStyleId = new ParagraphStyleId() { Val = "MyHeading1" };
heading.Append(heading_pPr);
heading_run.Append(heading_text);
heading.Append(heading_run);
The code above prepares the following document file in WordprocessingML:
<?xml version="1.0" encoding="utf-8"?>
<w:document xmlns:w="http://schemas.openxmlformats.org/wordprocessingml/2006/main">
    <w:body>
        <w:p>
            <w:pPr>
            <w:pStyle w:val="MyHeading1" />
            </w:pPr>
            <w:r>
            <w:t>This is Heading</w:t>
            </w:r>
        </w:p>
    </w:body>
</w:document>
Tables in Open XML SDK
In this section, I want to focus on the creation of tables using the Open XML Format SDK. Thanks to the simple API, it is easy as the examples shown before. To create a table, we have to use theTable class in which we embed the TableRow and TableCell elements. The simple example presents the code below:
Body body = new Body();
Table table = new Table(new TableRow(new TableCell(
  new Paragraph(new Run(new Text("Hello World!"))))));
body.Append(table);
In the following example, I will show how to create a simple document that contains the "Multiplication table" (just like in school ):
):
| Multiplication table | ||||||||||
| * | 1 | 2 | 3 | 4 | 5 | 6 | 7 | 8 | 9 | 10 |
| 1 | 1 | 2 | 3 | 4 | 5 | 6 | 7 | 8 | 9 | 10 |
| 2 | 2 | 4 | 6 | 8 | 10 | 12 | 14 | 16 | 18 | 20 |
| 3 | 3 | 6 | 9 | 12 | 15 | 18 | 21 | 24 | 27 | 30 |
| 4 | 4 | 8 | 12 | 16 | 20 | 24 | 28 | 32 | 36 | 40 |
| 5 | 5 | 10 | 15 | 20 | 25 | 30 | 35 | 40 | 45 | 50 |
| 6 | 6 | 12 | 18 | 24 | 30 | 36 | 42 | 48 | 54 | 60 |
| 7 | 7 | 14 | 21 | 28 | 35 | 42 | 49 | 56 | 63 | 70 |
| 8 | 8 | 16 | 24 | 32 | 40 | 48 | 56 | 64 | 72 | 80 |
| 9 | 9 | 18 | 27 | 36 | 45 | 54 | 63 | 72 | 81 | 90 |
| 10 | 10 | 20 | 30 | 40 | 50 | 60 | 70 | 80 | 90 | 100 |
At the beginning of this section, there was an example that showed how to prepare the simplest table. Now, we will also use theTable, TableCell, and TableRow elements, but additionally, we have to set the borders and span multiple columns in the first cell.
To set the borders, it is necessary to set special properties for the table. To do it, we have to use theTableProperties and TableBorders classes:
Table table = new Table();
TableProperties tblPr = new TableProperties();
TableBorders tblBorders = new TableBorders();
tblBorders.TopBorder = new TopBorder();
tblBorders.TopBorder.Val = new EnumValue<BorderValues>(BorderValues.Single);
tblBorders.BottomBorder = new BottomBorder();
tblBorders.BottomBorder.Val =new EnumValue<BorderValues>(  BorderValues.Single);
tblBorders.LeftBorder = new LeftBorder();
tblBorders.LeftBorder.Val = new EnumValue<BorderValues>(BorderValues.Single);
tblBorders.RightBorder = new RightBorder();
tblBorders.RightBorder.Val = new EnumValue<BorderValues>(BorderValues.Single);
tblBorders.InsideHorizontalBorder = new InsideHorizontalBorder();
tblBorders.InsideHorizontalBorder.Val = BorderValues.Single;
tblBorders.InsideVerticalBorder = new InsideVerticalBorder();
tblBorders.InsideVerticalBorder.Val = BorderValues.Single;
tblPr.Append(tblBorders);
table.Append(tblPr);
Now, let’s take a look at the first row and its cell. We have to set the span attribute to span 11 columns. To do it, we have to set the special properties for this cell (TableCellProperties) and itsGridSpan property.
tr = new TableRow();
tc = new TableCell(new Paragraph(new Run(new Text("Multiplication table"))));
TableCellProperties tcp=new TableCellProperties();
GridSpan gridSpan=new GridSpan();
gridSpan.Val=11;
tcp.Append(gridSpan);
tc.Append(tcp);
tr.Append(tc);
Finally, we have the following function:
public void HelloWorld_table(string docName)
{
  // Create a Wordprocessing document.
  using (WordprocessingDocument myDoc =
         WordprocessingDocument.Create(docName,
                       WordprocessingDocumentType.Document))
  {
    // Add a new main document part.
    MainDocumentPart mainPart = myDoc.AddMainDocumentPart();
    //Create DOM tree for simple document.
    mainPart.Document = new Document();
    Body body = new Body();
    Table table = new Table();
    TableProperties tblPr = new TableProperties();
    TableBorders tblBorders = new TableBorders();
    tblBorders.TopBorder = new TopBorder();
    tblBorders.TopBorder.Val = new EnumValue<bordervalues>(BorderValues.Single);
    tblBorders.BottomBorder = new BottomBorder();
    tblBorders.BottomBorder.Val =new EnumValue<bordervalues>(  BorderValues.Single);
    tblBorders.LeftBorder = new LeftBorder();
    tblBorders.LeftBorder.Val = new EnumValue<bordervalues>(BorderValues.Single);
    tblBorders.RightBorder = new RightBorder();
    tblBorders.RightBorder.Val = new EnumValue<bordervalues>(BorderValues.Single);
    tblBorders.InsideHorizontalBorder = new InsideHorizontalBorder();
    tblBorders.InsideHorizontalBorder.Val = BorderValues.Single;
    tblBorders.InsideVerticalBorder = new InsideVerticalBorder();
    tblBorders.InsideVerticalBorder.Val = BorderValues.Single;
    tblPr.Append(tblBorders);
    table.Append(tblPr);
    TableRow tr;
    TableCell tc;
    //first row - title
    tr = new TableRow();
    tc = new TableCell(new Paragraph(new Run(
                       new Text("Multiplication table"))));
    TableCellProperties tcp=new TableCellProperties();
    GridSpan gridSpan=new GridSpan();
    gridSpan.Val=11;
    tcp.Append(gridSpan);
    tc.Append(tcp);
    tr.Append(tc);
    table.Append(tr);
    //second row
    tr = new TableRow();
    tc = new TableCell();
    tc.Append(new Paragraph(new Run(new Text("*"))));
    tr.Append(tc);
    for (int i = 1; i <= 10; i++)
    {
      tr.Append(new TableCell(new Paragraph(new Run(new Text(i.ToString())))));
    }
    table.Append(tr);
    for (int i = 1; i <= 10; i++)
    {
      tr = new TableRow();
      tr.Append(new TableCell(new Paragraph(new Run(new Text(i.ToString())))));
      for (int j = 1; j <= 10; j++)
      {
        tr.Append(new TableCell(new Paragraph(new Run(new Text((i*j).ToString())))));
      }
      table.Append(tr);
    }
    //appending table to body
    body.Append(table);
    // and body to the document
    mainPart.Document.Append(body);
    // Save changes to the main document part.
    mainPart.Document.Save();
  }
}
The code above produces the following document file in WordprocessingML:
<?xml version="1.0" encoding="utf-8" ?>
<w:document xmlns:w="http://schemas.openxmlformats.org/wordprocessingml/2006/main">
    <w:body>
        <w:tbl>
            <w:tblpr>
                <w:tblborders>
                    <w:top w:val="single" />
                    <w:left w:val="single" />
                    <w:bottom w:val="single" />
                    <w:right w:val="single" />
                    <w:insideh w:val="single" />
                    <w:insidev w:val="single" />
                </w:tblborders>
            </w:tblpr>
            <w:tr>
                <w:tc>
                    <w:p>
                        <w:r>
                            <w:t>Multiplication table</w:t>
                        </w:r>
                    </w:p>
                    <w:tcpr>
                        <w:gridspan w:val="11" />
                    </w:tcpr>
                </w:tc>
            </w:tr>
            <w:tr>
            <w:tc>
                <w:p>
                    <w:r>
                        <w:t>*</w:t>
                    </w:r>
                </w:p>
            </w:tc>
            <w:tc>
                <w:p>
                    <w:r>
                        <w:t>1</w:t>
                    </w:r>
                </w:p>
            </w:tc>
            <!—- many cells and rows declarations -->
            </w:tr>
        </w:tbl>
    </w:body>
</w:document>
Summary
I hope that this simple article will be useful for developers that are interested in development using the Open XML Format SDK. I am going to update this article in future to show more about this SDK and this format. The Polish version is available in parts at my blog.
History
- 2009.05.24 - Initial version of this article (based on my posts (in Polish language) from my blog:http://maciej-progtech.blogspot.com/2009/04/open-xml-format-sdk-20-pierwsze.html).
License
This article, along with any associated source code and files, is licensed underThe Code Project Open License (CPOL)


 2303
2303

 被折叠的 条评论
为什么被折叠?
被折叠的 条评论
为什么被折叠?
 到【灌水乐园】发言


