


在 iPhone 上的地圖元件是非常常用的,有很多應用程式也會使用到,iPhone 上使用的 Map Kit Framework 預設是使用 Google Maps 的,雖然操作方法和 Google Maps JavaScript API 有很大的分別,但要上手一點都不難。
在應用程式使用地圖元件通常也有以下比較常用的功能:
- 顯示用戶現在位置
- 顯示地圖上的特定地點而使用了 Map Kit Framework 去做出以上的功能是很簡單的,幾分鐘就可以做好。
以下的例子為了減少複雜性,所以我不會使用到 Interface Builder,完全用程式碼去建構介面。
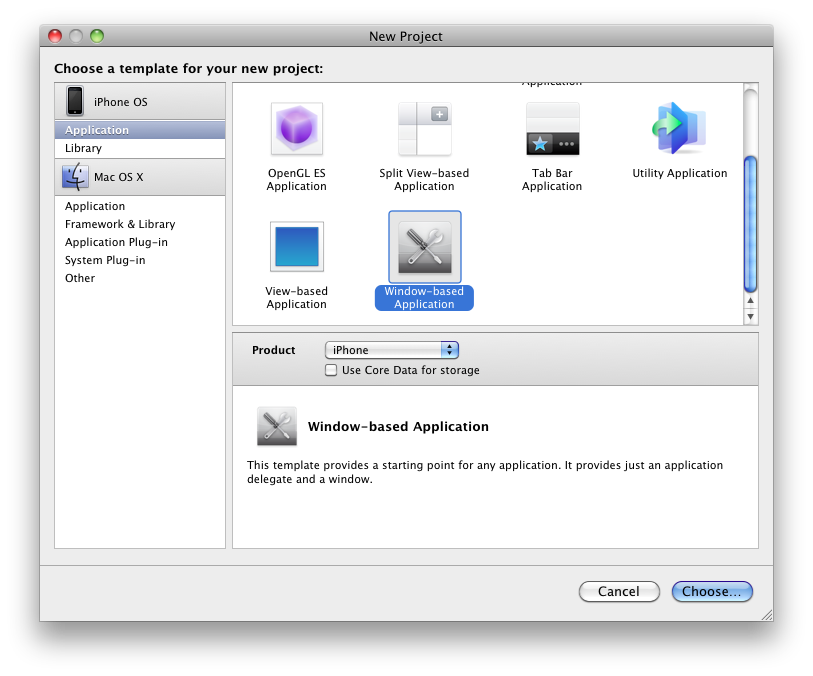
首先先新一增個 Window-based application 的 Project,命名為 Map:

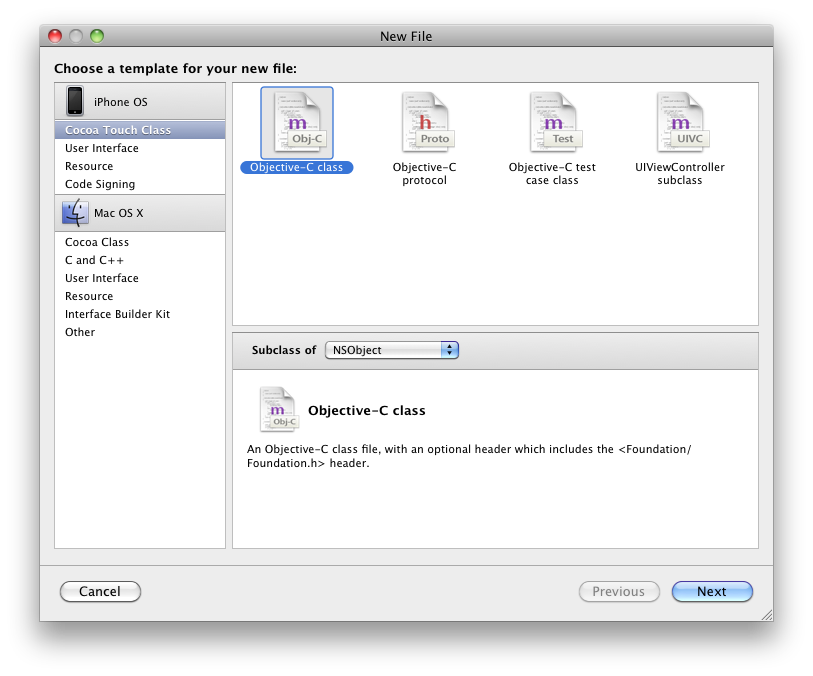
新增完成後,新增一個 UIViewController subclass,但不要選取 With XIB for user interface,因為我們不會用到 Interface Builder。

命名此類別為 MapViewController。

新增完成後不用理它,打開 MapAppDelegate.h 去修改一下,請改為以下內容:
1234567891011#import <UIKit/UIKit.h>#import "MapViewController.h"@interfaceMapAppDelegate :NSObject<uiapplicationdelegate> {UIWindow *window;UINavigationController *navigationController;}@property(nonatomic, retain)IBOutletUIWindow *window;@end
再打開 MapAppDelegate.m 去令應用程式能夠顯示剛才我們新增的 MapViewController,只需修改 - (BOOL)application:(UIApplication *)application didFinishLaunchingWithOptions:(NSDictionary *)launchOptions 就可以了:
12345678910111213141516- (BOOL)application:(UIApplication *)application didFinishLaunchingWithOptions:(NSDictionary*)launchOptions {// Override point for customization after application launch.MapViewController *mapViewController = [[MapViewController alloc] init];navigationController = [[UINavigationController alloc] initWithRootViewController:mapViewController];[navigationController.navigationBar setBarStyle:UIBarStyleBlack];[window addSubview:navigationController.view];[window makeKeyAndVisible];returnYES;}
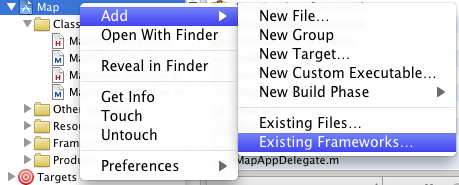
儲存後好後,用滑寫右鍵點擊 Project 名稱,去新增我們要使用到的 Map Kit Framework。

選取 MapKit.framework。

完成後打開 MapViewController.h 並改成以下內容:
12345678#import <UIKit/UIKit.h>#import <MapKit/MapKit.h>@interfaceMapViewController : UIViewController <MKMapViewDelegate> {MKMapView *mapView;}@end
第 2 行程式碼是加入 Map Kit Framework。
第 4 行加入的是 MKMapViewDelegate protocol 用來令到 MapViewController 成為MKMapView 的代理。
第 5 行加入的是最重要的地圖元件,所有東西也顥示在這裡。
儲存好後打開 MapViewController.m,修改一下 - (void)viewDidLoad 令地圖顯示出來:
1234567891011- (void)viewDidLoad {[superviewDidLoad];[self.view setFrame: [[UIScreen mainScreen] bounds]];self.title = @"Google Map";mapView = [[MKMapView alloc] initWithFrame:self.view.frame];mapView.delegate =self;[self.view addSubview:mapView];}
第 4 行程式碼是將最頂端的 View 設定為整個畫面大小。
第 8 行程式碼是將 mapView 的代理設為自己。
加入了以上程式碼可以運行了,看看是不是和我一樣一開始顯示在美國。

如果是美國人的話,地圖一開始顯示在美國當然沒問題,我們當然要設定回自己的地方。
再修改一下 - (void)viewDidLoad,讓地圖一開始顯示的地方是香港:
12345678910111213141516171819- (void)viewDidLoad {[superviewDidLoad];[self.view setFrame: [[UIScreen mainScreen] bounds]];self.title = @"Google Map";mapView = [[MKMapView alloc] initWithFrame:self.view.frame];mapView.delegate =self;[self.view addSubview:mapView];MKCoordinateRegion hongKong;hongKong.center.latitude = 22.3019;hongKong.center.longitude = 114.1729;hongKong.span.latitudeDelta = 0.45;hongKong.span.longitudeDelta = 0.45;[mapView setRegion:hongKong animated:NO];}
第 12 行程式碼新增了 MKCoordinateRegion struct,結構如下:
1234typedefstruct{CLLocationCoordinate2D center;MKCoordinateSpan span;} MKCoordinateRegion;
CLLocationCoordinate2D 是目標物的坐標。
MKCoordinateSpan 是地圖邊界與中心點的距離,你可以當成是放大率,數字愈少地圖顯示面積愈小。
第 13,14 行程式碼分別設定了中心點的 緯度 和 經度。
第 15,16 行程式碼分別設定了地圖邊界愈中心點的距難,一樣用 緯度 和 經度 去表示。
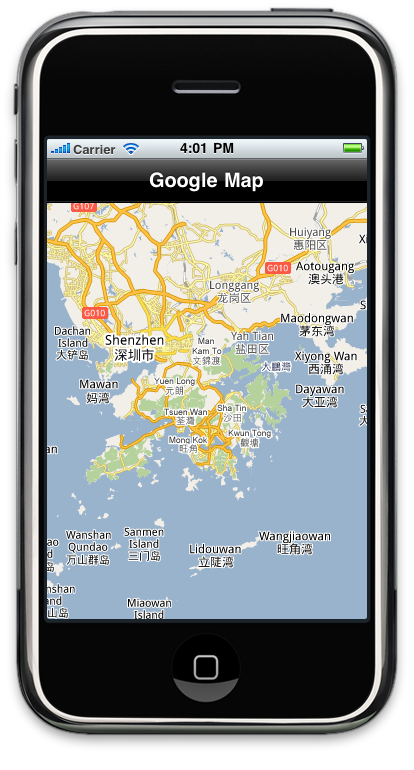
運行程式會是以下的樣子:

在來就是顯示用戶所在地點了,但使用模擬器會顯示用戶在美國 (我用實機測試是沒有問題的),只需加入一句程式碼就可以做到了:
123456789101112131415161718192021- (void)viewDidLoad {[superviewDidLoad];[self.view setFrame: [[UIScreen mainScreen] bounds]];self.title = @"Google Map";mapView = [[MKMapView alloc] initWithFrame:self.view.frame];mapView.delegate =self;[self.view addSubview:mapView];MKCoordinateRegion hongKong;hongKong.center.latitude = 22.3019;hongKong.center.longitude = 114.1729;hongKong.span.latitudeDelta = 0.45;hongKong.span.longitudeDelta = 0.45;[mapView setRegion:hongKong animated:NO];mapView.showsUserLocation =YES;}
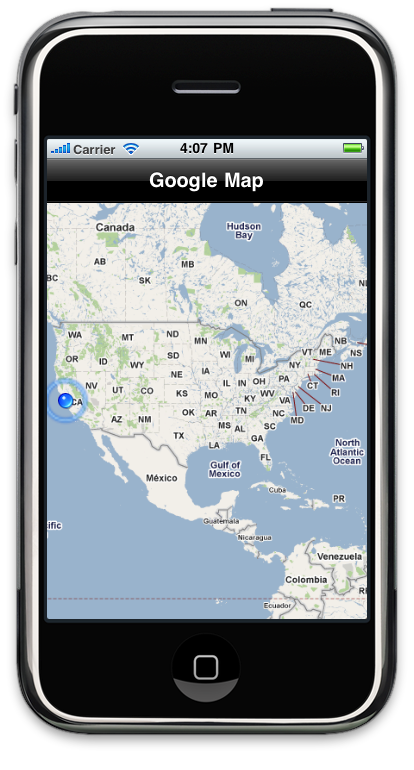
加入第 20 行的程式碼就可以了,模擬器會顯示在美國:

其實也有方法可以在模擬器裡也拿到正確坐標的,留待下一篇再說。
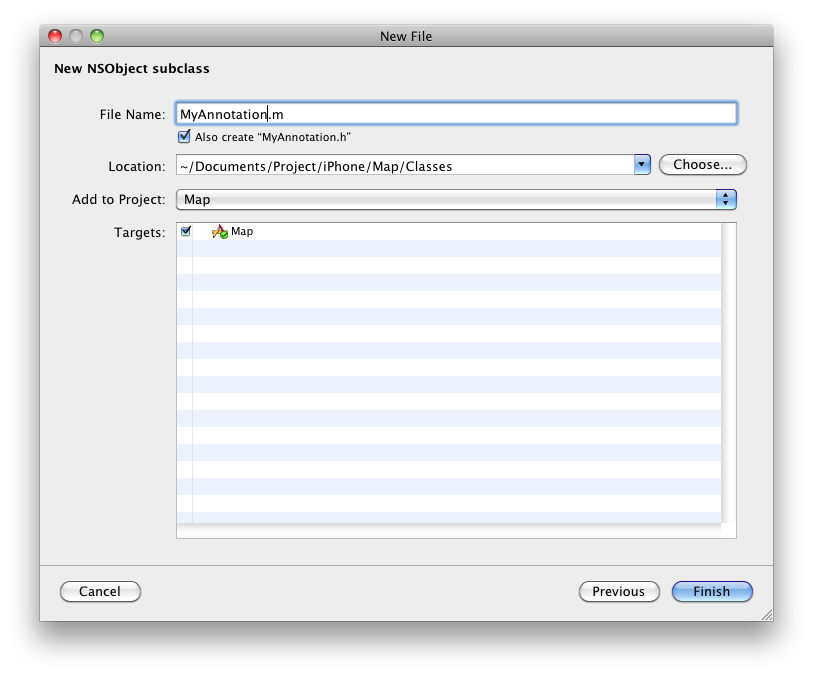
現在加入一些特定地方並用釘子顯示在地圖上,首先先新增一個類別:

命名為 MyAnnotation。

打開 MyAnnotation.h 更改成以下內容:
1234567891011121314#import <Foundation/Foundation.h>#import <MapKit/MapKit.h>@interfaceMyAnnotation :NSObject<MKAnnotation> {CLLocationCoordinate2D myCoordinate;NSString*myTitle;NSString*mySubTitle;}@property(assign,nonatomic) CLLocationCoordinate2D myCoordinate;@property(retain,nonatomic)NSString*myTitle;@property(retain,nonatomic)NSString*mySubTitle;@end
第 4 行程式碼加入了 MKAnnotation,因為的們需要實作出 MKAnnotation。
然後打開 MyAnnotation.m 並加入以下內容:
123456789101112131415161718192021#import "MyAnnotation.h"@implementationMyAnnotation@synthesizemyCoordinate, myTitle, mySubTitle;- (CLLocationCoordinate2D)coordinate;{returnself.myCoordinate;}- (NSString*)title{returnself.myTitle;}- (NSString*)subtitle{returnself.mySubTitle;}@end
實作出 MKAnnotation。
再次打開 MapViewController.m 去修改 - (void)viewDidLoad,令地圖可以加入一些指定地點。
123456789101112131415161718192021222324252627282930313233343536373839404142434445464748495051- (void)viewDidLoad {[superviewDidLoad];[self.view setFrame: [[UIScreen mainScreen] bounds]];self.title = @"Google Map";mapView = [[MKMapView alloc] initWithFrame:self.view.frame];mapView.delegate =self;[self.view addSubview:mapView];MKCoordinateRegion hongKong;hongKong.center.latitude = 22.3019;hongKong.center.longitude = 114.1729;hongKong.span.latitudeDelta = 0.45;hongKong.span.longitudeDelta = 0.45;[mapView setRegion:hongKong animated:NO];mapView.showsUserLocation =YES;NSMutableArray*annotations = [[NSMutableArrayalloc] init];for(inti = 1; i <= 30; i++){MyAnnotation *annotation = [[MyAnnotation alloc] init];CLLocationCoordinate2D coordinate;if(i % 4 == 0){coordinate.latitude = mapView.centerCoordinate.latitude + (float)(arc4random() % 100) / 1000;coordinate.longitude = mapView.centerCoordinate.longitude + (float)(arc4random() % 100) / 1000;}elseif(i % 4 == 1){coordinate.latitude = mapView.centerCoordinate.latitude - (float)(arc4random() % 100) / 1000;coordinate.longitude = mapView.centerCoordinate.longitude - (float)(arc4random() % 100) / 1000;}elseif(i % 4 == 2){coordinate.latitude = mapView.centerCoordinate.latitude + (float)(arc4random() % 100) / 1000;coordinate.longitude = mapView.centerCoordinate.longitude - (float)(arc4random() % 100) / 1000;}else{coordinate.latitude = mapView.centerCoordinate.latitude - (float)(arc4random() % 100) / 1000;coordinate.longitude = mapView.centerCoordinate.longitude + (float)(arc4random() % 100) / 1000;}annotation.myCoordinate = coordinate;annotation.myTitle = [NSStringstringWithFormat:@"I am annotation title %i", i];annotation.mySubTitle = [NSStringstringWithFormat:@"I am annotation subtitle %i", i];[annotations addObject:annotation];[annotation release];}[mapView addAnnotations:annotations];[annotations release];}
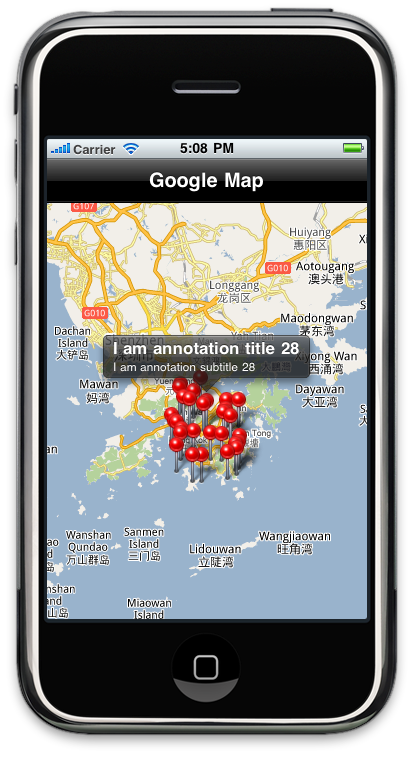
第 22 行開始便是新加入的程式碼,首先建立一個 NSMutableArray 去儲存所有的MKAnnotation,待最後才一之次過全部加入地圖中,以上所有的 MKAnnotation 都會以中心點為目標然後隨機設定坐標,而每一個 MKAnnotation 都有一個標題和次標題,按一下即會顯示出來。
運行程式大約是這個樣子:

那現在去改一改那些釘子的樣子吧,在 MapViewController 加入以下的 Method:
12345678910111213141516171819202122- (MKAnnotationView *)mapView:(MKMapView *)theMapView viewForAnnotation:(id<MKAnnotation>)annotation{if([annotation isKindOfClass:[MKUserLocationclass]])returnnil;if([annotation isKindOfClass:[MyAnnotationclass]]){staticNSString*MyAnnotationIdentifier = @"myAnnotation";MKPinAnnotationView *pinView = (MKPinAnnotationView *)[mapView dequeueReusableAnnotationViewWithIdentifier:MyAnnotationIdentifier];if(!pinView){MKPinAnnotationView* myPinView = [[[MKPinAnnotationView alloc]initWithAnnotation:annotation reuseIdentifier:MyAnnotationIdentifier] autorelease];myPinView.pinColor = MKPinAnnotationColorPurple;myPinView.animatesDrop =YES;myPinView.canShowCallout =YES;returnmyPinView;}else{returnpinView;}}returnnil;}
第 2 行測試是否為 MKUserLocation 類別,即是現在用戶位置的樣子(藍色的波) ,因為我們沒有必要修改那個樣子,所以返回 nil 就可以。
第 5 行 測試是 MyAnnotation 類別才改變樣子。
第 6 和 7 行先由地圖中抽出 myAnnotation 字眼的樣式,如果已經有就不改變樣式。
第 11,12,13 行開始是改變顏色,是否加入畫插入,是否能顯示詳細資訊。
運行程式會像以下的樣子。

這篇就說到這裡完結,有問題請留言給我。


 被折叠的 条评论
为什么被折叠?
被折叠的 条评论
为什么被折叠?
 到【灌水乐园】发言


