


文章目录
导读
开发环境
| 版本号 | 描述 | |
|---|---|---|
| 操作系统 | Win11-21H2 | 内部版本号22000.588 |
| node -v | v12.18.3 | |
| npm -v | 6.14.6 | |
| electron | @16.0.7 | npm list |
| @electron/remote | @2.0.8 | npm install --save @electron/remote@2.0.8 electron 14 之后remote模块独立出来了,更方便好用 |
electron 快速安装
之前在公司,网速贼棒,去了趟卫生间就安装好了,回家之后,网速卡的连打游戏都能卡掉线,安装electron实在是不忍直视,安装了3个小时没装好。总觉得哪里不对,肯定有更好的方案。
试了各种方案,发现文章《如何在国内一键安装electron》https://110501.com/2021/04/28/how-to-install-electron/,然后,秒安装!!!
npm config set registry https://registry.npm.taobao.org
npm config set ELECTRON_MIRROR http://npm.taobao.org/mirrors/electron/
npm config set CHROMEDRIVER_CDNURL https://npm.taobao.org/mirrors/chromedriver
npm config set ELECTRON_BUILDER_BINARIES_MIRROR https://npm.taobao.org/mirrors/electron-builder-binaries/

npm install electron@16.0.7
更多其它开发工具的加速方案,可参考《【高效】开发过程中常见配置(各种国内镜像等)》https://www.cocomanga.com/10081/1/944.html
ps: Electron安装过程深入解析(读完此文解决Electron安装失败导致的无法启动,无法打包的问题)https://cloud.tencent.com/developer/article/1710784
渲染进程中报错 electron require is not define
修改创建BrowserWindow部分的相关代码,
main.js中设置属性webPreferences.nodeIntegration为 true。
function createWindow () {
  // Create the browser window.
  const mainWindow = new BrowserWindow({
    width: 1600,
    height: 1200,
    webPreferences: {
      nodeIntegration: true,
      contextIsolation: false,
      preload: path.join(__dirname, 'preload.js')
    }
  })
}
渲染进程中 创建子窗口
安装 @electron/remote
npm i @electron/remote --save
主进程开启 remote功能
main.js中执行下面两个函数:
- .initialize()
- enable(mainWindow.webContents)
function createWindow () {
  // Create the browser window.
  const mainWindow = new BrowserWindow({
    width: 1600,
    height: 1200,
    webPreferences: {
      nodeIntegration: true,
      contextIsolation: false,
      preload: path.join(__dirname, 'preload.js')
    }
  })

  	// in the main process:
	require('@electron/remote/main').initialize()
	// 渲染线程开启remote electron 14+
	require("@electron/remote/main").enable(mainWindow.webContents)
}
渲染进程 index.html 中创建按钮
index.html中创建按钮。注意不能写成<button class="myButton" onclick="onStart">开始</button>,否则会报下图中的错误:
错误的意思就是说,chrome为了内容安全策略(Content Security Policy),不允许直接在html元素上绑定事件。
即不能在button元素上直接使用onclick绑定事件;需要使用js执行绑定事件document.getElementById("onStart").onclick = onStart;。

<button class="myButton" id="onStart">开始</button>
渲染进程 renderer.js 直接引用remote的BrowserWindow功能
renderer.js中执行下面两个函数:
- new BrowserWindow
- win.loadURL
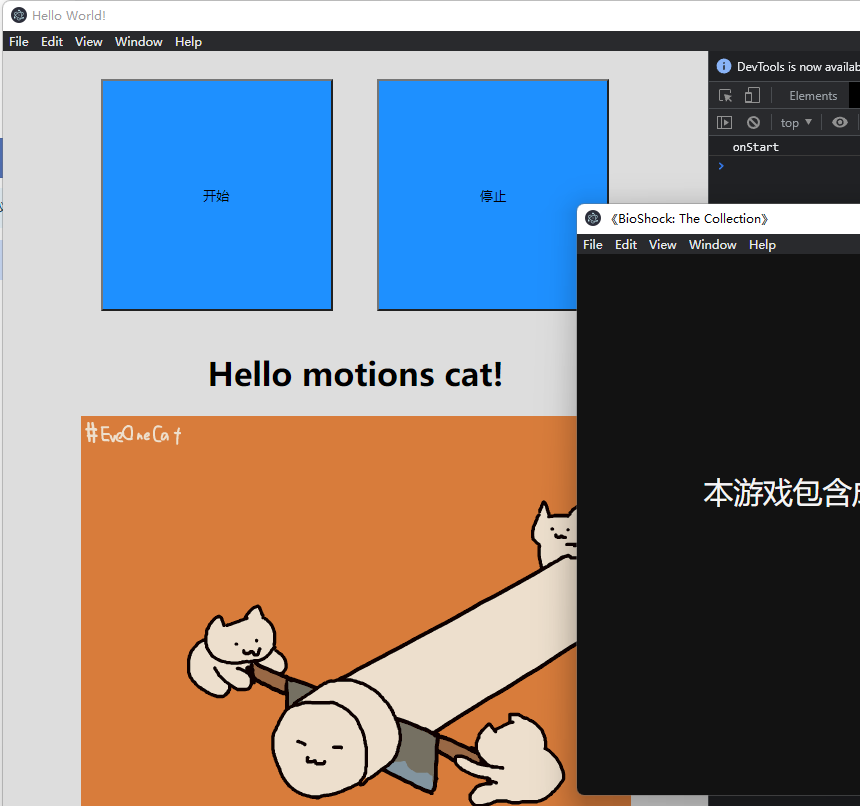
function onStart() {
    console.log('onStart');

	const { BrowserWindow } = require('@electron/remote')
    let win = new BrowserWindow({ width: 800, height: 600 });
    let url = "https://store.epicgames.com/zh-CN/bundles/bioshock-the-collection"
    win.loadURL(url);
}

// 在元素id为onStart的按钮上增加click事件
document.getElementById("onStart").onclick = onStart;
参考资料
- electron入门之创建新窗口remote(一) https://blog.csdn.net/weixin_44480167/article/details/123646819
- electron >=14.0版本 创建子窗口,新版本创建子窗体 https://blog.csdn.net/yunchong_zhao/article/details/120374986


 4234
4234


 被折叠的 条评论
为什么被折叠?
被折叠的 条评论
为什么被折叠?
 到【灌水乐园】发言


