


何夜息随笔录-快速入门MybatisPlus
文章目录
简述
MyBatis-Plus(简称 MP)是一个 MyBatis 的增强工具,在 MyBatis 的基础上只做增强不做改变,为简化开发、提高效率而生。
简单来说:mybatis简化了jdbc,mybatisPlus简化了mybatis的操作
快速构建项目
在Maven中导入主要依赖
<dependency>
    <groupId>com.baomidou</groupId>
    <artifactId>mybatis-plus-boot-starter</artifactId>
    <version>3.0.5</version>
</dependency>
<dependency>
    <groupId>com.baomidou</groupId>
    <artifactId>mybatis-plus-generator</artifactId>
    <version>3.0.5</version>
</dependency>
<dependency>
    <groupId>org.apache.velocity</groupId>
    <artifactId>velocity-engine-core</artifactId>
    <version>2.2</version>
</dependency>
弄完SpringBoot的基本配置后,我们创建实体类,然后创建mapper接口,但是这个mapper接口需要继承BaseMapper,然后CRUD就完成了,不需要写具体的实现,具体实现已经在BaseMapper找那个实现了。
package com.heyexi.mapper;

import com.baomidou.mybatisplus.core.mapper.BaseMapper;
import org.springframework.stereotype.Repository;

@Repository
public interface DepartmentMapper extends BaseMapper<Department>
{

}
然后需要在主程序入口中扫描这个mapper包
package com.heyexi;

import org.mybatis.spring.annotation.MapperScan;
import org.springframework.boot.SpringApplication;
import org.springframework.boot.autoconfigure.SpringBootApplication;

@MapperScan("com.heyexi.mapper")
@SpringBootApplication
public class SpringbootMybatisPlusApplication
{
    public static void main(String[] args)
    {
        SpringApplication.run(SpringbootMybatisPlusApplication.class, args);
    }
}
配置数据库
spring:
  datasource:
    driver-class-name: com.mysql.cj.jdbc.Driver
    username: root
    password:
    url: jdbc:mysql://localhost:3307/sjk?useUnicode=true&characterEncoding=utf-8&serverTimezone=Asia/Shanghai
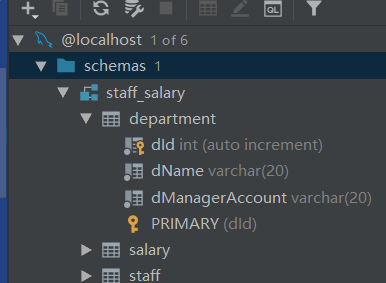
然后建立实体:需要注意表名和实体名要保持一致。
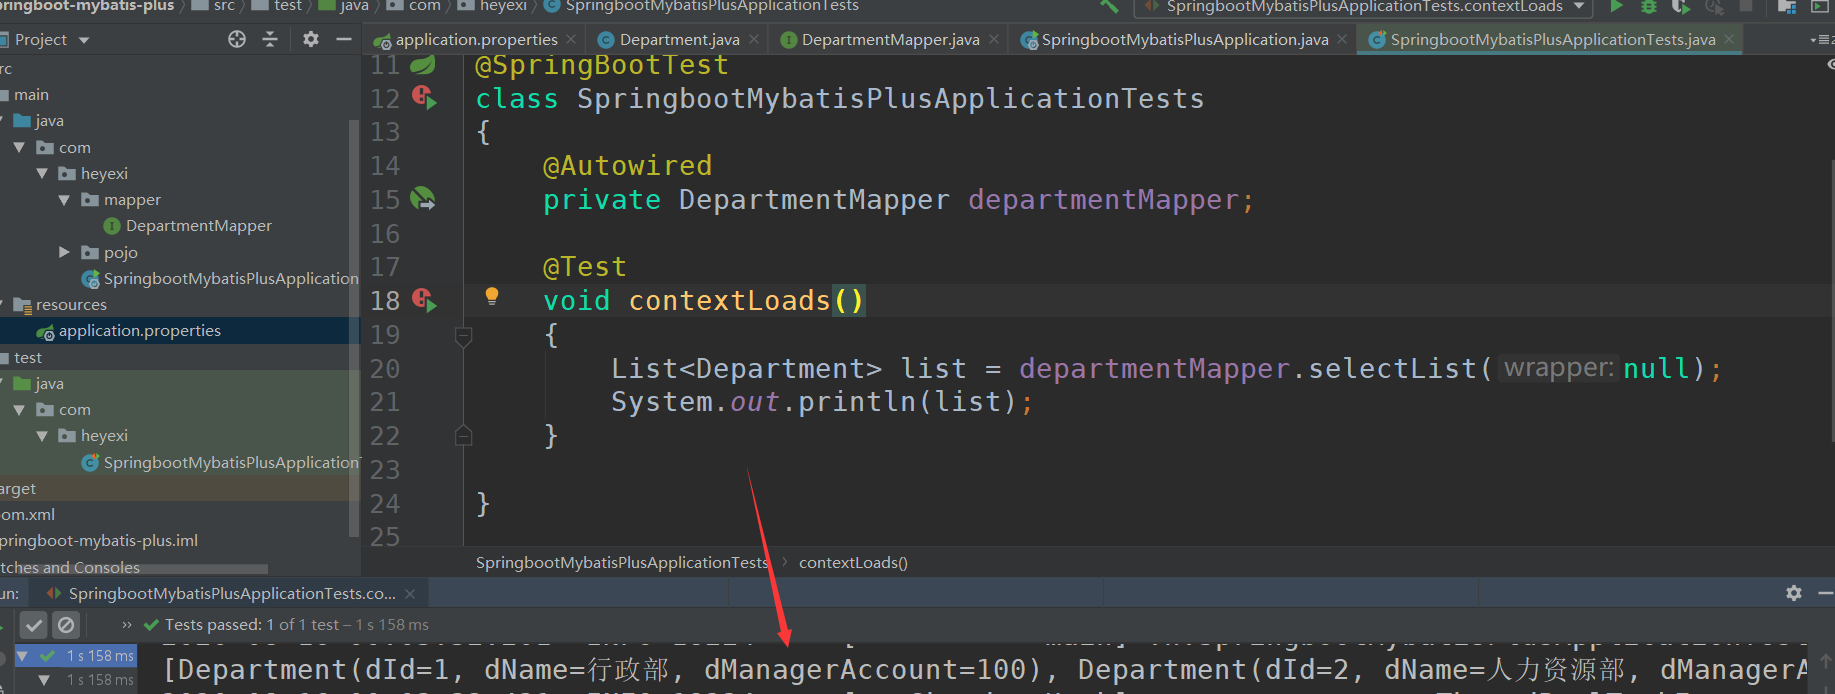
然后进行测试
package com.heyexi;

import com.heyexi.mapper.DepartmentMapper;
import com.heyexi.pojo.Department;
import org.junit.jupiter.api.Test;
import org.springframework.beans.factory.annotation.Autowired;
import org.springframework.boot.test.context.SpringBootTest;

import java.util.List;

@SpringBootTest
class SpringbootMybatisPlusApplicationTests
{
    @Autowired
    private DepartmentMapper departmentMapper;

    @Test
    void contextLoads()
    {
        List<Department> list = departmentMapper.selectList(null);
        System.out.println(list);
    }

}
然后就报错了!

为什么SQL语句自动加了呢?数据库表中没有用下划线,难道是把首字母大写替换成了_加小写?这个应该如何防止它改,自己我们实体类中自定义的字段来查询呢?
这时候我们需要去配置文件中关闭自动驼峰转化的功能
spring.datasource.url=jdbc:mysql://localhost:3307/staff_salary?useUnicode=true&characterEncoding=utf-8&serverTimezone=Asia/Shanghai
spring.datasource.username=root
spring.datasource.password=kingsley
spring.datasource.driver-class-name=com.mysql.cj.jdbc.Driver

#关闭驼峰自动转换下划线功能
mybatis-plus.configuration.map-underscore-to-camel-case=false
然后就发现已经成功了!
常用注解介绍
-
主键注解@TableId:给实体的主键添加,可以保证自动根据数据库的id自增。
-
@TableId(type = IdType.AUTO) private Long id; -
@TableName:表名注解,默认情况下实体名就是表名,当实体名跟数据库表名不同时,可以通过这个注解指定数据库的表名。
-
@TableName(value = "t_user") public class user { } -
@TableField:字段注解,当实体字段名跟表字段名不一致时,可以使用这个注解指定数据库的表名。还可以规定该实体字段名在数据库中是否存在,当设为不存在时,在插入时就不会进行插入。
-
@TableField(value = "u_id")
private Long id;
//指定字段在数据库不存在
@TableField(exist = false)
private String name;
获取添加对象的id
我们可以在添加一条记录后,立即获得该对象在数据库自增后的id,会自动回写到实体中。
User user = new User();
//获取添加后的对象id
user.setAge(11);
user.setName("何夜息");
userMapper.insert(user);
System.out.println(user.getId());

输出:
2021-01-31 13:54:06.289  INFO 19536 --- [           main] com.fucai3d.ApplicationTest              : Started ApplicationTest in 4.161 seconds (JVM running for 5.82)
1
通用CRUD操作
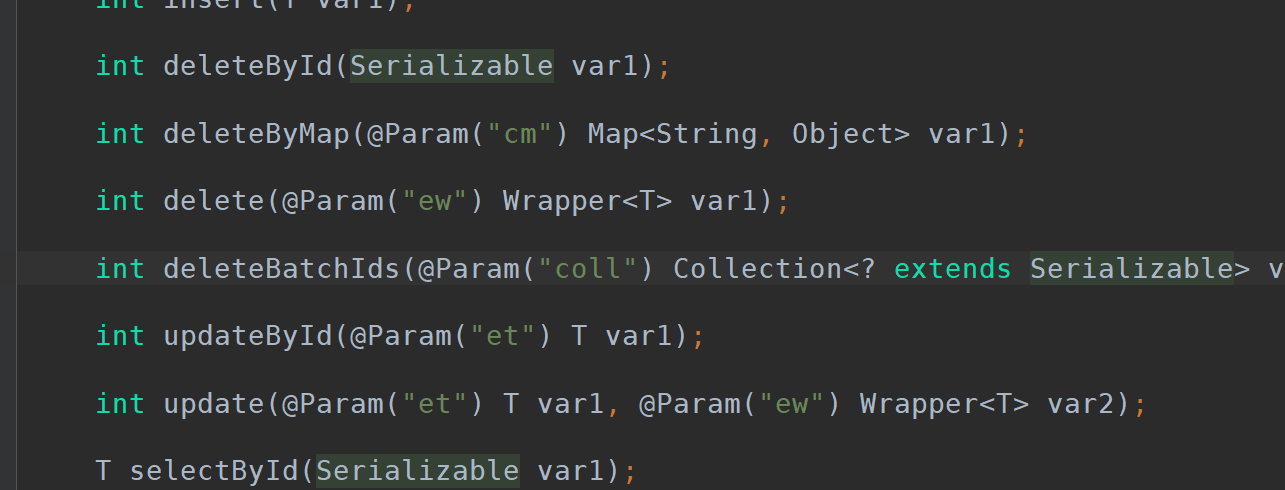
继承BaseMapper后,提供了一些常用的方法可以直接使用,特别方便。
insert
先说插入语句,调用insert方法,需要注意的是,这个只会添加设置了的值,比如不设Name,那么insert里面就不会有这个字段。
user.setAge(11);
user.setName("何夜息");
userMapper.insert(user);
update
更新操作一般就用id来更新,这是一个很好的方法,需要注意调用更新方法时,它只会更新你设置了的实体内容的值,没有设置的就不会更新,保留原来的数据,这是一个做的很好的地方。
User user = new User();
//获取添加后的对象id
user.setId(Long.valueOf(1));
user.setAge(666);
//user.setName("何夜息"); //没有设置的就不会更新,保留原来的属性
userMapper.updateById(user);

select
查询操作是最常用的操作,需要熟练掌握。
根据id查询
System.out.println(userMapper.selectById(1));
输出
2021-01-31 14:15:45.389  INFO 28860 --- [           main] com.fucai3d.ApplicationTest              : Started ApplicationTest in 4.58 seconds (JVM running for 6.315)
User(id=1, name=何夜息, age=666)
根据多个列查询
当我们需要根据其他列查询时,可以直接设置要查询的列,然后通过selectOne方法查询,但是这个查到两个以上的时候就会报错。
User user = new User();
user.setName("何夜息");//sql的where条件变成where name='何夜息'
System.out.println(userMapper.selectOne(user));
我也可以通过多个id查询
List u_ids = new ArrayList();
u_ids.add(1);
u_ids.add(2);

List list = userMapper.selectBatchIds(u_ids);
System.out.println(list);

输出
[User(id=1, name=何夜息, age=666), User(id=2, name=sa, age=112)]
使用selectOne查询时有多个返回值就会报错,这时候我们可以使用selectByMap来查询,map里还是查询的字段和条件,返回就是list,简直太完美了。
Map<String,Object> map = new HashMap<>();
map.put("age",666);//key是字段名,val是值
List list = userMapper.selectByMap(map);
System.out.println(list);

输出
[User(id=1, name=何夜息, age=666), User(id=4, name=张三, age=666)]
delete
删除基本不用,需要再使用即可,和查询一样。
User user = new User();
user.setId(112);
userMapper.deleteById(user);
可以用map多个条件删除
Map<String,Object> map = new HashMap<>();
map.put("age",666);//key是字段名,val是值
userMapper.deleteByMap(map);
还可以根据多个id删除
List u_ids = new ArrayList();
u_ids.add(1);
u_ids.add(2);
userMapper.deleteBatchIds(u_ids);//返回受影响行数
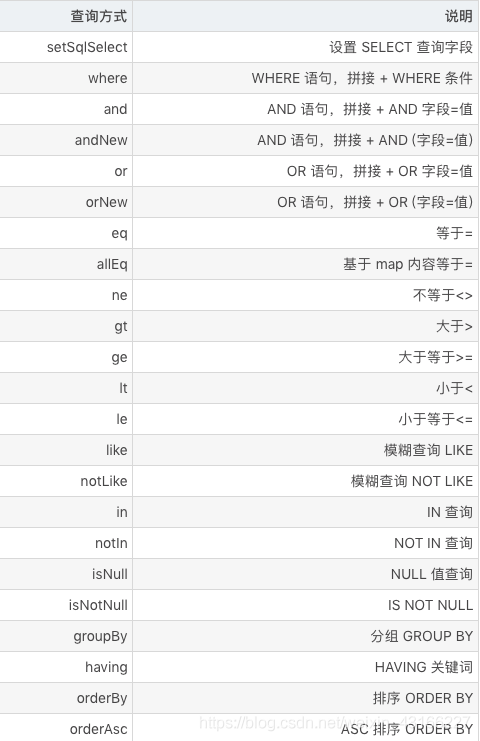
条件构造器
条件构造器就是我们需要使用其他自定义的查询条件,或者一些复杂的语句的时候,可以使用Wrapper来包装。
https://mp.baomidou.com/guide/wrapper.html#abstractwrapper
比如查询一下名字里带"三"的,age在500以上的,需要用到QueryWrapper来实现。
注意条件里面是数据库的列名,后面是值。
List<User> users = userMapper.selectList(new QueryWrapper<User>()
        .gt("age",500)
        .like("name","%三%")
);
System.out.println(users);
输出
[User(id=4, name=张三, age=666), User(id=5, name=三人, age=502)]
这个很像链式编程,很方便。
更新删除操作也是一样的道理,都可以使用条件构造器设置条件进行更新删除。
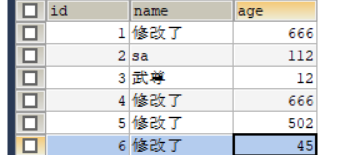
//更新姓名带“何”或者年龄在500到1000之内的数据
User user = new User();
user.setName("修改了");
//第一个参数是要修改成什么样子,第二个是条件构造器
Integer res = userMapper.update(user,new UpdateWrapper<User>()
    .like("name","%何%")
    .or()//使用or后后面的都是Or的条件
    .between("age",500,1000)
);
System.out.println(res);
输出:
WARNING: All illegal access operations will be denied in a future release
4
可以看到没有set的值age并没有修改哦!
代码生成器
使用mybatis-plus的代码生成器可以自动生成 Entity、Mapper、Mapper XML、Service、Controller 等各个模块的代码,极大的提升了开发效率。
添加 代码生成器 依赖
<dependency>
    <groupId>com.baomidou</groupId>
    <artifactId>mybatis-plus-generator</artifactId>
    <version>3.0.5</version>
</dependency>
添加 模板引擎 依赖,MyBatis-Plus 支持 Velocity(默认)、Freemarker、Beetl,用户可以选择自己熟悉的模板引擎,如果都不满足您的要求,可以采用自定义模板引擎。
<dependency>
    <groupId>org.apache.velocity</groupId>
    <artifactId>velocity-engine-core</artifactId>
    <version>2.2</version>
</dependency>
然后可以直接运行生成
//代码生成器
public class CodeGenerator
{
    public static void codeGenerator(String moudule_name,String t_name){
        // 1.全局配置
        GlobalConfig gc = new GlobalConfig();
        //获取项目路径,因为生成java文件需要文件路径
        String projectPath = System.getProperty("user.dir");
        gc.setOutputDir(projectPath + "/src/main/java")//设置java文件的输出路径
                .setAuthor("何夜息")//作者
                .setOpen(false)// 是否打开输出目录
                .setFileOverride(true)//多次生成时文件覆盖
                .setIdType(IdType.AUTO)//主键ID策略
                .setBaseResultMap(true)// 生成ResultMap
                .setBaseColumnList(true)// 生成 sql片段
                .setOpen(false) // 自动打开生成后的文件夹
                .setServiceName("%sService") //service接口开头不带I,自动匹配实体
                .setMapperName("%sMapper")
                .setXmlName("%sMapper")
                .setXmlName("%sMapper");

        // 2.数据源配置
        DataSourceConfig dsc = new DataSourceConfig();
        dsc.setUrl("jdbc:mysql://ip:2037/zhenxiang?useUnicode=true&characterEncoding=utf-8&serverTimezone=Asia/Shanghai");
        // dsc.setSchemaName("public");
        dsc.setDriverName("com.mysql.cj.jdbc.Driver");
        dsc.setUsername("root");
        dsc.setPassword("");


        //3. 包配置
        PackageConfig pc = new PackageConfig();
        pc.setModuleName(moudule_name)//模块名,就是父包下一级的包名
                .setParent("com.zhenxiang") //设置父包
                .setMapper("mapper") //设置mapper包
                .setService("service") //设置service包
                .setServiceImpl("service.impl")
                .setEntity("pojo"); //设置实体包

        //4. 策略配置
        StrategyConfig strategy = new StrategyConfig();
        strategy.setNaming(NamingStrategy.nochange) //表名生成实体名策略
                .setColumnNaming(NamingStrategy.nochange) //字段生成实体属性名称策略
                .setEntityLombokModel(true) //是否使用Lombok优化代码
                .setInclude(t_name) //需要生成的表
                .setTablePrefix("t_") //表前缀 可以保证生成的实体没有表的前缀
                .setRestControllerStyle(true);//控制器类型

        //5.整合配置
        // 代码生成器
        AutoGenerator mpg = new AutoGenerator();
        mpg.setGlobalConfig(gc)
                .setDataSource(dsc)
                .setPackageInfo(pc)
                .setStrategy(strategy);

        try
        {
            //执行
            mpg.execute();
            System.out.println("执行成功");
        }catch (Exception e)
        {
            System.out.println(e);
        }

    }
}
自定义SQL查询
使用定义语句我们可以使用mybatis中的方法,可以在mybatis-plus的XBase接口中,使用@Select注解,在mybatis中也一样,一种是将SQL语句写在XML配置文件中,如果我们不想写在配置文件中,可以直接写在注解中,这样其实还更方便。
    @Select("SELECT DISTINCT user_id FROM (SELECT * FROM expert_forecast WHERE DATE(create_time) >= DATE(#{start_time}) AND  DATE(create_time) < DATE(DATE_FORMAT(NOW(),'%Y-%m-%d'))) AS t1;")
    List<Long> get_user_id_100days(@Param("start_time") String start_time);
然后在service中定义相同的名字,注入Base接口进行调用就行了。


 4403
4403


 被折叠的 条评论
为什么被折叠?
被折叠的 条评论
为什么被折叠?
 到【灌水乐园】发言


