


脚手架发布
搭建一个合适框架并编译通过确保没问题。

在此目录下执行构建脚手架命令
mvn archetype:create-from-project
构建成功后,在target目录下更改相应内容,例如去除.idea配置文件等。

编辑脚手架的maven信息,后续需要用到此信息

进入到脚手架根目录即上图的archtype 执行安装命令
mvn clean install
可以直接在 archetype/pom.xml 添加仓库进行deploy
<distributionManagement>
    <!-- 如果需要发布到仓库,需要配置仓库用户名密码-->
    <!-- maven/Settings.xml的servers节点下增加
        <server>
            <id>私服【全局】</id>
            <username>询问管理员</username>
            <password>询问管理员</password>
        </server>
    -->
    <snapshotRepository>
      <id>私服【全局】</id>
      <name>私服【全局】</name>
      <url>http://ip/url</url>
    </snapshotRepository>
    <repository>
      <id>私服【全局】</id>
      <name>私服【全局】</name>
      <url>http://ip/url</url>
    </repository>
  </distributionManagement>
配置增加后执行 mvn deploy 即可完成发布。
也可以手动进入到本地仓库进行deploy
找到对应jar路径并执行 maven命令
mvn deploy:deploy-file -DgroupId=org.jason -DartifactId=hello-world -Dversion=1.0.1-SNAPSHOT -Dpackaging=jar -Dfile=G:\p2p\API4BDS-2.3.jar -Durl=http://maven.xxxx.com/nexus/content/repositories/releases -DrepositoryId=nexus-snapsho

roupId:上传到私服的groupId
artifactId:上传到私服的artifactId
version:上传到私服的version
file:jar包的本地路径
url: 你的maven私服地址
repositoryId:setting.xml配置的server id
对应本例子如下
mvn deploy:deploy-file -DgroupId=cn.katasea -DartifactId=bfapp-dubbo -Dversion=v1.0 -Dpackaging=jar -Dfile=E:\windows\apache-maven-3.5.2\repo\cn\katasea\bfapp-dubbo\v1.0\bfapp-dubbo-v1.0.jar -Durl=http://xx -DrepositoryId=nexus
如果报jar包上传maven私服出错Cannot deploy artifact from the local repository 解决方法:将要安装的jar和pom copy到其它目录再安装,只要不在本地仓库目录都应该可以.
maven的 deploy:deploy-file
命令,这种方法时要注意的是如果你要安装的jar和pom是位于本地repository的目录下,这个命令就会出错 (Cannot deploy
artifact from the local repository…), 解决方法:将要安装的jar和pom
copy到其它目录再安装,只要不在本地仓库目录都应该可以.
脚手架使用
idea新建项目,添加脚手架
如果是本地的话repository 填入 -DarchetypeCatalog=local
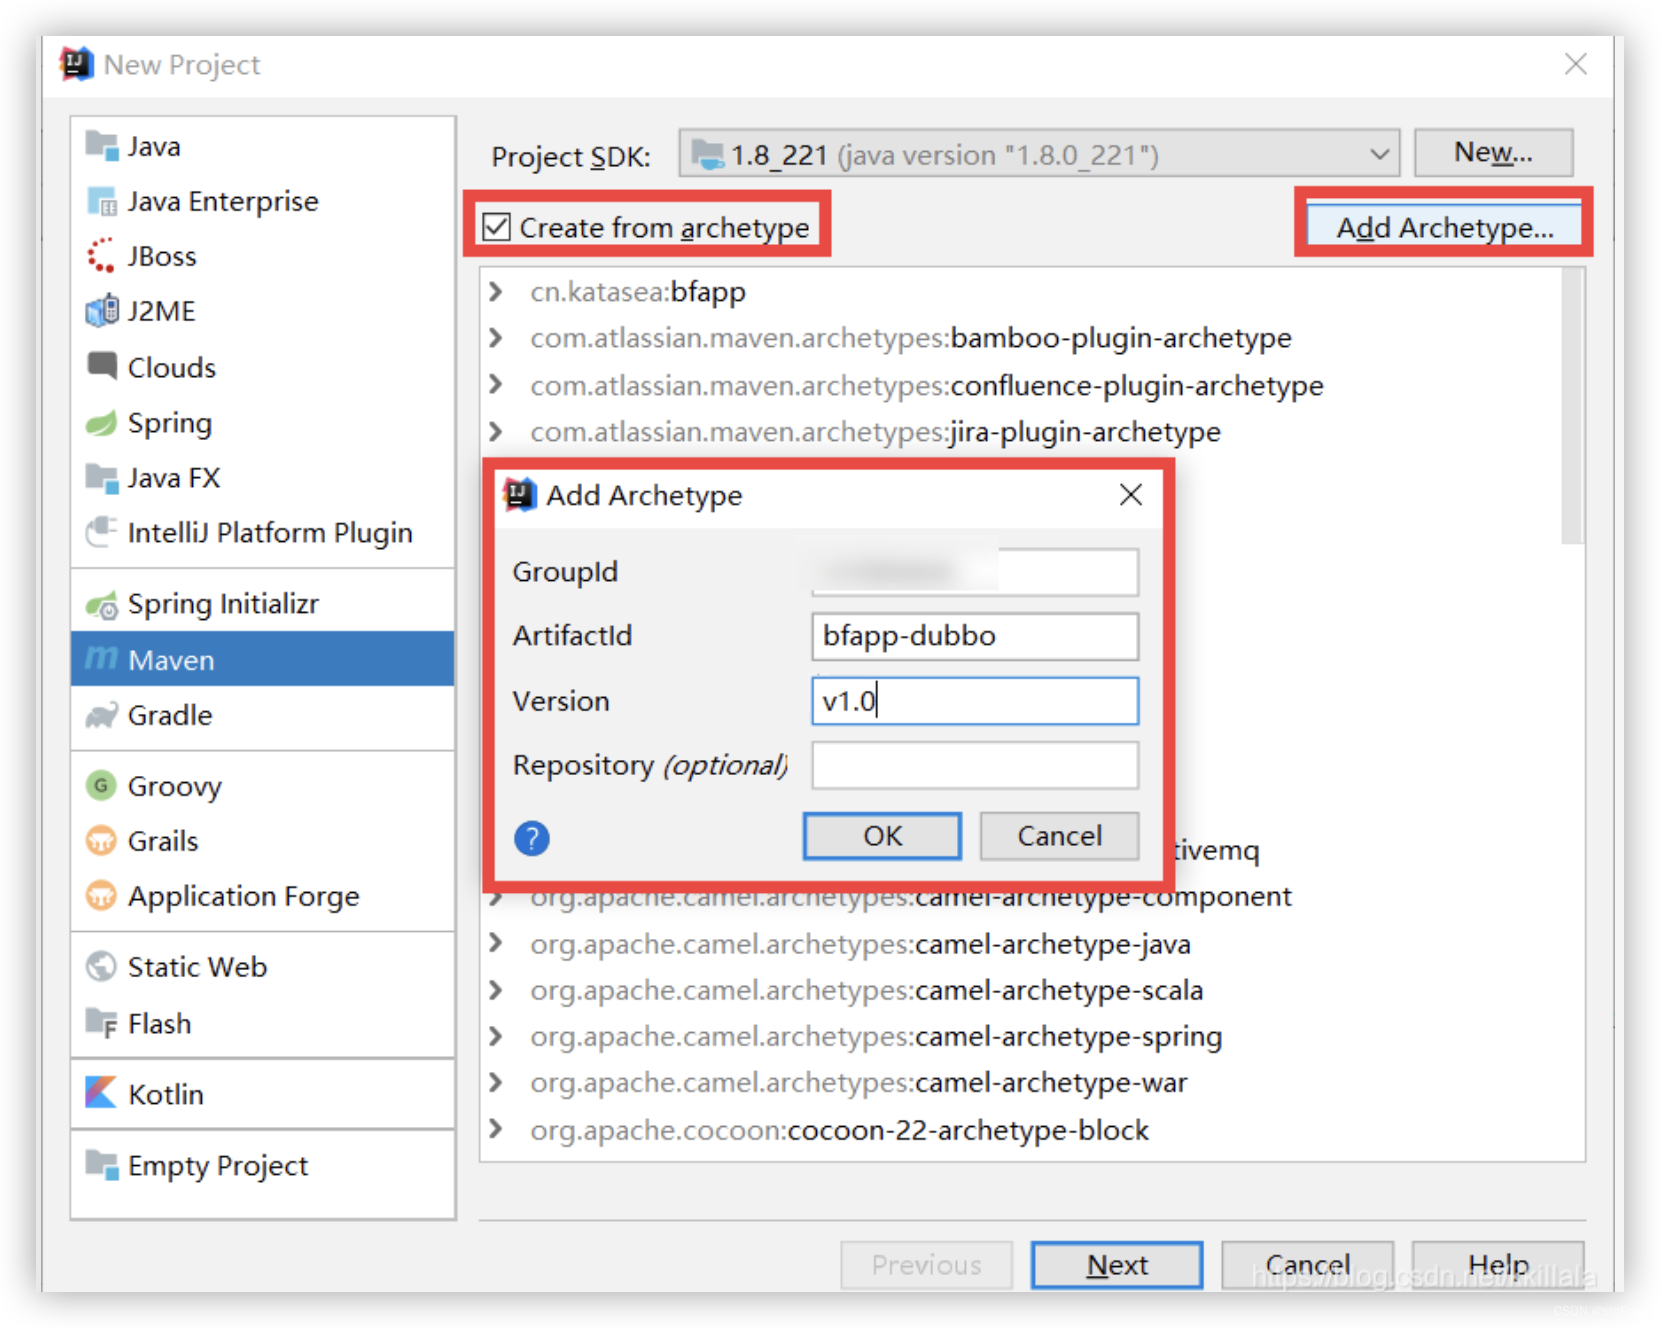
如果下载很慢,建议在创建项目的时候增加properties 点新增 archetypeCatalog = internal 亲测速度提升明显


私服地址和用户密码必须配置到server.xml里面。
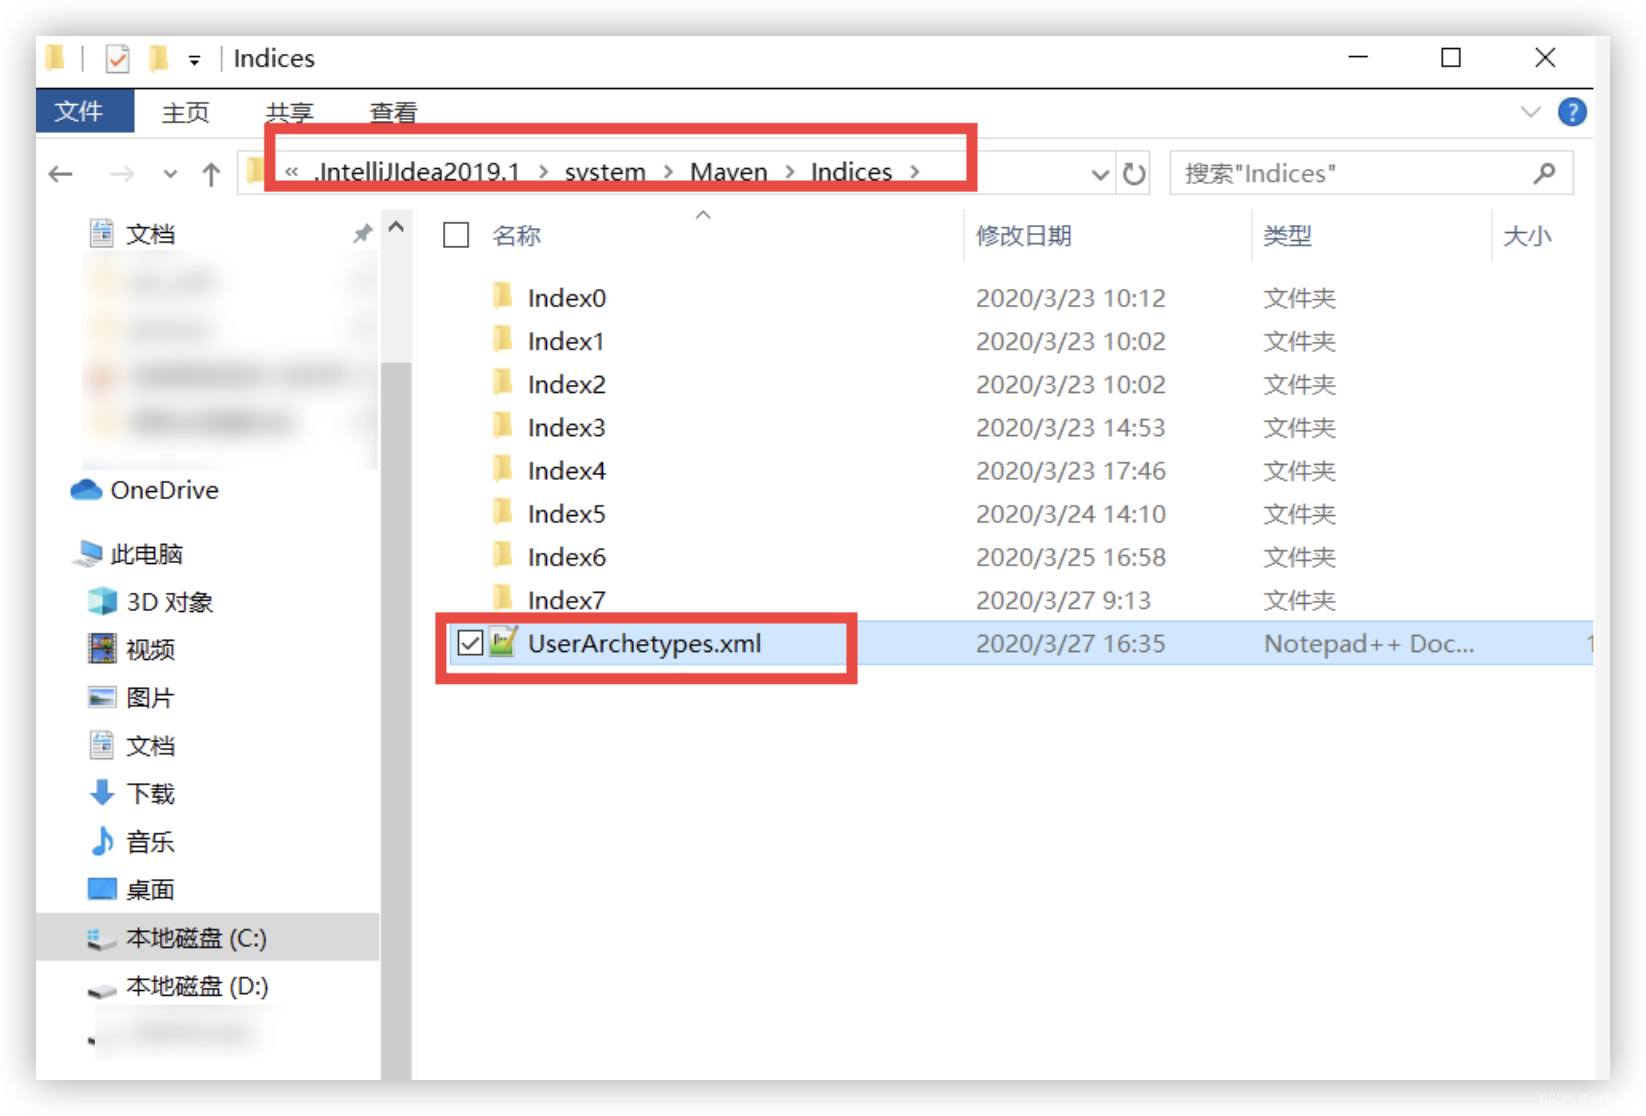
如果脚手架信息填错,需要删除脚手架配置信息,需要去用户根目录 c:/user/用户名 对应如下图位置修改文件里的信息即可。
添加后会出现自定义的archetype

稍等一会儿就会下载完毕,新项目直接构建完成

下载过程可能会卡住,需要注意私服的镜像需要配置在其他镜像之前,并且配置对应用户密码。


 4241
4241


 被折叠的 条评论
为什么被折叠?
被折叠的 条评论
为什么被折叠?
 到【灌水乐园】发言


