


背景
之前很少用钉钉,因为手机多装了一个软件,感觉占用系统资源。但是感觉确实有一些人使用钉钉告警,所以本篇来讲解如何通过钉钉来实现Prometheus的告警。
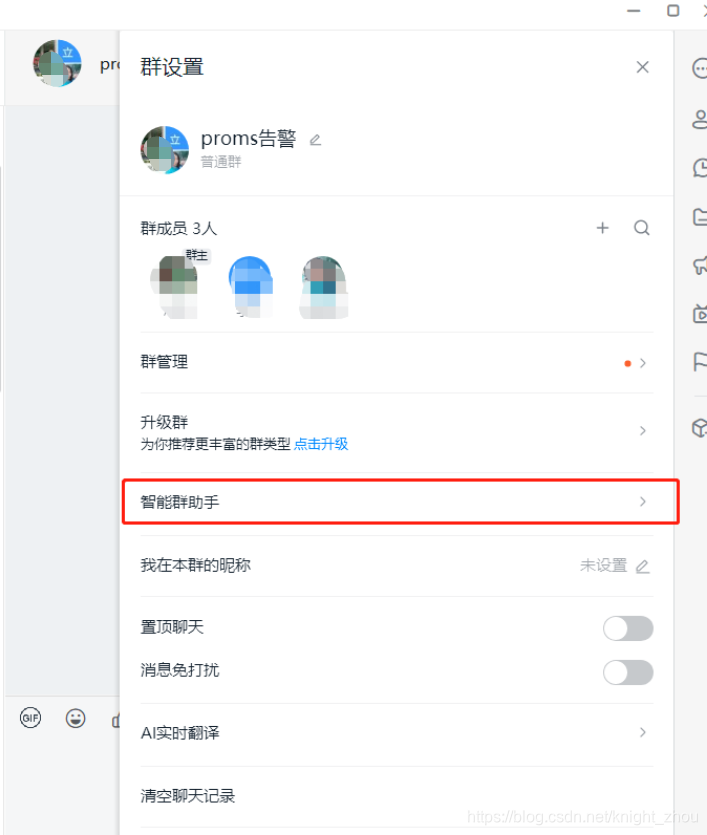
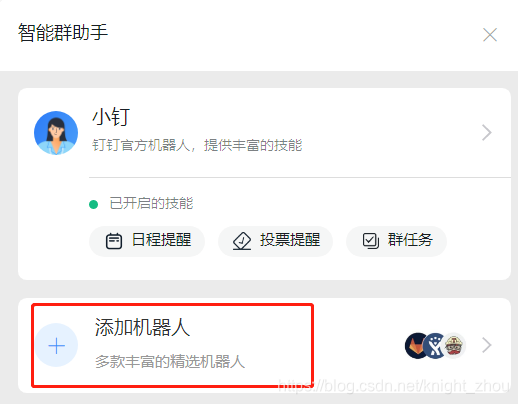
首先先注册钉钉,然后创建一个群。群的设置如下:
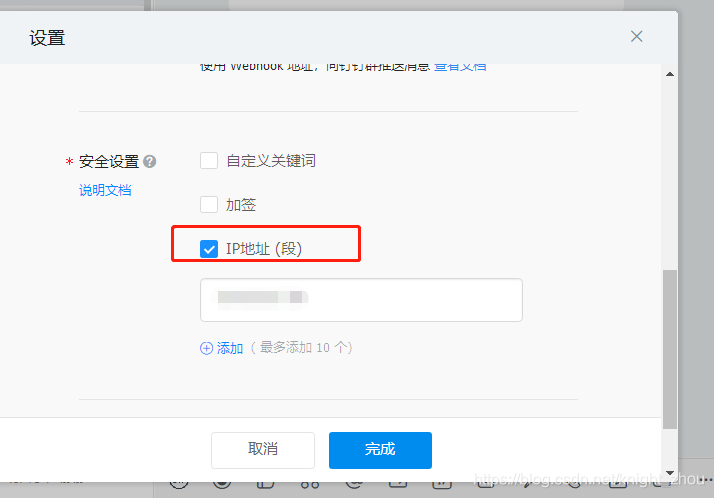
注意: 下面的ip地址段,请加入服务器的公网IP的地址,因为要设置白名单,所以要注意了。
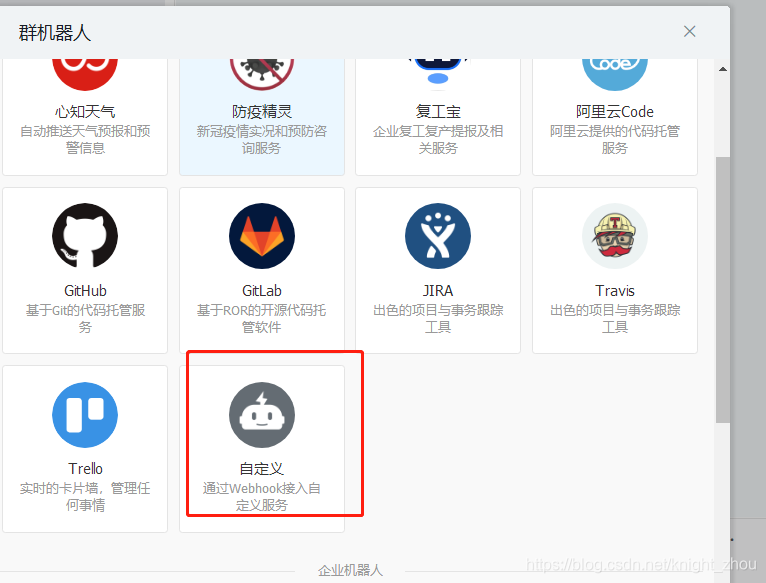
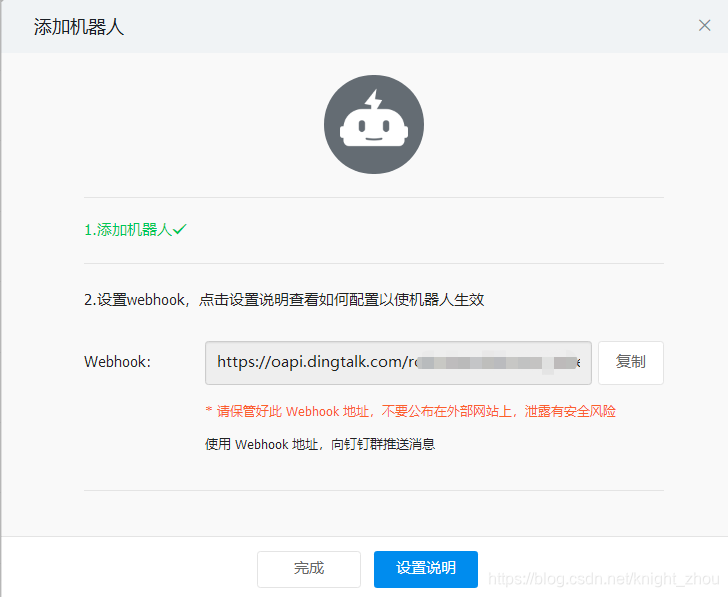
到此对于我们最重要的一点是 这里的Webhook。
Alertmanager 配置前的准备
插件官网: GitHub - timonwong/prometheus-webhook-dingtalk: DingTalk integration for Prometheus Alertmanager
因为使用钉钉告警的话,还需要钉钉插件支持,所以我们先来安装一下插件,我们直接下载二进制包。启动的默认端口为8060。
mdkir /opt/prometheus/server/ding
wget ..... prometheus-webhook-dingtalk-1.4.0.linux-amd64.tar.gz
cd /opt/prometheus/server/ding/prometheus-webhook-dingtalk-1.4.0.linux-amd64
# 前台启动
./prometheus-webhook-dingtalk --ding.profile="webhook1=https://oapi.dingtalk.com/robot/send?access_token=xxoo"

# 后台启动,当然你也可以使用Supervisor启动
./prometheus-webhook-dingtalk --ding.profile="webhook1=https://oapi.dingtalk.com/robot/send?access_token=xxoo"
从前台打印出的信息我们能看出,webhook的地址如下:
webhook: http://localhost:8060/dingtalk/webhook1/send
Prometheus的Alertmanager配置
路由配置:(更改告警发送给钉钉接收)
route:
  # 省略
  receiver: 'ops_dingding' #默认的接收器
webhook相关配置如下:
# 发送钉钉告警
  - name: 'ops_dingding'
    webhook_configs:
    - url: 'http://192.19.192.65:8060/dingtalk/webhook1/send'
      send_resolved: true
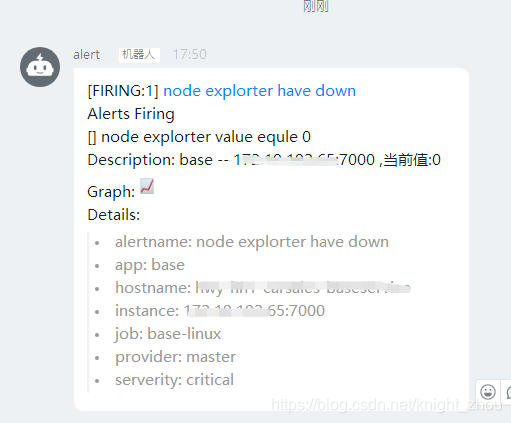
到此,我们就配置完毕,来看看最后的告警效果吧!
补充
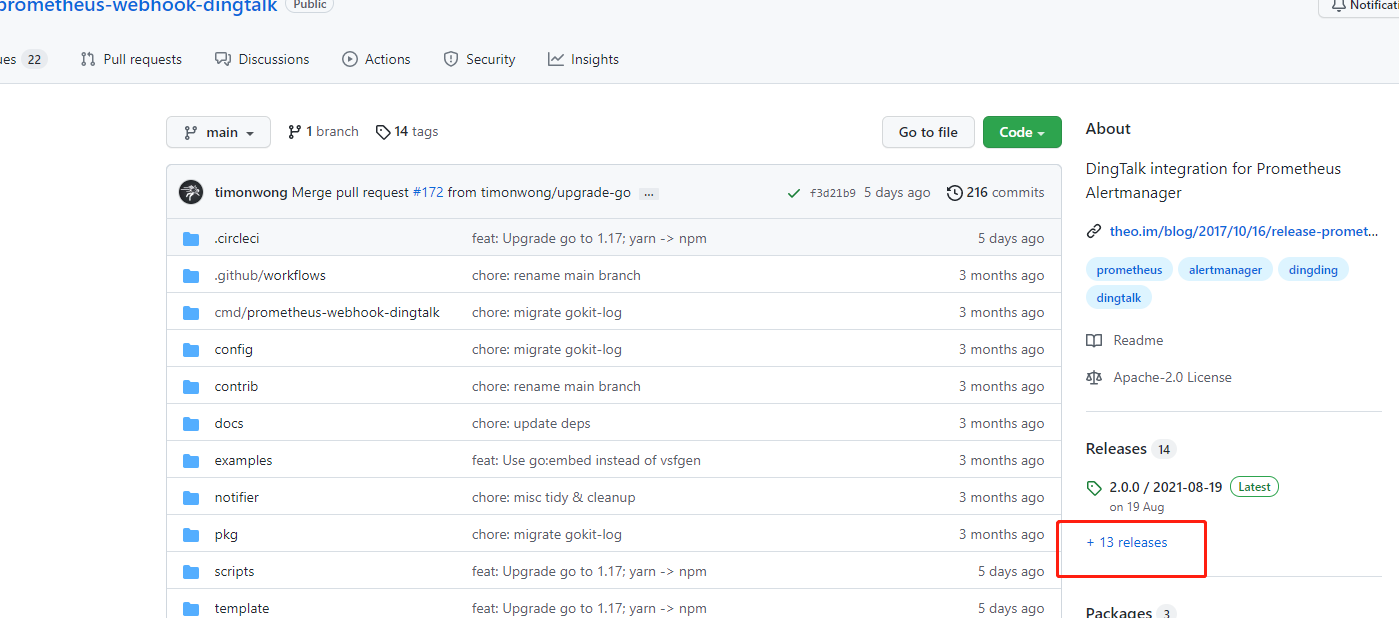
有一些朋友没看到release文件,可以直接在下面的URL找,或者看我的截图入口进去。
https://github.com/timonwong/prometheus-webhook-dingtalk/releases我这边截图如下:


 2135
2135

 被折叠的 条评论
为什么被折叠?
被折叠的 条评论
为什么被折叠?
 到【灌水乐园】发言


