


1.首先导入mybatis、mysql、springboot的相关依赖
<!-- mybatis-spring-boot-starter -->
        <dependency>
            <groupId>org.mybatis.spring.boot</groupId>
            <artifactId>mybatis-spring-boot-starter</artifactId>
            <version>2.1.1</version>
        </dependency>
         <dependency>
            <groupId>org.springframework.boot</groupId>
            <artifactId>spring-boot-starter-web</artifactId>
        </dependency>
        <dependency>
            <groupId>org.springframework.boot</groupId>
            <artifactId>spring-boot-starter-jdbc</artifactId>
        </dependency>
        <dependency>
            <groupId>org.springframework.boot</groupId>
            <artifactId>spring-boot-starter-web</artifactId>
        </dependency>
2.在springboot的yml配置文件中配置数据库以及mybatis,注意:如果mysql用的是8.0以上的版本需要使用driver-class-name: com.mysql.cj.jdbc.Driver,如果mysql用的是5.7的版本需要使用driver-class-name: com.mysql.jdbc.Driver,在mybatis的配置中type-aliases-package指的是需要扫描的dao层所有的接口, mapper-locations指的是*.xml映射文件的位置,在里面使用了classpath指的是该文件是存放在resource目录下的
spring:
  datasource:
    driver-class-name: com.mysql.cj.jdbc.Driver
    url: jdbc:mysql://localhost:3306/mybatistest?useUnicode=true&characterEncoding=utf8&serverTime=UTC
    username: root
    password: 991020


# 整合mybatis
mybatis:
  type-aliases-package: com.lz.pojo
  mapper-locations: classpath:mybatis/mapper/*.xml
3.创建实体类,并在数据库中创建对应的表
@Data
@AllArgsConstructor
@NoArgsConstructor
public class User {
    private int id;
    private String name;
    private String pwd;
}

注意:此类中的构造器、getXxx()、setXxx()方法都使用以上的注解代替了,使用上述注解需要导入lombok的依赖包
        <dependency>
            <groupId>org.projectlombok</groupId>
            <artifactId>lombok</artifactId>
        </dependency>
4. 创建dao层相应的接口以及抽象方法
// 这个注解表示整合了一个mybatis的mapper接口,此层是dao层

@Mapper
@Repository
public interface UserMapper {
    List<User> allUserList();

    User getUserById(int id);

    int addUser(User user);

    int updateUser(User user);

    int deleteUser(int id);

}
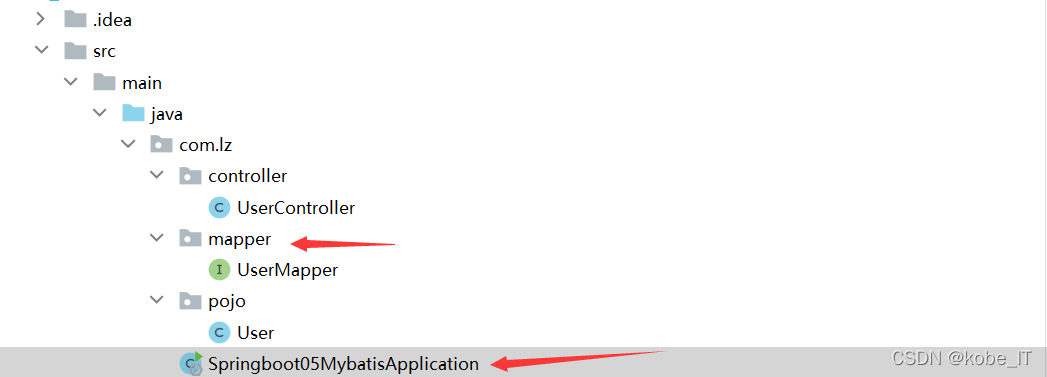
注意:可以在dao层加@mapper注解,如果不想在dao层该接口上加@Mapper注解,也可以直接在启动类上加@MapperScan注解,并在该注解后面注明扫描包的路径,在建立项目结构式一定要注意dao层一定要和启动类是同一目录结构,否则在启动上加该注解会扫描不到
@SpringBootApplication
//@MapperScan("com.lz.mapper") // 可以扫描mapper包下的所有mapper
public class Springboot05MybatisApplication {
    public static void main(String[] args) {
        SpringApplication.run(Springboot05MybatisApplication.class, args);
    }
}
5.创建dao层接口所对应的XxxMapper.xml文件,该映射文件可以直接在dao层创建,也可以创建一个mapper层,该目录中存放所有的映射文件,还可以建立在resource目录下,在该目录下创建mapper目录,创建相应的映射文件。映射文件中的namespace对应的dao层的接口,里面的id对应接口中的抽象方法,resultType指的是返回的类型,parameterType指的是传入的参数类型
<?xml version="1.0" encoding="UTF-8" ?>
<!DOCTYPE mapper
        PUBLIC "-//mybatis.org//DTD Mapper 3.0//EN"
        "http://mybatis.org/dtd/mybatis-3-mapper.dtd">
<mapper namespace="com.lz.mapper.UserMapper">
    <select id="allUserList" resultType="User">
        select * from user;
    </select>

    <select id="getUserById" resultType="User">
        select * from user where id = #{id};
    </select>

    <insert id="addUser" parameterType="User">
        insert into user(id,name,pwd) values(#{id},#{name},#{pwd});
    </insert>

    <update id="updateUser" parameterType="User">
        update User set name = #{name},pwd = #{pwd} where id = #{id};
    </update>

    <delete id="deleteUser" parameterType="int">
        delete from user where id = #{id};
    </delete>
</mapper>
6.实现对应的service以及controller层
@RestController
public class UserController {

    @Autowired
    private UserMapper userMapper;

    @GetMapping("/allUserList")
    public List<User> allUserList(){
        List<User> users = userMapper.allUserList();
        for(User user: users){
            System.out.println(user);
        }
        return users;
    }

    @GetMapping("/getUserById/{id}")
    public User getUserById(@PathVariable int id){
        User user = userMapper.getUserById(id);
        return user;
    }
    @GetMapping("/addUser/{id}")
    public String addUser(@PathVariable int id){
        userMapper.addUser(new User(id, "Lucy", "aaa"));
        return "用户添加成功...";
    }
    @GetMapping("/updateUser/{id}")
    public String updateUser(@PathVariable int id){
        userMapper.updateUser(new User(id, "lili", "ccc"));
        return "用户修改成功";
    }
    @GetMapping("/deleteUser/{id}")
    public String deleteUser(@PathVariable int id){
        userMapper.deleteUser(id);
        return "用户删除成功...";
    }
}


 1656
1656


 被折叠的 条评论
为什么被折叠?
被折叠的 条评论
为什么被折叠?
 到【灌水乐园】发言


