


Oracle Database 19c Download for Microsoft Windows x64 (64-bit)
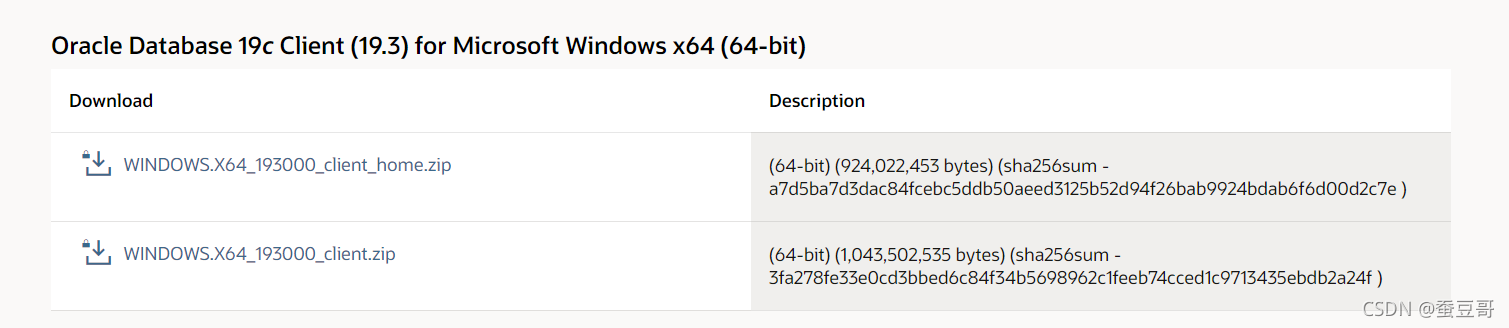
Client (客户端) 即为一个完整的安装程序,可以选择安装你指定的路径,系统将会在安装过程中复制相应的问题到目标路径并注册到客户端中,(19c以后开始区分)
而Client_home 则是可以理解为一种管理员类型的安装镜像,包括解压和注册,总体部署和前者类似,如无特殊要求可以依旧直接使用Client
以下是官方说明
Windows x64 19300_client is a fully featured installer where you can choose what to install and where, then the installer copies the files to the destination and registers the client.
Starting with Oracle Database 19c, the Oracle Database client software is available as an image file for download and installation. You must extract the image software into a directory where you want your Oracle home to be located, and then run the runInstaller script to start the Oracle Database client installation. Oracle Database client installation binaries continue to be available in the traditional format as non-image zip files.
As with Oracle Database and Oracle Grid Infrastructure image file installations, Oracle Database client image installations simplify Oracle Database client installations and ensure best practice deployments.
Windows x64 19300_client_home is an "image" of and "Administrator" type installation, that you unzip to the destination folder then register it.
About Image-Based Oracle Database Client Installation
Starting with Oracle Database 19c, installation and configuration of Oracle Database Client software is simplified with image-based installation.
To install Oracle Database Client, create the new Oracle home, extract the image file into the newly-created Oracle home, and run the setup wizard to register the Oracle Database product.
You must extract the image software (client_home.zip) into the directory where you want your Oracle Database Client home to be located, and then run the Setup Wizard to start the Oracle Database Client installation and configuration. Oracle recommends that the Oracle home directory path you create is in compliance with the Oracle Optimal Flexible Architecture recommendations.
Using image-based installation, you can install Oracle Database Client 32-bit and 64-bit configurations of the Administrator installation type.
As with Oracle Database and Oracle Grid Infrastructure image file installations, Oracle Database Client image installations simplify Oracle Database Client installations and ensure best practice deployments. Oracle Database Client installation binaries continue to be available in the traditional format as non-image zip files.


 2686
2686

 被折叠的 条评论
为什么被折叠?
被折叠的 条评论
为什么被折叠?
 到【灌水乐园】发言


