


文章转自:http://blog.csdn.net/u014733374/article/details/43560983
最近一直在做后台开发,但心里还是总惦记着Android,感觉还是Android有意思。正好项目中要用到极光推送,今天抽空来记录下这两天的研究成果。
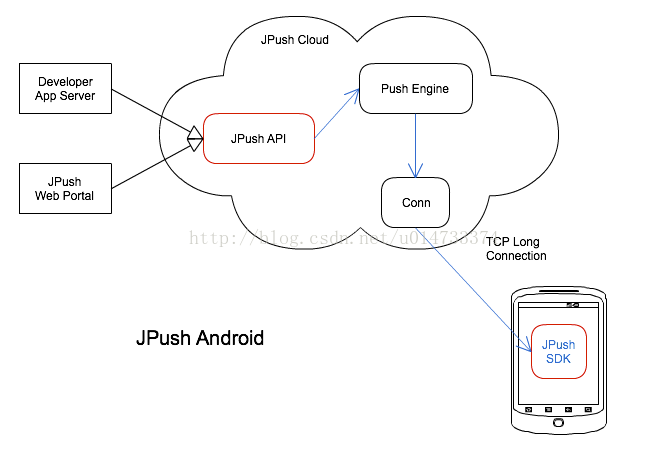
我们知道IOS有自己的推送服务,但很遗憾Android没有原生的推送服务,现在有很多第三方的推送服务,比如个推、极光、亚马逊、百度云、聚能等。今天我们就来研究下极光推送的后台服务器如何实现。
关键点:
1.首先最好是把极光官网java后台服务器的demo下载下来,里面有我们需要的jar包,以及example.
2.极光推送的关键jpushClient = new JPushClient(masterSecret, appKey, 3);就是这个类。其中的参数需要我们从极光官网注册开发者,然后创建具体项目获取相应的两 个key值。其中appKey值就是我们手机端对应的key值
3.极光推送给我们提供了很多种推送的方式,我们可以选择某一个平台进行推送(Android ,IOS ,Windows Phone),也可以全部推送;我们可以针对某个特别的用户进行推送(设置alisa),也可以针对特别的群体进行推送(设置tag),第三个参数是设置推送保留的时间,只要在有效时间内上线就可以收到推送信息
4. 极光推送现在都用https连接,提交请求是post,获取数据为get
ok 接下来就看服务端的实现(JAVA),JdPush推送方法+一个Servlet
package com.weiwend.jdpush;

import org.slf4j.Logger;
import org.slf4j.LoggerFactory;

import cn.jpush.api.JPushClient;
import cn.jpush.api.common.resp.APIConnectionException;
import cn.jpush.api.common.resp.APIRequestException;
import cn.jpush.api.push.PushResult;
import cn.jpush.api.push.model.Message;
import cn.jpush.api.push.model.Options;
import cn.jpush.api.push.model.Platform;
import cn.jpush.api.push.model.PushPayload;
import cn.jpush.api.push.model.audience.Audience;
import cn.jpush.api.push.model.audience.AudienceTarget;
import cn.jpush.api.push.model.notification.AndroidNotification;
import cn.jpush.api.push.model.notification.IosNotification;
import cn.jpush.api.push.model.notification.Notification;

public class Jdpush {
	 protected static final Logger LOG = LoggerFactory.getLogger(Jdpush.class);

	 // demo App defined in resources/jpush-api.conf

	public static final String TITLE = "申通快递";
    public static final String ALERT = "祝大家新春快乐";
    public static final String MSG_CONTENT = "申通快递祝新老客户新春快乐";
    public static final String REGISTRATION_ID = "0900e8d85ef";
    public static final String TAG = "tag_api";

    public  static JPushClient jpushClient=null;

	public static void testSendPush(String appKey ,String masterSecret) {


		 jpushClient = new JPushClient(masterSecret, appKey, 3);

	    // HttpProxy proxy = new HttpProxy("localhost", 3128);
	    // Can use this https proxy: https://github.com/Exa-Networks/exaproxy


        // For push, all you need do is to build PushPayload object.
        //PushPayload payload = buildPushObject_all_all_alert();
		 //生成推送的内容,这里我们先测试全部推送
        PushPayload payload=buildPushObject_all_alias_alert();


        try {
        	System.out.println(payload.toString());
            PushResult result = jpushClient.sendPush(payload);
            System.out.println(result+"................................");

            LOG.info("Got result - " + result);

        } catch (APIConnectionException e) {
            LOG.error("Connection error. Should retry later. ", e);

        } catch (APIRequestException e) {
            LOG.error("Error response from JPush server. Should review and fix it. ", e);
            LOG.info("HTTP Status: " + e.getStatus());
            LOG.info("Error Code: " + e.getErrorCode());
            LOG.info("Error Message: " + e.getErrorMessage());
            LOG.info("Msg ID: " + e.getMsgId());
        }
	}

	public static PushPayload buildPushObject_all_all_alert() {
	    return PushPayload.alertAll(ALERT);
	}

    public static PushPayload buildPushObject_all_alias_alert() {
        return PushPayload.newBuilder()
                .setPlatform(Platform.all())//设置接受的平台
                .setAudience(Audience.all())//Audience设置为all,说明采用广播方式推送,所有用户都可以接收到
                .setNotification(Notification.alert(ALERT))
                .build();
    }

    public static PushPayload buildPushObject_android_tag_alertWithTitle() {
        return PushPayload.newBuilder()
                .setPlatform(Platform.android())
                .setAudience(Audience.all())
                .setNotification(Notification.android(ALERT, TITLE, null))
                .build();
    }

    public static PushPayload buildPushObject_android_and_ios() {
        return PushPayload.newBuilder()
                .setPlatform(Platform.android_ios())
                .setAudience(Audience.tag("tag1"))
                .setNotification(Notification.newBuilder()
                		.setAlert("alert content")
                		.addPlatformNotification(AndroidNotification.newBuilder()
                				.setTitle("Android Title").build())
                		.addPlatformNotification(IosNotification.newBuilder()
                				.incrBadge(1)
                				.addExtra("extra_key", "extra_value").build())
                		.build())
                .build();
    }

    public static PushPayload buildPushObject_ios_tagAnd_alertWithExtrasAndMessage() {
        return PushPayload.newBuilder()
                .setPlatform(Platform.ios())
                .setAudience(Audience.tag_and("tag1", "tag_all"))
                .setNotification(Notification.newBuilder()
                        .addPlatformNotification(IosNotification.newBuilder()
                                .setAlert(ALERT)
                                .setBadge(5)
                                .setSound("happy")
                                .addExtra("from", "JPush")
                                .build())
                        .build())
                 .setMessage(Message.content(MSG_CONTENT))
                 .setOptions(Options.newBuilder()
                         .setApnsProduction(true)
                         .build())
                 .build();
    }

    public static PushPayload buildPushObject_ios_audienceMore_messageWithExtras() {
        return PushPayload.newBuilder()
                .setPlatform(Platform.android_ios())
                .setAudience(Audience.newBuilder()
                        .addAudienceTarget(AudienceTarget.tag("tag1", "tag2"))
                        .addAudienceTarget(AudienceTarget.alias("alias1", "alias2"))
                        .build())
                .setMessage(Message.newBuilder()
                        .setMsgContent(MSG_CONTENT)
                        .addExtra("from", "JPush")
                        .build())
                .build();
    }
}
可以看到上面我们推送平台设置的是所有平台,Audience设置为all(所有用户),这里key值和masterSecret值放在servlet中了。
servlet很简单,只要传入两个key值,调用该方法就可以
package com.weiwend.jdpush.servlet;

import java.io.IOException;

import javax.servlet.ServletException;
import javax.servlet.http.HttpServlet;
import javax.servlet.http.HttpServletRequest;
import javax.servlet.http.HttpServletResponse;

import com.sun.org.apache.xml.internal.serializer.utils.Utils;
import com.weiwend.jdpush.Jdpush;
import com.weiwend.jdpush.utils.Base64Utils;

/**
 * Servlet implementation class tuisong
 */
public class tuisong extends HttpServlet {
	private static final long serialVersionUID = 1L;

	private static final String appKey ="84cf5ee2099c654aa03a5d70";
	private static final String masterSecret = "7cf23f25a41806d5fd29e3c5";

    public tuisong() {
        super();
        // TODO Auto-generated constructor stub
    }

	/**
	 * @see HttpServlet#doGet(HttpServletRequest request, HttpServletResponse response)
	 */
	protected void doGet(HttpServletRequest request, HttpServletResponse response) throws ServletException, IOException {
		Jdpush.testSendPush(appKey,masterSecret);
		System.out.println("sucess");
	}

	/**
	 * @see HttpServlet#doPost(HttpServletRequest request, HttpServletResponse response)
	 */
	protected void doPost(HttpServletRequest request, HttpServletResponse response) throws ServletException, IOException {
		// TODO Auto-generated method stub
	}

}
最后来看下运行的结果,可以看到,提交数据是以json格式。如果返回{"msg_id":1663001319,"sendno":1981162191}这样数据说明推送已经成功发送
{"platform":"all","audience":"all","notification":{"alert":"祝大家新春快乐"},"options":{"sendno":1981162191,"apns_production":false}}
{"msg_id":1663001319,"sendno":1981162191}................................
sucess
源码分析:
JPushClient jpushClient = new JPushClient(masterSecret, appKey, 3);实际上是实例化了一下三个类
public JPushClient(String masterSecret, String appKey, int maxRetryTimes) {
        _pushClient = new PushClient(masterSecret, appKey, maxRetryTimes);
        _reportClient = new ReportClient(masterSecret, appKey, maxRetryTimes);
        _deviceClient = new DeviceClient(masterSecret, appKey, maxRetryTimes);
	}
PushPayload payload = buildPushObject_all_all_alert();,PushPayload类里包含了传递和返回的所有数据
public class PushPayload implements PushModel {
    private static final String PLATFORM = "platform";
    private static final String AUDIENCE = "audience";
    private static final String NOTIFICATION = "notification";
    private static final String MESSAGE = "message";
    private static final String OPTIONS = "options";

    private static final int MAX_GLOBAL_ENTITY_LENGTH = 1200;  // Definition acording to JPush Docs
    private static final int MAX_IOS_PAYLOAD_LENGTH = 220;  // Definition acording to JPush Docs

    private static Gson _gson = new Gson();

    private final Platform platform;
    private final Audience audience;
    private final Notification notification;
    private final Message message;
    private Options options;


    private PushPayload(Platform platform, Audience audience,
            Notification notification, Message message, Options options) {
        this.platform = platform;
        this.audience = audience;
        this.notification = notification;
        this.message = message;
        this.options = options;
    }
PushResult result = jpushClient.sendPush(payload);可以看到就是sendPost方法,然后接受返回的数据
 public PushResult sendPush(PushPayload pushPayload) throws APIConnectionException, APIRequestException {
        Preconditions.checkArgument(! (null == pushPayload), "pushPayload should not be null");

        if (_globalSettingEnabled) {
            pushPayload.resetOptionsTimeToLive(_timeToLive);
            pushPayload.resetOptionsApnsProduction(_apnsProduction);
        }

        ResponseWrapper response = _httpClient.sendPost(_baseUrl + PUSH_PATH, pushPayload.toString());

        return BaseResult.fromResponse(response, PushResult.class);
    }
另外我专门找了下sendNo如何生成的,其实就是随机生成的一个数字
 public static Options sendno() {
        return newBuilder().setSendno(ServiceHelper.generateSendno()).build();
    }
 public static int generateSendno() {
        return RANDOM.nextInt((MAX - MIN) + 1) + MIN;
    }
大家有兴趣也可以详细看一下代码的实现.


 3万+
3万+

 被折叠的 条评论
为什么被折叠?
被折叠的 条评论
为什么被折叠?
 到【灌水乐园】发言


